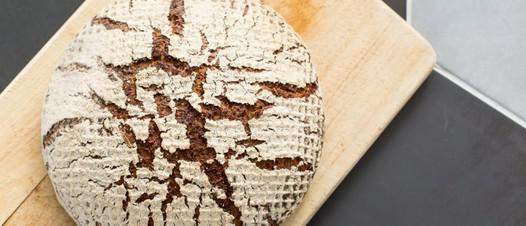
100% Rye Sourdough
-
500g rye flour
-
10g salt
-
350g rye sourdough starter
-
360ml water
-
Add the rye flour to a clean mixing bowl. Mix the salt through the flour. Add the water and sourdough starter to the flour. Combine all the ingredients together to form a rough dough. You may feel when you bring the dough together that something isn’t right because it doesn’t have the feel that regular bread or sourdoughs have. But don’t worry, that’s just the nature of rye flour, so although it feels like a thick and heavy paste, that’s exactly what you’re looking for. Tip: Your sourdough starter should have been fed the day before so that it’s active, bubbling & rising in its container on the day you bake with it.
-
Turn the dough out onto a clean work surface. Stretch and fold the dough to work the flour in using your fingertips. You won’t be able to knead it in the same way as rye flour is very low in gluten, and gluten is what gives the dough elasticity. Do this for a couple of minutes. Tip: Use a bench scraper to easily help keep the dough together.
-
First proving
-
Shape the dough into a rough ball shape and return the dough to the mixing bowl (which you can lightly grease with a bit of oil to help remove the dough later), cover with cling film and allow the dough to prove for approximately 2 ½ hours at room temperature.
-
After 2 ½ hours turn the dough onto a work surface lightly floured with rye flour and knock the dough back. Tip: Again, this dough will feel very different when you knock it back. It will crack and break, so you simply just want to reshape it into a rough round shape.
-
Shaping & second proof
-
Roughly knead the dough and shape into a ball. Place the shaped dough into a proving basket dusted with flour. Or alternatively a bowl lined with a flour-dusted tea towel will work fine (without the cloth, your loaf will stick in the bowl and you won't be able to turn it out).
-
Tip: The reason for using a bowl is that it acts like a proving basket. The dish acts as a support to your dough. It encourages the dough the take on the shape of the dish and to prove up and not just to spread out flat. Leave to prove for about 2 hours at room temperature.
-
Tip: Sourdough normally benefits from proving over longer periods in the fridge, but I find that rye sourdough is better when it’s baked on the same day.
-
Preheat your oven to 230°C/210°C fan assisted and place a baking tray in the bottom of the oven.
-
Turn the sourdough dough loaf out on to a floured baking tray. Leave the dough to sit for about 5 minutes so that it spreads slightly and cracks start to appear on the surface. This is a classic characteristic of rye sourdoughs.
-
Put into the preheated oven. To create steam in the oven, in the preheated baking tray in the base of the oven add a handful of throwing ice cubes or pour in some water from a boiled kettle. This will release a blast of steam into the oven.
-
Bake for 45 - 50 minutes. Remove from oven and leave to cool. You won’t see a big jump in the oven, but it will rise and spread slightly which creates a very close textured bread.
-
Because of the nature of rye flour, sometimes once baked the bread can feel a bit gummy, so it actually benefits from sitting or ripening for a day before cutting. This makes it ideal for baking in the evening and then leaving to sit overnight before eating.
4 Ingredient Cheese Scones

-
4 Cups Self Raising Flour, 540 grams
-
250 mls of Cream
-
250 mls of Soda Water
-
230 grams Cheese, grated (hard aged cheddar) 4-5 Cups
-
Milk to glaze
-
Additional grated cheese if you choose for topping
-
Salt & Pepper
-
Cayenne Pepper (just a pinch)
-
Paprika
-
Crispy Bacon Bits
-
Finely Diced Parsley and more!
-
Preheat the oven to 220 Bake ( 425F)
-
Prepare a baking tray with baking paper and set aside
-
Grate the cheese
-
In a large bowl add the flour and grated cheese and carefully combine the two with your hands or a large wooden spoon
-
Add to this the cream and soda water and using a large wooden spoon or your hands combine the ingredients gently.
-
If the dough looks dry add a splash more of both the soda water & cream and combine. It should not be wet but needs to come together in a soft ball
-
On a floured surface tip out the scone dough and form into a ball. Dust the scone mix lightly with flour and begin to gently press into shape
-
You want to make a square that is approximately 2.5cm high
-
To create the square shape gently press down the dough to spread it, and use your hands to keep the shape square, press down again and square up again until it is a suitable height.
-
Slice into 4 even lengths, then 4 even lengths the other direction to create 16 even shapes. Or you can use a cookie cutter
-
Place these 1 cm apart on a baking tray and lightly brush with a small amount of milk (if wanting to top with additional cheese sprinkle that over now)
-
Place the tray in the preheated oven and bake for 15 minutes, check at this time, they may require up to 5-6 minutes more, so I cook for 3 minute intervals from this time until I am happy.
-
They are cooked perfectly when lightly golden brown on the top and bottom and sound hollow to tap.
-
Remove from the oven and serve warm with butter
-
Store in an airtight container once cooled.
-
Can be frozen and reheated in the oven.
-
Enjoy!
90-Second Mile-High Nutella Mug Cake
-
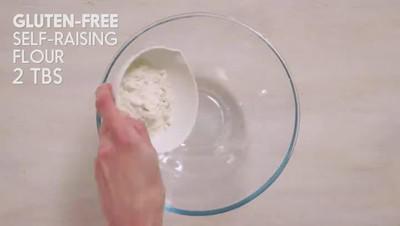
2 tbsp gluten-free self-raising flour
-
2 tbsp brown sugar
-
2 tbsp Dutch cocoa powder
-
1/4 tsp gluten-free baking powder
-
1 large egg
-
2 tbsp milk
-
1 tbsp oil
-
2 tbsp Nutella
-
Double cream or ice-cream, to serve
-
Gluten-free chocolate sauce, to serve
-
Select all ingredients
-
Combine the flour, sugar, cocoa and baking powder in a bowl.
-
Make a well in the centre and add the egg, milk and oil. Use electric beaters to beat until well combined.
-
Spoon into a 435ml (1 3/4 cup) mug. Spoon the Nutella into the centre. Microwave on High/1000watts/100% for 70 seconds or until risen. Top with double cream or ice-cream and drizzle with chocolate sauce ( Gluten-free chocolate sauce, to serve).
Adam Liaw's Chinese Steamed Pork and Eggs
-
150g pork mince
-
½ tsp salt
-
¼ tsp white pepper
-
1 tbsp Shaoxing wine
-
1 tsp corn starch
-
3 eggs
-
1 tsp soy sauce
-
1 tsp soy sauce
-
½ tsp sesame oil
-
2 tsp finely sliced spring onion
-
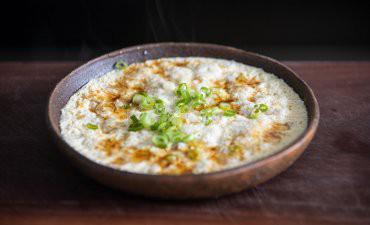
Combine the pork mince, salt, pepper, Shaoxing wine, and cornstarch and stir well. Transfer to a deep plate or shallow bowl suitable for steaming. Crack the eggs into a measuring jug and add an equal amount of water (1:1). Stir through the soy sauce and beat the eggs well, without incorporating too much air into the eggs. Strain the egg mixture over the mince and mix to distribute the mince.
-
Steam over low heat for 12-15 minutes until the eggs are just set, then remove from the steamer and pour over the soy sauce and sesame oil and scatter with the spring onion.
-
This recipe is part of a collection of delicious recipes we've curated with some of our favourite chefs to help you make a Meal to Remember with your family or friends at home. To see the whole collection click here.
Afghan Kidney Bean Curry (Lubya)

-
2 tbsp coconut oil, divided
-
1 tbsp whole coriander seed
-
1 tsp whole cumin seed
-
1/2 tsp dried mint (optional)
-
1 15 oz can (1 1/2 cups) whole tomatoes
-
1 small red onion, small dice, some reserved for garnish
-
4 cloves garlic, minced
-
1 cup vegetable broth
-
3 cups cooked kidney beans (2 15 oz cans) , rinsed and drained
-
1 tsp freshly ground black pepper, or to taste
-
1 tsp salt, or to taste*
-
cilantro for garnish
-
basmati rice, to serve
-
Melt 1 tablespoon of oil in a heavy bottomed pot over medium-low heat. Add the coriander and cumin and cook for about a minute or until the aromatic and a shade darker. Keep a close eye on them so they don't burn.
-
Add the dried mint and the tomatoes and their juices to the pot (watch for splattering!), and mash them a little. Cook over medium-low heat, stirring occasionally, for around 7 minutes until they break down and are saucy. Transfer to a blender and blend until smooth, making sure to vent.
-
Heat the remaining 1 tablespoon of oil to the pot and melt over medium-low heat. Add the onion and cook for 5 minutes, stirring occasionally, until softened and starting to turn golden. Then add the minced garlic, and continue cooking for an additional 5 minutes, stirring often so it doesn't burn.
-
Once the onions are nice and caramelized add the broth, the spiced tomato sauce, kidney beans, salt and pepper. Simmer uncovered on low heat for about 15 minutes. Adjust seasonings to taste.
-
Garnish with cilantro (if desired) and minced red onion and serve with basmati rice.
-
Based on how salty your broth and beans were you might need more or less salt, so it's always smart to start with less and add more to taste
Allotment Cake
-
200g light brown soft sugar
-
2 eggs, beaten
-
200ml sunflower oil
-
200g spelt flour
-
¾ tsp bicarbonate of soda
-
¾ tsp baking powder
-
¾ tsp cinnamon
-
½ tsp ground ginger
-
200g carrots, grated
-
¼ tsp vanilla extract
-
100g golden caster sugar
-
2 eggs, beaten
-
125ml sunflower oil
-
225g spelt flour
-
¾ tsp bicarbonate of soda
-
¾ tsp baking powder
-
¾ tsp mixed spice
-
250g courgettes, grated
-
50g butter, softened
-
250g cream cheese
-
600g icing sugar
-
Heat oven to 180C/160C fan/gas 4. Line 4 x 20cm cake tins with baking parchment (or use 2 and make the carrot sponges first, then the courgette layers).
-
Start by making the carrot layers. Put the sugar, eggs and oil in a large mixing bowl. Using an electric whisk, beat until incorporated. Sieve the flour and all the dry ingredients into the same bowl, then gently fold in before adding the carrot, a pinch of salt and vanilla extract. Stir to combine.
-
Divide the carrot cake mixture between 2 of the prepared cake tins and bake for 20-25 mins or until golden brown and firm to the touch. Leave the cakes to cool in the tins for a few mins, then turn out onto wire racks when cool enough to handle.
-
Meanwhile, make the courgette layers. Put the sugar, eggs and oil in a large bowl and use a hand whisk to combine. Sieve in the dry ingredients and fold in, then add the courgettes and mix together.
-
Pour the courgette cake mixture into the remaining 2 cake tins and bake for 20-25 mins or until golden brown. Leave to cool in the tins, then turn out onto wire racks to cool fully.
-
To make the frosting, tip the butter into a large bowl and beat with an electric hand whisk until smooth. Add the cream cheese and beat again. Sieve in the icing sugar and beat until combined.
-
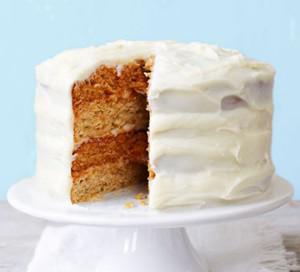
Layer up the cakes alternately, spreading a little frosting between each layer as you go. Cover the whole cake with the rest of the frosting and serve. Will keep for 2 days in an airtight container.
Aloo Methi
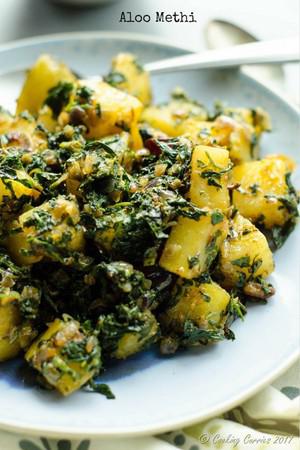
Tags:
Green Connect
-
3 tbsp avocado / grape seed oil
-
1 tsp cumin seeds
-
1/2 tsp asafetida
-
2 dried red chillies
-
1/2 red onion , finely chopped
-
2 Thai green chillies , finely chopped
-
2 yellow potatoes , peeled and cubed
-
1 bunch methi leaves , about 1 1/2 cups when chopped
-
1 tsp turmeric powder
-
1/2 tsp coriander powder
-
1/2 tsp Kashmiri chilli powder
-
salt , to taste and some to sprinkle on the methi leaves
-
Wash the methi leaves thoroughly and cut the stems near the roots and discard. Chop the rest, place in a bowl and add about 2 tsp salt to it. Mix well and keep aside.
-
Heat the oil in a heavy bottomed pan. Add the cumin seeds, asafetida and dried red chillies. Once the cumin and chillie start to turn color, add the onion and green chillies. Sauté till the onions start to become soft.
-
Add the potatoes, give it a quick stir to mix everything together, cover and cook over low heat for 7-8 minutes, till the potatoes are almost tender.
-
Now squeeze the methi leaves to take out any water from them. Add to the pan with the potatoes. Add turmeric powder, coriander powder, Kashmiri chili powder and salt. Give it a quick stir and let it cook over medium heat for 3-4 minutes. Remove from heat and serve hot with rotis and dal or rice and dal.
Andhra Fish Fry

-
Oil or ghee as needed
-
250 grams fish fillet or pieces
-
Salt as needed
-
2 to 3 pinches turmeric
-
1 tbsp Lemon juice or as needed
-
¾ tsp GINGER GARLIC PASTE
-
¼ to 3/4 tsp red chili powder
-
¼ to 1/2 tsp garam masala powder
-
Apply salt to fish and rinse it well. Drain thoroughly. Mix all the ingredients except oil. Apply to the fish. Keep this aside for 10 minutes. It absorbs flavors well.
-
Heat a small pan with oil or ghee. When the oil turns hot enough fry it for about 3 to 4 minutes. Then flip it to the other side. Fry again till it is fried completely. Add curry leaves and fry until crisp. Drain to a kitchen tissue.
-
Serve with onion wedges.
Apple and Custard Impossible Pie
-
75g (1/2 cup) plain flour
-
215g (1 cup) caster sugar
-
85g (1 cup) desiccated coconut
-
4 eggs, lightly whisked
-
2 tsp vanilla extract
-
125g butter, melted
-
500ml (2 cups) milk
-
385g can pie fruit apple slices
-
Select all ingredients
-
Preheat oven to 180C/160C fan-forced. Grease a 5cm deep, 24cm round pie dish.
-
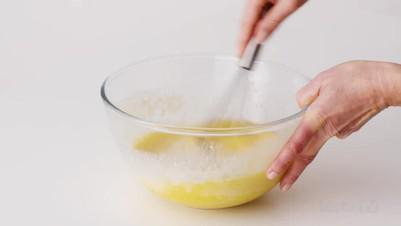
Use a whisk to whisk the flour, sugar, coconut, eggs, vanilla and butter in a large bowl. Gradually add the milk, whisking constantly, until combined.
-
Place the apple slices over the base of the prepared dish. Pour over egg mixture.
-
Bake the pie for 1 hour or until set. Set aside to cool before serving.
Apple Cake
-
3-4 (1.5 lb/680 g) medium apples, like Granny Smith
-
juice of ½ a lemon
-
3 large eggs
-
1 cup (220 g) sugar
-
2 tsp vanilla extract
-
¼ tsp salt
-
1 cup (130 g) all-purpose flour
-
powdered sugar, as needed
-
Preheat the oven to 350°F. Grease and line a 9” springform pan with parchment paper; you can also use a 9” round or square baking pan for this recipe.
-
Peel and core the apples. Cut the apples into 1” pieces, about ¼”-thick. Toss the apples in lemon juice, and then add them to the baking dish.
-
In a large bowl using a hand mixer, or in a stand mixer fitted with the whisk attachment, combine the eggs and sugar. Alternatively, you can beat the eggs and sugar by hand using a whisk. Beat until the eggs are pale, fluffy and have doubled in size, about 3-4 minutes. Add the vanilla extract and beat for one more minute.
-
Sift in half of the flour and salt to the egg mixture, and fold the dry ingredients into the batter. Sift in the remaining flour and salt, and fold them in until they are just incorporated. Be careful to gently fold in the dry ingredients and to not overmix the batter.
-
Pour the batter over the apples in the baking dish. If needed, use a spatula or spoon to smooth the batter over the top so it evenly covers the apples.
-
Bake for 45-50 minutes until golden brown and firm on top, or until a cake tester comes out clean. Allow the cake to cool for at least one hour prior to serving.
-
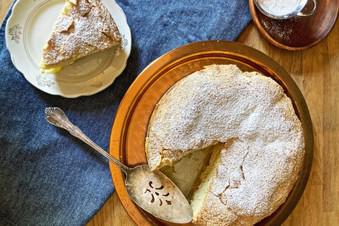
Before serving, sprinkle the cake with powdered sugar. Sharlotka can be made a day in advance and stored covered at room temperature, the crust will soften as it sits.
Apple Cake
-
German Apple Cake 0:50 Cook 8 Servings
-
Ingredients
-
125g butter
-
60g/90g sugar
-
1 cup self-raising flour sifted 1 egg
-
FILLING
-
3 cooking apples peeled thinly sliced 2 tbs sultanas
-
1 tbs raw sugar
-
1/2 tsp ground cinnamon
-
1/4 tsp nutmeg
-
1 lemon juiced
-
Method
Melt butter in a large saucepan, then add sugar and stir until it begins to dissolve. Add flour and stir well, then beat in egg.
Grease an 18cm cake tin and using fingers, spread a little more than half the cake mixture over the bottom.
Place half of the apple slices in layers over cake mixture.
Mix together sultanas, sugar and spices and sprinkle over apple.
Cover with the remaining apple slices, then sprinkle with lemon juice.
In spoon fulls, spread the remaining cake mixture on top.
Bake at 180C for 45 minutes, or until a knife comes out of the centre clean.
-
Place on a tray when baking ..
Apple Cider Vinegar
-
Apples
-
Water
-
Sugar or honey
-
Choose quality apples. Even though they're left to ferment for a long time, the apples you choose can significantly shape the flavor of your finished vinegar. Choose the best quality apples available to you in order to get the best apple cider vinegar at the end. [1]
For a more complex and deep vinegar at the end, try using a combination of different apples. Use two sweet apples, such as Golden Delicious or Gala, with one sharp tasting apple, such as McIntosh or Liberty, for a slightly sharper vinegar at the end. [2]
Instead of using whole apples, save scraps from apples used in other dishes to make your apple cider vinegar. One whole apple is roughly equivalent to the scraps of two apples. Keep the peel, core and other scraps in your freezer until you’re ready to use them to make vinegar. [3]
-
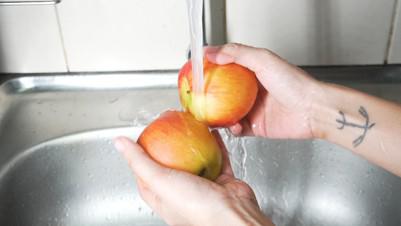
Wash your apples in cold water. It's always a good idea to wash your fruit and vegetables before eating them, and the same is true when cooking or fermenting them. Give your apples a thorough rinse and scrub with cold water to clean away anything you don't want in your vinegar. [4]
You can use any number of apples you want to make apple cider vinegar. The more you use, the more vinegar you’ll get! If you’re just starting out making your own apple cider vinegar, try using 3 apples for your first batch. This will give you a good amount of vinegar but won’t put too much at risk if something goes wrong. [5]
If you're using apple scraps, make sure to wash the whole apples before separating the scraps from the rest of the apples.
-
Cut the apples into small cubes. The more surface area of the apple you expose, the more quickly the vinegar will ferment. Use a clean knife to cut your apples into 1 inch (2.5 cm) cubes, keeping the peel and the core in as well. [6]
If you’re using scraps from other apples, there’s no need to cut them up further.
-
Transfer the apples to a glass jar. As the apples will be fermenting for up to 3 months, keep them in a sterilized, wide mouth, glass jar. The apples shouldn’t fill the jar more than ¾ of the way, so a quart jar or something bigger should work perfectly. [7]
Never use stainless steel to ferment your vinegar. As the apples ferment, the acidity of the vinegar can damage the steel, or impart a metallic taste into your vinegar that might change its flavor.. [8]
-
Cover the apples with water. Make sure the apples are completely covered with water, as any exposed apple will begin to rot rather than ferment into vinegar. For the best results, use filtered or mineral water that will be free from any impurities that could ruin your vinegar. [9]
For a quart jar with three apples, you’ll need around 800 millilitres (27 fl oz) of water. Use more or less as is needed.
It’s always better to add too much water than not enough. If you add too much, your apple cider vinegar might be a little weaker or take longer to ferment. If you don’t add enough water, some apple will be exposed and might begin to rot and ruin your vinegar entirely.
-
Add 1 teaspoon (4 grams) of raw sugar for each apple. Stir the mixture thoroughly to make sure everything combines fully. The sugar will ferment and turn into alcohol, making the apple cider that will eventually become apple cider vinegar. Raw sugar works best for this, but you can use honey or any other sugar if you’d prefer. [10]
-
Cover the jar with a cheesecloth. As the apples ferment into cider and eventually vinegar, the mixture will still need to be able to breathe. Use a piece of cheesecloth held in place around the mouth of the jar with a rubber band. This will keep everything out of the jar, but still let the gases release during the fermentation process. [11]
-
Keep the jar in a warm, dark place. Find somewhere that you can leave the vinegar to ferment for a long time, where it won’t be disturbed unintentionally. Keep it at the bottom or on top of your pantry, in a corner of your kitchen, or anywhere else where it won't be exposed to direct sunlight. Each home will have a different, perfect place. [12]
The jar should be kept at room temperature as it ferments, which is around 70 °F (21 °C). [13]
-
Stir the mixture once or twice a day. Stirring the mixture will help the fermentation process, as well as shifting apples around in the jar. Give the cider a stir with a wooden a spoon once or twice a day for the first week or two. Don’t worry too much if you miss a day, as long as you keep moving the mixture around regularly. [14]
If you notice the apples are rising out of the water, use a fermentation stone or something else to weigh them down slightly and make sure they're submerged. [15]
-
Wait for the apples to sink to the bottom of the jar. As you check on the apples every day or so, keep an eye out for bubbles indicating the fermentation process. After a week or two, the apples will fully sink to the bottom of the jar. This indicates that the apples have fermented and are no longer needed to make the vinegar.
If you notice any scum forming on top of the jar, skim it off and discard it. [16]
-
Strain the apples from the cider and pour the cider back into the jar. Use a plastic sieve or another cheesecloth to strain the apples out of the cider. As with every other step, avoid using metal as this can ruin the fermentation process. Pour the cider back into the jar, cover with a cheesecloth secured with a rubber band, and put it back in the same warm, dark place. [17]
Once you have strained the apples out of the cider, you should discard them. They are not suitable to eat once they’ve been fermented.
-
Leave the cider to ferment for 3 to 6 weeks, stirring every few days. This is where the apple cider will begin to turn into apple cider vinegar. Stir the jar every 3 to 4 days, just to move the vinegar around a little as it ferments. [18]
Over this time, the sweet cider scent should start developing a slightly more tangy aroma. This is a sign that the fermentation is working, and the cider is becoming vinegar. [19]
The longer you give the vinegar to ferment, the stronger the taste and tang will be. After around 3 weeks of fermentation, start tasting the vinegar every few days until you reach the taste and acidity you want. [20]
The length of the fermentation process will vary based on the climate you live in. During summer, the cider will take less time to ferment. In winter, it will likely take even longer. [21]
-
Transfer the fermented vinegar to a lidded glass jar and store. Use a clean, sterilized glass jar with a tight lid in order to halt the fermentation process and keep the vinegar fresh. Store the vinegar in your refrigerator and it should never go bad. [22]
Keeping the vinegar in the fridge should stop the fermentation process, but if left long enough it may continue. If the vinegar gets too strong, add a little bit of water to dilute it back down to the acidity you want. [23]
While you can safely store the apple cider vinegar at room temperature, it will continue to ferment if you do so.
If a gelatinous blob forms on the surface of your vinegar, this is cause for celebration rather than worry. This is known as the vinegar “mother” and can be used to jumpstart future batches of apple cider vinegar. Add the mother at the same time as the apples to speed up the fermentation process.
Apple Cider Vinegar - Great!

-
1 Kg Apples
-
1 teaspoon Brewers' Yeast
-
SCOBY
-
Juice/blend - aiming for about 1 litre
-
Strain to remove pulp
-
Add yeast
-
Place airlock and leave until bubbling action stops.
-
Strain into bottle avoiding sludge
-
Add scoby, cover with cloth and wait.
Apple Cinnamon Custard Cake

-
20g unsalted butter
-
500-550g (about 3) Granny Smith apples, peeled, cored, cut into 8 wedges, then cut into 1/2 cm thick slices
-
2 tablespoons grand marnier, or other orange liqueur
-
1 1/4 cups plain flour, plus 2 tablespoons extra
-
1 cup caster sugar, plus 1 tablespoon extra
-
2 teaspoons baking powder
-
1/2 teaspoon salt
-
3/4 teaspoon ground cinnamon
-
1 cup canola oil
-
1 cup full cream milk
-
2 large eggs
-
2 teaspoons orange zest
-
1 teaspoon vanilla extract
-
2 large egg yolks
-
1 teaspoon icing sugar, sifted
-
1 cup thickened cream
-
1 tablespoon icing sugar, sifted
-
Position a rack in the centre of the oven and preheat to 180C or 160C fan-forced. Grease a 23cm springform pan with the 20g of butter.
-
In a medium bowl, toss the apples with Grand Marnier to coat, and set aside.
-
In another medium bowl, whisk together the 1 1/4 cups of flour, 1 cup of caster sugar, baking powder, salt and 1/4 teaspoon of the cinnamon. In a large bowl, whisk together oil, milk, whole eggs, orange zest and vanilla to blend. Whisk dry ingredients into the wet ingredients to form a smooth batter. Be careful not to over-mix.
-
Transfer 1 cup of the batter to a small bowl and mix in the remaining 2 tablespoons flour; set aside. Whisk egg yolks into remaining batter in the large bowl just to blend. Stir in the apples. Transfer the apple batter to prepared pan and, using a crank-handled spatula, spread batter into an even layer and press the apples in to submerge them. Pour the reserved batter evenly over the apple batter. In a small bowl, whisk the remaining caster sugar and cinnamon to blend, and then sprinkle it evenly over the batter.
-
Bake for 50 mins, or until a skewer inserted into the centre of the cake comes out clean and the top is golden brown. Transfer the pan to a wire rack and cool for 15 mins. Run a knife around the sides of the cake and release the pan sides. Cool cake for about 30 mins to serve warm, or cool completely. Dust with icing sugar.
-
To make whipped cream, in a medium bowl, whisk cream and icing sugar until thick. To serve, cut cake into wedges and serve with a generous dollop of whipped cream.
Apple Sour Cream Slice

-
125 g butter, melted
-
200 g self-raising flour
-
150 g caster sugar
-
65 g coconut
-
2 tsp vanilla essence
-
2 eggs
-
250 g sour cream
-
2 apples, peeled and thinly sliced 2 tsp cinnamon or cinnamon sugar
-
Preheat oven to 180 degrees celsius (160 if using a fan forced oven).
-
Grease and line a 20cm square cake tin with baking paper.
-
Place the melted butter, caster sugar, coconut and vanilla essence into a medium sized bowl. 4. Sift over the self raising flour.
-
Use electric beaters to beat the mixture until smooth and creamy.
-
Press mixture into the tin and bake for 15-20 minutes or until golden.
-
Take the slice out of the oven and layer the thinly sliced apple over the top.
-
In a bowl, beat the sour cream and eggs together until well combined.
-
Pour the sour cream mixture over the top of the apple.
-
Sprinkle the cinnamon over the top (or cinnamon sugar).
-
Place back into the oven for another 20 minutes or until the sour cream has set in.
-
Leave to cool before placing into the fridge to cool completely.
-
Cut into slices when completely cold.
Apple Tart
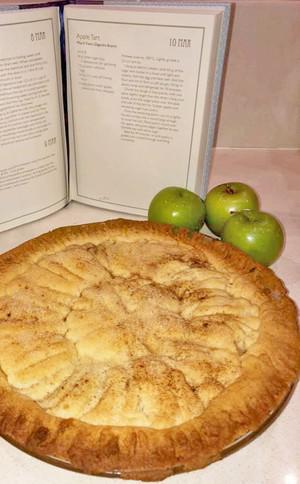
From CWA cookbook
-
60 g caster sugar, plus 2 tablespoons for sprinkling
115 g butter, softened
1 egg
250 g (1 2/3 cups) self-raising flour
2 large granny smith apples, peeled and finely chopped.
-
Preheat oven to 180°C. Lightly grease a 23 cm tart tin.
-
Using an electric beater, beat 60 g of the sugar with butter in a bowl until light and creamy. Add egg and beat well. Add the flour and stir to form a soft dough. Wrap dough in plastic wrap and refrigerate for 30 minutes.
-
Divide the dough in two pieces, with one piece slightly larger than the other. Using your hands, press the larger piece over the base and side of the tart tin. Scatter apples and remaining sugar over pastry.
-
Press the remaining pastry out on a lightly floured surface into a round, large enough to cover the tart. Place pastry round over the apples and press edges together to seal.
-
Sprinkle top with extra sugar.
-
Bake for 40 minutes, or until pastry is golden and cooked through and filling is bubbling.
Arla Quark Mini Tuna Fishcakes
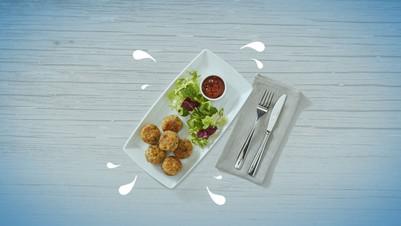
-
2 cans of tuna in water (about 185g)
-
2 medium eggs
-
1 onion (finely chopped)
-
2 garlic cloves (finely chopped)
-
40g fresh parsley (finely chopped)
-
1 teaspoon salt
-
freshly ground pepper
-
200g Arla Quark
-
75g bread crumbs
-
1 tablespoon vegetable oil
-
Lightly fry onions and garlic in a pan first. Drain the tuna and place in a bowl. Stir in the eggs, onions, garlic, parsley, salt and pepper.
-
Add the quark and breadcrumbs and mix all the ingredients together really well (probably easiest to use your hands!) and put the bowl covered in the refrigerator for about 10/15 minutes.
-
Then form the mixture into approx 24 balls and add half of the veg oil to a frying pan.
-
Fry 12 balls over a moderate heat for about 12 minutes, turning them occasionally. Once thoroughly cooked remove from the pan and keep warm in the oven.
-
Repeat this step with the remaining 12 balls until thoroughly cooked.
Armenian Nutmeg Slice
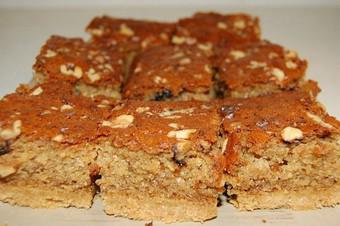
-
2 cups self-raising flour
-
2 cups brown sugar
-
125 g butter
-
1 egg
-
1 tsp bicarbonate of soda
-
2 tsp ground nutmeg
-
1 cup milk
-
1/2 cup walnuts chopped optional
-
Mix sugar and flour. Rub in butter until mixture resembles breadcrumbs. Place ½ the mixture in the base of a greased and floured 21 cm cake tin or lamington tray.
-
Dissolve bicarbonate of soda in milk and add to remaining crumb mixture, along with beaten egg and nutmeg.
-
Mix and pour over crumb base.
-
Sprinkle with chopped walnuts if liked.
-
Bake at 180C for approximately 1 hour.
-
Don't move tray during cooking or the sponge top may sink.
Aromatic Garlic-Ginger Beef Stew
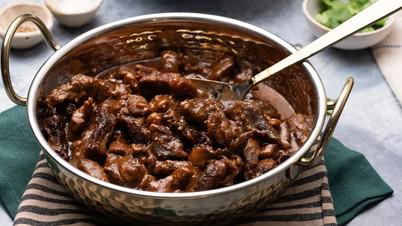
-
1 large onion, roughly chopped
-
8 garlic cloves, peeled
-
2 inch chunk fresh ginger, peeled
-
1 red chile, roughly chopped
-
1 tablespoons cooking oil
-
2 pounds beef shin/flank, cubed
-
Salt and pepper, to taste
-
4 star anise
-
2 teaspoons Chinese five spice
-
1 tablespoon flour
-
2 ½ cups beef stock
-
⅓ cup soy sauce
-
2 tablespoons brown sugar
-
1 tablespoon tomato paste
-
Preheat the oven to 325 F.
-
Place the onion, garlic, ginger, and red chile into a food processor and blend to form a paste. Place to one side.
-
Heat up an oven-safe, large, lidded skillet pan over medium-high heat, and season the beef with salt and pepper.
-
Add the cooking oil to the pan and then the seasoned beef, and cook the meat for 4 to 5 minutes until it is well browned, before removing from the pan.
-
Reduce the heat to medium and add the blended onion, ginger, and garlic mixture to the pan, then fry the curry paste for 5 minutes.
-
Add the Chinese five spice to the pan along with the star anise, mix these into the curry base and allow them to cook for a minute or two.
-
Add the browned beef back to the pan, add the tablespoon of flour and mix everything together to thoroughly coat the beef.
-
Add the beef stock, soy sauce, sugar, and tomato paste to the pan and mix everything once again, then bring to a simmer.
-
Place the lid on the skillet pan and then transfer the beef stew to the preheated oven. Leave it to braise, covered, for 2 ½ hours.
-
Remove from the oven and serve with rice, mashed potatoes, roasted root vegetables, or another chosen side.
Asian Greens with Oyster Sauce
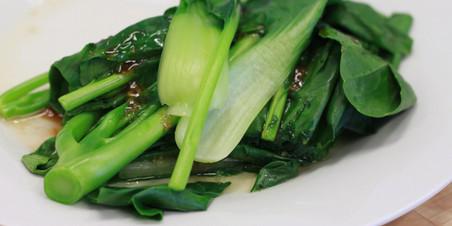
-
3 bunch bok choy ends removed
-
1 bunch broccoli, Chinese roughly chopped
-
1 clove garlic crushed
-
1 tsp ginger, fresh grated
-
½ tbsp soy sauce GF if required
-
2 tbsp oyster sauce GF if required
-
1 tbsp oil, peanut
-
Steam the Asian greens (bok choy and Chinese broccoli) for 2-3 minutes in a steamer or blanch them by placing them in a heat proof bowl and cover them with boiling water for 2-3 minutes. Drain.
-
Combine the dressing ingredients (garlic, ginger, soy sauce, oyster sauce, and peanut oil) in a jar or small container and shake or stir well to combine. Toss the warm, drained vegetables in the dressing and serve.
-
This recipe is a fantastic accompaniment to steamed fish or poached chicken breast and a small serving of brown or basmati rice.
-
Whole foods: 85%
-
serve of this recipe provides:
-
vegetable serves
-
½ fat serve
Asian Sesame Dressing
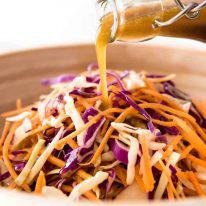
-
1/4 cup soy sauce
-
2 tbsp toasted sesame oil
-
1/4 cup white vinegar (adjust to taste for sharpness)
-
1/4 cup olive oil (Note 1)
-
1 tbsp sugar (any type) or 1 1/2 tbsp honey
-
1 tbsp soy sauce
-
2 tsp toasted sesame oil
-
1 tbsp white vinegar
-
1 tbsp olive oil (Note 1)
-
1 tsp sugar (any type) or 1 1/2 tsp honey
-
Place ingredients in a jar and shake well until sugar is dissolved. Adjust saltiness with salt and sweetness with sugar to taste.
-
Keep for up to 3 weeks, in the fridge (to be safe). Bring to room temp and shake well before use.
Asian Slaw
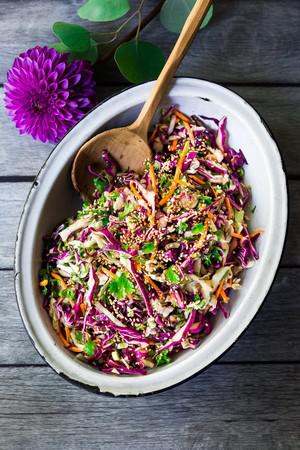
-
¼ Small Red Cabbage (Thinly Sliced)
-
1 cup Grated Daikon Radish
-
2 Grated Granny Smith Apples
-
1 Small Red Onion (Thinly Sliced)
-
150g Bean Sprouts
-
1 cup Coriander Leaf
-
1 cup Mint Leaf (Roughly Cut)
-
1 cup Basil Leaf
-
50g Pickled Ginger (Thinly Sliced)
-
Squeeze Of Limes
-
Squeeze Of Lemons
-
Dash Kecap Manis (Indonesian Sweet Soy Sauce)
Avocado and Corn Salsa
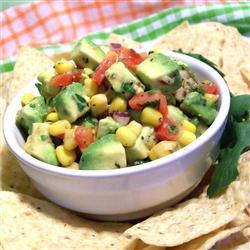
-
3 ears fresh corn, husks and silks removed
-
2 avocados - peeled, stone removed and cubed
-
1 red onion, finely diced
-
1 yellow capsicum, seeded and diced
-
1 clove garlic, minced
-
1 tablespoon ground cumin
-
1 teaspoon chilli flakes
-
small handful chopped fresh coriander
-
5 tablespoons red wine vinegar
-
2 tablespoons olive oil
-
4 tablespoons fresh lime juice
-
salt and freshly ground black pepper to taste
-
Place the corn in a large pot with enough water to cover and bring to a boil. Cook until kernels are tender but crisp, about 5 minutes. Drain and cool in cold water. Use a knife to scrape kernels from the cobs.
-
Place kernels in a medium bowl. Stir in avocado, red onion, capsicum and garlic. Add cumin, chilli flakes and coriander. Mix in vinegar, olive oil and lime juice. Season with salt and pepper.
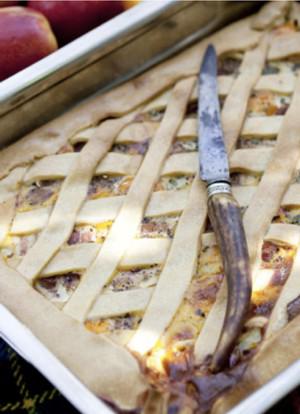
Bacon and Egg Pie
-
3 sheets (450g) ready-rolled savoury shortcrust pastry
-
250g streaky bacon, cut into 2cm pieces
-
2 medium potatoes, peeled, cooked and thinly sliced
-
3 tbsp soft herbs (eg parsley, basil, chives or spring onion tops), chopped
-
14 eggs
-
3/4 cup milk
-
1 tsp salt
-
ground black pepper
-
Preheat oven to 200C/400F. Place a flat baking tray in the oven to heat - the pie will sit on
this, and the heat will help it to crisp.
-
Cut a piece of baking paper to fit a 40 x 30cm (16 x 12 inch) baking dish or roasting pan. It
should cover the base and reach about 3-4cm (1ý-1ý inches) up the sides.
-
Remove the baking paper from the baking dish or roasting pan and lay it flat on your bench.
-
Dust it with a little flour and lay 2 pastry sheets on top. Join the pastry sheets by pressing
them together firmly with a small overlap. Roll out the pastry to thinly cover the paper.
-
Lift thepaper with the pastry and lay into the baking dish or roasting pan, covering the base and 3-
4cm (1 1/4-1 1/2 inches) up the sides.
-
Sprinkle the bacon over the pastry. Top with the slices of potato and sprinkle with the herbs.
Break 8 whole eggs over the top.
-
In a mixing bowl, lightly whisk the remaining 6 eggs with the milk, salt and pepper. Pour this
evenly over the whole eggs.
-
Roll out the remaining sheet of pastry very thinly and cut it into narrow strips. Arrange the
strips in a lattice pattern on top of the pie, trimming off any excess.
-
Place the prepared pie on top of the heated baking tray and bake for 12-15 minutes until the
pastry is starting to puff and turn golden.
-
Reduce the heat to 180C/350F and bake until the
pastry is golden and cooked through on the base (this should take a further 35-40 minutes).
Baguettes

Tags:
Bread
-
380 g bread flour
-
380 g cold water (straight from the tap)
-
0.7 g instant yeast in ‘summer’ / 1.3 g instant yeast in ‘winter’*
-
prepared poolish
-
380 g bread flour
-
190 g water at room temperature
-
12 g salt
-
2 g instant yeast
-
In a bowl stir together 380 grams of bread flour with 380 grams of cold water with the yeast (see above).
-
Mix until you have a consistency that looks like doughlike batter.
-
Cover the bowl and leave for 12 hours at room temperature.
-
So if you want to begin your baguette baking in the morning, you can make your poolish the evening before.
-
In the bowl of your standing mixer, combine the poolish with the other ingredients and knead for 6 minutes.
-
Cover and leave to rest for 40 minutes.
-
Now turn out the mass onto your working surface and stretch and fold, doing two to three sets of letter folds (one set = right over left, left over right, bottom over top, top over bottom) depending on how well your dough cooperates. Stop if the dough is not willing to stretch anymore.
-
Put the dough in a greased bowl, cover and again leave to rest for 40 minutes.
-
Turn out the dough and stretch and fold a second time, doing one to two sets of letter folds.
-
Directly after the stretch and fold, divide the dough in 4 equal parts.
-
Now you are going to preshape the dough parts one by one by carefully stretching the corners, making a rectangle of each of the 4 pieces, and rolling them up. Try to make your rectangle and roll as even as possible without fussing too much with the dough. Use enough flour to handle the dough, but try to keep it to a minimum.
-
Cover and leave to rest for 10 minutes so the gluten can relax.
-
Preheat your oven to 240°C (at what stage you preheat your oven depends on how long it takes for your oven to heat through, some take 30 minutes, some, like ours, with stone floors take a lot longer, up to two hours.)
-
Take a roll of the preshaped dough and sprinkle it with a little flour and softly press it into a rectangle with a short and a long side. The more even the rectangle the nicer the baguette will look in the end. With a dough scraper make sure the dough is not stuck to your work surface with the help of a little bit of flour.
-
With a dough scraper, flip 1/3 of the long side onto itself and press down the seam, with the heel of your hand, to get some tension on the outside of the dough, now repeat it two more times until you have a roll shape.
-
Make a rolling motion with your hands from the center to the sides with a soft touch to make the baguette longer and to try and make nice pointy ends on both sides of the baguette.
-
Place the baguettes in a couche / proofing cloth made of linen or in a baguette pan, or something of your own invention, but make sure the baguettes have enough side support to hold their shape.
-
Cover them and leave to proof for 35 minutes.
-
To check if the baguettes are ready, dip your finger in some flour and gently poke your dough.
-
If the hole disappears completely: under proofed
-
If the hole dent pops half way back out: proofing is just right
-
If the hole stays entirely dented in: over proofed
-
Score the top of the baguettes with a lame/bread scoring tool. Cut as straight along the long axis of the loaf as possible. Mentally divide the baguette into lengthwise thirds, and keep the cuts within the middle third. Overlap the cuts by about one third of their length, while holding the knife at a 30 degree angle.
-
Bake in the preheated oven for 27 minutes. Leave to cool on a wire rack.
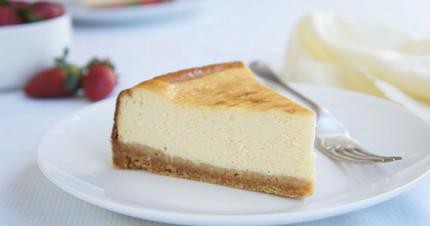
Baked Cheesecake
-
1 cup self raising flour
-
3/4 cup coconut
-
1/2 cup brown sugar
-
125 g butter - melted
-
1 1/2 cups crushed biscuits (digestives)
-
125 g butter - melted
-
250 g cream cheese, softened
-
500 g ricotta
-
1 1/2 cups (375g) white sugar
-
4 eggs
-
1 tablespoon lemon juice
-
1 teaspoon vanilla essence
-
3 tablespoons cornflour
-
3 tablespoons flour
-
125 g butter, melted and cooled
-
500 g sour cream
-
Combine dry ingredients.
-
Add melted butter.
-
Press into dish.
-
Bake at 180°C for 12 minutes.
-
Crushed biscuits in a food processor.
-
Add melted butter.
-
Press into dish and allow to set in the refrigerator.
-
Preheat oven to 180 degrees C. Lightly grease a springform pan.
-
Mix the cream cheese and ricotta together in a mixing bowl until well combined. Stir in the sugar, eggs, lemon juice, vanilla, cornflour, flour and butter. Add the sour cream last and stir. Pour the mixture into the prepared springform pan.
-
Bake in the preheated oven 1 hour; turn oven off and leave in oven 1 hour more. Allow to cool completely in refrigerator before serving.
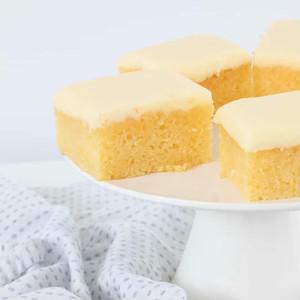
Baked Lemon Slice
-
115 g butter softened to room temperature
-
150 g (¾ cup) caster sugar
-
lemon zest from 1 lemon
-
2 eggs room temperature
-
lemon juice from 1 lemon
-
½ tsp baking powder
-
95 g (¾ cup) plain flour
-
270 g (1 ¾ cup) pure icing sugar sifted, see notes
-
65 g butter softened to room temperature
-
4 tbs lemon juice (extra if needed)
-
Preheat oven to 170 degrees celsius (fan-forced). Grease and line a 20cm x 20cm cake tin with baking paper. Set aside.
-
Place the butter, caster sugar and lemon zest into a large bowl. Beat until smooth and creamy.
-
Add the eggs and lemon juice and beat to combine.
-
Fold through the baking powder and flour.
-
Spoon the mixture into the prepared tin and bake for 20-25 minutes or until a skewer inserted into the middle comes out clean.
-
To prepare the frosting, place the sifted icing sugar, butter and lemon juice into a bowl. Whisk until smooth and creamy. If the frosting is a little too thick, add a bit more lemon juice and whisk again. If too thin, add a little more icing sugar.
-
Spread the frosting over the cooled slice and allow to set.
-
Preheat oven to 170 degrees celsius (fan-forced). Grease and line a 20cm x 20cm cake tin with baking paper. Set aside.
-
Place the butter, caster sugar and lemon zest into the Thermomix bowl. Insert the butterfly and mix for 30 seconds, Speed 4. Scrape down the sides of the bowl and repeat until smooth and creamy.
-
Add the eggs and lemon juice and mix for 10 seconds, Speed 4, to combine. Remove the butterfly.
-
Add the baking powder and flour and mix for 10 seconds, Speed 4. Scrape down the sides and repeat for a further 5 seconds.
-
Spoon the mixture into the prepared tin and bake for 20-25 minutes or until a skewer inserted into the middle comes out clean.
-
To prepare the frosting, place the icing sugar, butter and lemon juice into the Thermomix bowl and mix for 20 seconds on Speed 4. Scrape down the sides of the bowl with a spatula. Mix for an extra 30 seconds, Speed 4.
-
If the frosting is a little too thick, add a bit more lemon juice and whisk again. If too thin, add a little more icing sugar.
-
Spread the frosting over the cooled slice and allow to set.
-
Use pure icing sugar (as compared to icing sugar mixture) as it will set the frosting firmer than icing sugar mixture. A firmer icing is best when sending the slice in school lunch boxes.
-
If your frosting is too thick to spread, add a small amount of extra lemon juice and mix again.
-
If your frosting is too thin, add some extra sifted icing sugar.
-
Storing & Freezing - store this slice in an airtight container for up to 5 days, or wrap well and freeze for up to 1 month. Allow to thaw before consuming.
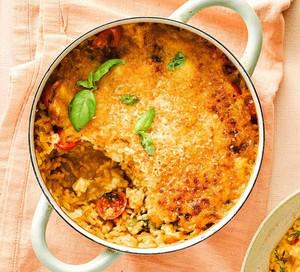
Baked Tomato, Mozzarella & Basil Risotto
-
2 tbsp olive oil
-
1 onion, finely chopped
-
300g arborio rice
-
small glass of white wine (optional), or 100ml extra stock
-
750ml hot vegetable stock
-
100g cherry tomatoes, halved
-
small handful of basil leaves, finely shredded, plus a few extra small leaves to serve
-
25g parmesan or vegetarian alternative, finely grated
-
150g ball mozzarella, torn into small chunks
-
25g dried breadcrumbs (panko are good but any will do)
-
Heat the oven to 200C/180C fan/gas 6. Heat half the oil in an ovenproof pan or casserole dish, then stir in the onion and cook over a low heat for 8-10 mins until golden. Scatter over the rice and mix well until coated. Pour over the wine, if using, and cook for 2 mins until absorbed. Pour over the hot stock, then give the rice a quick stir. Put the dish in the oven and bake the rice for 10 mins.
-
Remove from the oven and stir through the tomatoes, basil, half of the parmesan and some seasoning. Flatten everything out roughly with the back of a spoon, then nestle the chunks of mozzarella evenly into the risotto. Sprinkle over the breadcrumbs and the remaining parmesan, and drizzle with the rest of the olive oil. Put the dish back in the oven, and bake everything for another 10-15 mins until the rice is just cooked through, heating it under the grill if you want a deep, golden crust. Leave to stand for a few minutes, scatter with a few extra basil leaves and serve scooped straight from the dish.
Banana and Peanut Butter Bread
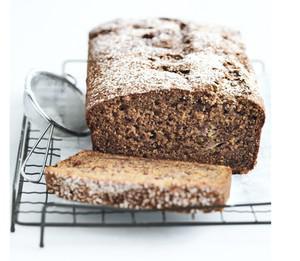
-
125g butter, softened
-
1 cup (175g) brown sugar
-
1 teaspoon vanilla extract
-
2 eggs
-
2 cups mashed banana
-
½ cup (140g) crunchy peanut butter
-
1¾ cups (255g) plain (all-purpose) flour, sifted
-
1 teaspoon baking powder, sifted
-
1 teaspoon bicarbonate of (baking) soda
-
1 teaspoon ground cinnamon
-
⅓ cup (80ml) maple syrup
-
icing (confectioner’s) sugar, for dusting
-
Preheat oven to 160°C.
-
Place the butter, sugar and vanilla in an electric mixer and beat for 8–10 minutes or until pale and creamy. Scrape down the sides of the bowl.
-
Gradually add the eggs and beat well to combine.
-
Add the banana, peanut butter, flour, baking powder, bicarbonate of soda, cinnamon and maple syrup and stir to combine.
-
Spoon the mixture into a 26cm x 11cm (2.5 litre-capacity) lightly greased loaf tin lined with baking paper.
-
Bake for 85–90 minutes or until cooked when tested with a skewer.
-
Cool in the tin for 20 minutes before turning out onto a wire rack to cool completely.
-
Dust with icing sugar to serve.
Banana Bread
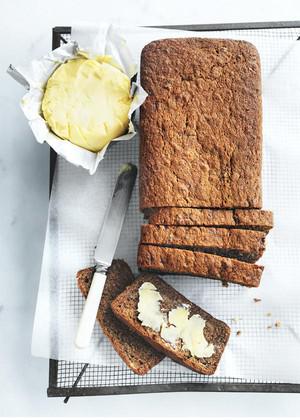
-
125G BUTTER, SOFTENED
-
1 CUP (175G) BROWN SUGAR
-
1 TEASPOON VANILLA EXTRACT
-
2 EGGS
-
2 CUPS MASHED BANANA
-
1¾ CUPS (255G) PLAIN (ALL-PURPOSE) FLOUR, SIFTED
-
1 TEASPOON BAKING POWDER, SIFTED
-
1 TEASPOON BICARBONATE OF (BAKING) SODA
-
1 TEASPOON GROUND CINNAMON
-
⅓ CUP (115G) GOLDEN SYRUP
-
BUTTER, EXTRA, TO SERVE
-
Preheat oven to 160°C (325°F). Place the butter, sugar and vanilla in an electric mixer and beat for 8–10 minutes or until pale and creamy. Scrape down the sides of the bowl.
-
Gradually add the eggs and beat well to combine. Add the banana, flour, baking powder, bicarbonate of soda, cinnamon and golden syrup and stir to combine.
-
Spoon the mixture into a 26cm x 11cm (2.5 litre-capacity) lightly greased loaf tin lined with baking paper. Bake for 60–65 minutes or until cooked when tested with a skewer.
-
Cool in the tin for 20 minutes before turning out onto a wire rack to cool completely. Slice and serve with the extra butter. Serves 6–8.
Banana Loaf
-
2 Tablespoons butter
-
2 Tablespoons milk
-
3 mashed bananas
-
1 ½ cups SR flour
-
1 egg
-
¾ cup sugar
-
Cream butter and sugar
Add egg
Add mashed bananas
Fold in flour
Stir in the milk
Bake in greased loaf tin 45 mins @ 200C° if doing muffins just reduce the cooking time - about 15-20 mins.
Banana Madeleines

-
3 ripe bananas
-
2 eggs
-
1/3 cup apple sauce
-
1/2 cup honey
-
1 tsp pure vanilla extract
-
1/2 tsp salt
-
1 cup whole wheat flour (or all purpose flour)
-
3/4 cup oats
-
1 tsp baking soda
-
1/4 cup hot water
-
pecans or walnuts (optional)
-
Dissolve the baking soda in the hot water. Then, place all the ingredients in a mixing bowl except for the pecans. Smash the bananas, and whisk everything together.
-
Grease each Madeleine shell with butter, and spread it around with a brush or paper towel.
-
Use a spoon to place the mixture into each shell. I did about a spoon and a half, which is slightly more than 3/4 of each shell. Top each one with a pecan if you’d like.
-
Bake at 350 degrees for 10-12 minutes, until the outer edges have a crisp look.
-
Remove them from the oven. Use a butter knife to gently lift them from the pan.
Let them cool down a bit. Then, enjoy! I know my husband did. He ate a dozen right when it came out of the oven.
Banana Peel Cake
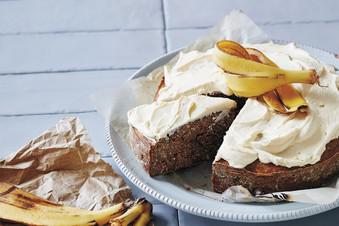
-
4 banana peels, black ends removed
-
1 teaspoon vanilla powder
-
80 g unsalted butter, softened, plus extra for greasing
-
1/2 cup rice malt syrup
-
4 organic eggs, separated
-
2 1/2 cups plain flour
-
1/2 cup desiccated coconut
-
1 1/2 tablespoons baking powder
-
2 teaspoons ground cinnamon
-
1/2 cup chopped walnuts
-
250 g cream cheese
-
2 teaspoons rice malt syrup
-
1/2 teaspoon vanilla powder
-
pinch of sea salt
-
60 g unsalted butter, softened, plus extra if needed
-
Preheat the oven to 190°C (170°C fan-forced).
-
Grease a 21 cm round cake tin with a little softened butter.
-
Place the banana peels in a food processor with ½ cup water and blitz to a thick purée.
-
Add the vanilla, butter, rice malt syrup and egg yolks and process for 30 seconds or until creamy.
-
Add the flour, coconut, baking powder and cinnamon and pulse until the mixture forms a batter.
-
Transfer the batter to a mixing bowl.
-
Whisk the egg whites to stiff peaks.
-
Gently fold the egg whites and walnuts through the batter and transfer to the prepared tin.
-
Bake for 45–50 minutes, or until the top crusts slightly and a skewer inserted in the centre comes out clean.
-
Allow to cool in the tin for a few minutes before turning out onto a wire rack to cool completely.
-
Meanwhile, to make the frosting, place all of the ingredients except the butter in a high-speed blender and blitz until combined.
-
Gradually add the butter until the mixture is thick but still spreadable. If needed, add more butter.
-
Spread the frosting over the cooled cake.
-
Store in an airtight container in the fridge for up to 1 week, or freeze it (minus the icing) for up to 3 months.
Barbecue Sauce - Basic
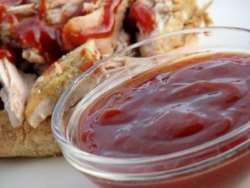
-
1/2 cup tomato sauce
-
2 tablespoons brown sugar
-
2 tablespoons Worcestershire sauce
-
1 tablespoon cider vinegar
-
1 dash hot sauce, such as Tabasco
-
1 clove garlic, crushed
-
1/4 teaspoon mustard powder
-
1/4 teaspoon salt
-
In a small saucepan over medium heat, stir together the ketchup, sugar, Worcestershire sauce, vinegar, hot sauce, garlic, mustard powder and salt. Bring to a simmer, then remove from heat and allow to cool slightly before brushing on your favourite barbecued meats.
Barbecue Sauce - Smoky
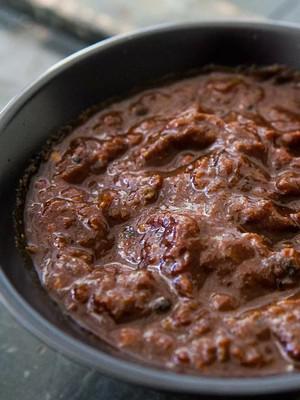
-
4 Tbsp butter (can substitute vegetable oil)
-
1/2 grated onion
-
1 15-ounce can crushed tomatoes
-
1/2 cup cider vinegar
-
2 Tbsp brown sugar
-
1/4 cup molasses
-
1-4 chipotle chiles in adobo (depending on how hot you want your bbq sauce)
-
1 teaspoon liquid smoke
-
1 Tbsp finely chopped fresh sage
-
Salt to taste
-
Heat the butter in a heavy pot over medium-high heat until it froths (or heat vegetable oil until hot), then add the grated onion. Sprinkle a little salt over the onion. Sauté until the onion just begins to colour, about 4-5 minutes.
-
While the onions are cooking, finely chop the chipotle chiles in adobo. They are hot, so start with one chile. You can add as many more as you want later.
-
Add the chipotle to with the onions, then add the tomatoes, vinegar, molasses, sugar, liquid smoke, and chopped sage. Stir to combine and let this simmer for 5 minutes. Taste it and add salt and more chipotle if you want.
-
Simmer the sauce gently, uncovered, for 1 hour. Before serving, taste one more time for salt and chile.
Basic Buttercream Icing

-
250g Western Star Chef’s Choice Butter, diced at room temperature
-
250g icing sugar mixture, sifted
-
2 teaspoons vanilla extract
-
1-2 tablespoons milk, room temperature
-
Send a Shopping List
-
Add to Calendar
-
Place the butter into the bowl of a stand mixer and mix on medium-high speed for 5 minutes. Butter will lighten in colour
-
Stop the mixer and add all the sugar and vanilla. Beat on low speed until combined
-
Increase speed to high and beat for 5-8 minutes or until fluffy
-
Add milk a teaspoon at a time until it reaches your desired consistency
-
Tips & Hints:
-
Butter must be softened before beating. Do not melt.
-
Butter should be well beaten and pale in colour before adding icing sugar mixture.
-
If making ahead, store buttercream well covered in a cool place for up to 1 week. Before using, beat to a smooth consistency adding extra milk as needed.
-
If buttercream becomes cold and hard to spread, beat in 1 to 2 teaspoons of warm milk to return mixture to a creamy, spreadable consistency.
Basic Fritter Batter

-
1 1/2 cup self-raising flour
-
200 ml milk
-
50 g butter melted
-
1 egg whisked
-
1 onion minced
-
200 g barbecue meat pack
-
Mix the flour in a little of the milk to a smooth paste.
-
Stir in melted butter, then add whisked egg. Add remaining milk.
-
Pour the liquid ingredients into the flour, whisking all the time with a wire whisk. The mixture should be smooth. Add pureed onion, if using.
-
Season meat with salt and pepper.
-
Pour batter into a flat rimmed pan. Holding one corner, lay the meat in the mixture. Flip it over to cover the other side. Drain of excess batter.
-
Shallow-fry in hot oil for 3-4 minutes each side.
-
Drain for a minute or two on a cake rack. Set aside on a warm plate.
Basic Playdough

-
2 cups plain flour
-
1 cup cooking salt
-
1 cup cold water
-
1 tbsp cream of tartar
-
food colouring
-
1 tbsp cooking oil
-
Mix the flour, salt, water and cream of tartar in a saucepan over medium heat until thick.
-
Allow the mixture to cool and then add the oil and knead well over a floured cutting board or similar.
-
Divide dough evenly into as may smaller balls as you like - add colouring of choice to smaller balls of dough and knead to combine.
-
SHOW MORE NOTES Notes
-
Stick to basic ingredients like flour, salt, water, cream of tartar, oil and food coloring. This ensures the playdough is safe and non-toxic.
Basic Sausage Rolls

-
1 medium onion (150g), chopped finely
-
1/2 cup (35g) stale breadcrumbs (see tips)
-
500 gram sausage mince
-
500 gram minced (ground) beef
-
1 egg
-
1 tablespoon tomato paste
-
1 tablespoon barbecue sauce
-
2 finely chopped fresh flat-leaf parsley
-
6 sheets puff pastry
-
1 egg, extra, beaten lightly
-
2 tablespoon sesame seeds
-
Preheat oven to 220°C. Line oven trays with baking paper.
-
Combine onion, breadcrumbs, sausage mince and beef, egg, paste, sauce and parsley in a large bowl.
-
Cut pastry sheets in half lengthways. Place equal amounts of filling mixture lengthways along centre of each pastry piece (see tips); roll each pastry piece, from one wide edge, to enclose filling. Cut each roll into six pieces; place rolls, seam-side down, on trays. Brush with extra egg, sprinkle with sesame seeds.
-
Bake rolls for 25 minutes or until golden and puffed. Serve sausage rolls hot with tomato sauce or chutney, if you like.
-
To make stale breadcrumbs, use 2-3 day old bread and process in batches. An easy way to make sure that you get an equal amount of filling mixture in each sausage roll is to pipe it down the length of the pastry, using a piping bag fitted with a 2cm plain tube. Uncooked sausage rolls keep well in the freezer for up to 3 months. Allow an extra 5 minutes when baking from frozen.
Basmati Pilaff
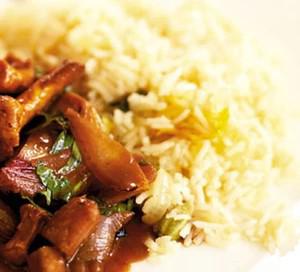
-
500g basmati rice
-
100g butter
-
1large onion , finely chopped
-
1large sprig fresh thyme
-
2 bay leaves
-
2 cinnamon sticks
-
8 cardamom pods , split open
-
3 cloves
-
4-6 thinly pared strips lemon zest
-
1l boiling chicken stock or water
-
Preheat the oven to fan 160C/conventional 180C/gas 4. You will need a medium casserole with a lid. Rinse the rice well in a large bowl of water, then drain.
-
Melt two-thirds of the butter in the casserole and sauté the onion for about 5 minutes. Add the rice, stir well, then add the herbs, whole spices and lemon zest and cook for a minute. Now pour in the boiling stock or water and mix into the rice, along with 1½ tsp sea salt and ground black pepper to taste.
-
Cover and bake for 25 minutes. Leave to stand for 5 minutes, then remove the lid and fork through the remaining butter until the rice is fluffy and separated.
Beef and Rice with Veggies

-
2 tbsp olive oil
-
1 onion , diced (any type)
-
1 red capsicum / bell pepper , diced (large)
-
2 garlic cloves , minced
-
500 g / 1 lb ground beef (mince) , lean
-
2 1/2 tbsp tomato paste
-
1 1/4 tsp salt
-
1/2 tsp EACH cumin, black pepper
-
1 tsp each onion powder, dried oregano (or other herb of choice)
-
1/4 tsp cayenne pepper (optional)
-
1 dried bay leaf
-
1 1/4 cups / 225g long grain white rice (uncooked) (Note 1)
-
2 cups / 500 ml beef broth , low sodium
-
2 cups / 300g diced frozen veggies (I used corn, pea, carrot mix) (Note 2)
-
3 big handfuls baby spinach (~ 90g/3 oz) , or other leafy greens (Note 3)
-
Heat oil in large pot over high heat. Add onion, capsicum and garlic. Cook for 1 minute.
-
Add beef, cook until brown, breaking it up as you go.
-
Add tomato paste, salt, pepper, onion powder, oregano, cumin and cayenne pepper. Cook for 1 minute.
-
Turn heat down to medium. Add rice and beef broth, mix well. Add frozen veggies and bay leaf, then stir.
-
Place lid on, lower heat to medium low so it's simmering gently. Cook for 12 - 15 minutes (might even take longer) until all liquid is absorbed (tilt pot to check). The rice should be just cooked, but will be wet.
-
Remove from heat. Quickly toss spinach on top of the rice and put the lid back on. Leave to rest for 10 minutes.
-
Fluff rice and mix through wilted spinach with a fork. Adjust salt if desired. Serve!
-
RICE - Best made with white long grain rice for fluffiest outcome. Medium grain is the next best, then short grain or sushi rice (still great, just less pilaf-like). Basmati and jasmine will also work but will take about 5 minutes longer to cook. Not suited to brown rice (takes too long too cook), risotto or paella rice. Not yet tested with quinoa or other rice subs!
-
IMPORTANT: You can sub the frozen with more chopped fresh veggies. But if you opt to use fresh instead of frozen veggies, add 1/4 cup of water to the rice (frozen veg adds water as it melts).
-
LEAFY GREENS: This can be substituted with any leafy greens that wilts quite easily. It will even work with torn kale (remove from the stems) or leafy part of Asian greens. Roughly chop, then use per recipe. PS Asian greens don't taste "Asiany"!
-
RICE FIRMNESS: This recipe makes al dente fluffy rice (ie tender and fluffy). If you like your rice softer, add 1/4 cup of water to the rice.
-
Nutrition per serving, assuming 5 servings.
Beef Bourguignon (Julia Child Recipe)
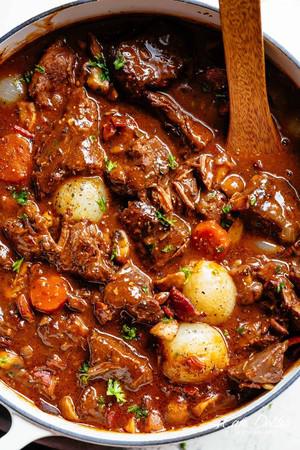
-
1 tablespoons extra-virgin olive oil
-
6 ounces (170g) bacon, roughly chopped
-
3 pounds (1 1/2 kg) beef brisket, trimmed of fat (chuck steak or stewing beef) cut into 2-inch chunks
-
1 large carrot sliced 1/2-inch thick
-
1 large white onion, diced
-
6 cloves garlic, minced (divided)
-
1 pinch coarse salt and freshly ground pepper
-
2 tablespoons flour
-
12 small pearl onions (optional)
-
3 cups red wine like Merlot, Pinot Noir, or a Chianti -- for a milder sauce, use only 2 cups of wine
-
2-3 cups beef stock (if using 2 cups of wine, use 3 cups beef stock)
-
2 tablespoons tomato paste
-
1 beef bullion cube, crushed
-
1 teaspoon fresh thyme, finely chopped
-
2 tablespoons fresh parsley, finely chopped (divided)
-
2 bay leaves
-
1 pound fresh small white or brown mushrooms, quartered
-
2 tablespoons butter
-
Preheat oven to 350°F (175°C).
-
Heat the oil in a large dutch oven or heavy based pot. Sauté the bacon over medium heat for about 3 minutes, until crisp and browned. Transfer with a slotted spoon to a large dish and set aside.
-
Pat dry beef with paper towel; sear in batches in the hot oil/bacon fat until browned on all sides. Remove to the dish with the bacon.
-
In the remaining oil/bacon fat, sauté the carrots and diced onions until softened, (about 3 minutes), then add 4 cloves minced garlic and cook for 1 minute. Drain excess fat (leave about 1 tablespoon in the pan) and return the bacon and beef back into the pot; season with 1/2 teaspoon coarse salt and 1/4 teaspoon ground pepper. Sprinkle with flour, toss well and cook for 4-5 minutes to brown.
-
Add the pearl onions, wine and enough stock so that the meat is barely covered. Then add the tomato paste, bullion and herbs. Bring to a simmer on the stove.
-
Cover, transfer to lower part of the oven and simmer for 2 to 3 hours, or until the meat is fall apart tender (adjust the heat so that the liquid simmers very slowly).
-
Heat the butter in a medium-sized skillet/pan over heat. When the foam subsides, add the remaining 2 cloves garlic and cook until fragrant (about 30 seconds), then add in the mushrooms. Cook for about 5 minutes, while shaking the pan occasionally to coat with the butter. Season with salt and pepper, if desired. Once they are browned, set aside.
-
Place a colander over a large pot (I do this in my clean kitchen sink). Remove the casserole from the oven and carefully empty its contents into the colander (you want to collect the sauce only). Discard the herbs
-
Return the beef mixture back into the dutch oven or pot. Add the mushrooms over the meat.
-
Remove any fat off the sauce( if any) and simmer for a minute or two, skimming off any additional fat which rises to the surface.
-
You should be left with about 2 1/2 cups of sauce thick enough to coat the back of a spoon lightly.
If the sauce is too thick, add a few tablespoons of stock. If the sauce is too thin, boil it over medium heat for about 10 minutes, or until reduced to the right consistency.
-
Taste for seasoning and adjust salt and pepper, if desired. Pour the sauce over the meat and vegetables.
-
If you are serving immediately, simmer the beef bourguignon for 2 to 3 minutes to heat through.
Garnish with parsley and serve with mashed potatoes, rice or noodles.
-
To serve the following day, allow the casserole to cool completely, cover and refrigerate.
The day of serving, remove from refrigerator for at least an hour before reheating. Place over medium-low heat and let simmer gently for about 10 minutes, basting the meat and vegetables with the sauce.
-
STOVE TOP BEEF BOURGUIGNON:
-
In a large dutch oven or heavy based pot, sauté the bacon over medium heat in 1 tablespoon of oil for about 3 minutes, until crisp and browned. Transfer with a slotted spoon to a large dish and set aside.
-
Pat dry beef with paper towel; sear in batches in the hot oil/bacon fat until browned on all sides. Remove to the dish with the bacon.
-
In the remaining oil/bacon fat, sauté the carrots and diced onions until softened, (about 3 minutes), then add 4 cloves minced garlic and cook for 1 minute. Drain excess fat and return the bacon and beef back into the pot; season with 1/2 teaspoon coarse salt and 1/4 teaspoon ground pepper. Sprinkle with flour, toss well and cook for 4-5 minutes to brown.
-
Add the pearl onions, wine and enough stock so that the meat is barely covered. Then add the tomato paste, bullion and herbs. Cover and bring to a boil, then reduce heat to low and simmer for 1 1/2 to 2 hours, stirring occasionally, until the meat is falling apart.
-
In the last 5 minutes of cooking time, prepare your mushrooms: Heat the butter in a medium-sized skillet/pan over heat. When the foam subsides, add the remaining 2 cloves garlic and cook until fragrant (about 30 seconds), then add in the mushrooms. Cook for about 5 minutes, while shaking the pan occasionally to coat with the butter. Season with salt and pepper, if desired.
-
Add browned mushrooms to the pot, let simmer for an additional 3 to 5 minutes, stirring occasionally, to combine.
-
Garnish with parsley and serve with mashed potatoes, rice or noodles.
-
INSTANT POT BEEF BOURGUIGNON / PRESSURE COOKER:
-
Set Instant Pot or Cooker to SEAR function (or use a pan on the stove over medium heat of you wish) . Sauté the bacon in 1 tablespoon of oil until crisp and browned. Remove with a slotted spoon and set aside.
-
Pat dry beef with paper towel; sear in batches until browned on all sides in the oil/bacon fat.
-
Return bacon to the pot. Season with 1/2 teaspoon coarse salt and 1/4 teaspoon ground pepper. Sprinkle with flour, toss well and cook on SEAR for a further 4-5 minutes to brown.
-
Add in the onions, pearl onions, carrots, wine, 2 cups of stock, tomato paste, 4 cloves minced garlic, bullion and herbs. Stir well, cover and lock the lid into place. Press Keep Warm/Cancel to stop the Sauté function, then set to MANUAL mode. Choose HIGH PRESSURE for 30 minutes cook time.
-
After cooking, allow the pressure to release naturally for 8-10 minutes. Open the valve and allow and remaining steam to escape (for Instant Pot, turn the valve from sealing to venting to release the pressure).
-
While steam is releasing, prepare your buttered mushrooms (OPTIONAL -- or add them straight in without cooking in butter if desired): Heat the butter in a medium-sized skillet/pan over medium heat. Add the remaining 2 cloves garlic and cook until fragrant (about 30 seconds), then add in the mushrooms. Cook for about 5 minutes, while shaking the pan occasionally to coat with the butter. Season with salt and pepper, if desired. Set aside.
-
Change the Instant Pot or cooker setting back to the SEAR setting (or SAUTE) stir well and allow the sauce to thicken uncovered, for a further 5-10 minutes.
-
Add the buttered mushrooms, garnish with parsley and serve with mashed potatoes, rice or noodles.
-
SLOW COOKER BEEF BOURGUIGNON:
-
In a large pan or skillet, sauté the bacon over medium heat in 1 tablespoon of oil for about 3 minutes, until crisp and browned. Transfer to 6 quart (litre) slow cooker bowl.
-
Pat dry beef with paper towel; sear in batches until browned on all sides in the oil/bacon fat. Transfer to slow cooker bowl with the bacon, and add in the onions (both types) and carrots. Season with 1/2 teaspoon coarse salt and 1/4 teaspoon ground pepper, tossing well to combine.
-
Pour the red wine into the pan or skillet and allow to simmer for 4-5 minutes, then whisk in the flour until free from lumps. Allow to reduce and thicken slightly, then pour it into the slow cooker along with 2 cups of stock, tomato paste, garlic, bullion and herbs.
-
Mix well to combine all of the ingredients. Cook on high heat setting for 6 hours or low for 8 hours, or until beef is falling apart and tender.
-
In the last 5 minutes of cooking time, prepare your mushrooms: Heat the butter in a medium-sized skillet/pan over medium heat. Add the remaining 2 cloves garlic and cook until fragrant (about 30 seconds), then add in the mushrooms. Cook for about 5 minutes, while shaking the pan occasionally to coat with the butter. Season with salt and pepper, if desired. Add to the Beef Bourguignon, mixing them through the sauce before serving.
-
Garnish with fresh parley and serve with mashed potatoes, rice or noodles.
Beef Jerky
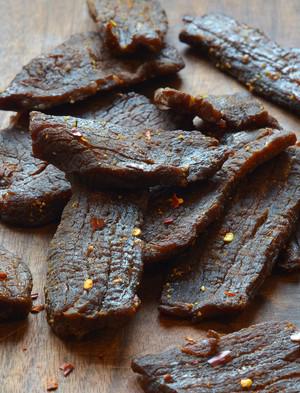
-
1 kg Steak
-
3 tablespoons shio koji
-
2 squirts liquid smoke
-
3 tablespoons Worcestershire sauce
-
1 tablespoon smoked paprika
-
1 teaspoon freshly ground black pepper
-
1 teaspoon red pepper flakes
-
1 teaspoon onion powder
-
½ teaspoon garlic powder
-
Slice the meat ½cm thick with the grain.
-
Add shio koji and liquid smoke and plce in the fridge for 24 hours..
-
Add all other ingredients and marinade for another 24 hours.
-
Line two baking sheets with aluminum foil for easy clean-up. Place a wire rack over each pan. Preheat the oven to 80°C and set two oven racks in the centremost positions.
-
Arrange the marinated meat on the wire racks in a single layer. Bake, rotating the pans from front to back and top to bottom midway through, until the meat is dried out, 3 to 4 hours. To determine if the jerky is thoroughly dried out, take a piece out of the oven and let it cool to room temperature. It should be dry to the touch, leather-like in appearance, and chewy but still somewhat tender.
-
Store the jerky inside an airtight plastic container, Ziploc bag, or airtight glass jars. Properly dried jerky will keep at room temperature for about one week. Refrigerate or freeze for longer storage.
-
Note: Pop the meat in the freezer for 1 to 2 hours before slicing; it will be easier to cut.
Beef Liver Paté
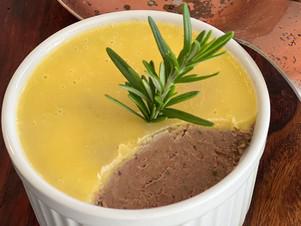
-
1kg beef liver
-
300g bacon
-
300g butter
-
One onion
-
5 cloves garlic
-
2tsp Pepper
-
Three sprigs rosemary
-
Dice the liver and bacon, onion and garlic.
-
Sauté the onion and garlic in 25g butter. Don’t overcook.
-
Fry off the bacon and liver well browned in 25g of butter.
-
Combine onion, garlic, liver and bacon mixture.
-
Add rosemary (finely chopped) to the pan and mix well.
-
Season heavily with pepper to taste.
-
Melt remaining butter.
-
In a food processor or blender add a few tablespoons of the liver mix with all the melted butter. Blitz for 10 seconds.
-
Add remaining liver mix in small portions until all of the butter and liver is smooth.
-
Spoon into a ramekin and add a little melted butter off the top and refrigerate.
Beef Rendang
-
1kg Diced Beef
-
185gr Rendang Paste
-
1 Cinnamon Stick
-
1/4 cup Tamarind Paste
-
2 sticks lemongrass
-
125ml beef stock
-
400ml coconut milk
-
6 Kafir Lime Leaves
-
Cook Beef and set aside
Add curry paste, Cinnamon, Paste and lemongrass - cook until fragrant
Return meat to pan
Add stock, coconut and half the lime leaves
Cook for 50-60 mins
Beef Stroganoff
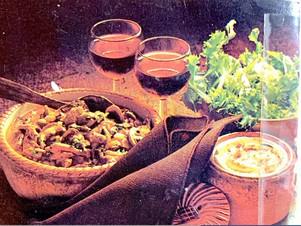
-
750g topside steak
-
⅓ cup plain flour
-
¼ tspn. nutmeg
-
½ tspn. pepper
-
125g Butter
-
2 large onions-sliced finely
-
3 cloves garlic-crushed
-
250g mushrooms-sliced
-
½ cup beef stock
-
½ cup white wine
-
1 cup Sour Cream
-
Cut meat into thin strips-approximately 5cm long.
-
Toss meat in flour, nutmeg, salt and pepper.
-
Heat butter in a large fry pan, fry onion and garlic until golden.
-
Add meat and all of the flour mixture and fry for a further 8 minutes.
-
Stir occasionally to prevent the mixture from sticking.
-
Add the mushrooms and continue frying another 3 minutes.
-
Pour in the stock and wine and simmer gently with the lid on for 10 minutes.
-
Stir in Sour Cream.
-
Serve with fluffy mashed potato that has had a little crushed garlic and ½2 cup finely chopped parsley added, accompanied by green vegetables in season.
Beef Tacos

-
10 to 12 crispy taco shells (“stand and stuff) OR soft tortillas of choice (Note 1)
-
1 tbsp oil
-
2 garlic cloves , minced
-
1 onion , finely chopped
-
500 g / 1 lb beef , ground / mince (Note 2)
-
2 tbsp tomato paste
-
1/4 cup / 65ml water
-
1 tsp EACH garlic powder, onion powder, dried oregano
-
2 tsp EACH cumin powder, paprika
-
1/4 tsp cayenne pepper (adjust spiciness to taste, can skip)
-
1 tsp salt
-
1/4 tsp black pepper
-
Shredded cheese (Note 3)
-
Shredded iceberg lettuce
-
2 tomatoes , chopped
-
1/2 red or white onion , chopped
-
Sour cream
-
Taco sauce (optional)
-
Other: coriander/cilantro , jalapeño, hot sauce / chilli sauce, pickled chillies, salsa sauce, pico de gallo
-
Preheat oven to 180C/350F.
-
Heat oil in a large skillet over high heat. Add garlic and onion – cook 2 minutes until golden.
-
Add beef and cook for 2 minutes, breaking it up as you go, until it changes from red to light brown.
-
Add Taco Seasonings and cook for 2 minutes until beef is cooked through.
-
Add tomato paste and water. Cook for 1 minute or until water is evaporated and you’re left with a juicy not not watery beef filling.
-
Place taco shells in a baking pan (I can fit 10 in). Fill with taco meat, top with cheese.
-
Bake 5 to 7 minutes until cheese is melted by which time the shells with be crispy.
-
Serve tacos hot, straight out of the oven. Lay out toppings and sauces of choice on the table and let everyone assemble their own!
-
Taco Shells – whatever taco shells or tortillas you use, warm them! Taco shells should be baked until crispy (they are kind of chewy and bendy straight out of the packet) and tortillas only need 20 seconds or so in the microwave (or wrap in foil and bake 5 to 10 minutes)
-
Meat – I usually use lean. If you use fatty beef, you can drain excess fat before adding Seasoning. Can also use chicken, turkey, pork.
-
Cheese – Monterey Jack is my favourite, then cheddar, tasty, pepper jack. Australia – Monterey Jack is now sold at Aldi, sometimes at Costco! Use to be sold at Harris. Melts like mozzarella, tasty like cheddar, non greasy. It’s my fave.
-
Nutrition for 3 tacos, including crispy taco shell, meat, cheese, lettuce, tomato and onion.
Beefed-Up Shakshuka
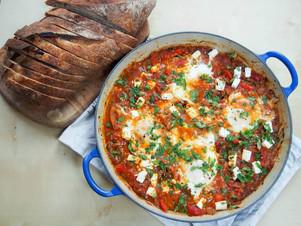
-
1 onion large, or 2 small
-
2 red peppers
-
3 tablespoon olive oil
-
2 cloves garlic or 3 if smaller, crushed
-
2 teaspoon ground cumin
-
2 teaspoon ground paprika
-
2 tablespoon parsley chopped
-
4 tablespoon cilantro coriander, chopped, divided
-
1 teaspoon dried thyme or 2tsp fresh, fresh leaves removed from stem and chopped
-
12 oz ground beef 340g beef mince, lean, eg 90% is best
-
28 oz chopped tomatoes 1 can/carton, 795g (see note)
-
4 eggs
-
2 oz feta cheese 60g
-
Peel and slice the onions in half or quarter rings, depending on size. Core the peppers and cut in slices.
-
Heat the oil in a large shallow pan or skillet and add the onions. Cook for 2-3minutes until they start to soften. Add the peppers and cook, stirring now and then, for another 5minutes.
-
Add the garlic, cumin, paprika, parsley, 2tbsp cilantro and thyme and stir. Cook for another couple minutes until starting to brown slightly.
-
Add the ground beef and brown the meat, then add the tomatoes. Cook for around 15-20minutes to allow the flavors to mingle. Season with a little salt and pepper to taste. Up to this point can be made in advance and chilled or frozen.
-
When ready to serve, re-heat the sauce if needed then gently push four indentations in the sauce with the back of a serving spoon and crack an egg into each one. Chop up the feta into small chunks and sprinkle over the top. Cover the pan with a lid and allow the eggs to cook in the sauce for around 5 minutes, basting the whites with the sauce part-way if needed. Ideally you want the whites just cooked and the yolks still a little soft so they will mingle with the sauce when you serve up.
-
When the eggs are ready, sprinkle the remaining cilantro over the top and serve with bread on the side to mop up the sauces.
-
Note: use good quality chopped tomatoes (ideally finely chopped) that will break down as you cook, or else I'd suggest tomato passata is better than coarsely-chopped tomatoes that stay in large chunks.
Beefy Eggplant Parmigiana

-
1/3 cup chopped onion
-
1/4 cup finely chopped celery
-
1/8 teaspoon garlic powder
-
2 tablespoons canola oil
-
1 can (14-1/2 ounces) Italian stewed tomatoes
-
1/2 cup water
-
1/4 cup tomato paste
-
1 teaspoon dried parsley flakes
-
1/2 teaspoon dried oregano
-
1-1/4 teaspoons salt, divided
-
1/2 teaspoon pepper, divided
-
1 bay leaf
-
1 pound ground beef
-
1-1/2 cups all-purpose flour
-
1 cup buttermilk
-
2 medium eggplants, peeled and cut into 1/2-inch slices
-
Additional canola oil
-
1/2 cup grated Parmesan cheese
-
2 cups shredded part-skim mozzarella cheese, divided
-
Minced fresh parsley
-
In a large saucepan, saute onion, celery and garlic powder in oil until tender. Stir in the tomatoes, water, tomato paste, parsley, oregano, 1/2 teaspoon salt, 1/4 teaspoon pepper and bay leaf. Bring to a boil. Reduce heat; cover and simmer for 1 hour. Discard bay leaf.
-
In a large skillet, cook beef over medium heat until no longer pink, breaking it into crumbles; drain and set aside. In a shallow dish, combine flour and remaining salt and pepper. Place buttermilk in another shallow dish. Dip eggplant in buttermilk, then in flour mixture.
-
In a large skillet, cook eggplant in batches in 1/2 in. of hot oil until golden brown on each side; drain.
-
Place half the eggplant in a greased 13x9-in. baking dish. Top with half the Parmesan cheese, beef and tomato mixture. Sprinkle with 1 cup mozzarella cheese. Top with remaining eggplant, Parmesan cheese, beef and tomato mixture.
-
Bake, uncovered, at 350° for 30 minutes or until heated through. Sprinkle with the remaining mozzarella cheese. Bake 5-10 minutes longer or until cheese is melted. Let stand for 10 minutes before serving. Sprinkle with parsley.
Beetroot Hummus
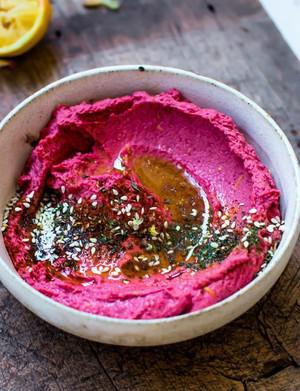
-
1 can chickpeas (430 g/15 oz), drained and rinsed
-
2 medium cooked beetroots (read above post on how to cook them), cut into quarters
-
2 cloves garlic
-
zest and juice from 1 medium lemon
-
2-3 tablespoons tahini
-
2-3 tablespoons olive oil
-
¼ teaspoon salt
-
½ teaspoon ground cumin
-
Place the beetroots, chickpeas and garlic into a food processor and process for 1 minute until ground. Add all the remaining ingredients and process until creamy. It should have some grainy texture, that's ok. If it's dry or you want to thin it out and make it more creamy, add more tahini or water, until you like the consistency.
-
Adjust seasonings, adding more salt, cumin, olive oil, or lemon juice if needed.
-
Refrigerate or use immediately. I like to serve it at room temperature.
-
Beetroot hummus will keep in the fridge, covered well, for 4-5 days.
Beetroot Kvass!
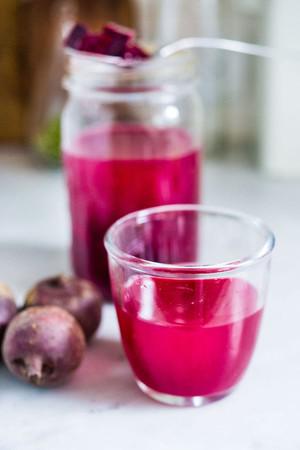
-
2 medium beets, organic (see notes for doubling, recommended) 2 cups diced or sliced, skin ON.
-
3 cups filtered water ( tap water may have too much chlorine & inhibit fermentation)
-
1 heaping tablespoon fine sea salt, or Himalayan salt ( iodized salt will inhibit fermentation)
-
fresh dill ( or fennel fronds), bay leaves, or other herbs.
-
pickling spices ( fennel seed, coriander seed, dill seed, peppercorns, celery seeds, caraway etc)
-
sliced onion, shallots, and/or garlic
-
fresh sliced ginger or turmeric root.
-
Dice or slice, two organic beets (about two cups) leaving the skin on. You want that bacteria from the skin, so dont peel! Place this in a sterile 4 cup jar. Add any optional addtions. You can double this recipe and place it in a half-gallon jar ( like I usually do). Or use two 4-cup jars.
-
Mix 3 cups water with 1 heaping tablespoon sea salt. Pour into the 4-cup jar, leaving an inch of headroom at the top. If you need more: The ratio is 1 heaping teaspoon of salt per cup of water. Mix first, then add. The salt will kill the harmful bacteria, but allow the healthy lactobacilli to flourish.
-
Cover with a loose fitting lid. Place in bowl or baking dish (to collect any drips) and then place in a cool dark place. Check every 3-4 days. After about 2 weeks you should notice some slight bubbling when you tap the jar. To get this even more bubbly and effervescent, tighten the lid, burping daily (or twice a day) for a few days.
-
Refrigerate (either strain, or leave beets in- I leave mine in) or, for a tangier flavor, continue fermenting for 1-2 more weeks, burping often. It will continue to ferment in the fridge, but at a much slower rate, developing more depth of flavor. The sugar from the beets will continue to feed the healthy bacteria.
-
If you notice any white foam on top of your kvass it is most likely kahm yeast and harmless. Skim it off with a spoon and toss.
-
Store this in the fridge, strain into a cup, and drink a few ounces daily.
-
This will last indefinitely in the fridge.
-
I highly recommend making a double batch of this because of the longer fermentation time.
-
Flavor this up!!! I love adding onion, garlic and pickling whole spices.
-
You can speed up fermentation significantly by adding a 1/4 cup of fermented pickle or kraut brine (make sure it is alive and bubbly- from the refrigerated section of the grocery store) to the jar. Some people like to add whey, feel free. An easy way to get whey is to strain some yogurt- the liquid is whey! Fermentation should occur within 3 days- and you can tell by the bubbly action when you tap the jar. Then Refrigerate!
-
NOTE: Fermentation slows down in cooler places and speeds up in warmer places.
-
6 beets to 9 cups water
Beetroot, Bacon and Cheese Cake
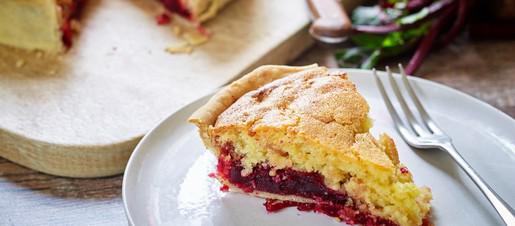
-
500g:beetroot, cooked and finely diced
-
100g: onion, finely diced
-
100g: cooking apples, peeled and finely diced
-
120g: caster sugar
-
2tsp: fresh ginger, grated
-
160ml: malt vinegar
-
1tsp: salt
-
150g: plain flour
-
75g: butter, cut into cubes
-
Water
-
A pinch of salt
-
120g: butter
-
120g: caster sugar
-
2: large eggs, beaten
-
120g: self-raising flour
-
40g: cheddar cheese, grated
-
150g: unsmoked streaky bacon, cut into pieces and fried until crispy
-
Place all the chutney ingredients into a large pan, bring to the boil and then simmer for 30–45 minutes, stirring occasionally. It's ready when the ingredients are soft and the liquid has reduced, leaving a thick chutney.
-
Remove from the heat and allow to cool completely.
-
1. Place the flour and butter into a bowl and rub together with your fingers until it resembles breadcrumbs.
-
2. Add the salt and enough water to bring the mix together to form a dough. Wrap the dough in a beeswax wrap or place it into a container with a lid and leave it to rest for 30 minutes.
-
3. Roll out the pastry to around 3mm thick and use it to line your sandwich tin.
-
4. Lightly prick the base with a fork and blind bake at 170°C for 15–20 minutes until lightly coloured and cooked through. Remove from the oven and leave to cool.
-
1. Cream together the butter and sugar until light and fluffy, then gradually incorporate the beaten eggs.
-
2. Fold in the flour and add almost all the grated cheese and bacon pieces, reserving a handful of bacon and cheese for sprinkling over the top.
-
3. To assemble the cake, spread the cooled chutney over the pastry base. Spoon the sponge mixture over the chutney. Scatter the reserved bacon and cheese over the top.
-
4. Bake the cake in the centre of the oven for 25–30 minutes. Cook until lightly browned and firm to the touch.
-
Remove from the oven and leave to cool before cutting into portions.
Belgian Lemon Teacake
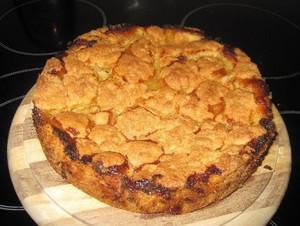
-
1 cup self-raising flour sifted
-
1/2 cup sugar
-
60g butter
-
1 egg beaten
-
1/4 cup lemon juice
-
1/3 cup sugar
-
1 egg beaten
-
60g butter chopped
-
Preheat oven to 180C.
-
Grease a 17cm shallow round tin and line base.
-
Mix flour and sugar, then rub in butter.
-
Make a well in mixture, then stir in egg to form a stiff dough.
-
Press two thirds of dough into tin.
-
Pour the hot filling over the dough, then crumble the remaining dough on top. Bake for 30 minutes.
-
Filling: Place all filling ingredients in a saucepan and combine, stirring, over a low heat until thick.
-
Serve dusted with icing sugar. I never rub in the butter - just melt it and mix it in. This could probably be made as a slice too.
Berry and Rhubarb Coconut Dumplings
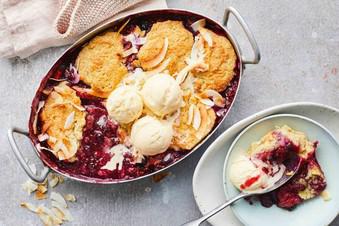
-
1 bunch rhubarb (6 stalks), trimmed, cut into 5cm lengths
-
21/2 cups frozen mixed berries
-
1 granny smith apple, peeled, cored, cut into 8 wedges
-
2 tbsp caster sugar
-
1 tbsp cornflour
-
25g butter, melted
-
2 tbsp toasted flaked coconut
-
Vanilla ice-cream, to serve
-
Coconut Dumplings
-
1 cup self-raising flour
-
50g butter, chilled, chopped
-
2 tbsp caster sugar
-
1/4 cup desiccated coconut
-
165ml can coconut milk
-
Preheat oven to 200C/180C fan-forced. Combine rhubarb, frozen berries, apple, sugar, cornflour and 1 tablespoon water in a large bowl. Place fruit mixture in a 10-cup-capacity oval ovenproof dish. Cover with 2 layers of foil. Bake for 10 minutes or until fruit begins to soften.
-
Meanwhile, make Coconut Dumplings Sift flour into a bowl. Using fingertips, rub in butter until mixture resembles fine breadcrumbs. Add sugar and coconut. Stir to combine. Add coconut milk. Stir with a wooden spoon until a soft dough forms.
-
Using 1/3 cup mixture at a time, dollop dumpling mixture onto fruit mixture. Cover tightly with 2 layers of foil. Bake for 30 minutes or until dumplings are puffed.
-
Remove foil. Brush dumplings with melted butter. Bake for a further 15 minutes or until dumplings are golden and berry mixture starts to bubble. Stand for 10 minutes. Sprinkle with coconut. Serve with ice-cream.
Berry Delicious Self Saucing Pudding

-
1 cup blueberries
-
1 cup raspberries
-
1 cup flour
-
½ cup sugar
-
4 t/s baking powder
-
¾ cup milk
-
¼ cup butter melted
-
finely grated rind from 1 lemon
-
320ml warm water
-
½ cup honey
-
¼ cup golden syrup
-
2 T/s melted butter
-
1 ½ t/s cornflour
-
Preheat the oven to 160C/320F.
-
Place berries in the bottom of a glass pie dish.
-
Add all the dry ingredients to a bowl. Add the milk, melted butter and lemon and combine.
-
Pour the batter over the berries. (You can also use pie apples and sultana instead of the berries)
-
In a jug combine all the sauce ingredients and pour over the batter slowly.
-
Cook the pudding for 40mins. Allow to stand for ten minutes before serving to allow the sauce to thicken and be partial absorbed into the pudding.
Best Bolognese Sauce
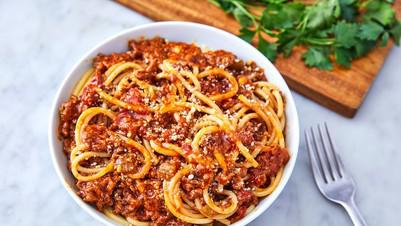
-
1 tbsp. extra-virgin olive oil
-
1 onion, chopped
-
1 carrot, peeled and finely chopped
-
1 stalk celery, finely chopped
-
1 lb. ground beef
-
2 cloves garlic, minced
-
1/2 c. dry white wine
-
1 (15-oz.) can crushed tomatoes
-
3 tbsp. tomato paste
-
2 c. low sodium beef (or chicken) broth
-
1 bay leaf
-
1 c. whole milk
-
3/4 tsp. kosher salt
-
Freshly ground black pepper
-
In a large dutch oven over medium-high heat, heat oil. Add onion, carrot, and celery, and cook until soft, about 7 minutes. Stir in beef and garlic, breaking up meat with back of a spoon. Cook until no longer pink and lightly seared, about 8 minutes.
-
Add wine, and bring mixture to a simmer. Cook until wine is mostly reduced. Stir in tomatoes, tomato paste, stock, and bay leaf, then reduce heat and simmer for 1 hour, allowing flavors to meld.
-
Discard bay leaf, then gradually stir in milk. Cover with a lid slightly ajar and simmer, stirring occasionally, until milk is fully incorporated, about 45 minutes. Season with salt and pepper.
Biscotti Di Prato

Stefano Del Pieri
-
1 egg
-
1 egg yolk
-
125 g caster sugar
-
1⁄2 tablespoon olive oil
-
150 g self-raising flour
-
50 g almonds, roasted and roughly chopped
-
1⁄2 teaspoon anise seeds (optional)
-
Preheat the oven to 170°C and line a baking tray with non-stick baking paper. Whisk together the egg, egg yolk and sugar until thick and pale.
-
Add the oil to the eggs. Combine the flour, almonds and anise, if using. Add the flour mixture to the eggs and stir until a sticky dough forms.
-
Dust your work surface well with flour and roll out the dough into pencil-shaped lengths. Place the pastry lengths on the prepared baking tray, allowing space in between for the biscuits to expand.
-
Bake for 15 minutes until golden. Cool and store in an airtight container.
Black Bean and Dark Chocolate Brownies
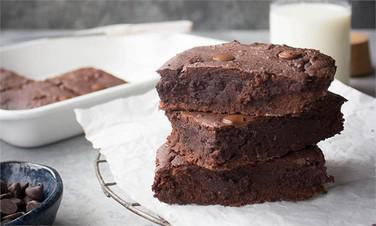
-
Black beans, canned, drained, 1⅔ 400g can(s) (drained)
-
Rolled oats, raw, 80 g
-
Dark chocolate chips, 90 g, reserve 30g to top
-
Eggs, raw, 1 extra large egg(s)
-
Olive oil, extra virgin, 3 tablespoon(s)
-
Milk, low-fat, ½ cup(s)
-
Cocoa powder, ¼ cup(s)
-
Brown sugar, 2 tablespoon(s)
-
Vanilla bean extract, 2 teaspoon(s)
-
Baking powder, 1 teaspoon(s)
-
Sea salt, 1 pinch(s)
-
Preheat a fan forced oven to 180°C.
-
In a food processor or blender, process the oats into a flour. Place to one side.
-
Combine the black beans and olive oil in the food processor or blender, and process until it forms a paste. You shouldn’t have any chunks or whole beans left, as this will effect the consistency of the brownie.
-
Return the oat flour to the food processor, along with the bean paste, baking powder, sea salt, cocoa powder, brown sugar, egg and vanilla extract. Process, slowly pouring the milk in until it forms a batter.
-
Meanwhile, create a double boiler by placing a glass bowl over a saucepan with a little water in it. Heat over a medium-high flame until the water is boiling. Add 60 g dark chocolate to the bowl and stir regularly until it is melted. Once melted, slowly pour the chocolate into the batter and mix through.
-
Pour into a 20 cm x 20 cm square baking tray (or similar) lined with baking paper. Top with the remaining 30 g of dark chocolate chips.
-
Bake for 20 to 25 minutes or until cooked through. Leave to cool before slicing into six even portions.
-
TIP: You will need almost 2 x 400g cans of black beans, drained, to yield 400 g black beans for this recipe
Blender Yorkshire Pudding

-
Original recipe (1X) yields 6 servings
-
2 eggs
-
¾ cup all-purpose flour
-
½ teaspoon salt
-
1 cup milk, divided
-
¼ cup beef drippings, divided
-
Blend eggs in a blender for 2 to 3 minutes.
-
Sift flour and salt together into a bowl. Add flour mixture and 1/4 cup milk to the blender; blend until smooth, about 1 minute. Scrape batter from the sides of the blender and pour in remaining 3/4 cup milk; blend until smooth, 2 to 3 more minutes.
-
Refrigerate batter for 1 to 2 hours before cooking.
-
Preheat the oven to 450 degrees F (230 degrees C).
-
Divide beef drippings among six muffin cups in a 12-cup muffin pan. Place the muffin pan into the preheating oven and heat until drippings are very hot.
-
Remove pan from the oven. Pour batter over hot beef drippings.
-
Bake in the preheated oven until puffed and slightly browned, 20 to 30 minutes.
-
If you don't have any meat drippings, you can use vegetable oil instead.
Blood Orange Segments and Ox Tongue
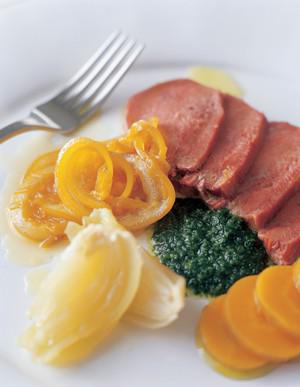
-
1 litre white vinegar
-
750 g white sugar
-
4 cardamom, crushed
-
2 cinnamon quills
-
2 whole allspice berries, lightly
-
crushed
-
8 blood oranges
-
1 cup verjuice or white wine vinegar
-
ox tongue
-
1 x 1 kg pickled ox tongue
-
2 onions, peeled and quartered
-
1 stick celery, cut into long lengths
-
1 medium-sized carrot, cut into long lengths
-
Antipasto Blood Oranges
-
Combine the vinegar and sugar in a heavy-based, non-reactive shallow pan. Stir over a medium heat until the sugar has dissolved. Add the spices. Bring to the boil and simmer gently for 30 minutes or until the spice flavours have strengthened and the vinegar has lost its sharpness.
-
Meanwhile, slice the blood oranges into very thin rings and carefully add to the preserving liquid with the verjuice. Do not stir as the orange segments will break. Gently shake the pan from time to time to disperse the liquid and oranges. Simmer gently for about 30 minutes or until the liquid has become syrupy and the blood orange rinds are translucent.
-
Carefully pack the blood orange segments into hot sterilised jars, strain the syrup and pour into the jars. Seal and store for a minimum of a month before opening so that the flavours develop. This preserve will be at its best after six months. Eat within a year of making.
-
Place the tongue, onions, celery and carrot in a large pot, cover with water and simmer for 2 hours or until the tongue is soft.
-
Remove from the pot and use a sharp knife to carefully peel away the outer skin.
-
Carve into slices and serve with the pickled blood oranges, a mound of mashed potato and perhaps a dollop of tangy salsa verde. It is best served as a part of a large bollito misto dish.
-
�Divide pasta among serving bowls. Spoon over sauce. Serve topped with cheese.
Blue Cheese Sauce
-
3 ounces blue cheese, crumbled, plus more for garnish
-
3 tablespoons buttermilk
-
2 tablespoons sour cream
-
1 clove garlic, minced
-
1 teaspoon lemon juice
-
1/2 teaspoon Worcestershire sauce
-
1/4 teaspoon freshly ground black pepper
-
1/4 teaspoon ground mustard powder
-
1/4 teaspoon kosher salt
-
Stir together blue cheese, buttermilk, sour cream, minced garlic, lemon juice, Worcestershire sauce, pepper, ground mustard powder, and salt.
If a creamier sauce is desired, blend with an immersion blender or in a food processor.
-
Place in refrigerator for 30 minutes for flavors to blend.
-
Use immediately and garnish with additional crumbled blue cheese or transfer to an airtight container and store in refrigerator for up to a week.
Blueberry and Honey Slice
-
70g dried blueberries
-
1 cup rolled oats
-
½ cup desiccated coconut
-
½ cup self-raising flour
-
½ cup raw sugar
-
125g butter
-
2 tablespoons honey
-
Preheat oven to 180°C
-
Lightly grease a slice pan and line the base and sides with baking paper.
-
Combine the dry ingredients in a large mixing bowl.
-
Place the butter and honey in a saucepan and gently heat until the mixture is bubbling.
-
Make a well in the centre of the dry ingredients and pour in the butter mixture.
-
Press mixture firmly into the prepared pan.
-
Bake for 10-15 minutes, until golden.
-
Let cool for 10 minutes in the pan before cutting into squares.
-
Cool completely and serve.
Blueberry Bread & Butter Pudding
-
6 slices of white bread, thickly sliced
-
100g unsalted butter, softened
-
5 free range eggs
-
3 cups milk
-
1/3 cup caster sugar
-
1/4 tsp cinnamon
-
2 tsp vanilla extract
-
125g blueberries, plus extra 125g to scatter if desired
-
icing sugar, to serve
-
thickened cream, to serve
-
Preheat oven to 200°c/180°c fan-forced. Lightly grease a 1l-capacity ovenproof dish with 1/2 tbs of the butter.
-
Generously spread both sides of bread with remaining butter. Cover base of dish, overlapping slices to fit.
-
In a medium bowl, whisk eggs, milk, sugar, cinnamon and vanilla. Evenly cover bread with mixture and stand until mixture is almost completely absorbed.
-
Scatter over blueberries and bake for 40 minutes or until golden and custard is set. Dust with icing sugar and serve with cream.
-
You can replace blueberries with your favourite fruit; try banana, cherries or raspberries. You can use either fresh or frozen fruit in this recipe.
Bombay Potatoes
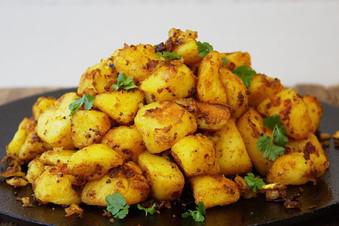
-
8 to 10 medium potatoes, peeled & cut into small chunks (I used Maris Piper potatoes)
-
1/2 teaspoon salt
-
1 teaspoon turmeric
-
2 - 4 tablespoons rape seed oil or sunflower oil
-
1 onion diced
-
2 teaspoons black mustard seeds
-
2 teaspoons curry paste (or garam masala if you prefer)
-
Preheat your oven to 200 C
-
Place the potatoes in a large saucepan and cover with water.
-
Add salt and turmeric before bringing your potatoes to the boil and then simmer gently for 5 minutes.
-
Drain your potatoes and toss them with the remaining ingredients ensuring all the potatoes are well coated.
-
Turn out into a large roasting pan and pop in the oven for 30 to 40 minutes until nice and crispy.
-
Note: If using leftover boiled or roasted potatoes, simply toss the potatoes in a mixture of turmeric, curry paste, onions, oil and black mustard seeds before popping in the oven for 20 minutes.
Bouillabaisse Marseillaise
-
1/2 cup ( 120 ml) extra-virgin olive oil
-
1 large yellow onion 340 g, diced
-
1 large leek 450 g, washed of any grit and diced
-
1 medium fennel bulb 225 g, cored and diced
-
5 medium cloves garlic, crushed
-
1/2 teaspoon whole fennel seeds
-
2 large pinches saffron threads
-
One 5xm strip zest from 1 orange
-
Large pinch cayenne pepper or other red chile powder
-
2 sprigs thyme
-
2 tablespoons (30ml) tomato paste
-
6 plum tomatoes 565 g, cored, seeded, and diced
-
900 g whole fish or fish bones and heads (see note)
-
2 cups dry white wine
-
1/4 cup Pernod or pastis (optional)
-
1.9L boiling water, or more as needed
-
2 sprigs fresh flat-leaf parsley
-
1 bay leaf
-
Kosher or sea salt and freshly ground black pepper
-
2 medium cloves garlic
-
1/4 cup crumbled stale bread or panko bread crumbs 15 g
-
Large pinch cayenne pepper or other red chile powder
-
Pinch saffron threads
-
1 large egg yolk
-
Kosher or sea salt
-
1/2 cup extra-virgin olive oil
-
1.3 to 2.25kg mixed whole and/or filleted fish (1.3 to 2.25 kg; see note)
-
453 g mussels and/or crabs (optional; see note)
-
Kosher or sea salt
-
Baguette toasts, for serving
-
For the Broth: In a Dutch oven, heat olive oil over medium heat until shimmering. Add onion, leek, fennel, garlic, fennel seeds, saffron, orange zest, cayenne pepper, and thyme sprigs. Cook, stirring occasionally, until vegetables have softened, about 10 minutes; lower heat if necessary to prevent browning.
-
Stir in tomato paste and cook, stirring, for 2 minutes. Add diced tomatoes and cook, stirring, until tomatoes begin to soften, about 3 minutes longer. Layer in whole fish and/or fish bones and heads, stirring to mix.
-
Add white wine and Pernod or pastis (if using), stirring to scrape up any bits from the bottom of the pot. Bring to a boil over medium-high heat, then boil until raw alcohol smell has cooked off, about 3 minutes.
-
Add enough boiling water to fully cover all ingredients in the pot. Add parsley and bay leaf, increase heat to high, and bring broth to a vigorous boil. Allow to boil rapidly for 5 minutes. Lower heat to a simmer and continue to cook until broth is flavorful, about 45 minutes. Season with salt and pepper.
-
Meanwhile, Make the Rouille: Using a mortar and pestle , a blender , or a food processor , process garlic, bread, cayenne pepper, saffron, and egg yolk to a paste. Work in 2 tablespoons (30ml) liquid from fish broth pot to thin paste slightly. (This can also help a blender or food processor work the mixture more effectively.) Season with salt.
-
While pounding with the pestle, or with the blender or processor running at its lowest speed, drizzle in the olive oil. If the mixture seems too thick at any point, add fish broth, 1 tablespoon (15ml) at a time, until a thick, mayonnaise-like consistency is reached. Refrigerate the rouille until ready to use, up to 3 days.
-
To Finish: Working in batches, transfer broth and all ingredients, including fish bones, to a blender. Remove top vent from blender lid, cover with a folded clean kitchen towel, and turn blender on at lowest speed. (Keeping the blender fully sealed and turning it on at high speed immediately can be dangerous with hot liquids, so please don't do that.) Gradually increase speed to high, then blend until as smooth as possible. (This may take some time and will depend on your blender, but feel free to let it run for a minute or longer.)
-
Transfer blended soup to a fine-mesh strainer set over a clean pot and, using a wooden spoon, work the broth through the strainer, scraping and pressing, until only bones and very dry fibrous material are left. Repeat with remaining broth and bones. Season strained broth with salt and pepper. Alternatively, you can work the broth and all the bones and solids through the fine disk of a food mill, but this will only work with a high-quality, commercial-grade food mill (see the "Special Equipment" section for a link).
-
Return broth to heat and bring to a very gentle simmer over medium. Working in batches if necessary, season the whole and filleted fish and fully submerge in broth. Poach until just cooked through, starting with the larger whole fish that will take the longest to cook and finishing with the fillets; feel free to check doneness by cutting into the thickest part of each fish or fillet. As each is done, transfer it to a serving platter and keep warm.
-
If using mussels or crabs, add to gently simmering broth and cook until mussels have just opened or crabs are cooked through. (This will depend on the size of your crabs; ask your fishmonger for advice if you need it.) Transfer to the serving platter.
-
Bring the platter of fish to the table along with the broth in the soup pot or a tureen. Guests can eat the soup and fish separately, or together in the same bowl. The soup is best served with baguette toasts smeared with the rouille.
-
For the Broth: If you can find inexpensive whole rockfish, such as red mullet, or other whole fish, such as monkfish or conger eel, you can use any combination of them to make the soup base. If the fish are large, cut them into sections before adding to the pot. Otherwise, use a selection of fish bones and heads from your fishmonger; many types of fish can work for this, including red snapper, sea bass, and more.
-
For the Poaching Fish: Select the best variety of fish you can find in your area—whole when possible, fillets when not. If you use only fillets, you will need about 3 pounds total; if you use only whole fish, you will need about 5 pounds total; if you use a combination, about 4 pounds total will work. This can include a variety of delicate, firm, oily, and lean fish, such as daurade or porgy (both types of sea bream), branzino (or another type of sea bass), snapper, monkfish, whiting, turbot, John Dory, and Dover sole. You can also add some shellfish, such as mussels and/or crabs, but make sure the shellfish do not take over the soup.
Braised Greek Lamb with Olives and Feta
-
4 x 130g large lamb leg steaks
-
1 tbsp plain flour
-
2 tbsp olive oil
-
1 large onion, cut into thin wedges
-
2 tsp dried oregano
-
400g can chopped tomatoes
-
100g pitted black olives
-
300g small new potatoes, quartered
-
Grated zest and juice of 1 orange
-
150g feta, crumbled
-
2 tbsp chopped fresh oregano or mint
-
Preheat the oven to 180°C/fan160°C/gas 4. Dust the lamb leg steaks in the flour and season well.
-
Heat the oil in a shallow roasting tin and fry the lamb for 1 minute each side until browned. Add the onion and oregano and fry for just 1 minute. Remove from the heat and add the tomatoes, olives, potatoes, zest and juice from the orange, and season. Cover with foil and bake for 45 minutes or until the meat is tender.
-
Crumble the feta over; scatter with the herbs. Serve with crusty bread.
Braised Pork in Sweet Soy Sauce

-
2 pound pork loin
-
2 tablespoon vegetable oil
-
1 tablespoon garlic and ginger paste
-
1 tablespoon olive oil
-
1 tablespoon sesame oil
-
½ cup soy sauce
-
4 tablespoon sugar
-
1½ cup water
-
1 tablespoon chili garlic sauce
-
2 green onions (chopped (optional)
-
Cut the pork in about 1 inch pieces and saute in a pan with the vegetable oil for about 3 minutes over medium-high heat, until the pork is no longer pink and starts to brown.
-
In a medium bowl mix the rest of the ingredients. Pour over the pork and bring to a boil. You may think there's too much water, but it will reduce. Once it's boiling turn the heat down to low and let simmer for about 30 minutes uncovered, stirring occasionally, or until there's only about 3 tbsp of sauce left.
-
Garnish with green onions. Serve over noodles or steamed rice.
-
Store your leftovers in an airtight container in the fridge for 3-4 days. If you made a carb like noodles, rice, or potatoes, you can store the leftover pork in the same container, or separate. Totally up to you!
Brazilian Cheese Bread

Tags:
Bread
-
1 cup whole milk
-
1/2 cup vegetable oil
-
1 teaspoon salt
-
2 cups (280 gms) tapioca flour or sour cassava flour
-
2 eggs
-
1 to 1 1/2 cups Parmesan cheese
-
Preheat the oven to 230°C. Line a baking pan with parchment and set aside.
-
Boil the Milk and Oil: Combine the milk, oil, and salt in the saucepan, and whisking occasionally, bring it to a gentle boil over medium heat. Remove from heat as soon as you see big bubbles coming through the milk.
-
Add the Tapioca Flour: Add all of the tapioca flour to the saucepan and stir until you see no more dry tapioca flour. The dough will be grainy and gelatinous at this point.
-
Cool the Dough: Transfer the dough to the bowl of a standing mixer fitted with a paddle attachment. (Alternatively, you can do the next few steps by hand. Be prepared for a work-out.) Beat the dough for a few minutes at medium speed until it smooths out and has cooled enough that you can hold your finger against the dough for several seconds.
-
Beat in the Eggs: Whisk the eggs together in a small bowl. With the mixer on medium, beat the eggs into the dough in two additions. Wait until the first addition has been fully incorporated into the dough before adding the second. Scrape down the sides of the bowl as needed.
-
Beat in the Cheese: With the mixer on medium, beat in the cheese until fully incorporated. The resulting dough will be very sticky, stretchy, and soft with a consistency between cake batter and cooke dough.
-
Portion the Puffs: Using an ice cream scoop, a tablespoon measure, or a dinner spoon, scoop rounded portions of the dough into mounds on the parchment-lined baking sheet. Space the mounds an inch or two apart. Dip your scoop in water to prevent sticking.
-
Bake the Puffs: Transfer the sheet with the puffs to the oven and immediately turn down the heat to 180°C. Bake for 25-30 minutes, until the puffs have puffed, the outsides are dry, and they are just starting to color. Cool briefly and eat. Leftover puffs can be kept in an airtight container for up to a week and re-crisped in a warm oven or toaster oven.
Brazilian Cheese Bread (Blender Version)
-
1 cup milk
-
1/2 cup vegetable oil
-
2 cups tapioca flour
-
1 teaspoon salt, or to taste
-
2 eggs
-
1 cup freshly grated parmesan cheese
-
Preheat oven to 350 degrees F.
-
Combine all the ingredients in the jar of a blender and pulse until smooth. Pour the batter into two mini muffin tins (or one big tin), lightly greased or sprayed with cooking spray.
-
Bake for 15-20 minutes or until puffed and golden brown.
-
Let them cool slightly and serve warm.
Brazilian Coconut Chicken Curry

-
Vegetable oil for frying
-
1 onion, sliced
-
2 garlic cloves, crushed
-
200g okra (from larger supermarkets and Indian food shops), sliced into 1-2cm pieces
-
1 green chilli, roughly chopped
-
2 tbsp crunchy peanut butter (we like Whole Earth)
-
8 skinless, boneless, free-range chicken thighs, sliced into strips
-
400ml coconut milk J
-
uice 2-3 limes, plus wedges Bunch fresh coriander, chopped
-
Steamed basmati and wild rice, and unsalted peanuts, toasted in a dry pan, to serve (optional)
-
Heat a glug of oil in a large, deep frying pan over a medium heat.
-
Add the onion and fry for 5 minutes.
-
Add the garlic, okra and chilli, then fry for a further 2-3 minutes.
-
Stir in the peanut butter and chicken, then fry for 10-15 minutes over a high heat until the chicken changes colour and is nearly cooked through.
-
Add the coconut milk, juice of 2 limes and half the coriander.
-
Taste, season and add more lime juice if you think it needs it, then simmer for 5-10 minutes until the chicken is cooked through.
-
Sprinkle with the remaining coriander, then serve with basmati and wild rice, and lime wedges.
-
Scatter with toasted peanuts if you like.
-
Tips
-
If you like, stir in some spinach at the end of cooking so it wilts into the sauce, to bulk out the curry.
-
Freeze in a freezer bag for up to 1 month; fully defrost, then slowly heat through until piping hot.
Bread - Basic Ian Style
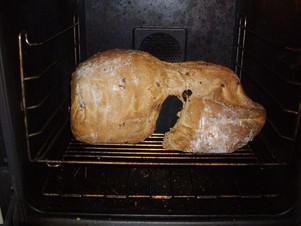
-
4 cups bakers’ flour
-
0.5 t improver
-
1.5 t salt
-
1T dry yeast (only just - not heaped)
-
1.5 t dextrose
-
0.25 cup seeds (flax)
-
400ml warm water
-
0.5 T olive oil
-
Put warm water into mixing bowl and sprinkle yeast on top. Wait five minutes.
-
Add flour, improver, dextrose and salt last.
Add seeds and olive oil.
-
Mix using dough hooks for a few minutes making sure it is all well combined, scraping away from the side of the bowl to make sure it is all mixed in. (If mixing by hand - combine a bit first to stop the water running off and tip onto a clean dry bench and punch!)
-
Pour hot tap water (not boiling water) into a large saucepan that the bowl will sit on the top off without falling in!
-
Place bowl on top of saucepan, cover with a tea towel and leave for one hour away from any draughts.
-
Sprinkle a little more flour onto the bench and onto your hands and pull the dough from the bowl onto the bench - sprinkle a little flour into the bowl and rub to get the stubborn bits.
-
Squash the dough and fold the two outer edges onto the middle (making thirds) and squash again.
-
Turn the dough one quarter turn and repeat twenty times - it gets harder as the air is gradually pushed out of the dough.
-
Roll the dough by hand into a log shape that fits into the tin and drop it into the lightly oiled (olive) tin.
-
Run enough water into the small sink (or a baking dish) to reach about one third up the side of the tin when the tin is placed in it.
-
Place the tin into the water and cover with a tea towel and leave for one hour.
-
Preheat the oven to 210ºC about ten minutes before the hour is up.
-
Bake for thirty minutes. Tip the loaf onto a cooler immediately.
-
Do not put the tin in water - allow to cool and wipe out with a paper towel only. Use a little olive oil to remove any stubborn bits.
Bread and Butter Cucumber Pickles
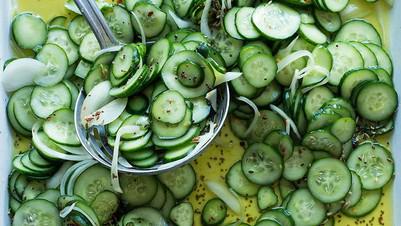
-
2 kg (4 lb 8 oz) Lebanese (short) cucumbers (the smaller, the better)
-
2 tbsp salt
-
1 litre (35 fl oz/4 cups) white wine vinegar
-
220 g (7¾ oz/1 cup) caster (superfine) sugar
-
½ tsp turmeric
-
2 small brown onions, thinly sliced
-
3 tsp brown mustard seeds
-
2 tsp fennel seeds
-
2 tsp dill seeds
-
2 tsp chilli flakes (optional)
-
12–18 black peppercorns
-
Oven temperatures are for conventional; if using fan-forced (convection), reduce the temperature by 20˚C. | We use Australian tablespoons and cups: 1 teaspoon equals 5 ml; 1 tablespoon equals 20 ml; 1 cup equals 250 ml. | All herbs are fresh (unless specified) and cups are lightly packed. | All vegetables are medium size and peeled, unless specified. | All eggs are 55-60 g, unless specified.
-
Slice the cucumbers into rounds about the thickness of a coin. Put into a bowl and sprinkle with the salt, then leave to sit for an hour or two (or overnight). This is to draw out any excess liquid; the bigger the cucumbers, the longer it will take. Transfer to a large colander and leave to drain thoroughly.
-
Meanwhile, sterilise your jars (see Note).
-
Make a brine by putting the vinegar, sugar, turmeric and 500 ml (17 fl oz/2 cups) of water into a medium non-reactive saucepan over low heat. Stir to dissolve the sugar, then increase the heat and bring to the boil. Let it bubble for 5 minutes.
-
Transfer the cucumbers to a large bowl. Add the onions, along with the mustard, fennel and dill seeds, and the chilli flakes, if using. Use your hands to mix everything together well.
-
When the jars are cool enough to handle, use small tongs or clean hands to carefully pack the cucumbers into the jars, adding 2 or 3 peppercorns to each jar. The jars should be full but not over-packed – the brine needs to cover every slice of cucumber, and if they are packed too tightly the brine won’t be able to get into every nook and cranny.
-
Carefully fill the jars with the hot brine until the cucumbers are completely covered. Remove any air bubbles by gently tapping each jar on the work surface and sliding a butter knife or chopstick around the inside to release any hidden air pockets. You may need to add more brine or cucumbers after doing this (the liquid should reach about 1 cm/½ in from the top of the jar). Wipe the rims of the jars with a clean cloth or paper towel and seal. Heat-process for 10 minutes (see Note), then store in a cool, dark place. Although these pickles will keep for up to 12 months, they start to lose their crunch after about 6 months.
-
Use good-quality jars made of thick glass, such as those available from kitchen supply stores. Cheap jars from discount stores often have thin glass, which tends to become brittle at high temperatures.
-
To sterilise jars or bottles, give them a wash in hot soapy water and a good rinse, then place in a cold oven. Heat the oven to 110ºC (225ºF/gas mark ½) and, once it has reached temperature, leave the jars in the oven for about 10 minutes or until completely dry, then remove them carefully.
-
To sterilise the lids, place them in a large saucepan of boiling water for 5 minutes, then drain and dry with clean paper towels or leave them on a wire rack to air dry. Make sure they are completely dry before using.
-
Also called water bathing or canning, heat-processing uses heat to stop the growth of bacteria. Treating your preserves in this way has two benefits: it lengthens their shelf life, and it ensures the jars or bottles are sealed correctly.
-
Get the biggest pan you have, such as a stockpot and put it on the stove pot. Lay a folded tea towel in the bottom of the pan, then sit your jars on the tea towel, taking care not to cram them in and keeping them clear of the sides of the pan. (All these measures are to stop the jars from wobbling around and cracking as the water boils.) Roughly match the water temperature to the temperature of the jars (to help prevent breakages form thermal shock), then pour in enough water to cover the jars, either completely or at least until three-quarters submerged. Bring to the boil over medium heat. The heat-processing time given in the recipe starts from boiling point.
-
You may expect one or two breakages when you’re starting out – the worst that can happen is that the remaining jars will swim in pickles or jammy water for the rest of the processing time. Just keep going, then take the surviving jars out at the end and give them a wipe down. If they all break, you have our permission to have a gin and a lie-down!
-
Once the heat-processing time is up, the lids should be puffed up and convex. Carefully remove the hot jars from the water. If you’ve bought some clamps, now is the time to use them, or you can use oven mitts and a thick cloth to protect your hands. Line your jars up on the bench and let them sit overnight. As they cool, a vacuum will form inside each jar and suck down the lid, sealing them securely. In the morning, the lids should be concave: either get down to eye level with the top of the jar to check for the tell-tale dip in the lid, or lay a pencil across each lid to show the cavity below it. If you have concerns about the seal of any of your jars (sometimes a couple of jars fail to seal correctly), store them in the fridge and use their contents within a few weeks.
Brown Sauce
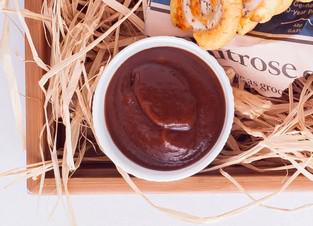
-
500g of tomatoes
-
112g of cooking apples , peeled, cored and finely chopped
-
700ml of water
-
225g of onion , finely chopped
-
15g of ginger
-
100ml of red wine vinegar
-
50g of dried apricots
-
1 bay leaf
-
1/2 star anise
-
2 cloves
-
1/2 chilli
-
2 pinches of white pepper
-
1 pinch of salt
-
5 juniper berries
-
12 fennel seeds
-
1/4 tsp allspice
-
4 tsp Worcestershire sauce
-
4 tsp black treacle
-
oil
Butter biscuits
-
In a food processor put 2 cups plain flour + 1 cup icing sugar (or icing mixture). Blend. Add 250gm cold cubed butter and half a teaspoon of salt. Blend until it comes together. Smoosh into a standard slice tin and bake at 160 degree C for 50 mins or until golden brown.
Butterfly Cakes

-
125g butter, softened
-
1/2 cup (120g) caster sugar
-
2 eggs, lightly beaten
-
1 1/2 cups (225g) self-raising flour
-
1/2 cup (125ml) milk
-
1 tsp vanilla essence
-
1/2 cup (125ml) thickened cream
-
1/4 cup strawberry jam
-
Icing sugar, to dust
-
Preheat oven to 180°C. Line 12 x 1/2 cup muffin pans with paper cases.
-
Using electric beaters, cream butter and sugar until light and creamy. Gradually add egg, beating well between each addition. Add flour alternately with milk and vanilla. Divide evenly between patty cases. Bake for 12-15 minutes or until golden brown. Leave to cool.
-
Cut a circle from the top of each cake, then cut the circle in half. Beat cream in a small bowl until thick.
-
Put a teaspoon of jam into the top of each cake and top with a dollop of cream. Press two of the half circles onto each cake. Dust with icing sugar to serve.
Butterscotch Cake
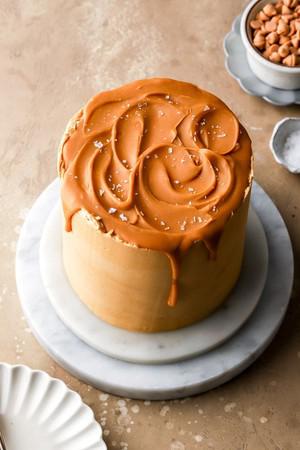
-
250 g butter
-
1 teaspoon vanilla
-
1 cup brown sugar, lightly packed
-
2 eggs, separated
-
1 tablespoon golden syrup
-
1 cup self-raising flour
-
1/2 cup plain flour
-
1/2 teaspoon cinnamon
-
1/2 cup milk
-
60 g butter
-
1/2 cup brown sugar, lightly packed
-
3/4 cup icing sugar
-
1/4 cup milk
-
Cream butter, vanilla and sugar until light and fluffy.
-
Beat in egg yolks and golden syrup. beat until well combined.
-
Fold in sifted flour and cinnamon alternately with milk.
-
Beat egg whites until soft peaks form, fold gently into mixture.
-
Spread mixture into greased deep 20cm round cake tin which has base lined with greased greaseproof paper.
-
Bake in moderate oven 50 to 60 minutes.
-
Turn onto wire rack to cool.
-
When cake is cold, top with Caramel Icing.
-
Melt butter in saucepan.
-
Add sugar, stir over medium heat 3 minutes.
-
Gradually add milk, stir until sauce boils.
-
Remove from heat and leave to become cold.
-
Gradually add sifted icing sugar and beat until thick and spreadable.
Buttery Fruit Cake

-
1 1 /2 cup sugar
-
1 cup Land O Lakes® Butter, softened
-
1 (8-ounce) package cream cheese, softened
-
1 1 /2 teaspoons vanilla extract
-
4 large Land O Lakes® Eggs
-
2 1 /4 cups all-purpose flour
-
1 1 /2 teaspoons baking powder
-
1 1 /2 cups candied fruit mix
-
1 /2 cup chopped walnuts
-
Heat oven to 350°F. Grease and flour 6 mini (5 3/4x3-inch) loaf pans. Set aside.
-
Combine sugar and butter in large bowl. Beat until light and fluffy. Add cream cheese and vanilla; beat until well mixed. Add eggs, one at a time, beating well after each addition. Stir in 1 1/4 cups flour and baking powder. Mix until well combined. Stir in remaining flour, candied fruit, and walnuts; mix until just combined.
-
Spoon batter into prepared pans. Bake 35-40 minutes or until toothpick inserted in center comes out clean.
-
Cool in pans 10 minutes; remove from pans. Cool completely.
Cabbage & Cucumber Salad
-
1/3 cabbage
-
1/4 teaspoon salt
-
1-2 cucumbers
-
1/4 teaspoon salt
-
1/2 onion
-
1 teaspoon rice vinegar
-
1/3 red cabbage
-
1 carrot
-
20g walnuts
-
2 cloves of garlic
-
2 tablespoons olive oil
-
1 tablespoon honey
-
2 tablespoons mustard
-
1 teaspoon soy sauce
Cabbage Bhaji
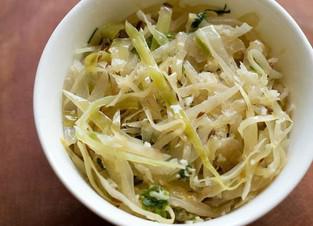
-
2.5 tablespoons oil
-
½ teaspoon cumin seeds
-
12 to 15 curry leaves
-
1 green chili, chopped
-
1 pinch asafoetida (hing)
-
4 cups chopped cabbage (patta gobi) or 300 grams cabbage - shredded or chopped
-
salt as required
-
¼ cup tightly packed grated coconut or desiccated coconut powder
-
2 tablespoons chopped coriander leaves
-
Rinse and then slice or shred or chop 300 grams cabbage. Also chop 1 green chili. Keep aside.
-
Heat oil in a shallow kadai or a shallow frying pan.
-
Add cumin seeds and let them splutter.
-
Then add curry leaves, chopped green chilies and a pinch of asafoetida. Stir and mix well.
-
Cover the pan with a rimmed lid. Pour water on the lid. The water in the lid, creates steam in the pan and helps in cooking the cabbage. Steam cook on sim or a low flame.
-
Do check the cabbage after every 5 to 6 minutes, by carefully removing the lid. In case the water dries on the lid, then add some more water and continue cooking the cabbage.
-
If you see the cabbage getting browned, then sprinkle some water in the pan. Usually the cabbage does not get browned. But depending on the type and quality of pan, the cabbage can get browned.
-
When the cabbage is cooked well, then add 1/4 cup grated coconut. Mix well and saute for a minute.
-
Switch off the flame. Lastly add 2 tablespoon chopped coriander leaves. Mix well.
-
Serve cabbage bhaji with chapatis or a side dish with any dal-rice or sambar-rice.
-
Instead of asafoetida, 3 to 4 medium garlic cloves can be used.
Capsicum Marinated Chargrilled
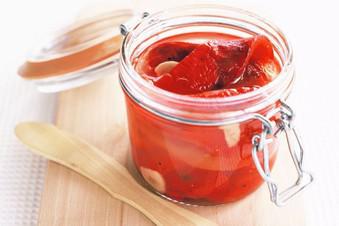
-
1.2kg red capsicum
-
2 to 3 garlic cloves, peeled, thinly sliced
-
1/2 to 1 cup vegetable oil
-
1/4 cup red-wine vinegar
-
Remove flesh, in thick slices, from capsicum stems. Remove any white pith and seeds.
-
Preheat a barbecue grill plate or chargrill on high heat. Place capsicum skin-side down and cook for 10 minutes or until skin is blackened.
-
Remove from barbecue and place into a sealed plastic bag for 5 minutes to steam. Remove from bag and peel or rub the blackened skin to remove.
-
Place soft capsicum flesh into clean sterilised jars with garlic. (see note) Combine oil, vinegar, and salt and pepper in a jug. Pour over capsicum to cover. Seal and store in the fridge for up to 6 months.
-
Tip: Use in risottos, salads, sandwiches, lasagnes and pizzas. Note: Makes 4 x 1-cup capacity jars
-
It is important to sterilise jars to prevent mould forming. Jars can be sterilised in a number of ways. Firstly, choose glass jars with an airtight lid. Remove any old labels and ensure they are free from cracks or chips. Wash in hot soapy water and rinse, then sterilise using one of the following methods:
-
Oven: Preheat the oven to 120°C. Place jars (upright) and lids (seperately) on an oven tray and heat in the oven for 20 minutes. Remove and fill immediately with jam or other preserves.
-
Stovetop: Place jars and lids in a deep saucepan. Cover with cold water. Bring water to the boil over high heat, reduce heat to medium and boil for 10 minutes. Line a baking tray with paper towel. Remove the jars using metal tongs and dry with paper towel.
-
Dishwasher: Place jars, lids and rubber seals in the dishwasher on the hottest cycle. Remove onto a paper towel lined tray; the heat will dry them naturally or you can dry them with paper towel.
Caramel Sauce

-
1 cup ( 210 g) sugar
-
6 tablespoons ( 85 g) butter (salted or unsalted)
-
1/2 cup ( 120 ml) heavy cream
-
First, before you begin, make sure you have everything ready to go — the cream and the butter next to the pan, ready to put in. Making caramel is a fast process that cannot wait for hunting around for ingredients. If you don't work fast, the sugar will burn.
-
Heat sugar on moderately high heat in a heavy-bottomed 2-quart or 3-quart saucepan. The sugar will begin to melt in a minute or two. As the sugar begins to melt, stir vigorously with a whisk or wooden spoon. The sugar will form clumps and will start to melt at the edges of the pan.
-
As the sugar starts to melt, lower the heat a bit to keep the sugar from burning.
Keep whisking until all of the sugar has melted. It will clump up quite a bit, but just keep stirring. Once all of the sugar has melted, stop stirring. You can swirl the pan a bit if you want.
-
As soon as all of the sugar crystals have melted (the liquid sugar should be medium amber in color), immediately add the butter to the pan. Whisk until the butter has melted.
-
Once the butter has melted, take the pan off the heat. Count to three, then slowly add the cream to the pan and continue to whisk to incorporate.
Note that when you add the butter and the cream, the mixture will foam up considerably. This is why you must use a pan that hold at least 2 quarts, preferably 3 quarts.
-
Whisk until caramel sauce is smooth. Let cool in the pan for a couple minutes, then pour into a glass mason jar and let sit to cool to room temperature. (Remember to use pot holders when handling the jar filled with hot caramel sauce.)
Store in the refrigerator for up to 2 weeks.
To reheat the caramel, microwave for 30-second intervals, heating just until warm and pourable. Alternatively, add to a double boiler or a heatproof bowl set over a pot with a small amount of simmering water and heat until warm.
Caramel Sticky Date Cookies
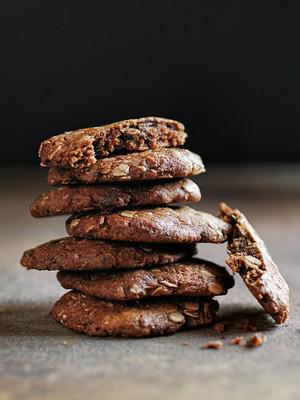
-
1½ CUPS (360G) FIRMLY PACKED CHOPPED PITTED FRESH DATES (ABOUT 15 DATES)
-
½ CUP (85G) BROWN SUGAR
-
125G UNSALTED BUTTER OR COCONUT OIL
-
1 TEASPOON BICARBONATE OF (BAKING) SODA
-
1 CUP (140G) WHOLEMEAL SPELT FLOUR
-
1 CUP (80G) SPELT FLAKES
-
1 EGG
-
1 TEASPOON GROUND CINNAMON
-
1 TEASPOON VANILLA EXTRACT
-
Preheat oven to 160°C (320°F).
-
Place the dates, sugar and butter in a small saucepan over medium heat and stir until the butter is melted. Cook, stirring, for a further 5 minutes or until the dates are soft. Add the bicarbonate of soda, mix to combine and set aside to cool.
-
Place the flour, spelt flakes, egg, cinnamon and vanilla in a large bowl. Add the date mixture and mix to combine.
-
Divide and shape the mixture into 2-tablespoon balls, flatten slightly and place on baking trays lined with non-stick baking paper. Bake for 12–14 minutes or until golden.
-
Allow to cool on trays. Store cookies in an airtight container for up to 1 week. Makes 12
-
Can use plain flour and oats instead of spelt flakes
Caramelised Onion
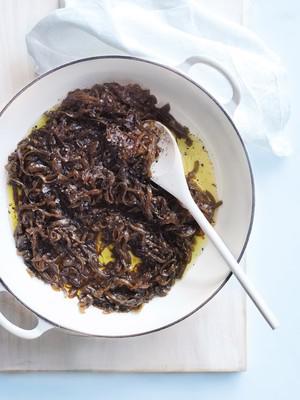
-
2 TABLESPOONS EXTRA VIRGIN OLIVE OIL
-
1KG BROWN ONIONS, SLICED
-
⅓ CUP (80ML) BALSAMIC VINEGAR
-
⅓ CUP (60G) BROWN SUGAR
-
1 TEASPOON SEA SALT FLAKES
-
CRACKED BLACK PEPPER
-
Heat the oil in a large saucepan over medium heat. Add the onion and cook, stirring frequently, for 12–15 minutes or until the onion is soft.
-
Reduce the heat to low and add the vinegar, sugar, salt and pepper and cook for a further 15 minutes or until dark and caramelised. Makes 2 cups
Carrot Cake Baked Steel Cut Oats
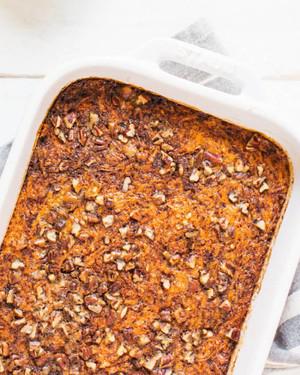
-
3 large carrots ( 1 ½ cups grated)
-
2 tablespoons extra-virgin olive oil
-
1 large egg (or flax egg for vegan)
-
2 cups 2% milk (or oat or almond milk)
-
⅓ cup maple syrup
-
1 teaspoon vanilla extract
-
1½ teaspoons cinnamon
-
1 teaspoon ground ginger
-
¼ teaspoon ground nutmeg
-
1 teaspoon baking powder
-
¾ teaspoon kosher salt
-
1 cup raw steel cut oats (do not use rolled oats)
-
⅓ cup pecan pieces
-
Preheat the oven to 375F. Grease a 8×8 or 9×9 baking dish.
-
Peel and finely grate the carrots, enough for 1 ½ cups.
-
In a medium bowl, whisk together the olive oil, egg, milk, maple syrup and vanilla extract.
-
In a small bowl, stir together the cinnamon, ginger, nutmeg, baking powder and kosher salt. Pour into the bowl with the wet ingredients and whisk to combine. Stir in the steel cut oats.
-
Pour the mixture into the prepared baking dish, then mix in carrots and spread them around evenly. Cover the pan loosely with foil.
-
Bake for 30 minutes. Remove the foil then sprinkle with pecans. Bake another 30 to 35 minutes until set. Serve warm, or refrigerate and eat leftovers for several days. (Note: This baked steel cut oatmeal is best warm or room temperature. Leftovers store well and can be reheated. To make it ahead, you could bake the entire pan and reheat: or prepare the wets and dries separately and refrigerate overnight, keeping the carrots in a separate container, and then mix them and bake the next morning.)
Carrot Top Pesto
Tags:
Green Connect
-
3 tbsp pine nuts or almonds
-
100–150 g carrot tops, washed and dried, chopped roughly (don’t worry too much about the weight here, you can add extra ingredients)
-
small handful of any herbs (optional)
-
1–2 garlic cloves, minced
-
juice of 1 lemon (or orange) – you can add some zest, too, if you like
-
3 tbsp Parmesan cheese, grated
-
olive oil
-
salt and freshly ground black pepper, to taste
-
Oven temperatures are for conventional; if using fan-forced (convection), reduce the temperature by 20˚C. | We use Australian tablespoons and cups: 1 teaspoon equals 5 ml; 1 tablespoon equals 20 ml; 1 cup equals 250 ml. | All herbs are fresh (unless specified) and cups are lightly packed. | All vegetables are medium size and peeled, unless specified. | All eggs are 55-60 g, unless specified.
-
Toast the nuts in a dry pan until they turn golden. Watch carefully and move them around the pan whilst they are cooking as they can easily burn.
-
Put the carrot tops and herbs (if using) in a food processor and blitz until smooth. Add the garlic and lemon juice (and zest) and blitz again for a few seconds. Now add the Parmesan and enough oil to give the consistency you like for your pesto. I drizzle the oil in slowly so I can control the texture. Season to taste and blitz again for a few seconds. Store in an airtight container in the fridge for up to a week. Add more oil if too dry.
Cauliflower and Leek Gratin
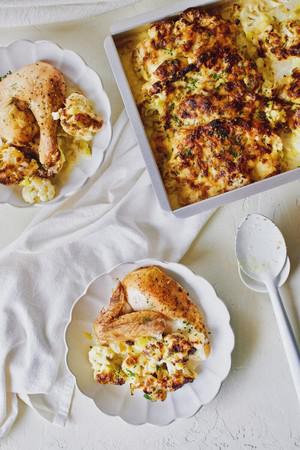
-
2 heads Cauliflower, sliced into steaks
-
4 tablespoons Unsalted Butter
-
2-3 Leeks, halved-sliced, and washed
-
2 cloves Garlic, sliced
-
4 tablespoons All-Purpose Flour
-
1 ½ cup Heavy Cream
-
1 ½ cup Chicken Stock
-
1 teaspoon Kosher Salt or White Truffle Salt
-
½ teaspoon White Pepper
-
¼ teaspoon Nutmeg
-
1 cup Gruyere Cheese, shredded
-
¼ cup Parmesan, shredded
-
Prevent screen from sleeping
-
On Off
-
Preheat the oven to 425˚F.
-
Slice the cauliflower and arrange the steaks in a 9x13 baking pan. Drizzle some olive oil over the steaks and season them with some truffle salt and black pepper. Roast the steaks in the preheated oven for 20-25 minutes, or until they begin to brown slightly.
-
While the cauliflower is roasting, in a medium saucepan heated over medium heat, melt the butter and cook the leeks until soft, about 10 minutes. Add in the garlic and cook 30-45 seconds more. Whisk in the flour to form a roux, cook for about 1 minute. Whisk the cream, stock, salt, pepper, and nutmeg in and bring the mixture to a simmer. Simmer 2-3 minutes, stirring often, until thick. Stir in the gruyere and parm, reserving a handful of gruyere for the top.
-
Remove the roasted cauliflower from the oven and pour the sauce over top. Finish with the reserved gruyere and return the pan to the oven for 10-15 minus longer. When the gratin is bubbling and has browned slightly on top, it is done. Remove it from the oven and let it rest for 10 minutes before serving. Top with a sprinkle of truffle salt and enjoy.
Cauliflower with Chicken, Corn and Fresh Avocado

-
1 large head cauliflower chopped into bite size pieces.
-
2 chicken breasts cooked and cut into bite size pieces
-
2 ears fresh corn or 1 cup frozen, thawed
-
2 cups tex mex cheese
-
1 cup black beans
-
1/2 cup cilantro chopped ( plus some for garnish)
-
1 tsp. chili powder
-
1 tsp. cumin
-
1/2 tsp. garlic powder
-
1/2 avocado diced
-
salt to taste
-
Cut cauliflower into bite size pieces.
-
Cut corn kernels off the cob, and place in a large mixing bowl with cauliflower.
-
Add juice of one lime, cilantro and spices, mix ingredients so spices coat all cauliflower pieces. Set aside for at least 15 min. to let the flavors mingle and intensify.
-
Cook chicken breast on stove top in skillet over medium heat, and cut into bite size pieces. Add to the cauliflower mixture.
-
Add black beans and 1 cup of cheese to the cauliflower mixture , mix thoroughly.
-
Transfer to individual ramekins or a 8 x 12 baking dish.
-
Bake in preheated oven at 425F for 15 min.
-
Remove from oven and sprinkle remaining cheese on top. Return to oven and broil until cheese is bubbling and golden brown ( approx. 10 min).
-
Garnish with fresh diced avocado and chopped cilantro. Serve this one dish, complete meal while it's still piping hot. Enjoy!
Cauliflower, Leek and Bacon Gratin
-
1 head of cauliflower cut into bite-size florets (7 to 8 cups/1.75 to 2 L)
-
6 slices bacon cut into thin strips
-
3 leeks white and light green parts only, chopped into half-moons
-
3 tbsp (45 mL) butter
-
3 tbsp (45 mL) all-purpose flour
-
2 cups (500 mL) Milk
-
1/2 cup (125 mL) grated Canadian Canadian-Swiss
-
1/2 cup (125 mL) grated Canadian Parmesan
-
1 tsp (5 mL) salt
-
1/2 cup (125 mL) fresh breadcrumbs
-
1/4 cup (60 mL) grated Canadian Canadian-Swiss
-
2 tbsp (30 mL) melted butter
-
Protein found in milk, yogurt and cheese is considered a “complete protein.” Plant-based protein, on the other hand, found in most legumes, nuts and grains, is deemed “incomplete.”
-
Preheat oven to 350°F (180°C). Butter an 8-inch (2 L) square dish.
-
In a large pot of boiling salted water, cook cauliflower for 5 min. Drain; set aside in bowl.
-
Meanwhile, cook bacon in a large skillet set over medium heat for 5 min or until crispy. Set aside on paper towels. Discard all but 2 tsp (10 mL) fat. Add leeks to skillet; cook, stirring occasionally, for 5 to 7 min or until very soft and just starting to turn golden. Transfer to bowl with cauliflower; add bacon.
-
Wipe skillet clean. Melt butter in a skillet set over medium heat. Sprinkle with flour; cook, whisking, for 1 min. Gradually whisk in milk. Bring to a boil and reduce heat. Whisk for 3 to 5 min or until smooth and thickened. Whisk in Canadian-Swiss, Parmesan and salt until cheese is melted.
-
Pour over cauliflower mixture, stirring until well coated.
-
Transfer to buttered dish.
-
In a bowl, stir together breadcrumbs, cheese and butter. Sprinkle over dish. Bake for about 30 min or until golden on top and heated throughout.
-
Add chopped fresh sage or tarragon to the leeks just after they’re cooked.
-
Instead of cauliflower, try cooked Brussels sprouts.
-
Use broccoli and Canadian Cheddar in place of cauliflower and Canadian-Swiss and Parmesan.
Chang's Crispy Noodle Salad
-
1 Chinese cabbage (wombok), or 1/2 a giant one (Note 1)
-
100g/ 3.5oz Chang's crispy noodles (store bought, the fine ones not chunky ones, Note 2)
-
5 green onions , finely sliced on the diagonal
-
100g/ 3.5oz slivered almonds
-
4 tbsp white vinegar (just ordinary vinegar, nothing fancy!)
-
2 tbsp white sugar (or brown)
-
2 tbsp soy sauce , all purpose or light, NOT dark soy sauce
-
2 tsp sesame oil , toasted (brown, not yellow untoasted)
-
5 tbsp olive oil
-
Dressing: Shake Dressing ingredients in a jar until sugar is dissolved. (This keeps for 3 weeks!)
-
Shred cabbage: Cut cabbage (see photos in post, helpful): cut 1 slit down the middle lengthwise (or 2, if it's giant like the one I used). Then finely slice so it's shredded. Just use the top 1/2 – 2/3, mostly leafy part. Reserve the thick crunchy white part for another use (excellent in stir fries!).
-
Toss everything except crispy noodles: Place cabbage in a big bowl with toasted almonds and green onions. Pour over Dressing, toss well.
-
Add crispy noodles! Toss through noodles just before serving so they stay crisp!
Cheese Fondue
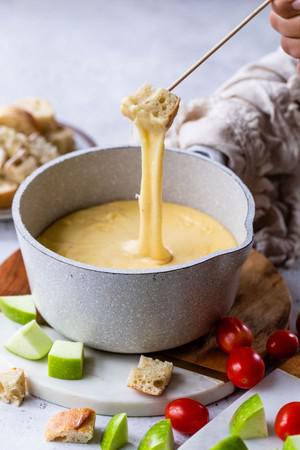
-
1/3 pound firm alpine-style cheese such as gruyere
-
1/3 pound fontina
-
1/3 pound gouda
-
2 tablespoons cornstarch
-
1 cup dry white wine such as Sauvignon Blanc
-
1 clove garlic minced
-
1 tablespoon fresh lemon juice
-
1 tablespoon brandy
-
1 teaspoon Dijon mustard
-
1/8 teaspoon nutmeg
-
Boiled baby new potatoes in their skins quartered if large
-
Lightly steamed broccoli florets
-
Lightly steamed cauliflower florets
-
Lightly steamed asparagus
-
Button mushrooms wiped clean and stems removed
-
Cherry tomatoes
-
Sliced firm apples such as Granny Smith
-
Cooked sliced hot sausage
-
Cubed French, sourdough, and/or pumpernickel bread
-
Grate all of the cheeses. In a medium bowl, combine the cheeses with the cornstarch, tossing thoroughly to coat all pieces.
-
In a stove-safe fondue pot or large heavy saucepan, bring the wine, garlic, and lemon juice to a simmer over medium-low heat. Add the cheeses to the simmering liquid a little at a time, stirring well between each addition to ensure a smooth fondue. Once smooth, stir in the brandy, mustard, and nutmeg.
-
Arrange an assortment of bite-size dipping foods on a platter. If necessary, carefully pour the fondue into a fondue pot. Serve with fondue forks or wooden skewers. Dip and enjoy!
Cheesy Chicken Fritters
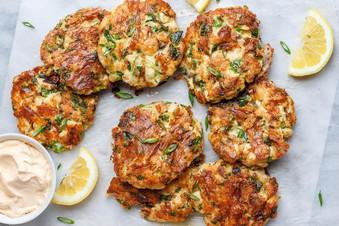
-
1.5 lb (700g) skinless, boneless chicken breast, finely diced
-
2 medium eggs
-
1/3 cup almond flour or coconut flour
-
1 cup shredded mozzarella cheese
-
1/2 cup grated parmesan cheese, optional
-
3 Jalapeño peppers, seeded and finely diced
-
1 spring onion, sliced + for garnish
-
2 tablespoons parsley chopped
-
1/2 teaspoon garlic powder
-
A pinch of salt and fresh ground black pepper
-
1 tablespoon olive oil, to fry
-
Into a large bowl, add diced chicken, almond flour, eggs, mozzarella, parmesan, spring onion, Jalapeño, parsley, garlic powder, salt, and pepper. Mix well to combine.
-
Heat oil in a large non-stick pan over medium-low heat. With an ice cream scoop or a large spoon, scoop into the chicken mixture and transfer it to the pan, then slightly flatten to make a fritter. Don’t overcrowd the pan, cook the fritters in batches to ensure even cooking.
-
Fry until golden brown on both sides, about 6-8 minutes. Make sure to cook the chicken fritters at medium-low temp, otherwise, they will burn on the outside and won’t get well cooked in the inside. Garnish with more sliced spring onion and serve immediately with your favorite dip: mayonnaise, chipotle aioli, Sriracha or even ketchup. Enjoy!
Cheesy Vegetable and Bacon Filo Parcels
-
750 g bag Wattie’s frozen International Stir-fry Mix
-
50 g butter
-
1 onion, finely chopped
-
200 g middle bacon rashers, chopped
-
¼ cup flour
-
1 cup milk
-
½ cup grated tasty cheese
-
375 g box filo pastry
-
oil spray
-
2 Tbsp sesame seeds (optional)
-
Put Wattie’s frozen International Stir-fry Mix into a microwave proof dish. Cover. Microwave on high for 5 minutes, until vegetables are partially cooked. Drain off any excess water. Set aside.
-
Melt butter in a saucepan. Add onion and bacon and cook until the onion is soft and bacon is cooked. Cook at a medium heat, to avoid the onion burning.
-
Stir in the flour. Gradually add milk, stirring constantly until the sauce thickens and boils. Reduce heat and simmer for a further minute. Remove from heat. Stir in the grated cheese and vegetables and mix well.
-
Set aside to cool. Preheat oven to 180°C fan bake.
-
Take one sheet of filo pastry and place it on a board with the short edge facing you. Spray or brush lightly with oil. Place a second sheet of filo on top, brush with oil and top with a third sheet. Place 1/8 of the cooled vegetable mixture into the middle of the bottom third of the filo. Fold the sides of the filo into the filling and roll up to enclose the vegetables. Place the parcel seam side down on a baking tray lined with baking paper and spray the top with oil. Sprinkle with sesame seeds. Repeat with the remaining vegetables and filo.
-
Bake for 25-30 minutes until golden and filling is hot.
Chewy Chocolate Chip Cookies

-
200G COLD UNSALTED BUTTER, CHOPPED
-
1 CUP (175G) BROWN SUGAR
-
¾ CUP (165G) WHITE (GRANULATED) SUGAR
-
1 TEASPOON VANILLA EXTRACT
-
2 TABLESPOONS MILK
-
1 EGG
-
2 CUPS (300G) PLAIN (ALL-PURPOSE) FLOUR
-
¼ TEASPOON BAKING POWDER
-
¼ TEASPOON BICARBONATE OF (BAKING) SODA
-
¼ TEASPOON TABLE SALT
-
300G DARK CHOCOLATE, CHOPPED
-
Preheat oven to 180°C (350°F).
-
Place the butter and both the sugars in the bowl of an electric mixer and beat on low speed until just combined.
-
Increase the speed to medium and beat for 8 minutes or until pale and creamy, scraping down the sides of the bowl.
-
Add the vanilla, milk and egg and beat for 2 minutes or until light and fluffy.
-
Sift in the flour, baking powder, bicarbonate of soda and salt and beat until combined.
-
Add the chocolate and stir to combine.
-
Roll heaped tablespoons of the mixture into balls and place on lightly greased baking trays lined with non-stick baking paper . Bake for 12–14 minutes or until golden brown .
-
Allow to cool on the trays for 5 minutes before transferring onto wire racks to cool. Makes 22
-
Leave 2–3cm between each ball of cookie dough to allow for spreading in the oven.
-
Cookies should be golden around the edges with even colouring on the base when they’re ready.
-
TIP If you’re baking more than one tray of cookies at a time, swap their shelf positions in the oven halfway through cooking time to ensure even colouring.
Chewy Chocolate Chip Cookies

-
½ cup granulated sugar (100 g)
-
¾ cup brown sugar (165 g), packed
-
1 teaspoon salt
-
½ cup unsalted butter (115 g), melted
-
1 egg
-
1 teaspoon vanilla extract
-
1 ¼ cups all-purpose flour (155 g)
-
½ teaspoon baking soda
-
4 oz milk or semi-sweet chocolate chunks (110 g)
-
4 oz dark chocolate chunk (110 g), or your preference
-
In a large bowl, whisk together the sugars, salt, and butter until a paste forms with no lumps.
-
Whisk in the egg and vanilla, beating until light ribbons fall off the whisk and remain for a short while before falling back into the mixture.
-
Sift in the flour and baking soda, then fold the mixture with a spatula (Be careful not to overmix, which would cause the gluten in the flour to toughen resulting in cakier cookies).
-
Fold in the chocolate chunks, then chill the dough for at least 30 minutes. For a more intense toffee-like flavor and deeper color, chill the dough overnight. The longer the dough rests, the more complex its flavor will be.
-
Preheat oven to 350°F (180°C). Line a baking sheet with parchment paper.
-
Scoop the dough with an ice-cream scoop onto a parchment paper-lined baking sheet, leaving at least 4 inches (10 cm) of space between cookies and 2 inches (5 cm) of space from the edges of the pan so that the cookies can spread evenly.
-
Bake for 12-15 minutes, or until the edges have started to barely brown.
-
Cool completely before serving.
-
Enjoy!
Chicken & Broccoli Bake
-
1.5 cups chopped cooked chicken (BBQ is good or 2 chicken breasts)
-
1 small head of broccoli, washed and broken into small florets
-
1or2 Carrots chopped
-
1 small onion, chopped
-
2 tablespoons olive oil
-
1 cup chicken stock
-
splash of white wine
-
2 tablespoons softened butter
-
2 tablespoons flour
-
1 tablespoon wholegrain mustard salt and pepper
-
1 cup fresh breadcrumbs
-
1/2 cup grated cheese
-
Saute onion in oil until soft. Add chicken and cook on high heat until just cooked (if using raw chicken) or heated through if using cooked. Add broccoli in the last few minutes and season to taste. Spoon broccoli & chicken mixture into an ovenproof dish.
Deglaze the pan with the wine then lower the heat and add the chicken stock. Bring to boil. In the meantime, mix the flour and butter into a paste. Add this a teaspoon at a time to the stock and whisk to eliminate lumps. When sauce has reached the desired consistency, stir in the mustard. Pour over the chicken mix and sprinkle with breadcrumbs and cheese. Bake at 180 C for about 20 minutes till golden and melted.
Chicken & Broccoli Casserole
-
1 tbsp. extra-virgin olive oil
-
1 c. small yellow onion, chopped
-
2 cloves garlic, minced
-
1 lb. boneless, skinless chicken breasts, cut into 1-inch pieces
-
Kosher salt
-
Freshly ground black pepper
-
1 c. white rice
-
2 1/2 c. low-sodium chicken broth, divided
-
1 c. heavy cream
-
2 c. broccoli florets
-
1 c. shredded cheddar
-
1/4 c. panko bread crumbs
-
In a large oven-safe skillet over medium-high heat, heat oil. Add onion and cook, stirring, until soft, 5 minutes. Add garlic and cook until fragrant, 1 minute more. Add chicken and season with salt and pepper. Cook, stirring occasionally, until golden, about 6 minutes more.
-
Stir in rice, heavy cream, and 1 cup of the broth. Bring to a simmer and cook until rice is tender, about 15 minutes. Add remaining 1 1/2 cups broth, broccoli, and cheddar cheese and cook until broccoli is tender and cheese is melty, about 10 minutes.
-
Heat broiler. Sprinkle chicken mixture with bread crumbs and season with salt and pepper. Broil until golden and crispy, about 2 minutes.
Chicken & Dahl Soup
-
2 tablespoons olive oil
-
2 garlic cloves, halved
-
2 vine-ripened tomatoes, diced
-
½ teaspoon turmeric powder
-
1 teaspoon salt
-
Freshly cracked black pepper, to taste
-
1 cup red lentils, rinsed until water runs clear and drained (6-8 times)
-
2 cups (500ml) vegetable stock (see tips above on adjusting the consistency to your taste)
-
¼ cup (60ml) pure cream or coconut cream to make it dairy-free
-
1 small green chilli, halved (optional)
-
2 tablespoons olive oil
-
500g chicken thigh, finely chopped
-
1 teaspoon salt
-
½ teaspoon cumin powder
-
½ teaspoon red chili powder (optional)
-
2 tablespoons Kecap manis (see tips above for substitutions)
-
For the Kachumber salad (optional)
-
½ small red onion, finely diced
-
1 Lebanese cucumber, finely diced
-
1 vine-ripened tomato, finely diced
-
2 sprigs fresh coriander, finely chopped
-
Method
-
1.In a medium sized pot, fitted with a lid, heat the olive oil over medium heat. Sauté the tomatoes, garlic and turmeric powder until the tomatoes have softened, about 2-3 minutes. Add salt and pepper to taste.
-
2.Stir in the red lentils, vegetable stock and bring to a simmer. Turn the heat down to low, and cover with a lid. Gently simmer for 15-20 minutes or until lentils have cooked and dal has thickened.
-
3.While the dal cooks, make the sticky chicken. In a large fry pan, heat the olive oil on high heat. Fry up the chicken until crispy and golden brown for 6-8 minutes.
-
4.Stir through the salt, cumin, chili powder (optional) and cook out for 30 seconds. Add kecap manis and cook through for 1-2 minutes more until the sauce has reduced and is coating the chicken. Remove from the heat.
-
5.Once dal is cooked, remove from heat. At this stage you can blitz it using a stick blender or high-speed blender if you prefer a creamier consistency (taking care if your using a blender with hot dal). Then, add in the cream and chili, if using. Stir to combine.
-
6.If you're making the Kachumber time, simply mix all the ingredients together in a small bowl.
-
7.To serve, ladle the dal soup into a bowl and top with sticky chicken. If using, top with kachumber salad and lots of freshly cracked black pepper.
Chicken and Chorizo Stew
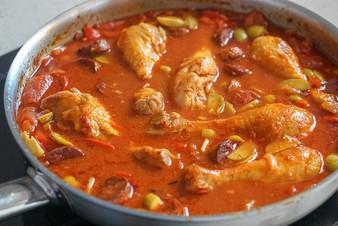
-
6 bone-in chicken thighs
-
Salt and pepper
-
2 tablespoons olive oil
-
1 lb semi-cured chorizo, sliced into roughly 1/2-inch pieces (if you can't find semi cured, use fresh) about 450g
-
1 large yellow onion thinly sliced
-
2 red bell peppers seeds removed and thinly sliced
-
2 garlic cloves minced
-
4 sprigs fresh thyme or 1 teaspoon dried
-
1 teaspoon smoked paprika
-
1 teaspoon ground cumin
-
2 bay leaves
-
1 cup dry sherry or any other dry white wine
-
2 cups chicken stock
-
2 cans of tomatoes
-
1 tablespoon tomato paste
-
1/2 cup green olives pits removed (you can keep whole or cut into slices -- I prefer the latter!)
-
Season the chicken thighs liberally with salt and pepper.
-
Place a large dutch oven (or heavy pan) over medium-high heat and add the olive oil. When the oil is hot, sear the chicken on all sides until brown (in batches if necessary), about 7-8 minutes total. Transfer to a plate and set aside.
-
Return the dutch oven to medium-high heat and add the chorizo. Sear for about 2-3 minutes, until the chorizo is brown and releasing its fat to the pan. Add the onion and bell peppers and saute until softened and translucent (about 5 minutes). Stir frequently to avoid burning.
-
Next, add the garlic, thyme, paprika, cumin, and bay leaves. When aromatic (about a minute), add the dry wine and stir to remove anything stuck to the bottom of the pan.
-
When the wine has reduced by half, add the chicken stock, tomatoes, and tomato paste to the pan. Stir to combine and then return the chicken to the pan.
-
Bring to a boil and then reduce to a simmer. Cover the dutch oven and leave to cook for 50 minutes and until the chicken is cooked through.
-
If the sauce is still thin after this time, remove the chicken and increase the heat to medium-high so that the sauce can further reduce.
-
Add in the sliced olives, along with the chicken and chorizo (if you removed it). Make sure everything is heated through and serve with rice, potatoes, bread, or salad.
Chicken and Leek Pie
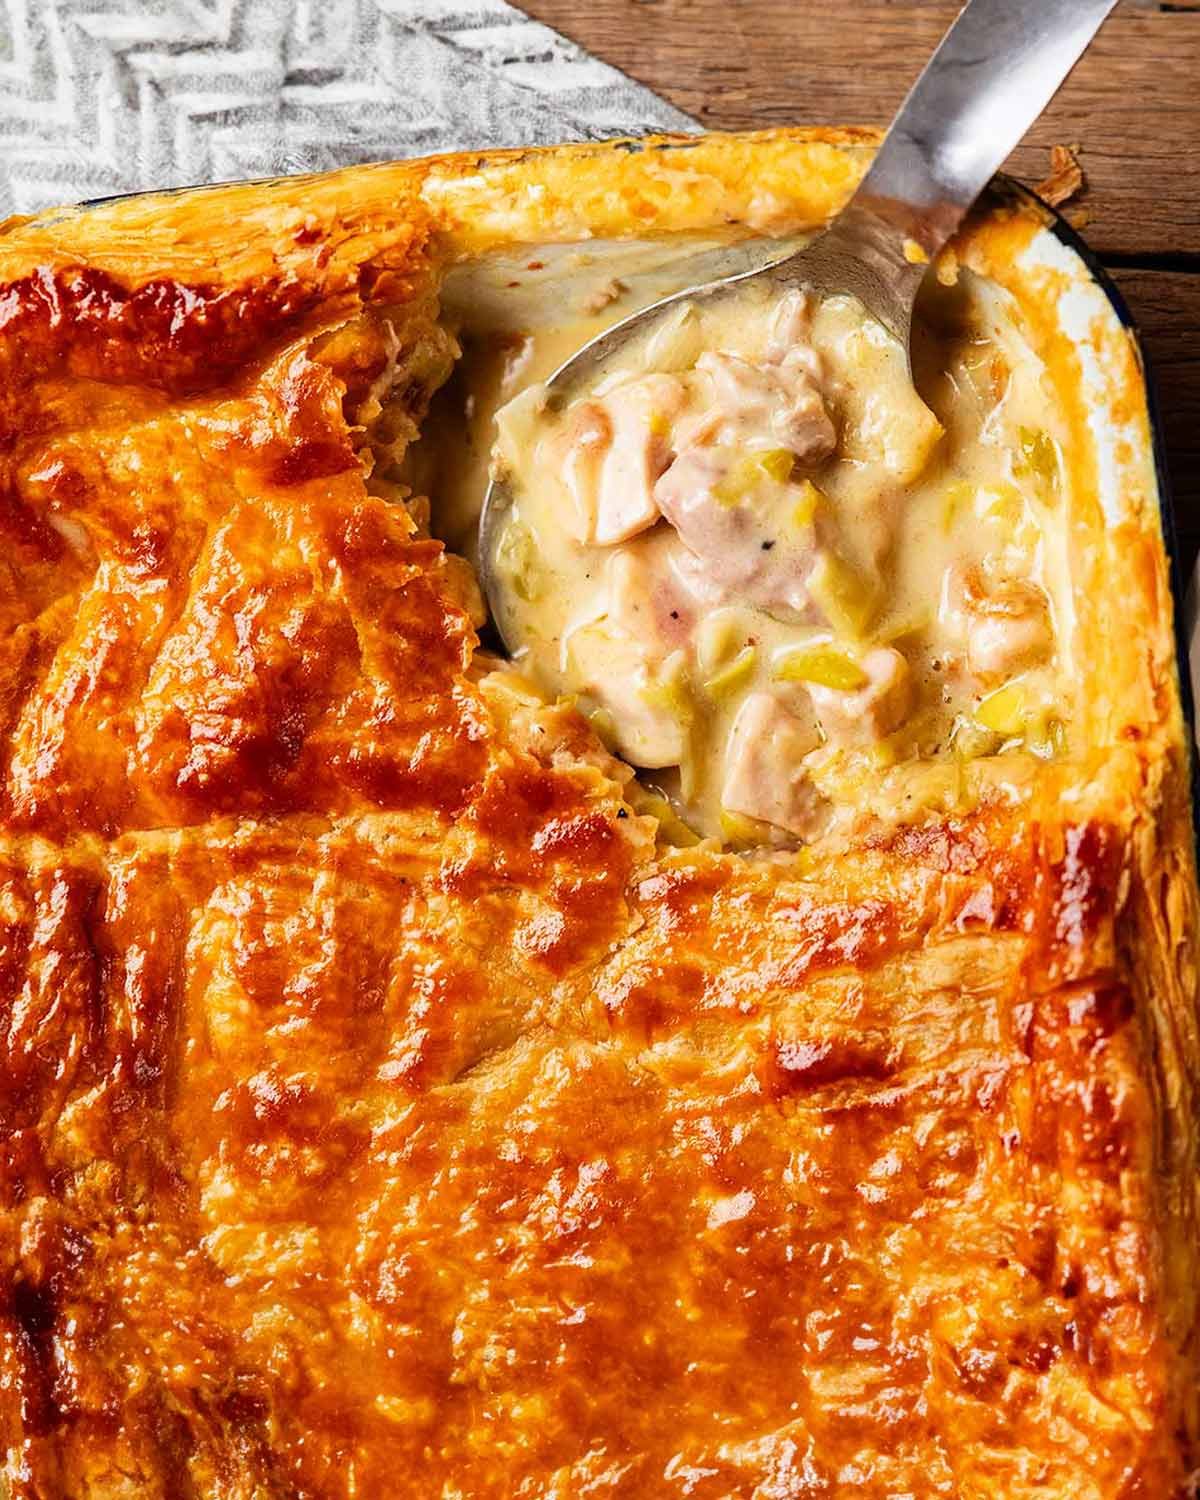
-
50g/ 3 1/2 tbsp unsalted butter (, divided)
-
750g/ 1.5lb chicken thighs (, skinless, boneless, cut into 1.8 cm / 3/4" bite size pieces (Note 1))
-
1/4 tsp each black pepper and cooking salt ((kosher salt))
-
80g / 3 oz streaky bacon (, chopped into 1cm / 0.4" squares (Note 2))
-
2 leeks ((Note 3))
-
2 celery stems (, sliced 4 mm / 0.2" thick (cut thick end in half lengthways first))
-
2 garlic cloves (, finely minced)
-
1/3 cup chardonnay (or other dry white wine (Note 4))
-
1/4 cup flour ((plain / all-purpose))
-
1 tbsp dijon mustard ((Note 5))
-
2 thyme sprigs ((or 1/2 tsp dried thyme))
-
2 bay leaves ((preferably fresh, else dried))
-
1 cup chicken stock / broth (, low sodium)
-
1 cup thickened / heavy cream ((or any full-fat cream, or sub milk for lower fat))
-
1/2 tsp cooking salt / kosher salt
-
1/4 tsp black pepper
-
2 x 20cm / 8" frozen butter puff pastry sheets (, or single sheet large enough to cover baking dish, 360g / 12 oz (Note 6))
-
1 egg (, yolk and whites separated, lightly whisked)
-
ABBREVIATED:
-
Sear surface of chicken in half butter, remove. Cook bacon 1 minute, then leek, celery and garlic 5 minutes. Deglaze with wine, melt remaining butter, then cook flour 1 minute. Add stock, then remaining Filling ingredients. Add chicken, thicken sauce (~5 minutes).
-
Cool filling 1 hour, assemble pie with double layer puff on rim, brush lid with yolk, bake 45 minutes 200°C/375°F (180°C fan).
-
Cut leek (step photos above helpful):
-
Trim the reedy dark green ends and root off, then cut in half. Cut each piece in half lengthways. Remove the outer 5 to 6 layers (keep them together), lay them flat, cut in half lengthways then into 1.8cm / 3/4" squares. Cut the inner core into 2cm / 0.8" pieces.
-
Filling:
-
Chicken - Melt half the butter in a large pan over high heat. Add the chicken, salt and pepper. Cook until the surface changes from pink to white (inside still raw), then remove into a bowl using a slotted spoon. Leave residual butter and chicken juices in the pan.
-
Sauté - In the same pan, cook the bacon for 1 minute. Add the leek, celery and garlic. Cook for 5 minutes until the celery is softened. Don't let the leek brown - lower the heat if needed.
-
Deglaze - Add the wine and simmer rapidly on high heat, stirring, until it is mostly evaporated.
-
Roux - Lower the heat to medium. Add the remaining butter. Once it melts, sprinkle the flour across the surface (don't dump in one place) and stir for 1 minute.
-
Creamy sauce - While stirring, slowly pour the stock in. The mixture will thicken into a thick sauce once combined. Then add the mustard, cream, thyme, bay leaves, salt and pepper. Stir to combine, then add the chicken including all the juices accumulated in the bowl.
-
Simmer - Increase the heat, stir to combine. Once it comes to a simmer, reduce the heat to medium high. Simmer for 5 minutes, stirring regularly, or until the sauce is a thick creamy consistency you want in the finished pie (ie sauce thickness now = thickness in the baked pie, see Note 7).
-
Cool - Remove the pan from the stove and cool for 1 hour. (You can also store in fridge for 3 - 4 days).
-
Assembling and baking:
-
Preheat the oven to 200°C/375°F (180°C fan-forced). Use a 1.5 litre / 1.5 quart baking pan (Note 9) or 4 to 5 x ~350ml / 12 oz ramekins.
-
Connect puff pastry sheets (if needed) - Semi-thaw the puff pastry (Note 6). Brush the edge of one sheet with egg white, then overlap 0.5cm / 0.2" with the other sheet to connect them. Use the back of a spoon to "smear" the pastry to hide the seam and firmly connect.
-
Cut out the pie lid (I use the dish as a cutting guide).
-
Optional strips for extra puffy edges (Note 8): Cut strips using the residual pastry to line the rim of the dish (if your dish has a thick rim, like mine) and place on the rim of the dish.
-
Fill the pie dish with the cooled filling and smooth the surface. Brush the pastry strips on the rim with egg white (if not using strips, don't do this step) then cover with the puff pastry lid.
-
Brush the lid with egg yolk. Cut a small X in the middle.
-
Bake 45 minutes or until the surface is a deep golden brown. Rest 5 minutes then serve!
Chicken Cacciatore

-
4 chicken thighs
-
2 chicken breasts with skin and backbone, halved crosswise
-
2 teaspoons salt, plus more to taste
-
1 teaspoon freshly ground black pepper, plus more to taste
-
1/2 cup all purpose flour, for dredging
-
3 tablespoons olive oil
-
1 large red bell pepper, chopped
-
1 onion, chopped
-
3 garlic cloves, finely chopped
-
3/4 cup dry white wine
-
1 ( 28-ounce) can diced tomatoes with juice
-
3/4 cup reduced-sodium chicken broth
-
3 tablespoons black olives
-
1 1/2 teaspoons dried oregano leaves
-
1/4 cup coarsely chopped fresh basil leaves
-
Sprinkle the chicken pieces with 1 teaspoon of each salt and pepper. Dredge the chicken pieces in the flour to coat lightly.
-
In a large heavy saute pan, heat the oil over a medium-high flame.
-
Add the chicken pieces to the pan and saute just until brown, about 5 minutes per side. If all the chicken does not fit in the pan, saute it in 2 batches.
-
Transfer the chicken to a plate and set aside.
-
Add the bell pepper, onion and garlic to the same pan and saute over medium heat until the onion is tender, about 5 minutes.
-
Season with salt and pepper.
-
Add the wine and simmer until reduced by half, about 3 minutes.
-
Add the tomatoes with their juice, broth, olives and oregano.
-
Return the chicken pieces to the pan and turn them to coat in the sauce.
-
Bring the sauce to a simmer.
-
Continue simmering over medium-low heat until the chicken is just cooked through, about 30 minutes for the breast pieces, and 20 minutes for the thighs.
-
Using tongs, transfer the chicken to a platter. If necessary, boil the sauce until it thickens slightly, about 3 minutes.
-
Spoon off any excess fat from atop the sauce.
-
Spoon the sauce over the chicken, then sprinkle with the basil and serve.
Chicken Korma

-
2 tbsp ghee
-
1 onion
-
3 chicken breasts
-
2 cloves garlic
-
2 tsp minced ginger
-
1 tsp ground cumin
-
1 ½ tsp ground coriander
-
1 ½ tsp garam masala
-
½ tsp mild chilli powder
-
½ tsp turmeric
-
¼ tsp salt
-
¼ tsp white pepper
-
2 tbsp tomato puree
-
¼ tsp white pepper
-
2 tbsp tomato paste
-
½ full-fat plain/natural yogurt 120 ml
-
½ cup coconut cream
-
2 tbsp ground almonds
-
1 tbsp sugar
-
60 ml (4 tbsp) double (heavy) cream
-
2 tbsp freshly chopped coriander cilantro
-
boiled rice and/or chapati
-
Heat the ghee in a large frying pan over a medium heat, until hot.
-
Add the onion and cook for 5 minutes, stirring often, until softened.
-
Add the chicken breasts and cook for 5 minutes, stirring occasionally, until the chicken is sealed.
-
Add the minced garlic, minced ginger, cumin, ground coriander, garam masala, chilli powder, turmeric, salt, white pepper, and tomato puree.
-
Cook for 2 minutes, stirring, until the chicken is coated.
-
Add the yogurt, coconut cream, ground almonds, and sugar.
-
Stir everything together, bring to a gentle boil, then simmer for 6-8 minutes, until the chicken is cooked through.
-
Stir in the double (heavy) cream and turn off the heat.
Chicken Liver Pate
-
500 gram chicken livers
-
125 gram butter
-
1 large onion
-
1/2 teaspoon thyme
-
1 bay leaf
-
6 rashers bacon
-
3 tablespoon port
-
3 tablespoon dry sherry
-
1 tablespoon brandy
-
salt
-
pepper
-
125 millilitre (1/2 cup) cream
-
125 gram mushrooms
-
60 gram butter, extra
-
extra bay leaves
-
Heat butter in pan, add finely chopped onion, thyme, bay leaf and finely chopped bacon. Saute slowly until very tender but not brown. Add cleaned livers, which have been soaked in salted water for 1 hour, then drained; simmer 7 minutes or until cooked.
-
Put cooked mixture and butter from pan into blender. Add brandy, port, sherry, salt, pepper, cream and finely chopped mushrooms to pan. Stir to combine, bring to boil, simmer gently uncovered until sauce has reduced by half. Pour sauce into blender, blend both together until smooth.
-
Push mixture through coarse sieve. Place in individual dishes. Refrigerate until firm.
-
Put extra butter in saucepan, melt over gentle heat until white sediment comes to top; skim off white sediment only. Place a bay leaf on top of each pate, pour the clarified butter over to cover top of pate; refrigerate until set.
Chicken Massaman Curry (Massaman Gai)

-
1 cinnamon quill
-
1 star anise
-
1/4 cup (60ml) sunflower oil
-
2 tbsp good-quality massaman curry paste
-
1 onion, roughly chopped
-
500g skinless chicken thigh fillets, sliced into 3cm lengths
-
2 cups (500ml) coconut milk
-
3 potatoes cut into 2cm pieces, par-boiled
-
1/3 cup (50g) roasted unsalted peanuts
-
2 tbsp fish sauce
-
1/4 cup (60ml) tamarind puree (see note)
-
2 tbsp palm sugar (see note) or brown sugar
-
2 kaffir lime leaves (see note)
-
2cm piece ginger, grated
-
Micro coriander (see note) or coriander, to serve
-
Heat a wok over medium-high heat, add cinnamon and star anise and heat until fragrant. Add oil and curry paste and stir-fry for 2 minutes or until fragrant. Add onion and cook, stirring, for 1-2 minutes until softened. Add chicken and toss to combine.
-
Add coconut milk, potato, peanuts, fish sauce, tamarind puree, palm sugar, kaffir lime leaves and ginger and bring to a simmer. Reduce heat to low, cover and cook for 10-12 minutes until chicken is cooked through. Adjust seasoning to taste and serve with coriander.
Chicken Minestrone
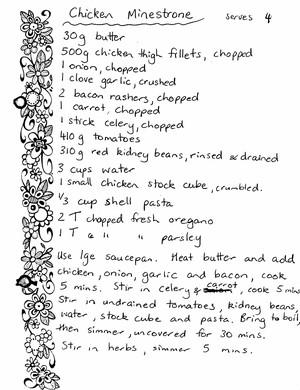
-
30g butter
-
500g chicken thigh fillets, chopped
-
1 onion, chopped
-
1 clove garlic, chopped
-
2 bacon rashers, chopped
-
1 carrot, chopped
-
1 stick celery, chopped
-
410g tomateos
-
310g red kidney beans, rinsed & drained
-
3 cups water
-
1 small chicken stock cube, crumbled
-
⅓ cup shell pasta
-
2T chopped fresh oregano
-
2T chopped fresh parsley
-
Melt butter in a large saucepan.
-
Add chicken, onion, garlic and bacon - cook for five minutes.
-
Stir in celery and carrot - cook for five minutes.
-
Stir in undrained tomatoes, kidney beans, water, stock cube and pasta - bring to boil.
-
Simmer uncovered for thirty minutes.
-
Stir in herbs and simmer for five minutes.
Chicken Nuggets
-
500 grams chicken mince see notes
-
1 tablespoon onion flakes optional
-
½ teaspoon salt
-
¼ teaspoon pepper
-
1 cup panko breadcrumbs
-
100 grams parmesan cheese finely grated
-
2 tablespoon dried mixed herbs
-
3 eggs
-
olive oil spray
-
Preheat your oven to 190 degrees celsius (fan-forced) set aside two non stick baking trays until needed.
-
Place the chicken mince, a pinch of salt and pepper and one egg into a large bowl and mix to combine. Use a dessert spoon to scoop up the mixture and shape/roll into a nugget shape. Place onto a plate and pop into the fridge until needed.
-
Lightly beat the eggs and place them into a bowl – set aside until needed.
-
Place the panko breadcrumbs, finely grated parmesan cheese and mixed herbs into a bowl and stir to combine.
-
Remove the chicken from the fridge and coat in the egg before transferring to the bowl with the breadcrumb mixture and turn to coat before placing on a baking tray – repeat until all of the mixture has been used.
-
Lightly spray the nuggets with olive oil (optional) before placing them into the oven to cook for 25 minutes or until golden and cooked through.
Chicken Parmesan Meatballs (With Video)

-
1 pound ground chicken breast
-
3/4 cup Italian breadcrumbs
-
1-1/4 cup fresh grated Parmesan cheese, divided
-
3 garlic cloves, minced
-
1/2 small onion, grated (or minced)
-
2 tablespoons 1 cup marinara sauce (divided)
-
1/2 tablespoon dried Italian seasoning
-
2 tablespoons fresh basil, chopped
-
2 tablespoons fresh parsley, chopped
-
1/2 teaspoon kosher salt
-
1/2 teaspoon fresh cracked black pepper
-
1 large egg, lightly beaten
-
1 cup shredded mozzarella cheese, for topping
-
Preheat oven to 350°F. Prepare a baking sheet by lining with parchment paper.
-
Set aside 1 cup marinara, 1 cup shredded mozzarella cheese and 1/4 cup Parmesan cheese.
-
In a large mixing bowl, combine all remaining ingredients (chicken, breadcrumbs, 1 cup Parmesan, garlic, onion, 2 tablespoons marinara sauce, Italian seasoning, basil, parsley, salt, pepper and egg). Mix well, do not over mix or you will have tough meatballs.
-
Using a 1-1/2 tablespoon scoop, portion out meat mixture and place on baking sheet. After all meatballs have been scooped onto tray, roll into balls.
-
Bake for 16-18 minutes until lightly browned.
-
Turn oven to broil.
-
Drizzle a spoonful of marinara over each meatball. Sprinkle with mozzarella cheese.
-
Broil for 2-3 minutes until cheese is golden brown and bubbly.
-
Serve and enjoy!
Chicken Parmigiana
-
3 chicken breasts, sliced in half length-wise to create 6 cutlets
-
1/2 cup all-purpose flour can also use gluten-free flour blend or white whole wheat
-
3 eggs, whisked
-
1/3 cup olive oil
-
1 1/2 cups breadcrumbs
-
1/2 cup parmesan cheese, shredded
-
1/2 tsp (each) salt & pepper
-
2 tsp Italian herb blend (thyme, oregano, basil, rosemary)
-
1 tsp garlic powder
-
6 slices Mozzarella
-
1 1/2 cups marinara sauce
-
1/3 cup parmesan cheese, shredded
-
2 tbsp fresh basil, chopped
-
Preheat oven to 425F
-
Tenderize chicken: place chicken cutlets/breasts in a large ziplock bag or between two sheets of parchment paper. Firmly pound with a rolling pin or the smooth side of a meat hammer (chicken thickness should be 1/2 inch). Remove cutlets from the bag and pat dry with paper towels.
-
Breadcrumbs: In a shallow dish, mix all of breadcrumb ingredients together.
-
Assembly line: Set up a line of shallow bowls/dishes with flour, whisked eggs, and breadcrumbs.
-
Bread the chicken: First, coat the chicken in flour on both sides, then shake off the excess flour that isn't sticking. Transfer to whisked eggs, then dip into the breadcrumbs. Use your hands to gently pack the breadcrumbs onto each side of the chicken. Repeat until all the cutlets have been breaded.
-
Brown the chicken: Heat 3 tablespoons of oil at a time in a cast iron skillet or pan on LOW to MEDIUM heat. Brown chicken for 2-3 minutes on both sides until the breading is golden.
-
Layer and bake: arrange browned chicken in a large baking dish or pan. Layer first with mozzarella slices then tomato sauce over top. Bake uncovered in the oven for 14 minutes – remove from oven then sprinkle with shredded parmesan cheese. Then broil on HIGH for 1 minute until the cheese is melted and browned. Sprinkle with fresh basil and serve!
-
If you would like to use less oil, use this baking method instead! I love making chicken parmesan this way and the results are almost identical to pan-frying.
Baked method: preheat oven to 450F. Follow steps 2-5 above, then after breading the chicken, lay the cutlets in a generously oiled baking pan. Spray the chicken with olive oil, or brush with 2 Tablespoons of olive oil. Bake for 25 minutes, then remove from oven and layer with mozzarella, sauce, and parmesan and bake for 5 additional minutes. Broil on HIGH for the last minute for the cheese to brown. Serve with fresh basil!
Chicken Stroganoff
-
600g / 1.2 lb chicken thighs (4 - 5) , boneless skinless (or breast or tenderloin, Note 1)
-
1 tsp garlic powder
-
Salt and pepper
-
1 tbsp olive oil
-
1 large onion , chopped
-
300g / 10oz mushrooms , sliced (not too thin)
-
40g / 3 tbsp butter
-
2 tbsp flour (Note 2)
-
2 cups / 500 ml beef broth/stock , salt reduced
-
1 tbsp Dijon mustard
-
2/3 cup (150g) sour cream (or yogurt)
-
250 - 300 g / 8 - 10 oz pasta or egg noodles of choice (Note 3)
-
Chopped parsley or chives , for garnish (optional)
-
Sprinkle chicken with garlic powder, salt and pepper on both sides.
-
Heat oil in a large skillet over medium heat. Place chicken in skillet smooth side down.
-
Press down lightly with with spatula. Cook for 4 minutes until golden.
-
Turn and press lightly with spatula. Cook for 2 minutes.
-
Remove chicken onto a plate.
-
Turn heat up to medium high. Add butter, melt. Then add onions, cook for 1 minute, then add mushrooms.
-
Cook mushrooms until golden. Scrape bottom of fry pan to get all the golden bits off (this is flavour!).
-
Add flour, cook, stirring, for 1 minute.
-
Add half the broth while stirring. Once incorporated, add remaining broth.
-
Stir, then add sour cream and mustard. Stir until incorporated (don't worry if it looks split, sour cream will "melt" as it heats).
-
Bring to simmer ,then reduce heat to medium low. Once it thickens to the consistency of pouring cream (3 minutes), adjust salt and pepper to taste.
-
Add chicken back in (including plate juices). Simmer for 1 minute, then remove from stove.
-
Serve over pasta or egg noodles, sprinkled with parsley or chives if desired.
-
Chicken - If using breast, use 2 and either slice horizontally to form 4 "steaks" in total or chop into bite size pieces. If using tenderloin, use whole or chop. If cut into bite size pieces, still follow the recipe. ie brown then remove, then return into pan.
-
Flour - Any wheat flour is fine here, I use plain white flour (all purpose). Or use 1 tbsp cornstarch / cornflour mixed with 1 tbsp water (makes it Gluten Free), mix those together then add that in with the beef broth.
-
Serving - I like serving this with pasta. It's also great with mashed potato, rice, polenta - anything that's suitable to slop up all that gravy!
-
Fat reduction - use low fat sour cream and reduce butter to 2 tbsp, and use a non stick pan. Mixture will seem drier once you add flour but don't worry!
-
Nutrition per serving, excluding noodles.
Chicken, Corn and Salami Tacos

-
2 chicken breasts
-
1 clove fresh garlic sliced
-
1 tbsp Mexican spices
-
1 tbsp olive oil for the rub
-
8 soft tacos
-
100mL sour cream (or natural yoghurt)
-
Salt and pepper, to taste
-
150g DON® Mild Hungarian salami
-
2 corn cob-grilled or seared in the pan
-
1 small chilli habanero, thinly sliced
-
1 red onion, diced
-
1 fresh tomato, diced
-
1 avocado, diced
-
1 tbsp coriander, chopped
-
1 lime, squeeze to taste
-
1 carrot, thinly sliced
-
1 zucchini, thinly sliced
-
10mL apple cider vinegar
-
Slice chicken
-
in half horizontally to reduce thickness. Marinate with Mexican spice mix, garlic, 1 tbsp olive oil and a little salt and pepper. Set aside for 25 minutes.
-
Meanwhile, remove the husk from corn and wash in water. Season with salt and pepper and rub with olive oil. Heat a skillet or grill pan to medium-high heat and char on all sides for 7 – 8 minutes. Allow to cool before removing the kernels and placing in a large bowl.
-
Remove the skin from the salami and dice into chunky pieces. Heat up a fry pan to medium-high heat and add half of the salami to the pan. Place chicken in the frying pan with some olive oil on top of the salami, allowing the salami to release the spicy flavour until golden brown.
-
Remove the salami from the pan and continue to cook the chicken through for 8 – 10 minutes. Remove and rest for 5 – 7 minutes while you prepare your tacos and filling.
-
Warm the tacos in a pan on high heat for 30 seconds and then set aside and cover with a cloth to keep them warm.
-
Shred the chicken with a couple of forks and add to a bowl with half the cooked salami and stir through to combine.
-
Add the red onion, tomato, chilli to the bowl of corn along with the remaining fresh salami and top with coriander, a squeeze of lime, avocado, and mix through.
-
Combine zucchini and carrot in a bowl and dress with the apple cider vinegar.
-
To assemble, spoon some of the chicken and salami mix onto a taco, then add some of the salsa mix and then top with the zucchini and carrot and a dollop of sour cream.
Chicken, Leek & Mushroom Pies
-
400g button, cup or flat mushrooms
-
1 tbs olive oil
-
1 leek, halved lengthways, washed, finely chopped
-
400g chicken mince
-
3 tsp fresh thyme
-
100g butter, chopped
-
1/2 cup plain flour
-
2 cups milk
-
1/2 cup finely grated parmesan
-
4 sheets frozen ready-rolled puff pastry, defrosted
-
Finely chop mushrooms by hand, or alternatively, pulse in a food processor until finely chopped.
-
Heat oil in a saucepan over medium heat. Add leek, cook for 3-4 minutes until softened. Add mushrooms, increase heat to high and cook for 5 minutes or until moisture has almost evaporated. Add mince and thyme, cook, breaking up mince with wooden spoon, until mince changes colour. Remove from heat.
-
Melt butter in a large saucepan over medium-high heat. Add flour and cook, stirring for 2 minutes. Remove from heat, gradually add milk, whisking constantly to prevent lumps forming. Return to heat and bring to boil, whisking constantly. Add parmesan, chicken and mushroom mixture. Season and stir to combine. Set aside to cool.
-
Preheat oven to 220°C fan-forced. Lightly grease 4 x 2-cup capacity heatproof ramekins or bowls. Spoon chicken and mushroom mixture among bowls. Place a sheet of pastry over each ramekin, trim excess pastry. Cut a cross in the centre of each pie. Brush tops with water and season. Place pies onto a tray and bake for 25-30 minutes until pastry is puffed and golden. Serve.
Chickpea and Leek Soup with Chorizo

-
1 tablespoon extra virgin olive oil
-
2 leeks, trimmed, halved, thinly sliced
-
1 garlic clove, finely chopped
-
1.25 litres Massel chicken style liquid stock
-
900g cream delight potatoes, peeled, cut into 2cm pieces
-
400g can chickpeas, drained, rinsed
-
1 chorizo sausage, finely chopped
-
2 tablespoons fresh chives, chopped, to serve
-
Heat oil in a large saucepan over medium heat. Add leek. Cook, stirring often, for 5 minutes or until softened. Add garlic. Cook for 1 minute.
-
Add stock and potato. Bring to a simmer. Cover. Simmer for 15 minutes or until potato is tender. Stir in chickpeas. Remove from heat. Transfer 1/2 the soup mixture to a heatproof bowl. Using a stick blender, blend soup in pan until smooth. Return unblended soup to pan. Season with salt and pepper.
-
Meanwhile, heat a non-stick frying pan over medium heat. Add chorizo. Cook, stirring occasionally, for 3 to 4 minutes or until golden.
-
Serve topped with chorizo and chives.
Chickpea Chocolate Chip Cookies
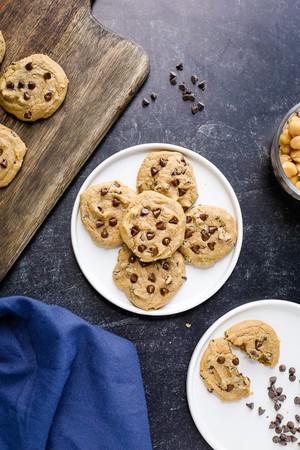
-
1 15oz can chickpeas, rinsed and drained
-
½ cup smooth almond butter or cashew butter, unsalted
-
⅓ cup maple syrup
-
2 teaspoons vanilla
-
½ teaspoon baking soda
-
½ teaspoon baking powder
-
½ teaspoon salt
-
½ cup dark chocolate chips
-
Preheat the oven to 350 degrees.
-
Add the chickpeas and nut butter into a food processor and blend on high for 1 minute.
-
Add the maple syrup and vanilla and continue to blend for 2-3 minutes, scraping down the sides every minute. You want the mixture to be entirely free of any lumps.
-
Add the baking soda, baking powder, and salt, then blend for 30 seconds.
-
Test the temperature of the batter and if necessary, let cool before adding the chocolate chips. When blending for a long time, the mixture can get warm and cause the chocolate to melt slightly.
-
Once cooled, stir in the chocolate chips.
-
Drop rounded tablespoons of cookie dough onto a baking sheet. The cookies will spread just slightly so be sure you leave a few inches of space between cookies.
-
Bake for 12-14 minutes until the cookies have browned on the edges.
-
Be sure to blend the chickpeas with the nut butter until completely smooth.
-
Did you make this recipe?
-
Tag @iheartveggies on Instagram and hashtag it #iheartveggies
-
These chickpea chocolate chip cookies will be soft and just a tiny bit crumbly since they’re gluten-free. Be sure to let them cool completely before trying to remove them from the baking sheet. Store them in an airtight container to keep them fresh!
Chilli Con Carne
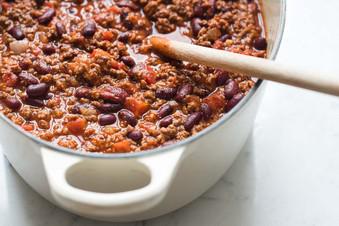
-
2 teaspoons olive oil
-
125 g rindless bacon, roughly chopped
-
750 g lean beef mince
-
2 medium brown onions, finely chopped
-
2 medium red capsicums, chopped
-
3 garlic cloves, crushed
-
1 long red chilli, chopped
-
2 tablespoons Mexican chilli powder
-
800 g can chopped tomatoes
-
400 g can red kidney beans, drained, rinsed
-
Heat oil in a large saucepan over medium heat. Add bacon. Cook for 5 to 6 minutes or until crisp. Add mince. Cook, stirring with a wooden spoon to break up mince, for 15 minutes or until browned.
-
Add onions, capsicums, garlic and chopped chilli. Cook for 5 to 6 minutes or until vegetables are soft. Add chilli powder. Cook, stirring, for 1 minute or until fragrant.
-
Add tomatoes and 1 cup cold water. Bring to the boil. Reduce heat to mediumlow. Simmer, partially covered, for 30 minutes or until sauce has reduced slightly.
-
Add beans. Increase heat to medium. Cook for 15 minutes or until beans are heated through and sauce has thickened.
Chilli Sauce - Basic
-
250g red birdseye chillies, roughly chopped
-
1/2 x 400g can diced tomatoes
-
1/4 cup white sugar
-
60ml (1/4 cup) White Wine Vinegar
-
Combine chilli, tomatoes, sugar and vinegar in a saucepan over high heat.
-
Bring to the boil. Reduce heat to medium.
-
Simmer, stirring occasionally, for 7 minutes or until sauce thickens slightly.
-
Remove from heat. Stand for 5 minutes.
-
Process mixture, in batches, until smooth. Pour into hot sterilised jars. Secure lids. Refrigerate for up to 3 weeks.
Chinese Crispy Pork Belly
-
1 pork belly, skin on (800 - 1.2kg / 1.6 - 2.4 lb) (Note 1)
-
1 1/2 tbsp Chinese cooking wine (Shaoxing wine) (Note 2)
-
1 tsp Chinese five spice powder (Note 3)
-
1 tsp white pepper (sub black pepper)
-
1/2 tsp salt
-
1 tbsp white vinegar (helps conduct heat evenly)
-
200 g / 7 oz rock salt (Note 4)
-
Use an ice pick, sharp metal skewer or another tool to prick tons and tons of holes in the skin. Avoid piercing into the fat as best you can, and really ensure you do not pierce the flesh (Note 5)
-
Turn the pork belly upside down. Rub the flesh (not skin) with Chinese cooking wine, dribbling it on gradually. Sprinkle over five spice powder, salt and pepper. Rub all over flesh, including sides (not on skin).
-
Turn skin side up and place in a container. Dab skin dry with paper towels. Refrigerate uncovered for 12 hours (max 24 hrs, min 3 hrs).
-
Preheat oven to 180C/350F (all oven types).
-
Remove pork from fridge. Place onto a large sheet of foil. Fold up sides of foil around the pork to enclose it snugly (see photos in post or video) with a 1.5cm / 2/5" rim above the pork skin (to hold salt in).
-
Transfer pork to baking tray. Dab skin with paper towels.
-
Brush skin with vinegar.
-
Spread rock salt on the skin (the foil edges will stop it from falling down the sides).
-
Roast for 60 minutes.
-
Remove pork from oven and transfer onto work surface.
-
Switch to grill/broiler on medium high. Move shelf so it is at least 25cm/10" from the heat source.
-
Fold down foil and scrape all the salt off the top and sides. Return pork only (i.e. discard foil) to baking tray.
-
Place under grill/broiler for 20 - 25 minutes, rotating tray once, until skin is golden, crispy and puffed. (Note 6)
-
Remove pork onto cutting board. Slice into 1 - 1.5cm / 2/5 - 3/5" thick slices, then into smaller slices like pictured in post.
-
Serve with ordinary yellow mustard - or Hot English Mustard if you like spicy like me! Not Dijon, just ordinary American or other yellow mustard (yes really!). Sometimes it is served with white sugar on the side too. Add some fresh raw vegetables (I use cucumber and radish).
Chinese Lemon Chicken

-
21 oz (600 g) chicken tenderloins cut into 1-inch pieces
-
1 large egg
-
2 tablespoons soy sauce
-
2 tablespoons Chinese shaoxing wine (or white vinegar)
-
1/2 cup corn starch
-
1/2 cup vegetable oil or canola oil
-
1 tablespoon oil
-
3 teaspoons minced garlic
-
1 teaspoon minced or finely grated ginger
-
1/2 cup chicken stock or broth
-
2 tablespoons soy sauce
-
juice of 1 lemon (about 3-4 tablespoons)
-
2 tablespoons sugar
-
2 tablespoons honey
-
salt to taste
-
2 teaspoons corn starch dissolved in 2 tablespoons water
-
1 teaspoon sesame seeds to garnish
-
thinly sliced green onions to garnish
-
lemon slices, to serve (optional)
-
In a large shallow bowl whisk egg, soy sauce and wine. Add in chicken, mix well and allow to marinate for 20 minutes, covered.
-
Place corn starch into a large baking tray. Pour chicken and marinade into the corn starch and coat chicken pieces evenly, lightly pressing the corn starch around the chicken.
-
Heat oil in a large wok, pan or skillet over medium-high heat. When oil is hot (325°F or 165°C), shake off excess corn starch and fry chicken in batches in a single layer for about 5-6 minutes, turning half way during cooking, until golden and cooked through.
-
Drain on a plate lined with paper towel. Discard oil and wipe wok/pan over with paper towel.
-
Heat oil over medium-high heat. Sauté the garlic and ginger until fragrant (about 30 seconds). Add stock, soy sauce, lemon juice, sugar, honey, and a pinch of salt. Whisk, bring to a simmer until the sugar dissolves.
-
Whisk corn starch mixture into the simmering sauce and stir until thickened. Toss chicken in the sauce until evenly coated (about 2 minutes).
-
Garnish with sesame seeds, green onions and lemon slices. S erve.
Chinese Lettuce Wraps (San Choy Bow )
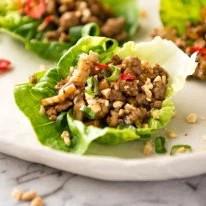
-
1 1/4 tsp cornflour / cornstarch
-
3 tbsp water, separated
-
1 1/2 tbsp light soy sauce (Note 1)
-
1 tsp dark soy sauce (Note 1)
-
2 tbsp oyster sauce
-
1 tsp sesame oil
-
2 tbsp Chinese cooking wine (or sub Mirin or dry sherry, Note 2)
-
1 tsp white sugar (can omit)
-
1 tbsp peanut oil
-
1 clove large garlic, minced
-
1/2 tsp ginger, minced
-
300g / 10oz pork mince (ground pork) (Note 3)
-
1/2 onion, finely chopped
-
1 small carrot, finely chopped
-
100g/ 3.5oz canned water chestnuts, drained and finely chopped (Note 4)
-
5 baby corn, canned or fresh, finely chopped (Note 4)
-
5 mushrooms, finely chopped(shiitake is best, I used Swiss Brown)
-
8 leaves large or 16 - 20 small lettuce, preferably soft (Note 5)
-
Crushed peanuts
-
Finely sliced scallions / shallots
-
Mix cornflour with 1 tbsp water until lump free. Then add remaining Sauce ingredients and mix.
-
Heat oil in a wok or large skillet over high heat. Add garlic and ginger, give it a quick stir then add onion.
-
Cook for 1 minute then add pork. Cook pork until it turns white.
-
Add all the vegetables. Cook for 2 minutes until the carrot is softened and pork is cooked through.
-
Add Sauce and cook for 1 1/2 minutes or until it thickens and glossy, coating the Filling.
-
Transfer Filling into serving bowl. Lay out lettuce leaves, peanuts and scallions on the side.
-
To serve, spoon some Filling into a lettuce leaf. Top with peanuts and scallions, bundle it up and enjoy!
-
Light soy sauce adds the salt and the dark soy sauce adds a touch of colour. You can sub the dark soy with more light soy sauce, or just sub both the light and dark with ordinary soy sauce. The filling will just be a bit lighter in colour. Don't just use all dark soy sauce - flavour is way too strong - or with a thick sweet soy sauce like kecap manis.
-
Chinese cooking wine - sub with Mirin or dry sherry. For a non alcoholic option, use chicken broth/stock (low sodium) in place of the Chinese wine AND water in the Sauce.
-
Protein - Also great with chicken but I prefer pork because it's not as lean and has slightly more flavour. Chinese restaurants typically use pork. Never seen it with beef or lamb! Can also sub with 2 1/2 cups of chopped veggies of choice.
-
Water chestnuts - see in post for image. These are a key ingredient in San Choy Bow as served at Chinese restaurants here in Australia, but can be skipped. They have a natural light flavour, but it's the texture that is unique - a fresh crunchiness.
-
Nowadays these are sold in both the Asian and canned vegetable section of major supermarkets.
-
Lettuce - Typically served at Chinese restaurants using crisp iceberg lettuce leaves which are cut into neat rounds so they are all the same size. My preference is to use soft lettuce leaves like Butter Lettuce or Bibb Lettuce (US) because iceberg has a tendency to crack when rolled to eat, causing juices to run out. I used Baby Gem Lettuce in the photos which come in twin packs at Woolworths.
-
Customise - I use 2 1/2 cups of chopped vegetables. You can substitute with whatever chopped vegetables you want, though I urge you to stick with the onion.
-
The meat can be substituted with 2 1/2 cups of any vegetable or chopped firm tofu. For a super quick version, make this with pork frozen diced vegetables. Works a treat!
-
This recipe makes enough for 3 as a main (4 if it's 2 adults and 2 kids) or around 6 as a starter.
-
Nutrition per serving, assuming 4 servings. This is a fantastic healthy dinner!
Chinese Noodles {Lo Mein}

-
1 lb Chinese noodles of your choice
-
2 tbsp vegetable oil
-
2 garlic cloves peeled and thinly sliced
-
½ inch piece fresh ginger grated
-
3 green onions sliced into thin rounds
-
1 8 ounce package of fresh stir-fry vegetables
-
3 tablespoons dry sherry
-
1 cup cooked meat of your choice cut into bite-size(optional)
-
2 tablespoons low sodium light soy sauce
-
1 tablespoon low sodium dark soy sauce
-
1 tablespoon oyster sauce optional
-
Ground black or white pepper to taste
-
Cups - Metric
-
Cook the noodles a little less than stated on the package instructions (until just underdone), then drain, rinse with cold water and set aside.
-
Heat the oil in the wok over a high heat. Once hot, add the garlic, ginger, and green on onions. Stir-fry for 30 secs.
-
Add the stir-fry vegetables. Stir-fry for 2-3 minutes.
-
Add the sherry and allow to almost evaporate before adding any meat you are using and cooked noodles. Toss so that all of the ingredients are combined.
-
Turn the heat down to medium and add both of the soy sauces, oyster sauce, and pepper. Stir-fry for a further 1-2 then toss to combine and serve.
-
The trick to the perfect noodle stir-fry is to cook the noodles until they are al dente or just slightly undercooked and then rinse them with cold water to stop the cooking process.
-
Noodles stir-fry better if you shake them after draining until dry as possible. They shouldn't be wet to the touch.
-
To keep your noodles from sticking before adding to the wok, add them back to their pot after draining and toss them with a little sesame oil or cooking oil.
-
Prepare your ingredients before heating the wok. When stir-frying, things move quickly. Have everything ready before you start.
-
Set the heat to high. Heat your wok before adding the oil. This step will help prevent food sticking to the pan.
-
Once the oil is added, spread it around the pan to coat well. Choose an oil with a high smoke point.
Chinese Pork Mince Stir-Fry
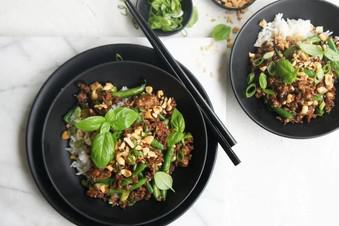
-
2 garlic cloves crushed
-
1 chilli deseeded fresh thinly sliced whole
-
1 tbs ginger finely chopped fresh
-
2 tsp sesame oil
-
500g pork mince
-
3 spring onions sliced
-
2 tsp brown sugar
-
2 tbs soy sauce
-
2 tbs oyster sauce
-
250g fresh green beans cut lengthways
-
30g unsalted roasted peanuts chopped
-
3 tbs fresh basil
-
2 tbs water
-
Combine chilli, ginger and garlic in a bowl. Cut green beans into 5cm lengths.
-
Heat a non-stick wok over high heat and add oil. Once oil is hot, add garlic, ginger, chilli and spring onions and stor.
-
Cook for a minute or so, then add the pork mince. Once pork is cooked, add green beans and stir fry.
-
While beans are still crisp, add sugar, soy sauce, oyster sauce and 2 tablespoons of water.
-
Allow to cook for a further 2 minutes, or until the sauce has reduced a little.
-
Finally add peanuts and fresh basil, and serve immediately with jasmine rice.
-
View all notes NOTES
-
Sometimes I add red capsicum.
Chocolate Beetroot Cake

-
250g cooked beetroot, pureed
-
3 eggs
-
1/2 teaspoon vanilla extract
-
250ml vegetable oil
-
300g caster sugar
-
225g plain flour
-
1 1/2 teaspoons bicarb soda
-
1/4 teaspoon salt
-
6 tablespoons cocoa powder
-
Preheat oven to 180 degrees C. Grease and flour one 20x30cm or similar sized baking tin.
-
In a large bowl, combine pureed beetroots, eggs, vanilla, oil and sugar. Mix with an electric mixer on low speed until well combined.
-
In a separate bowl, mix together flour, bicarb soda, salt and cocoa. Add to the beetroot mixture, beating together well. Pour batter into prepared tin.
-
Bake for 25 to 30 minutes until done.
Chocolate Cheesecake Slice
-
185g Butter
-
1/4 Cup Cocoa
-
1 Cup Sugar
-
2 Eggs
-
1 Cup Plain Flour
-
250g Cream Cheese
-
1/3 Cup Sugar, extra
-
1 Teaspoon Vanilla
-
1 Egg
-
Melt butter with cocoa. Remove from heat, add sugar, whisk in eggs. Stir in sifted flour, beat until smooth. Pour mixture into a greased lamington tin (base measures 16cmx26cm). Beat cheese, extra sugar and vanilla together, add egg, pour over chocolate mixture, swirl with knife for marbled effect. Bake in moderate oven for 40 mins. Cool in tin, cut when cold.
-
Refrigerate for a week or freeze, wrapped in freezer wrap for a month.
Chocolate Chip Cookies

-
250 gram butter, softened
-
1 teaspoon vanilla extract
-
3/4 cup (165g) caster (superfine) sugar
-
3/4 cup (165g) firmly packed brown sugar
-
1 egg
-
2 1/4 cup (335g) plain (all-purpose) flour
-
1 teaspoon bicarbonate of soda (baking soda)
-
375 gram dark chocolate melts, chopped coarsely
-
Preheat oven to 180°C. Grease oven trays; line with baking paper.
-
Beat butter, extract, sugars and egg in a small bowl with an electric mixer until light and fluffy. Transfer mixture to a large bowl; stir in sifted flour and soda, in two batches. Stir in chocolate.
-
Roll tablespoons of mixture into balls; place 5cm apart on trays.
-
Bake cookies 15 minutes or until golden; cool on trays.
-
For a chewier cookie, bake for 12 minutes. Cookies will keep in an airtight container for up to 1 week.
Chocolate Magic Cake
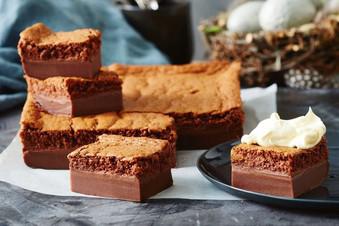
-
4 eggs, separated
-
2 teaspoons vanilla extract
-
3/4 cup caster sugar
-
125g butter, melted, cooled
-
3/4 cup plain flour
-
1/4 cup Dutch-processed cocoa powder
-
3/4 cup milk
-
Pinch of cream of tartar
-
1 cup thickened cream, whipped, to serve
-
Preheat oven to 170C/150C fan-forced. Grease a 3.5cm-deep, 18cm x 28cm (base) slice pan.
Step 2
Using an electric mixer, beat egg yolks, vanilla and sugar together for 5 minutes or until thick and creamy. Gradually add melted butter, beating until well combined. Add flour and cocoa, in 2 batches, beating until combined. Gradually beat in milk (mixture will be quite runny).
Step 3
Using an electric mixer and a clean bowl, beat egg whites and cream of tartar until stiff peaks form. Fold 1/2 the egg white mixture into chocolate mixture. Fold in remaining egg white mixture.
Step 4
Gently pour mixture into prepared pan (mixture will sit level with the top of pan). Bake for 40 to 45 minutes or until edges are just firm, but mixture is slightly wobbly in centre. Cool for 30 minutes. Refrigerate for at least 2 hours or until cold. Serve cake with whipped cream.
Chocolate Tortino
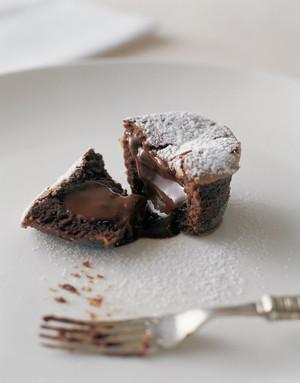
Stefano Del Pieri
-
300 g best chocolate (85 per cent cocoa)
-
150 g unsalted butter
-
20 ml brandy
-
6 eggs, separated
-
90 g caster sugar
-
Preheat the oven to 210°C. Butter 8 metal dariole moulds and dust each very lightly with flour.
-
Melt the chocolate, butter and brandy in a bowl set over simmering water, then leave to cool to room temperature. In a separate bowl, beat the egg yolks and sugar together until they are pale and doubled in volume.
-
Whisk the egg whites to stiff peak stage and gently fold into the egg yolks. Fold in the cooled chocolate (it must be at room temperature, or it will harden) until evenly combined.
-
Pour into the dariole moulds and bake for exactly 9 minutes. The puddings should be firm on the outside and still undercooked in the centre. These chocolate tortino are very rich and really just need a little whipped cream on the side. If you prefer, you could also serve them with vanilla ice-cream or a light custard cream.
Chocolate Zucchini/Tromboncini Cake
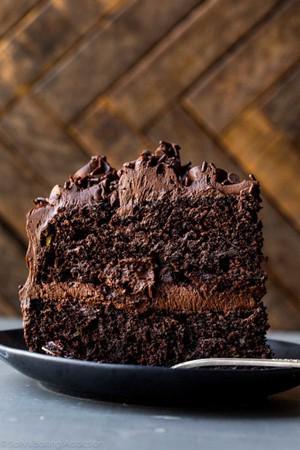
-
2 cups ( 250g) all-purpose flour ( spoon & leveled)
-
¾ cup ( 63g) unsweetened natural cocoa powder
-
2 teaspoons baking soda
-
½ teaspoon baking powder
-
½ teaspoon salt
-
1 cup (240ml) canola or vegetable oil
-
1 cup ( 200g) granulated sugar
-
¾ cup ( 150g) packed light or dark brown sugar
-
4 large eggs, at room temperature
-
⅓ cup ( 80g) sour cream or plain yogurt, at room temperature
-
2 teaspoons pure vanilla extract
-
3 cups shredded zucchini or trombone squash (about 3 medium)
-
1 cup ( 180g) semi-sweet chocolate chips
-
chocolate frosting or vanilla frosting
-
Preheat oven to 350°F (177°C). Grease two 9×2 inch cake pans. (Make sure they’re at least 2 inches high, deep dish style.) I used a rectangular tray. Set aside.
-
Make the cake: Whisk the flour, cocoa powder, baking soda, baking powder, and salt together in a large bowl. In another large bowl using a handheld or stand mixer fitted with a paddle or whisk attachment, beat the oil, granulated sugar, brown sugar, eggs, sour cream, vanilla, and zucchini together until combined. Pour into dry ingredients and beat on medium speed until completely combined. Beat in the chocolate chips. Batter will be slightly thick.
-
Pour batter evenly into cake pans. Bake for around 25-32 minutes or until the cakes are baked through. To test for doneness, insert a toothpick into the centre of the cake. If it comes out clean, it is done. Allow cakes to cool completely in the pans set on a wire rack. The cakes must be completely cool before frosting and assembling.
-
Butter, Cream Cheese, Icing sugar and Cocoa. Use your desired quantities to make icing.
Choko Chutney
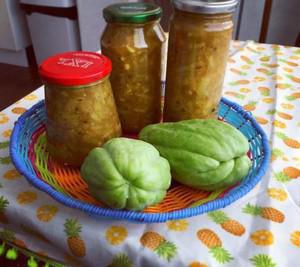
-
4 medium chokos (about 1.2 kg), peeled, cored and diced
-
2 green apples, peeled, cored and diced
-
2 medium onions, peeled and diced
-
1/2 cup treacle
-
2 teaspoons salt
-
1/4 teaspoon cayenne pepper
-
1/4 teaspoon ground cloves
-
3 cups white vinegar
-
3/4 cup raisins
-
Put all the ingredients, except the raisins, in a large, heavy-based saucepan. Bring to the boil over medium heat, stirring occasionally. Boil on low heat for 1 hour, or until any excess liquid has evaporated and the chutney is thick. Stir in the raisins and allow the chutney to stand for 15 minutes.
-
Ladle the hot chutney into clean, warm, dry jars and cover with vinegarproof lids. When the chutney is cold, label the jars and store in a cool, dark cupboard for two to three months before using. This allows the flavours of the chutney to develop and mature before you eat it.
-
Variation
-
Choko and Ginger Chutney: Replace the raisins with 1/2 cup chopped glacé ginger and make in the same way as choko chutney.
Choko Loaf
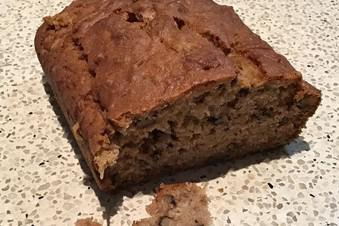
-
3 egg
-
1 tsp vanilla essence
-
1 cup peanut oil
-
3 cup plain flour
-
1 1/2 cup sugar
-
1 tsp salt
-
1 tsp bicarbonate of soda
-
1/4 tsp baking powder
-
3 tsp ground cinnamon
-
2 cup chokoes grated peeled
-
1 cup walnuts chopped
-
Beat together eggs, oil and vanilla.
-
Add sugar and chokos, mix well.
-
Sift together flour, salt, cinnamon, bicarbonate of soda and baking powder.
-
Fold egg and choko mixture into dry ingredients.
-
Add chopped walnuts and mix through.
-
Divide mixture between 2 lined or greased loaf pans.
-
Bake at 180C for 80 minutes or until cooked through.
Choko Pickle
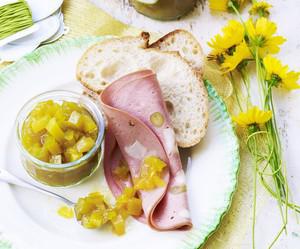
-
1 kilogram (2 pounds) chokoes, peeled, cored, chopped finely
-
2 large brown onions (400g), chopped finely
-
1/4 cup (70g) coarse cooking salt (kosher salt)
-
2 teaspoon curry powder
-
2 teaspoon mustard powder
-
2 cup (440g) white (granulated) sugar
-
2 cup (500ml) white vinegar
-
1 tablespoon cornflour (cornstarch)
-
1 tablespoon white vinegar, extra
-
Combine choko, onion and salt in large non-metallic bowl; stand 2 hours. Rinse and drain well.
-
Combine vegetables with curry powder, mustard powder, sugar and vinegar in large saucepan; stir over high heat, without boiling, until sugar dissolves. Bring to the boil. Reduce heat; simmer, uncovered, stirring occasionally, about 45 minutes or until pickle is thick.
-
Blend cornflour with extra vinegar in small bowl until smooth; stir into pickle. Simmer, stirring, about 5 minutes or until mixture boils and thickens.
-
Spoon hot pickle into hot sterilised jars; seal immediately. Label and date jars when cold.
-
Wear disposable gloves when preparing chokoes as they will leave a sticky residue on your skin. Store pickle in a cool, dark place for at least three weeks before opening. Refrigerate after opening. Serve with cold meats and cheese.
Classic Flourless Mandarin and Almond Cake

-
3 large (or 4 small) mandarins
-
6 eggs
-
250g almond meal
-
250g caster sugar
-
1 teaspoon baking powder
-
Icing sugar for dusting
-
Carefully lower the unpeeled mandarins into a large-ish saucepan of boiling water. Let them bubble gently for about 1 1/4 hours or until they're very soft and a fine skewer pushes through them easily. You'll need to keep an eye on the water level and top it up from time to time. The mandarins tend to bob on the surface, so I spin them around occasionally to make sure they cook evenly.
-
When the mandarins are ready, drain off the water and leave the mandarins to cool on a plate. Once they're cool, halve them and scoop out and discard the pips. Chop them coarsely, skin and all, then puree them as finely as you can in a food processor. Set the puree aside.
-
Preheat your oven to 170C. Butter a 22-23cm cake tin and line the base with buttered baking paper. Dust the tin with flour (or almond meal if you want to avoid flour completely) and set it aside.
-
Put the eggs into the bowl of an electric mixer (or use a hand-held electric beater) and beat them on medium/high speed for five minutes or so, until they're very light and fluffy. Meanwhile, in another bowl use a balloon whisk to thoroughly whisk together the ground almonds, sugar and baking powder, for 40 seconds or so.
-
When the eggs are ready, turn off the mixer and scrape the mandarin puree and almond mixture into them. Mix everything together on low speed just until they're combined. The eggs will deflate a lot but don't worry that's just what they do — they will be fine. I usually stop the mixer and finish the last bit of stirring with a rubber spatula to make sure everything is scraped up from the bottom of the bowl. Pour the batter into the prepared tin.
-
Sit the tin in the oven and bake the cake for about 1 hour or until the top is just firm if you press on it gently. Remove it to a wire rack and leave the cake to cool in the tin. Once it's cool, run a blunt knife around the sides of the tin to loosen the cake, then invert it onto a serving plate.
-
When you're ready to serve the cake dust it with icing sugar. Leftover cake keeps really well in the fridge for up to a week - just remember to bring it to room temperature before serving it.
Confit De Canard
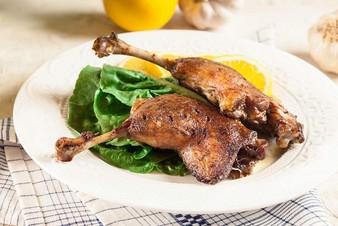
-
sea salt
-
freshly cracked black pepper
-
4 duck legs (thigh and drumstick attached)
-
2 lb (1 kg) duck fat
-
2 bay leaves
-
4–6 sprigs of thyme
-
On to the flesh side of the drumsticks, rub a generous amount of sea salt and freshly cracked black pepper.
-
Cover each drumstick with cling film and let it marinate in the refrigerator overnight.
-
Once marinated, rinse the duck legs under cold water, then pat them dry with kitchen paper.
-
In a large saucepan (large enough to keep a single layer of duck legs), melt the duck fat. The temperature of the fat should be around 210°F/100°C.
-
Gently place the duck legs in the fat, along with a few sprigs of thyme and some bay leaves. When immersed, the duck legs should be completely covered with fat. Keep in mind that, as they cook, the legs will render even more fat.
-
Cook the legs on very low heat for at least two hours until the meat starts separating from the bone. Make sure that the fat is not boiling at any point. A great way to make sure that the temperature is right is to cook the duck in the oven set to 210°F/100°C.
-
To check if the duck has been cooked, transfer one drumstick onto a plate and, using a fork, see if the meat falls off the bone.
-
In a large frying pan, sear the duck legs on both sides until they turn golden, and the skin becomes crispy.
-
Serve with a fresh green salad and confit potatoes (cooked in previously used duck fat).
Corned Beef Brine
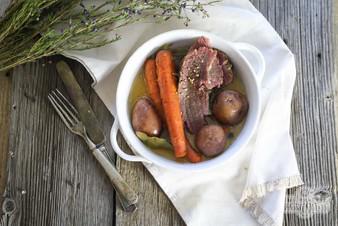
-
4 litres of water
-
2 cups coarse salt (use one cup of salt per 1 litres of water)
-
1/2 cup unrefined whole cane sugar (or regular brown sugar works too)
-
4 garlic cloves, smashed
-
2 tablespoons black peppercorns
-
1 tablespoon mustard seeds
-
1 tablespoon juniper berries
-
1 teaspoon prague powder/curing salt #1
-
1 teaspoon dried thyme
-
1 teaspoon ground ginger
-
10 allspice berries
-
4 bay leaves
-
1 cinnamon stick
-
The water needs to completely cover the meat during the brine process, so the exact amount of water required will depend on the size of your brisket and the size of your brining container. Adjust the salt if you use less water (the general rule of thumb is 1 cup of coarse salt per 2 quarts of water).
-
Place the water, salt, prague powder, sugar, garlic, and all the herbs and spices in a stockpot and bring to a simmer. Stir until the salt is completely dissolved, then set aside to cool.
-
Put the brisket in a large non-reactive container and pour the cooled brine over the top. The brine should cover the meat completely. If the brisket wants to float to the top, weigh it down with a plate. (I use these large food-grade plastic tubs with lids for brining.)
-
Let the brisket brine in the refrigerator for 5 to 10 days. The longer it sits, the saltier it will be. If you are in a hurry, you can brine for a shorter amount of time, although the finished product might not be as flavorful.
Country Egg and Bacon Pie

-
1 sheet frozen shortcrust pastry
-
1/4 cup tomato chutney
-
1 onion, finely sliced
-
3 rashers rindless bacon, halved lengthways
-
1/2 cup tasty cheese, grated
-
8 eggs
-
parsley leaves, to serve
-
Preheat oven to moderate, 180°C.
-
Lightly roll pastry sheet out with a rolling pin to fit a 25cm pie plate. Ease into pie plate, crimping edges; chill 15 minutes.
-
Spread chutney over pastry base. Scatter over onion, bacon and cheese.
-
Break eggs evenly over filling, pushing aside ingredients to allow eggs to seep around filling. Season to taste.
-
Bake 30-35 minutes, until filling sets and pastry turns golden. Scatter with parsley to serve.
Swap tomato chutney for caramelised onion relish, if preferred. It is important to rest the pastry after rolling it to fit the pan, as this will help prevent it shrinking during baking.
Creamy caramelised fennel and onion pasta
Tags:
Green Connect
-
3 fennel bulbs
-
1 small brown onion
-
3 tbsp extra virgin olive oil
-
1/2 lemon
-
1/2 cup white wine
-
200 ml cream or Créme Fraiche
-
1 cup peas
-
1/2 cup grated parmesan
-
Medium ground black pepper
-
Optional: Add chicken, lardons, salmon.
-
Heat up the olive oil in a medium-sized.
-
Add thinly sliced fennel and onion and cook pan over medium heat for 5-6 minutes or until the fennel and onion are caramelised but not burn.
-
If you want to add any protein such as chicken, lardons or salmon, cook that separately in a frying pan and add to your caramelised fennel.
-
Add peas and wine and let that cook-off.
-
Season with salt and pepper, add cream or Creme Fraiche and bring to a simmer, then stir in the grated parmesan.
-
Serve with cooked pasta.
Creamy Celery Soup
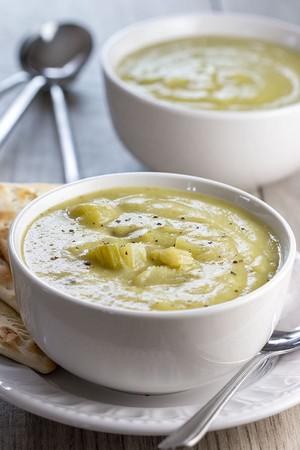
Tags:
Green Connect
-
1-2 tablespoons olive oil
-
1 large onion, chopped
-
3 garlic cloves, peeled and crushed
-
2 lbs fresh celery, cleaned and chopped (see post for removing strings)
-
1 qt chicken or vegetable stock
-
1 lb potatoes, peeled the potato and cut it into quarters
-
a good handful of fresh parsley, roughly chopped, including stems
-
salt and Pepper, to taste
-
Cups - Metric
-
Chop the celery into roughly the same-sized pieces, about an inch - 1.5 inches, Don't worry about precision as the soup is going to be puréed anyway. You just want it to cook evenly.
-
In a large soup pot, heat the oil over medium heat. Add the onion and cook until soft.
-
Add the garlic and cook another minute before adding the celery, stock, potato, and parsley. Increase the heat to medium-high and bring to a boil.
-
Cover, lower the heat and simmer for about 30 minutes or until the celery and potatoes are soft enough that they can easily be pureed (But don't let them get too mushy).
-
Remove the soup from heat. If necessary, using a ladle, remove enough stock so that the celery is just covered. Set any reserved stock aside.
-
Remove some of the chopped celery with a slotted spoon (1-2 spoonfuls) and set aside.
-
Purée the soup with a stick blender in the pot - adding the reserved stock little by little until the soup reaches the desired consistency.
-
Add the reserved celery, mix to combine and serve hot.
-
If you don't have a stick blender, a food processor or blender would work just as well to puree the soup.
-
To avoid stringy celery, use the more tender celery stalks that are closer to the middle of the head. Lighter colored celery is less likely to have though strings.
-
To test if your celery is stringy (which for some can be unpleasant), before cutting the celery, break it in half by hand. If you see the strings sticking out of the break (see photo above), peel the celery to remove the strings.
-
To remove the strings from the celery, clean and peel the back of the stalk with a vegetable peeler (for more detailed instructions, you can see this video on YouTube) or just by snapping your celery into sections and pulling out the exposed, stringy ribs.
Creamy Roasted Cauliflower Soup

-
1 large head cauliflower (about 2 pounds), cut into bite-size florets
-
3 tablespoons extra-virgin olive oil, divided
-
Fine sea salt
-
1 medium red onion, chopped
-
2 cloves garlic, pressed or minced
-
4 cups (32 ounces) vegetable broth
-
2 tablespoons unsalted butter
-
1 tablespoon fresh lemon juice, or more if needed
-
Scant ¼ teaspoon ground nutmeg
-
For garnish: 2 tablespoons finely chopped fresh flat-leaf parsley, chives and/or green onions
-
Preheat the oven to 425 degrees Fahrenheit. If desired, line a large, rimmed baking sheet with parchment paper for easy cleanup.
-
On the baking sheet, toss the cauliflower with 2 tablespoons of the olive oil until lightly and evenly coated in oil. Arrange the cauliflower in a single layer and sprinkle lightly with salt. Bake until the cauliflower is tender and caramelized on the edges, 25 to 35 minutes, tossing halfway.
-
Once the cauliflower is almost done, in a Dutch oven or soup pot, warm the remaining 1 tablespoon olive oil over medium heat until shimmering. Add the onion and ¼ teaspoon salt. Cook, stirring occasionally, until the onion is softened and turning translucent, 5 to 7 minutes.
-
Add the garlic and cook, stirring constantly, until fragrant, about 30 seconds, then add the broth.
-
Reserve 4 of the prettiest roasted cauliflower florets for garnish. Then transfer the remaining cauliflower to the pot. Increase the heat to medium-high and bring the mixture to a simmer, then reduce the heat as necessary to maintain a gentle simmer. Cook, stirring occasionally, for 20 minutes, to give the flavors time to meld.
-
Once the soup is done cooking, remove the pot from the heat and let it cool for a few minutes. Then, carefully transfer the hot soup to a blender, working in batches if necessary. (Do not fill past the maximum fill line or the soup could overflow!)
-
Add the butter and blend until smooth. Add the lemon juice and nutmeg and blend again. Add additional salt, to taste (I usually add another ¼ to ¾ teaspoon, depending on the broth). This soup tastes amazing once it’s properly salted! You can also a little more lemon juice, if it needs more zing. Blend again.
-
Top individual bowls of soup with 1 roasted cauliflower floret and a sprinkle of chopped parsley, green onion and/or chives. This soup keeps well in the refrigerator, covered, for about four days, or for several months in the freezer.
Creamy Salmon and Leek Pie
-
⚬ 60g Unsalted Butter, Plus Extra Melted Butter for Brushing
-
⚬ 1 Tablespoon Extra Virgin Olive Oil, Plus Extra for Brushing
-
⚬ 2 Leeks, Trimmed and Sliced
-
⚬ 1 Tablespoon Plain (All-Purpose) Flour
-
⚬ ⅓ Cup (80ml) Dry White Wine or Fish Stock
-
⚬ 600g Fillet Sustainably Caught Salmon, Skin Removed, Cut into 3cm Chunks
-
⚬ 400g Asparagus, Trimmed and Chopped into Chunks
-
⚬ 400g Crème Fraîche
-
⚬ ¼ Cup (12g) Chopped Dill or Tarragon Leaves
-
⚬ 3 Teaspoons Dijon Mustard
-
⚬ 2 Teaspoons Finely Grated Lemon Rind
-
⚬ Sea Salt and Cracked Black Pepper
-
⚬ 12 Filo Pastry Sheets
-
⚬ 2 Teaspoons Sesame Seeds
-
⚬ Green Salad, to Serve
-
Preheat oven to 200°C (400°F).
-
Heat the butter and oil in a deep ovenproof frying pan over medium–high heat.
-
Add the leek and cover with a tight-fitting lid. Cook for 5 minutes, stirring occasionally, or until soft. Sift over the flour and cook, stirring, for 30 seconds.
-
Add the wine or stock and cook for 1 minute, stirring, or until reduced. Remove from the heat.
-
Add the salmon, asparagus, crème fraîche, dill or tarragon, mustard, lemon rind, salt and pepper and stir through.
-
Brush each sheet of filo pastry with oil and fold each sheet into quarters. Scrunch the sheets on top of the salmon mixture to cover. Brush with extra melted butter and sprinkle with sesame seeds.
-
Bake for 20 minutes or until the pastry is golden. Serve the pie with a crisp green salad.
Creamy Slow Cooked Pork Casserole
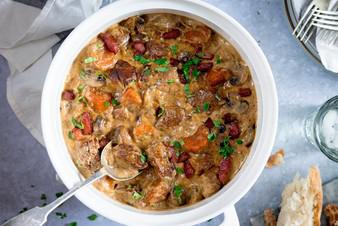
-
2 tbsp sunflower oil 500 g (1.1 lbs) diced pork shoulder ¼ tsp salt ¼ tsp ground black pepper ¼ tsp celery salt optional – I find it adds a nice savoury flavour 1 onion peeled and chopped 12 baby mushrooms chopped in half 2 carrots peeled and chopped 250 ml (1 cup) dry cider hard cider if you're in the USA 420 ml (1 3/4 cups) chicken or vegetable stock water 2 stock cubes is fine ½ tsp dried thyme 150 g (1/2 cup) bacon lardons or chopped streaky bacon 1 tbsp cornflour (cornstarch) mixed with 3 tbsp cold water 60 ml (1/4 cup) double (heavy) cream 2 tbsp freshly chopped parsley
-
mashed potatoes
-
steamed kale or other green veg
-
Preheat the oven to 170C/325F (fan).
-
Heat 1 1/2 tbsp of the oil in a large casserole dish, over a high heat, until hot.
-
Add the pork, salt, pepper and celery salt and brown on all sides – it should take around 6-8 minutes.
-
Turn the heat down to medium and add in the onion. Cook for 5 minutes, stirring occasionally until the onion softens.
-
Add the mushrooms and cook for a further two minutes.
-
Add the carrots, cider, stock, and dried thyme. Turn up the heat and bring to the boil. Stir and scrape up any bits that may have stuck to the bottom of the pan.
-
Place a lid on the pan, and place in the oven for 2 1/2 to 3 hours*, until the pork flakes apart when you press it with a fork. Check a couple of times during the last hour of cooking and add a splash of water or stock if it's starting to look a little dry.
-
Just before the casserole comes out of the oven, heat the remaining 1/2 tbsp oil in a frying pan and cook the bacon lardons until crispy. Turn off the heat.
-
Remove the casserole from the oven and stir in the cornstarch and water mixture to thicken, if needed.
-
Stir in the cream. Taste and season with a little more salt and pepper if needed. Sprinkle on the bacon lardons.
-
Serve with green veg on top of mashed potatoes. Sprinkle on a little chopped parsley before serving.
Crispy Barramundi with Creamy Mushroom and Lentils
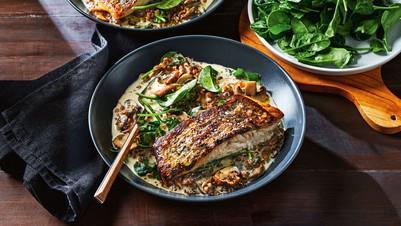
-
4 Coles Australian Barramundi Portions Skin On
-
200g Swiss brown mushrooms, sliced
-
400g can lentils, rinsed, drained
-
300g sour cream
-
120g baby spinach leaves
-
Season barramundi. Spray a large non-stick frying pan with olive oil spray. Place over high heat. Add barramundi, skin-side down, and cook for 3 mins each side or until golden and just cooked through. Transfer barramundi to a plate. Cover and set aside to rest.
-
Add the mushroom to the pan and cook, stirring, for 6-8 mins or until golden and starting to caramelise. Season. Add the lentils and sour cream and cook for 1 min or until heated through. Add three-quarters of the spinach and toss to combine.
-
Divide the lentil mixture among serving bowls. Top with barramundi and serve with remaining spinach.
Crispy Beer Battered Fish

-
700g/ 1.4lb white fish fillets , like flathead, snapper, whiting, cod, tilapia, flathead (skinless, boneless, Note 1)
-
¼ cup rice flour (Note 2)
-
¾ cup plain/all purpose flour
-
¼ cup rice flour (makes it super crispy, Note 2)
-
1¼ tsp baking powder
-
¼ tsp salt
-
1 cup very cold beer , anything other than dark beers like stout, porter etc (Note 3)
-
4 – 5 cups peanut oil (or vegetable, canola or cottonseed oil)
-
Tartare Sauce
-
Lemon Wedges
-
Chips or wedges
-
Dry & cut fish: Pat fish dry using paper towels or a tea towel. Cut into 7 x 3cm / 3 x 1¼" batons, or larger fillets if you prefer. If you have very thick fillets, cut in half horizontally (Note 1)
-
Dusting bowl: Place ¼ cup rice flour in a shallow bowl.
-
Heat oil: Heat 6cm / 2" – 3" oil in a large heavy based pot over medium high heat to 190°C/375°F.
-
Salt & dust: While oil is heating, sprinkle 3 or 4 pieces of fish with a pinch of salt, then coat in rice flour and shake off excess. You can leave them like this for up to 10 minutes.
-
Cold batter: Just before cooking, whisk together the flour, rice flour, baking powder and salt. Add very cold beer into the batter and whisk just until incorporated evenly into the flour. Do not over-mix, do not worry about flour lumps (Note 4). It should be a fairly thin batter but fully coat the back of a spoon. If too thick, add beer 1 tsp at a time.
-
Dredge fish: Dunk a piece of fish in the batter, the let the excess drip off very briefly.
-
Fry 3 minutes: Carefully lower into oil, dropping it in away from you, one piece at a time. Don't crowd the pot; fry in batches. Fry for 3 minutes, flipping after about 2 minutes, until deep golden.
-
Drain: Drain on paper towels. Repeat with remaining fish. Serve hot! However it will stay crisp for 15 – 20 minutes. (Note 5 for larger batch cooking).
-
Serve with Tartare Sauce, lemon wedges and a leafy green salad on the side dressed with a classic vinaigrette. Easy single-fry-ultra-crunchy chips coming soon! In the meantime, use oven baked wedges!
-
Note: Light crispy batter requires a cold batter, so if it’s hot where you are, keep it in the fridge between batches.
-
Recipe makes more batter than you need – you can cook up to ~1kg/1.2lb of fish. It’s hard to dredge fish properly with any less.
-
Fish to avoid: Meaty fish prone to drying out (like swordfish, tuna), delicate or thin fish (like flounder or sole). I personally wouldn’t use oily fish like salmon, but it works just fine.
-
Cutting: Recipe works for fish cocktail size pieces (ie. pick-up-and-dunk size), batons or whole fillet sizes. Remember that the batter puffs up considerably when fried.
-
If your fish is very thick (3cm / 1.25″ ), cut in half horizontally to make thinner pieces, otherwise the fish may not cook through by the time the batter is golden and crispy. Also the ratio of fish to batter will be too high.
-
Rice flour – Essential ingredient for a really good crispy batter, and to keep it crispy for a reasonable time (15 minutes ). If you only use normal wheat flour, it will go soggy within minutes.
-
Find it in the baking aisle at the supermarket. Substitute with cornflour/cornstarch or potato starch (not quite as crispy, but still crispier than using only plain flour).
-
Beer: Must be ice cold, in fridge 2 hours . Key for crispy batter!
-
Best types: Pale ale and lagers are most commonly used, but I’ve used all sorts in my time and they’ve all worked out fine. Doesn’t really matter because you can’t taste it, but avoid dark, heavily flavoured beer like stout or porter (will discolour and flavour batter).
-
Non alcoholic sub: Ice cold soda water ¼ tsp extra baking powder. It’s basically the same as the batter used for Honey Chicken, slightly adapted to be suitable for fish.
-
Batter thickness: Thinner batter = crispy, delicate crust like you get at good fish and chip shops. 70% fish, 15% crispy batter, 15% empty cavern between fish and batter (the “puff”!).
-
Thicker batter = thicker crust, which some people like, but I am disappointed if I bite in only to find it’s 50% batter, 20% fish, and 30% empty cavern!
-
Do minimal whisking of batter, don’t worry about lumps, just make the beer mix through the flour evenly. If you over-mix, it will activate the gluten and the batter won’t be as light and delicate, it will be thicker, greasier and chewier.
-
Large Batch cooking: The nice thing here is that the fish cooks in 3 minutes so you can just keep them coming out. But if you want to do one large batch, you can do a double fry to reheat & it actually makes the batter less greasy because we use a higher heat (read up on this in my Stay-Crispy Honey Chicken):
-
– First fry: Fry fish in batches for 2½ minutes until crispy and golden, but not a deep golden. Drain on paper towels, continue with remaining fish.
-
– Second fry: This is to reheat and make it deep golden and crispy. Increase oil temperature to 200°C/390°F. Add fish and fry for 1 minute until deep golden. For Fry #2, you can crowd the oil more (ie. if you cooked fish in 4 batches, you can do this in 2 batches). Drain and repeat with remaining fish. Voila! All fish, piping hot!
-
Reuse oil – Can be used twice more because flavour of batter is neutral, and doesn’t infuse oil with flavour. Cool oil in pot, line mesh colander with paper towel, strain oil. Store until required. I personally would stick to savoury uses rather than sweet. More fry-worth foods here.
-
Source – Partially adapted from this recipe by Chef John of Food Wishes. He knows his stuff, I trust him – and he’s pretty funny too!
-
Make ahead – Can’t be done I’m afraid! Fried fish will be soggy if reheated, and the batter needs to be made fresh. Sorry folks!
-
Nutrition per serving, assuming 4 servings. It’s nowhere near as bad as you think, and I have allowed for a very generous 1/3 cup of oil consumption (across whole recipe). There is no way the batter for 700g/1.4lb of fish will hold that much oil, but I’ve included it to be conservative, so actual calories will be far lower. Very little batter actually ends up on the fish, you will discard about half. It’s hard to make less and dredge properly.
Crispy Beer Battered Fish

-
700g/ 1.4lb white fish fillets , like flathead, snapper, whiting, cod, tilapia, flathead (skinless, boneless, Note 1)
-
¼ cup rice flour (Note 2)
-
¾ cup plain/all purpose flour
-
¼ cup rice flour (makes it super crispy, Note 2)
-
1¼ tsp baking powder
-
¼ tsp salt
-
1 cup very cold beer , anything other than dark beers like stout, porter etc (Note 3)
-
4 – 5 cups peanut oil (or vegetable, canola or cottonseed oil)
-
Dry & cut fish: Pat fish dry using paper towels or a tea towel. Cut into 7 x 3cm / 3 x 1¼" batons, or larger fillets if you prefer. If you have very thick fillets, cut in half horizontally (Note 1)
-
Dusting bowl: Place ¼ cup rice flour in a shallow bowl.
-
Heat oil: Heat 6cm / 2" – 3" oil in a large heavy based pot over medium high heat to 190°C/375°F.
-
Salt & dust: While oil is heating, sprinkle 3 or 4 pieces of fish with a pinch of salt, then coat in rice flour and shake off excess. You can leave them like this for up to 10 minutes.
-
Cold batter: Just before cooking, whisk together the flour, rice flour, baking powder and salt. Add very cold beer into the batter and whisk just until incorporated evenly into the flour. Do not over-mix, do not worry about flour lumps (Note 4). It should be a fairly thin batter but fully coat the back of a spoon. If too thick, add beer 1 tsp at a time.
-
Dredge fish: Dunk a piece of fish in the batter, the let the excess drip off very briefly.
-
Fry 3 minutes: Carefully lower into oil, dropping it in away from you, one piece at a time. Don't crowd the pot; fry in batches. Fry for 3 minutes, flipping after about 2 minutes, until deep golden.
-
Drain: Drain on paper towels. Repeat with remaining fish. Serve hot! However it will stay crisp for 15 – 20 minutes. (Note 5 for larger batch cooking).
-
Serve with Tartare Sauce, lemon wedges and a leafy green salad on the side dressed with a classic vinaigrette. Serve with Crispy French Fries or oven baked wedges!
-
Note: Light crispy batter requires a cold batter, so if it’s hot where you are, keep it in the fridge between batches.
-
Recipe makes more batter than you need – you can cook up to ~1kg/1.2lb of fish. It’s hard to dredge fish properly with any less.
-
Fish to avoid: Meaty fish prone to drying out (like swordfish, tuna), delicate or thin fish (like flounder or sole). I personally wouldn’t use oily fish like salmon, but it works just fine.
-
Cutting: Recipe works for fish cocktail size pieces (ie. pick-up-and-dunk size), batons or whole fillet sizes. Remember that the batter puffs up considerably when fried.
-
If your fish is very thick (3cm / 1.25″ ), cut in half horizontally to make thinner pieces, otherwise the fish may not cook through by the time the batter is golden and crispy. Also the ratio of fish to batter will be too high.
-
Rice flour – Essential ingredient for a really good crispy batter, and to keep it crispy for a reasonable time (15 minutes ). If you only use normal wheat flour, it will go soggy within minutes.
-
Find it in the baking aisle at the supermarket. Substitute with cornflour/cornstarch or potato starch (not quite as crispy, but still crispier than using only plain flour).
-
Beer: Must be ice cold, in fridge 2 hours . Key for crispy batter!
-
Best types: Pale ale and lagers are most commonly used, but I’ve used all sorts in my time and they’ve all worked out fine. Doesn’t really matter because you can’t taste it, but avoid dark, heavily flavoured beer like stout or porter (will discolour and flavour batter).
-
Non alcoholic sub: Ice cold soda water ¼ tsp extra baking powder. It’s basically the same as the batter used for Honey Chicken, slightly adapted to be suitable for fish.
-
Batter thickness: Thinner batter = crispy, delicate crust like you get at good fish and chip shops. 70% fish, 15% crispy batter, 15% empty cavern between fish and batter (the “puff”!).
-
Thicker batter = thicker crust, which some people like, but I am disappointed if I bite in only to find it’s 50% batter, 20% fish, and 30% empty cavern!
-
Do minimal whisking of batter, don’t worry about lumps, just make the beer mix through the flour evenly. If you over-mix, it will activate the gluten and the batter won’t be as light and delicate, it will be thicker, greasier and chewier.
-
Large Batch cooking: The nice thing here is that the fish cooks in 3 minutes so you can just keep them coming out. But if you want to do one large batch, you can do a double fry to reheat & it actually makes the batter less greasy because we use a higher heat (read up on this in my Stay-Crispy Honey Chicken):
-
– First fry: Fry fish in batches for 2½ minutes until crispy and golden, but not a deep golden. Drain on paper towels, continue with remaining fish.
-
– Second fry: This is to reheat and make it deep golden and crispy. Increase oil temperature to 200°C/390°F. Add fish and fry for 1 minute until deep golden. For Fry #2, you can crowd the oil more (ie. if you cooked fish in 4 batches, you can do this in 2 batches). Drain and repeat with remaining fish. Voila! All fish, piping hot!
-
Reuse oil – Can be used twice more because flavour of batter is neutral, and doesn’t infuse oil with flavour. Cool oil in pot, line mesh colander with paper towel, strain oil. Store until required. I personally would stick to savoury uses rather than sweet. More fry-worth foods here.
-
Source – Partially adapted from this recipe by Chef John of Food Wishes. He knows his stuff, I trust him – and he’s pretty funny too!
-
Make ahead – Can’t be done I’m afraid! Fried fish will be soggy if reheated, and the batter needs to be made fresh. Sorry folks!
-
Nutrition per serving, assuming 4 servings. It’s nowhere near as bad as you think, and I have allowed for a very generous 1/3 cup of oil consumption (across whole recipe). There is no way the batter for 700g/1.4lb of fish will hold that much oil, but I’ve included it to be conservative, so actual calories will be far lower. Very little batter actually ends up on the fish, you will discard about half. It’s hard to make less and dredge properly.
Crispy Chinese Duck Breast
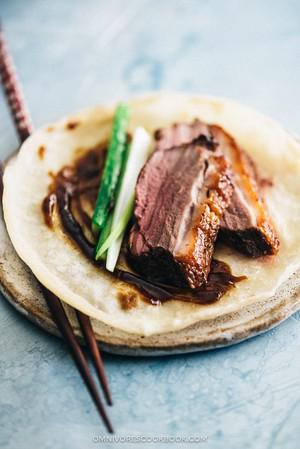
-
4 pieces duck breast 12 ounces / 340 grams per piece
-
1/2 teaspoon salt
-
1/4 cup hoisin sauce
-
1/4 cup Shaoxing wine (or dry sherry)
-
1/2 teaspoon five spice powder
-
1 thumb ginger , sliced
-
4 cloves garlic , coarsely chopped
-
1/4 cup plum sauce
-
1 sweet potato , spiralized to noodles or cut to thin slices with a julienne peeler
-
2 zucchini , spiralized to noodles or cut to thin slices with a julienne peeler
-
1/4 teaspoon salt
-
1/4 cup sweet bean sauce (or hoisin sauce)
-
1 cucumber , sliced to strips
-
2 green onion , sliced to strips
-
16 homemade Beijing duck pancakes (or store-bought pancakes)
-
Combine all the marinade ingredients in a tall bowl (or small food processor) and chop with an immersion blender until it forms a runny paste. Pour into a 12-inch (30 cm) tray or baking dish.
-
Pat the duck dry with paper towels. Place in the tray with the marinade, skin side up. Sprinkle salt on the skin. Marinate in room temperature for 30 minutes up to 1 hour, or uncovered in the fridge for a couple hours to overnight. In this case, bring the duck to your kitchen counter for at least 20 minutes before cooking, so it will return to room temperature.
-
Preheat oven to 425°F (218°C).
-
Right before cooking, pat the duck dry with paper towels. Score the skin 1/2-inch (1 cm) apart to a diamond pattern (but careful not to score the meat).
-
You might need to cook the duck in two batches. Place the breast pieces in a cold ovenproof 12-inch heavy skillet, skin-side down. Cook over medium heat, until they’re gently sizzling. Turn to medium-low heat. Cook until the skin turns golden brown, for another 10 to 12 minutes. Flip them over every 3 to 4 minutes. If the duck skin cooks too fast, turn to low heat. Transfer the cooked duck onto a plate and cook the rest using the same method.
-
Arrange all the duck pieces in the pan, skin- side down. Transfer the skillet into the oven and bake for 8 minutes, until the skin turns dark brown. Flip to skin-side up and bake for another 6 to 8 minutes, until the skin turns dark brown but not burnt. Transfer the duck onto a big plate, skin-side up. Allow to rest for 10 minutes without cover before carving.
-
Prepare the sides while resting the duck.
-
If you plan to serve the duck later, wrap each duck breast with aluminum foil when they are warm enough to handle and seal in a bag. Store in the fridge for up to 3 days. When you’re ready to serve, warm them up in a preheated 300°F (150°C) oven for 10 minutes.
-
Transfer 1 tablespoon rendered duck fat into a large skillet. Cook the sweet potato first over medium heat until it’s tender. Then add the zucchini and sprinkle with salt. Cook until the zucchini just turns tender and the sweet potato is almost caramelized. Transfer the ‘noodles’ to serving plates.
-
Slice the duck into thin slices and place on top of the vegetables, with plum sauce on the side.
-
Enjoy hot as a main dish.
-
To serve Peking duck style, steam the pancakes in a bamboo steamer for 3 to 5 minutes until hot.
-
Slice the duck and place them on a plate. Serve with hot pancakes, sweet bean sauce (or hoisin sauce), cucumber and green onions on the side.
-
To assemble - place one pancake in the palm of your hand, brush some sauce on the pancake, place 2 to 3 slices duck in the center, top with a few strips of green onions and cucumber. Roll and tuck the pancake like a mini burrito. Repeat, and enjoy hot as a main dish.
-
The nutritional information is calculated based on the duck breast without sides and dipping sauces. In reality, the fat content and the calories will be much lower because you will render about 1 cup of fat from the duck skin.
Croissants
Tags:
Bread
-
500 g flour porridge T45
-
25 g of fresh yeast
-
10 g salt
-
50 g sugar
-
125 ml of milk
-
125 ml of water
-
300 g butter (I suggest getting a quality butter, such as Poitou-Charentes, ideally Layering butter 84% fat if you find)
-
1 egg yolk for gilding
-
The lifting of folding pastry and fold several times a paste called "soaking" and butter plate. It is these different layers that give the laminate.
-
Start by preparing the tempera . To do this, place the yeast at the bottom of the bowl of your food processor, then coat with flour, sugar and salt. The goal is that the yeast does not touch sugar or salt, so that it retains its properties well.
-
Add the milk and water, and Running the low speed robot, with the hook of the robot, about ten minutes. Without robot, knead by hand until the dough separates easily from the sides of your container.
-
Form a ball and let it grow (that is to say up) one hour at room temperature. If it is not warm enough at home, you can place a bowl of hot water in your oven and put the tank next. This will serve as an oven, it is very convenient! Note however that the temperature does not exceed 30 ° C.
-
You now need to degas your tempera. To do this, place it on a floured surface and press it with your hands to escape the gas. Reconvene a ball and set aside in refrigerator about 2 hours.
-
Meanwhile, place the butter on a sheet of greaseproof paper and work it into the striking with a rolling pin to give it the shape of a square of about 15 to 20 cm. Put the butter in the fridge so that it is at the same temperature as distemper. This is important for the lamination.
-
Fold tempera so butter is captured and can get out. Do not hesitate to distort tempera to get there and stick out the "ears" them by pressing with fingers.
-
Roll out your dough into a long rectangle on a floured surface , then fold the bottom up to 2/3 of the height. Then fold the top, remained free on the bottom.
-
We have given our first " easy ride ".
-
Place the dough in the refrigerator for about twenty minutes.
-
Turn crescent dough a quarter turn and repeat the operation. Turn back a quarter of all and repeat a third time bending to get 3 laps .
-
Take your dough and spread it over a large rectangle about 40 x 60 cm. Divide this rectangle in half crosswise to make two rectangles of 20 x 60 cm.
-
Cut out triangles in each rectangle (8 or 9 per band).
-
He will remain you of dough on each side and that's good because they will serve us to make our croissants more puff!
-
Take each triangle and split on the basis of 2 cm. Cut a small piece of falling pulp and place in bottom of the triangle. Fold the dough as in the photo below, then roll the triangle entirely on himself.
-
Place the croissants obtained on a sulphurized sheet of paper or a Silpat . Wedge the small point on the bottom so they do not fall apart during cooking.
-
You are in a hurry, you're too hungry, you can not wait: do push croissants an hour in oven as earlier.
-
No stress, you are super organized: let slide growing two hours at room temperature.
-
You have an iron character and you are able to wait until tomorrow to enjoy your growing: let them gently push all night in the fridge, you will cook them just before breakfast :)
-
Preheat oven to 220 ° C.
-
Using a food brush, brush the egg yolk croissants and avoid touching the edges (this prevents good lamination develop). Repeat the operation after 10 minutes and bake for 15 minutes. Sometimes it takes a little longer, depending on the oven, so do not hesitate to cook 5 minutes more in doubt.
-
Let your growing cool on a rack. Well, not too long because it is better hot!
-
Well duh, I'm hungry!
Crustless Broccoli Quiche
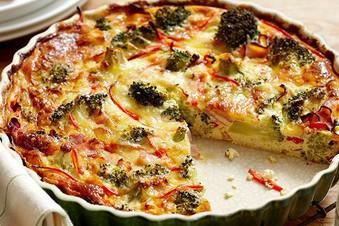
-
2 tablespoons breadcrumbs, dried
-
2 heads broccoli, cut into florets
-
1 red capsicum, seeded and sliced
-
75g low-fat ham, shaved, sliced
-
1 cup low-fat tasty cheese, grated
-
4 eggs
-
1 cup low-fat milk
-
1 teaspoon dijon mustard
-
Salad, to serve
-
Preheat oven to 180C. Spray a 22cm pie plate with oil. Dust with crumbs.
-
Arrange broccoli, capsicum, ham and cheese over base.
Crustless Ham-And-Leek Quiche

-
1 tbsp. olive oil, plus more for pan
-
2 medium leeks, chopped
-
1 small onion, chopped
-
Kosher salt and freshly ground black pepper
-
4 oz. thinly sliced deli ham, torn into pieces
-
8 large eggs
-
1 c. crème fraîche
-
1 c. whole milk
-
1 tbsp. Dijon mustard
-
4 ounces Gruyère cheese, grated (about 1 cup)
-
2 tbsp. chopped fresh chives
-
2 tbsp. chopped fresh parsley
-
Preheat oven to 325°F. Lightly oil a 2-quart baking dish.
-
Heat oil in a large skillet over medium heat. Add leeks and onion. Season with salt and pepper. Cook, stirring occasionally, until tender, 6 to 8 minutes. Add ham; cook until liquid is evaporated, 2 to 3 minutes.
-
Beat together eggs, crème fraîche, milk, mustard, and 1/4 teaspoon each salt and pepper in a bowl. Fold in cheese, chives, parsley, and leek mixture; transfer to the prepared pan.
-
Bake until just set, 45 to 55 minutes. Let stand 5 minutes before serving.
Cultured Butter
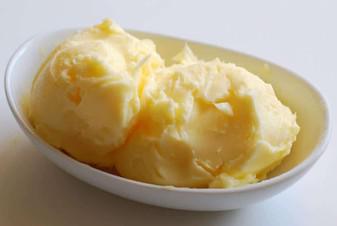
-
2 litres pouring cream
-
240 g créme fraiche or yoghurt
-
Salt
-
Combine all ingredients and mix well.
-
Cover and leave at room temperature for twenty-four hours.
-
Whip mixture until the butter and buttermilk separates.
-
Drain off buttermilk.
-
Squeeze butter to remove as much liquid as possible.
-
Place butter in a colander and rinse with chilled water.
-
Add salt and mix.
-
Place into moulds/tubs.
Cultured Cream
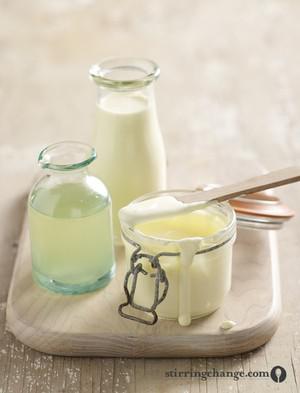
-
500ml pouring cream, at room temperature
-
3 tbsp whey or buttermilk
-
Add your cream and whey to a glass jar (with a lid), leaving an inch at the top. Stir to combine.
-
Attach the lid and leave it in a warm place (22-25C) to culture for 12-24 hours, until it has thickened (the process will be at warmer temperatures). The cream will thicken from the top down, so if you’re new to the process, use a spoon to make sure that the bulk of the jar has cultured rather than simply the top layer. There may be a small layer of liquid whey collected at the bottom – this is ok.
-
Transfer to the fridge, where it will store for up to 3 weeks.
Curtido
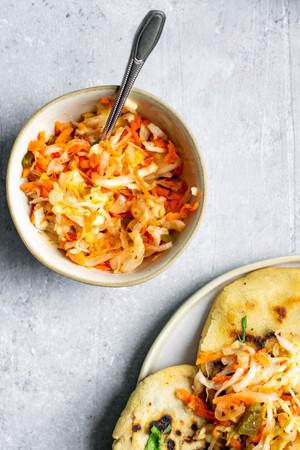
-
1 medium head red or green cabbage, sliced thinly
-
2 medium carrots, shredded
-
1 small red or white onion, sliced thinly
-
1/2 cup white vinegar (or pineapple vinegar)
-
1/2 cup water
-
1 tsp. oregano
-
1 tsp. crushed red pepper flakes
-
salt to taste
-
4 cups boiling water for blanching.
-
Thinly slice the cabbage and onion
-
Shred the carrots
-
Place in a large heat proof bowl and pour the boiling water overtop to blanch - 5 minutes.
-
Meanwhile mix the remaining ingredients in a small heat proof bowl.
-
Heat Vinegar mixture in microwave for 1 minute.
-
Drain cabbage, carrot, onion mixture.
-
Stir vinegar mixture into cabbage mixture.
-
Move to an airtight container, and store in the fridge.
Daikon & Carrot Miso Soup

Tags:
Green Connect
-
1 daikon (900 gram / 2 lb), peeled and cut into small pieces
-
450 gram (1 lb), peeled and cut into small pieces
-
1/2 onion, peeled and diced
-
8 cups vegetarian dashi stock (typically kombu and/or mushroom stock)
-
1 block (~ 400 gram) firm/silken tofu, drained and cut into 1/2" cubes
-
1 tablespoon wakame, soaked in cold water to rehydrate, then drained
-
1/4 cup white miso paste
-
salt and pepper, as needed
-
1-2 stalks of Chinese celery, thinly sliced
-
2-3 scallions, thinly sliced
-
Place daikon, carrot, onion, and dashi stock in a soup pot. Bring to a boil, then reduce to a simmer. Cover the pot with a lid, and continue cooking for 30-45 minutes, or until the daikon and carrot are soft.
-
Remove the lid and bring the soup to a boil. Add tofu cubes and wakame and wait until the soup boils again, then quickly turn off the heat.
-
In a small bowl, whisk together white miso paste and a ladle of the soup until the miso paste is fully dissolved. Return this mixture back into soup pot. Add salt and pepper if needed.
-
Serve the soup hot in individual soup bowls and garnish with thinly sliced Chinese celery and scallions.
Date & Walnut Meringue
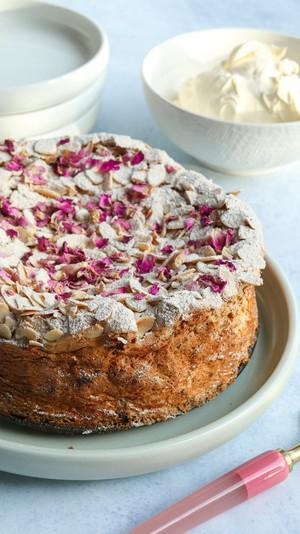
-
8 egg whites from free range or organic eggs
-
Pinch of salt
-
Pinch of cinnamon
-
200g pure icing sugar
-
300g walnuts, roughly chopped
-
300g good-quality medjool dates, finely chopped
-
1/2 cup flaked almonds, lightly toasted
-
300g pouring cream
-
1/3 cup icing sugar
-
1 tsp vanilla extract
-
Rose petals
-
Preheat the oven to 180°C/160°C fan-forced. Butter and flour a 20-centimetre round cake tin. For a gluten-free cake, use gluten-free flour.
Start with a clean stainless steel bowl in the electric stand mixer and beat the egg whites to stiff peaks. Keep beating and add the salt and cinnamon, then slowly add the icing sugar. Once it is all incorporated, stop the mixer. Using a large metal spoon, gently fold in the walnuts, then the dates.
-
Pour the mixture into the cake tin, sprinkle with the flaked almonds and bake for 35-40 minutes. Once the cake is baked, allow to cool in the tin for about 30 minutes, then carefully transfer it to a cake rack.
If using the cream accompaniment, whip the cream with the sugar and vanilla extract, and serve alongside the cake.
Date and Fig Slice
-
2 cups chopped dates
-
1 cup chopped dried figs
-
Rind and juice of 1 orange
-
1 cup water
-
250g butter
-
2 cups brown sugar
-
2 eggs
-
1 teaspoon vanilla essence
-
2 cups rolled oats
-
11/2 cups flour
-
1 teaspoon cinnamon
-
1 teaspoon nutmeg
-
1 teaspoon baking powder
-
Combine the date mixture ingredients in a pot over medium heat.
-
Cook until it reaches a jam consistency.
-
Add two tablespoons of brandy if desired, then cool."
-
Cream butter and sugar.
-
Add eggs then the rest of the ingredients.
-
Spread three quarters of the base mixture into a 26cm x 26cm slice tray.
-
Spread with date mixture over the base then dollop the remaining base mixture on top.
-
Bake at 180°C for approximately 40 minutes or until cooked.
-
Serve hot or cold with whipped cream or yoghurt or enjoy on its own.
Date Loaf
-
1½ cups dates
-
1 teaspoon baking soda
-
⅔ cup brown sugar
-
1⅛ cup boiling water
-
1 egg
-
1 teaspoon vanilla
-
1 tablespoon butter
-
1 teaspoon salt
-
1½ cups flour
-
1 teaspoon baking powder
-
Cut dates into small pieces
-
Add baking soda and boiling water, mix well.
-
Allow to cool a little.
-
Add sugar, beaten egg, butter and vanilla.
-
Add flour sifted with salt and baking powder.
-
Turn into a greased baking pan.
-
Cook in a slow oven for 1¼ hours. 275°C to 300°C
Devonshire Junket

-
600ml full cream milk, or single cream
-
1 heaped tbsp caster sugar
-
1 tbsp brandy
-
1 tsp rennet
-
Nutmeg
-
Heat the milk until gently bubbling, then dissolve in the sugar, stirring constantly.
-
Add the brandy, rennet and a generous grating of nutmeg. Pour into a large bowl, or four individual dishes, and allow to cool at room temperature.
-
Chill for an hour before serving with a final flourish of nutmeg. It would traditionally have been served with clotted cream and soft fruit.
Dhall
-
250 g lentils
-
2½ cups (625 ml) chicken stock
-
2 teaspoons curry powder
-
1 medium onion, chopped
-
2½ tablespoons (50 g) butter
-
1 teaspoon salt
-
Soak the lentils in enough water to cover for 1½ hours.
-
Drain the lentils and mix in a saucepan with the onion, butter, powder and chicken stock.
-
Bring to the boil. Reduce heat, cover and simmer for ½ hour.
-
Stir in the salt and cook until the mixture is thick.
Diane Sauce
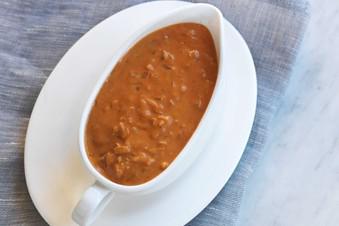
-
1 tbsp olive oil
-
1 small brown onion, finely chopped
-
1 clove garlic, crushed
-
2 tbsp Worcestershire sauce
-
2 tbsp tomato (ketchup) sauce
-
2/3 cups (160ml) cream
-
We are temporarily pausing click-to-cart functionality due to a technical issue. We will resume as soon as possible. Thank you for understanding.
-
Heat medium frying pan over medium heat. Add oil , onion and garlic . Cook, stirring for 3 minutes or until onion has softened.
-
Add remaining ingredients . Bring to the boil. Simmer, uncovered, for 3 minutes or until sauce has thickened slightly.
Dishwashing Liquid
-
1/4 cup grated soap
-
2 cups water
-
1-2 Tbsp white vinegar
-
1 Tbsp glycerin (optional)
-
5 drops lemon essential oil (optional)
-
Pour the water and grated soap into a saucepan, and place it on your stovetop over medium heat. Stir the mixture until all the soap has melted into the water. DO NOT let the mixture come to a boil. (Just turn down the heat if it seems like it’s starting to simmer/boil.)
-
Once the soap has all melted into the water, remove from heat. Allow the mixture to cool off for a few minutes.
-
Next, stir the vinegar and glycerin into the soap and water mixture. (The glycerin is optional, but it does help to thicken the mixture and make it feel less water-y.) You can also add a few drops of your favorite essential oil at this stage, if desired. I used about 5 drops of lemon essential oil, for the fresh scent and an extra boost of cleaning power!
-
Allow the mixture to rest in the pot until completely cooled, then pour it into your preferred soap dispenser.
Easy Apple Cake

-
125 g butter softened
-
165 g (3/4 cup) caster sugar superfine sugar
-
1 tsp vanilla extract
-
2 eggs
-
125 ml milk
-
225 g (1 and 1/2 cups) self-raising flour sifted
-
3 apples cored, peeled and thinly sliced
-
1/2 cup (45g) flaked almonds see notes
-
3 tbsp raw sugar
-
Grease the bottom and sides of a 22cm springform pan. Line the base with baking paper.
-
Preheat oven to 160 degrees celsius (fan-forced).
-
Beat the butter, caster sugar and vanilla extract until smooth and creamy. Add the eggs and milk and beat until combined.
-
Sift in the self-raising flour and beat until just combined.
-
Pour half of the the mixture into the prepared tin. Add a layer of the thinly sliced apples (half of them).
-
Repeat with the remaining cake mixture and apple slices.
-
Sprinkle over the flaked almonds and the raw sugar.
-
Bake in the oven for 40-45 minutes or until the cake is cooked when tested with a skewer.
-
Leave to cool in the baking pan for 20 minutes before placing onto a wire rack to cool completely.
-
Serve on it's own or warm with a scoop of vanilla ice cream.
Easy Baked Beef Ribs
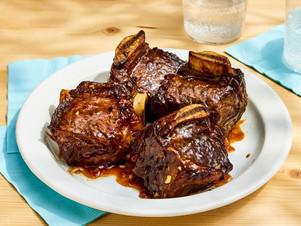
-
Original recipe (1X) yields 3 servings
-
2 pounds beef short ribs
-
¾ cup red wine
-
½ cup olive oil
-
⅓ cup soy sauce
-
¼ cup brown sugar
-
2 tablespoons all-purpose flour
-
4 cloves garlic, minced
-
1 pinch curry powder
-
Gather all ingredients. Preheat the oven to 425 degrees F (220 degrees C).
-
Place ribs in a large pot and fill with enough water to cover. Bring to a boil and cook until meat is no longer pink, about 20 minutes. Drain.
-
Stir together red wine, olive oil, soy sauce, brown sugar, flour, garlic, and curry powder in a medium bowl.
-
Coat ribs generously with sauce and arrange on a baking sheet.
-
Roast in the preheated oven until fork-tender, about 30 minutes. Pour remaining sauce over ribs about halfway through cooking.
Easy Black Bean Dip
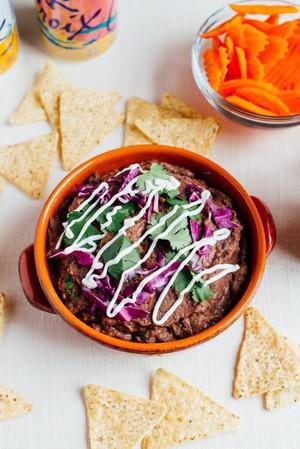
-
2 – 15 oz cans black beans, drained and rinsed (reserve 1/4 cup black bean liquid)
-
1 teaspoon olive oil
-
1/2 medium red onion, chopped
-
2 garlic cloves, minced
-
1 teaspoon cumin
-
1/2 teaspoon chili powder
-
1/2 teaspoon sea salt
-
1/4 teaspoon cayenne pepper
-
2 Tablespoons tomato paste
-
2 Tablespoons lime juice
-
1/2 Tablespoon apple cider vinegar
-
2 Tablespoons fresh cilantro, chopped extra for garnish
-
yogurt or sour cream for topping (optional)
-
Add oil to a skillet over medium heat. Once hot add onion and garlic and cook, tossing frequently so the garlic doesn’t burn. After about 5 minutes add in the spices (cumin, chili powder, sea salt and cayenne pepper). Toss to combine and continue cooking another 5 minutes. Add a tablespoon of water if the pan starts to dry out. After about 10 minutes of cooking total, remove from heat.
-
Place garlic and onion mixture, black beans, reserved black bean liquid, tomato paste, lime juice, apple cider vinegar and fresh cilantro into a blender. Blend until smooth. Taste and add additional spices, if needed. More salt or perhaps more cayenne pepper if you want the dip to be spicier.
-
Transfer the dip to a bowl, garnish with extra cilantro and sour cream, if using. Store in the fridge until ready to serve. Leftover can be stored in the fridge for 2-3 days.
-
If you like things spicer, feel free to add a seeded and chopped jalapeño while sautéing the garlic and onion. Another option is adding more cayenne pepper.
Easy Bread and Butter Pudding
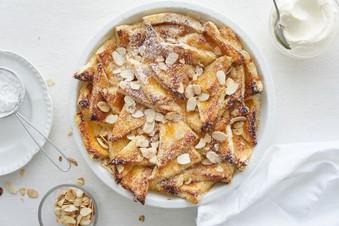
-
8 slices bread crusts removed
-
3 eggs
-
3 tbs caster sugar
-
300ml cream
-
1/4 cup apricot jam *to taste
-
1 tbs ground cinnamon *to taste
-
40g butter softened
-
Preheat oven to 180C.
-
Spread the bread with, butter, apricot jam and sprinkle with cinnamon.
-
Cut the bread into triangles and arrange in a greased oven-proof dish.
-
Whisk together the eggs, sugar and cream.
-
Pour over the bread and bake for 25 minutes.
-
View all notes NOTES
-
You can substitute the apricot jam for any jam of your choice. I often use strawberry jam.
Easy Butter Chicken

-
1/2 cup Greek-style yoghurt
-
2 garlic cloves, crushed
-
3cm piece ginger, peeled, finely grated
-
2 tsp ground cumin
-
2 tsp ground coriander
-
1 tsp garam masala
-
1/4 tsp chilli powder
-
600g Lilydale Free Range Chicken Thigh, cut into 3cm pieces
-
1 tbsp vegetable oil
-
20g butter
-
1 brown onion, halved, thickly sliced
-
410g can tomato puree
-
1/2 cup Massel chicken style liquid stock
-
1/2 cup thickened cream
-
Basmati rice, to serve
-
Coriander leaves, to serve
-
Select all ingredients
-
Place yoghurt, garlic, ginger, cumin, coriander, garam masala and chilli powder in a glass or ceramic dish. Add chicken. Stir to coat. Cover. Refrigerate for 2 hours.
-
Heat oil and butter in a heavy-based saucepan over medium-high heat. Add onion. Cook, stirring occasionally, for 3 to 4 minutes or until softened. Add chicken mixture to pan. Cook, stirring, for 5 minutes or until chicken just starts to change colour. Add tomato puree and stock. Cover. Bring to the boil. Reduce heat to low. Simmer, stirring occasionally, for 10 minutes or until chicken is tender and mixture has thickened slightly.
-
Stir in cream. Simmer for a further 5 minutes or until heated through. Serve with steamed rice and coriander leaves.
Easy Chickpea Curry (Channa Masala) Recipe by Tasty

-
1 tablespoon vegetable oil
-
1 large onion, diced
-
2 cloves garlic, minced
-
ginger, peeled and grated, 1 inch (2 1/2 cm) piece
-
1 jalapeño, or green chile, seeded and sliced
-
2 tablespoons garam masala
-
1 teaspoon turmeric
-
1 teaspoon salt
-
1 teaspoon black pepper
-
2 cups fresh tomato, diced (400 g)
-
15 oz chickpeas, drained and rinsed, 2 cans (425 g)
-
½ cup water (120 mL)
-
½ lemon, juiced
-
¼ cup fresh cilantro, chopped (10 g)
-
Heat olive oil in a large stock pot or dutch oven over medium-high heat.
-
Add onion and cook until onion becomes translucent and begins to brown, about 3-5 minutes.
-
Add garlic, ginger, and jalapeño. Continue to cook over medium heat until garlic is fragrant and jalapeño is tender, about 3-4 minutes.
-
Add garam masala, turmeric, salt, and pepper then continue to cook for 1-2 minutes.
-
Add tomatoes, chickpeas, and water. Stir to incorporate, making sure to use the spoon the scrape off any brown bits that have appeared on the bottom or sides of the pot.
-
As the tomatoes break down, the mixture should take on the texture of a thick stew. Add more water if needed before bringing everything to a simmer and then cover with a lid.
-
Once covered, cook for 15 minutes while stirring occasionally.
-
Remove lid, reduce heat to low and mix in the lemon juice and chopped cilantro. Cook over low heat 1-2 minutes until the cilantro has wilted and turned bright green.
-
Serve over basmati rice or with a side of naan.
-
Enjoy!
Easy Chocolate Slice

-
1 & ¼ cups self raising flour 190 grams
-
2 tablespoons cocoa
-
¾ cup coconut 65 grams
-
½ cup caster sugar 110 grams
-
125 grams butter melted
-
1 egg
-
100 grams chocolate chips optional
-
1 & ½ cups icing sugar
-
3 tablespoons cocoa
-
1-2 tablespoons milk
-
100s and 1000s to decorate
-
Preheat your oven to 180 degrees and line an 18 x 28 slice tin with baking paper.
-
Place the egg into a mug and lightly whisk to combine.
-
Add the egg, butter and the dry ingredients into a large bowl and mix to combine.
-
Transfer the mixture into your prepared slice tin and smooth the surface with the back of a spoon.
-
Place into the oven and bake for 10-15 minutes.
-
Carefully remove the slice from the oven and let it sit to cool for 10 minutes before transferring to a wire rack to cool completely.
-
To make the icing, mix icing sugar, cocoa and gradually add the milk until you get a smooth but not runny consistency. Spread over cooled slice and decorate with 100s and 1000s.
-
Preheat your oven to 180 degrees and line an 18 x 28 slice tin with baking paper.
-
Place the butter into your Thermomix bowl and cook for 3 minutes, 60 degrees, speed 2 to melt.
-
Add the remaining ingredients and mix for 10 seconds, speed 4.
-
Scrape down the sides of your Thermomix bowl and mix for a further 5 seconds, speed 4 to combine.
-
Transfer the mixture into your prepared slice tin and smooth the surface with the back of a spoon.
-
Place into the oven and bake for 10-15 minutes.
-
Carefully remove the slice from the oven and let it sit to cool for 10 minutes before transferring to a wire rack to cool completely.
-
To make the icing, mix icing sugar, cocoa and gradually add the milk until you get a smooth but not runny consistency. Spread over cooled slice and decorate with 100s and 1000s.
-
If you prefer your slice to have a more 'cake like' consistency, bake for 10/12 minutes.
-
To store, keep in an airtight container in your fridge.
-
This slice is freezer friendly.
Easy Classic Baked Cheesecake

-
200g / 7 oz Arnott’s Marie crackers or other plain biscuit (Aus) or 28 Graham Cracker squares (Note 1)
-
120g / 8 tbsp unsalted butter , melted
-
1 lb / 500g cream cheese , softened (Note 2)
-
2 tbsp plain flour (all purpose flour)
-
1 tsp vanilla extract
-
1/2 cup sour cream (full fat)
-
1 1/2 cups caster sugar (superfine sugar)
-
Zest of 1 lemon
-
3 large eggs , at room temperature
-
Strawberries, blueberries, raspberries
-
Icing sugar / powdered sugar , for dusting
-
Preheat oven to 160°C/320°F (140°C fan).
-
Prepare pan – Get a 20cm/8" springform cake tin. Turn the base UPSIDE DOWN (Note 4), butter lightly and place a square piece of parchment/baking paper on the base. Then clip into the springform pan – excess paper will stick out, see photos in post and video. Butter and line the side of the pan.
-
Blitz – Break up biscuits roughly by hand and place in a food processor. Blitz until fine crumbs (Note 5). Add butter, briefly blitz until dispersed and it resembles wet sand.
-
Press into pan – Pour into the prepared cake tin. Use a spatula to roughly spread it out over the base and up the walls. Use something with a flat base and vertical edges (I used a measuring cup) to press the crumbs up the wall almost to the top of the sides, and flatten the base.
-
Beat cream cheese – Use a mixer or beater to beat the cream cheese until smooth – about 30 seconds on medium high,.
-
Finish batter – Add flour, beat until just combined (10 sec). Add vanilla, sour cream, sugar and lemon zest. Beat until just combined (10 – 15 sec). Add eggs one at a time, beat in between until just combined (10 sec each). Don't over beat, we don't want to aerate the batter.
-
Bake – Pour into prepared crust. Bake for 55 minutes. The top should be a very light golden brown, not cracked, and near perfectly flat. It should jiggle slightly when you gently shake the pan.
-
Cool in the oven with the door open 20 cm / 8" (Note 6), then refrigerate for 4 hours in the pan.
-
Remove springform pan sides. Use overhang paper to slide cheesecake off the cake pan. Then slide the cheesecake off the paper.
-
Serve – Top with berries and dust with icing sugar!
-
Biscuits: Any plain crackers will work fine here, you need 2 cups of crumbs.
-
Australia: Arnott’s Marie Crackers, Arrowroot and Nice are ideal, I’ve made it with all these.
-
US: Use 28 squares / 14 full sheets, yes I measured it with my last Graham Cracker packet I brought back from my last trip.
-
UK: Digestives are ideal, I LOVE digestives!
-
The crumb should be like wet sand so when pressed, it stays packed firmly, especially up the wall. Adjust if necessary with more butter. It’s delicate when uncooked but once the filling is cooked, it becomes much more stable.
-
Cream Cheese – In the UK and some parts of Europe, block cream cheese isn’t available. If you can only get spreadable cream cheese in tubs (softer than block), skip the sour cream.
-
Lemon Juice or Water – Depends on sweetness of strawberries. If they aren’t that sweet, use water instead.
-
Inverted cake pan with overhang paper: The base of springform pans have a slight ridge. By inverting it, there is no ridge which makes it easier to slide the cheesecake on a serving platter without ruining the crust. There is no risk of batter leakage as the crust is thick enough to hold it all in.
-
Crumbs: OR crush in a ziplock bag using a rolling pin or large can.
-
Cool in oven: This helps stop the surface from cracking.
-
Different measures: Cups and spoons vary slightly between countries (US and CAN are different to most of the rest of the world). I have made this recipe using both US and Australian measures, using Australia Marie crackers and US Graham Crackers. The Graham Cracker crust is slightly crunchier because the biscuit doesn’t crush to a fine sand like Marie Crackers do. Both are delicious!
Easy Classic Chinese Beef Stir Fry
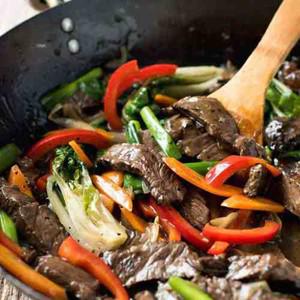
-
3 tsp cornstarch / corn flour*
-
2 tbsp 1/3 cup water , separated
-
2 tbsp soy sauce (Note 2)*
-
1 tbsp oyster sauce*
-
2 tbsp Chinese cooking wine OR Mirin (Note 3)*
-
1 tsp white sugar*
-
1/2 tsp sesame oil (optional)*
-
Dash of black pepper*
-
2 tbsp peanut oil
-
1 garlic clove , crushed
-
7 oz / 200 g beef , good quality, thinly sliced (Note 4)
-
1/2 small onion , sliced (yellow, brown or white)
-
1/2 red bell pepper / capsicum , sliced
-
1 small carrot , halved lengthwise and sliced thinly on the diagonal
-
3 baby pak choy / bok choy , quartered lengthwise
-
2 stems scallion / shallots , cut into 1.5"/3cm pieces
-
Steamed white rice
-
Sesame seeds (optional)
-
Fresh cilantro / coriander (optional)
-
Combine the cornstarch and 2 tbsp of water in a small bowl, mix until smooth.
-
Mix in remaining Sauce ingredients EXCEPT the 1/3 cup water.
-
Place the beef and 2 tbsp of Sauce in a bowl and mix gently. Set aside for 15 minutes.
-
Add 1/3 cup water into the remaining Sauce. Set aside.
-
Heat oil in wok over high heat. Add garlic and cook for 15 seconds.
-
Add onion and cook for 1 minute.
-
Add the beef and cook until it changes colour from red to light brown but not cooked through.
-
Add bell pepper and carrots and stir fry for 30 seconds.
-
Add Sauce and cook for 30 seconds.
-
Add pak choy and scallions/shallots and cook for a further 1 minute until the Sauce is thickened.
-
Remove from heat immediately.
-
Serve immediately with rice - or for a low carb, low cal option, try Cauliflower Rice! Garnish with sesame seeds and cilantro, if using.
-
Shortcut - Instead of making this Sauce for this recipe, you can use 5 tablespoons of my Homemade All Purpose Stir Fry Sauce.(i.e. replace the ingredients marked with * with 5 tbsp of my All Purpose Stir Fry Sauce. Add the same quantity of water specified in this recipe and follow all other directions in this recipe.
-
Soy - Please use ordinary all purpose soy sauce for this. I use Kikkoman. Do not use light soy sauce (too salty) or dark soy sauce (too thick).
-
Chinese cooking wine is an essential ingredient for real stir fry sauces. The alcohol cooks out. However, if you cannot get it, substitute with chicken broth.
-
Beef - As with all stir fries, this cooks very quickly so you need to use a decent cut of beef for it. Rump, flank, sirloin, t-bone and scotch fillet are excellent for this recipe.
-
Slice the beef against the grain. When you look at the beef, you will notice that the fibres are mostly going in one direction. Place the beef in front of you so the fibres are going left to right. Then cut through the fibres i.e. cut perpendicular to the direction of the fibres ( see here for illustrative image). Cutting it this way makes the beef more tender!
-
Slow cooking cuts, like chuck, are not suitable unless you tenderise it (see How to tenderise beef the Chinese restaurant way)
Easy Crustless Bacon and Egg Pie No Pastry

-
1 onion diced *OPTIONAL
-
10 bacon medallions fat trimmed
-
6 eggs
-
80 g lighter mature cheddar cheese grated
-
200 g fat free natural yogurt
-
½ teaspoon mustard powder
-
Seasoning
-
Preheat your oven on 200 degrees.
-
Meanwhile, spray a large frying pan with oil spray and cook the bacon and onion if using and set to one side.
-
In a separate bowl, mix together the yogurt, two of the eggs, mustard powder, 50g of cheese and seasoning.
-
Now spray a 7" quiche dish with frylight and place 3 bacon rashes on the base. Then add some onions if using, a couple of eggs, yogurt mixture.
Repeat and finish with covering all the filling with the remaining yogurt mixture, then the remaining cheese.
-
Bake in the oven for 20 to 25 minutes until golden.
-
Cut in to 4 pieces and why not let me know what you ate yours with by tagging me on Instagram (#TastefullyVikkie).
Easy Homemade Ricotta Gnocchi (From Scratch)

-
8 oz / 250g ricotta - ordinary supermarket ricotta , not expensive fresh Italian ricotta (Note 1)
-
3/4 cup / 75 g freshly grated parmesan cheese (Note 2)
-
3/4 to 1 cup / 112 - 150g plain flour , plus more for dusting (Note 3)
-
1 egg
-
1 egg yolk
-
1/4 tsp salt
-
Black pepper
-
4 tbsp / 60 g unsalted butter
-
1/4 tsp salt (or omit if using salted butter)
-
Black pepper
-
2 tbsp olive oil
-
3 garlic cloves , minced
-
1/2 brown onion , finely diced
-
28 oz / 800 g canned crushed tomatoes
-
1 tbsp mixed dried Italian herbs (or any combination of dried parsley, basil, oregano and thyme)
-
1 tsp salt
-
Black pepper
-
Freshly grated parmesan
-
Fresh parsley , finely chopped (optional)
-
Combine the gnocchi ingredients in a bowl except the flour.
-
Use a rubber spatula to mix until the egg is partially mixed into the ricotta. Then add 3/4 cup of flour and mix until just combined so it is a sticky very soft dough, but not like batter. Use the remaining flour, 1 tbsp at a time to get the dough consistency right. I find 3/4 cup is enough. (Note 3)
-
Turn it out on a work surface lightly dusted with flour, sprinkle a tiny bit of flour on top then pat it down to a disc about 1"/2.5cm thick. Cut it into 8 pieces.
-
Roll a piece into a log about 3/5" / 1.5 cm in diameter and about 10"/25cm long. Repeat with remaining dough.
-
Line 4 logs up, then cut them into 3/5" / 1.5cm pieces. Repeat with remaining 4 logs. (Note 4)
-
Bring a large pot of water to boil. Tumble the gnocchi in and cook for around 2 1/2 minutes, or until the gnocchi is floating on the surface for around 30 seconds.
-
Reserve 1 mug of cooking water. Then drain and add the gnocchi into the frypan with your sauce of choice (you only need one of them, not both). Follow the instructions below.
-
Melt the butter in a large fry pan over medium high heat. Let it bubble until it turns brown. Add the salt and pepper. If the gnocchi isn't ready yet, remove from the stove until ready.
-
Pour the cooked gnocchi into the fry pan along with 1/2 cup of the reserved cooking water. Gently stir, coating the gnocchi in the melted butter, cooking for 1 minute. This is the step when the butter and starch in the water emulsify so the sauce coats each piece of gnocchi.
-
Do a taste test and add more salt if required. Serve immediately.
-
Heat the olive oil over medium high heat.
-
Add the garlic and onion. Sauce for 3 to 5 minutes until the onion is translucent.
-
Add the remaining ingredients and cook for 10 minutes. Do a taste test and adjust saltiness to taste.
-
Add the gnocchi and 1/2 cup of the reserved cooking water. Cook for 1 minute, stirring gently. The olive oil and starch in the water will emulsify to thicken the sauce so it clings to the gnocchi better.
-
Serve immediately as the gnocchi will start to harden after about 15 minutes as it cools. You can reheat in the microwave to soften.
-
Garnish with freshly grated parmesan and parsley, if desired.
Easy Lemon Ricotta Pasta & Spinach
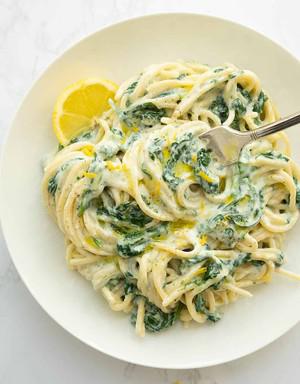
-
1/2 lb (8oz/220 grams) pasta (spaghetti, linguine, penne, fusilli...)
-
1 cup (9oz/250 grams) whole-milk ricotta
-
8 oz (230 grams) fresh baby spinach, washed
-
1/3 cup (35 grams) grated Parmesan cheese, plus extra to serve
-
1 unwaxed lemon, zest and juice
-
3 lemon wedges, to serve (optional)
-
1 Tbsp extra virgin olive oil, plus extra for drizzling
-
1 garlic clove, grated or pressed
-
salt and black pepper, to taste
-
In a large pot of boiling salted water, cook pasta according to package directions until al dente. Meanwhile, make the ricotta sauce.
-
In a medium bowl, combine ricotta, olive oil, parmesan cheese, garlic, lemon zest and juice. Season with 1/4 tsp of salt and a good pinch of pepper.
-
Stir until well combined, taste and make sure you're happy with the seasoning.
-
In the last minute of the pasta's cooking time, reserve 1/2 cup of the cooking water, then and add spinach to the pot. Stir well and push the leaves down to submerge them in water.
-
After 1 minute, drain and return pasta and spinach to the same pot.
-
Add the ricotta sauce and part of the reserved cooking water. Stir well to evenly coat the pasta in the sauce, add more cooking water as needed, you want a smooth and creamy texture.
-
Serve immediately and garnish with grated or shaved Parmesan cheese, a drizzle of extra virgin olive oil and lemon wedges if desired (for extra freshly squeezed juice, but I leave it optional). Plus, I love adding a good pinch of red pepper flakes, you might give it a go. Enjoy!
Easy Lemon Self-Saucing Pudding

-
1 cup self-raising flour
-
1/2 cup caster sugar
-
1 tsp lemon rind grated
-
2 tbs butter melted
-
1/2 tsp vanilla extract
-
1/2 cup milk
-
1/3 cup caster sugar
-
1 tsp lemon rind grated
-
1 cup boiling water
-
1/2 cup lemon juice
-
Preheat oven to 180C.
-
Pudding batter: Sift the flour and pinch of salt together.
-
Add sugar and grated lemon rind, mixing well. Stir in melted butter, vanilla and milk.
-
Turn into a greased, ovenproof dish with deep sides.
-
Sauce: Sprinkle mixture with the sugar and lemon rind.
-
Combine boiling water and lemon juice, and carefully pour over the mixture in the dish.
-
Bake for 30-40 minutes.
-
Stand for 5-10 minutes before serving.
-
View all notes NOTES
-
I use a round cake tin as the ovenproof dish.
Easy Orange Cake
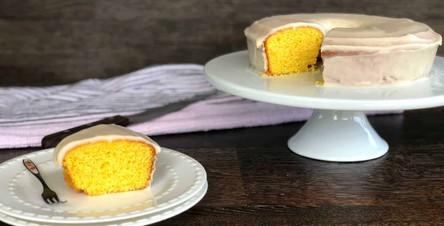
-
1 whole orange - washed & pulped, skin and all! (I remove the green stalk bit)
-
125 grams Melted Butter
-
1 Cup White Sugar
-
2 Medium Eggs
-
1 1/2 Cups Self Raising Flour
-
1 1/2 Cups Icing Sugar
-
2 teaspoons melted butter
-
1 teaspoon Vanilla Essence
-
1-3 Tablespoon Water
-
Prevent screen from sleeping
-
Preheat the oven to 180C Bake
-
Prepare a ring tin, or a small baking tin (approx 20-23cm) with a generous spray of cooking spray or melted butter.
-
Place baking paper in the base of the tin, cut to size and set aside
-
In a food processor place the washed and quartered orange.
-
Blitz until it forms a pulp
-
Add to this the eggs and sugar and mix for 20 seconds and scrape down the sides
-
Add to this the melted butter and mix for a further 20-30 seconds or until fully blended
-
Finally add the flour and blend for 20 seconds until all fully incorporated and no lumps remain
-
Spoon the mixture into the prepared baking tin
-
Bake for 35 minutes or until a skewer or knife comes out clean
-
Remove from the oven and set aside for 10 minutes before carefully removing from the tin. You may need to carefully work a knife around the edge of the tin to help
-
Allow to cool completely on a wire rack before icing.
-
For the icing, in a medium bowl place the icing sugar, add to this the melted butter and vanilla and mix (I always mix my butter and vanilla together first as this helps it to infuse)
-
Then add a tablespoon of water at a time until you get the desired consistency.
-
It should not be too runny, the right consistency is when it just starts to fall from the spoon.
-
Spread this over the cake and store in an airtight container until ready to serve
-
Should keep for at least 3 days
-
Enjoy!
Easy Potatoes Au Gratin with Gruyere
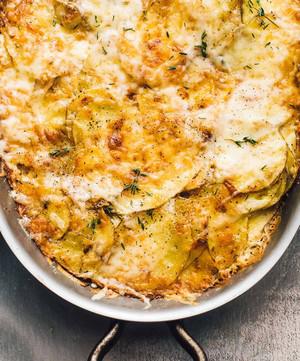
-
2 pounds yukon gold potatoes (you do not have to peel them)
-
5 ounces gruyere cheese
-
1 teaspoon kosher salt
-
1/2 teaspoon ground black pepper
-
3 tablespoons all purpose flour or sweet rice flour to make gluten-free
-
1/2 teaspoon garlic powder or 3 cloves garlic, minced
-
1/2 teaspoon thyme, fresh or dried
-
1 cup half and half
-
Mandoline Slicer (optional)
-
Preheat oven to 375 degrees F.
-
Use a mandoline to thinly slice potatoes to 1/8 inch thick. Put into large bowl. Then grate gruyere cheese and set aside.
-
Add salt, black pepper to bowl and toss to coat as evenly as possible. Then add flour, thyme, garlic powder to the potatoes and toss again to distribute. Add 1/2 of cheese to potatoes and toss.
-
Butter a 7×10 baking dish and put half of potatoes into the dish, laying them flat. Add a little bit more cheese over the top of them. Then place remaining potatoes on top of the others, in a flat and organized manner. Sprinkle with remaining cheese.
-
Pour half and half over the potatoes, distributing evenly. Cover the top of the pan with aluminum foil and secure it tightly.
-
Bake for 30 minutes covered, then remove foil and increase temperature to 385 degrees F. Bake for 20-30 more minutes, until potatoes are cooked through, and can be pierced easily with a fork.
-
Remove from oven and serve warm.
Easy Sponge Cake

-
3 Size 7 Medium Eggs, room temperature
-
¾ Cup Caster Sugar, 158grams
-
1 Cup Plain White Flour * (less 2 Tablespoons, see below instructions), 117grams total
-
1 teaspoon Baking Powder
-
50 grams Butter, melted
-
2 Tablespoons Boiling Water
-
Prevent screen from sleeping
-
Before you make this recipe, if this is the first time you have made a sponge read my tips above for the perfect sponge every time
-
Preheat the oven to 180C Bake
-
Prepare the tins, you will need 2 20cm (8in) round cake tins
-
Prepare the tins by greasing the base and sides of the tin with butter, then add a few tablespoons of flour, tip and rotate the pan until the sides and base are covered with flour
-
Set aside the tins
-
In a large glass or metal food mixer bowl add the room temperature eggs and caster sugar
-
Set the mixer on medium and whip for 8 minutes. At this point check to see if the mixer leaves a trail that stays on top of the batter, if not whisk for a further two minutes.
-
While the eggs and sugar are mixing prepare the flour and baking powder. From the cup of flour return 2 Tablespoons back to the flour bag. Using two bowls and a sieve, pour the flour and baking powder back and forward between the two bowls through the sieve. This ensures the flour is light and airy. I sift 3 times.
-
Melt the butter and boil the kettle
-
Once the egg and sugar mixture has finished whisking together, carefully add the sifted flour and baking powder. Using a large metal spoon or your hands, lightly cut and fold the mixture through. Taking care not to loose any of the air you just created. Continue until no flour remains visible
-
Combine the melted butter and hot water and carefully pour this into the mix
-
Repeat with the metal spoon cutting and folding until all of the butter has been incorporated
-
Split the batter between the two prepared pans. I like to do this using scales to ensure both pans contain the same amount of batter
-
Gently and lightly smooth out the batter
-
Carefully place in the oven, careful not to bang the pans to loose air.
-
Bake for 15 minutes without opening the oven door, at 15 minutes, open quickly to check if sponges are done, sponges are done once they spring back to a light touch, do not use a skewer.
-
You may need to bake for up to 18 minutes or more for them to spring back to a light touch.
-
Once baked immediately remove from the oven, carefully placing them on the bench.
-
You want to remove the cakes from the pans immediately.
-
Run a knife carefully around the edge of the sponge pan to release any cake from the pan.
-
Carefully invert the sponge onto wire racks. You can do this by placing your hand gently on the sponge and turning the pan and your hand over so that you are holding the sponge, then place the wire rack on top of the sponge and invert this back the right way up. This way the top of the sponge is up and the base is on the wire rack.
-
Allow the sponge to completely cool away from any drafts.
-
Sponge Cakes are best served fresh, so if you wish to assemble it later you can wrap the cooled sponges carefully in plastic wrap, separately so they do not stick to each other.
-
Prepare the cream using my Easy Whipped Cream Recipe, and use strawberry jam and strawberries.
-
If made with cream and not eating straight away store covered in the refrigerator.
-
Enjoy!
Egg Custard
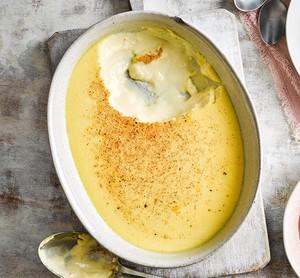
-
3 eggs, plus 1 yolk, lightly beaten
-
1 vanilla pod, split lengthways and seeds scraped out or 1 tsp vanilla bean paste
-
60g caster sugar
-
215ml whole milk
-
215ml double cream
-
nutmeg, to grate
-
Heat the oven to 150C/130C fan/gas 2. Beat together the eggs, vanilla and sugar with a wooden spoon until combined. Mix in the milk and cream and pour into a medium-sized dish. Finely grate over a generous grating of nutmeg.
-
Half-fill a roasting tin with water to make a bain-marie. Place the dish in the tin so that the water comes about three-quarters of the way up the sides of the dish. Bake for 45-50 mins, or until just set with a slight wobble in the centre. Serve warm or leave to cool in the fridge overnight. Serve with poached fruit.
Eggplant
-
Eggplant
-
Garlic
-
Thyme
-
Onion
-
Diced Tomatoes
-
Feta
-
Parsley
-
1. Preheat oven to 400
2. Cut one large eggplant in half and salt the flesh. Let sit for 15 min and then pat dry with a paper towel to remove the bitter liquid
3. Score the eggplant deep into the flesh and stuff each half with 3-4 slices of garlic. Optional- also add thyme to the slits. Season with red and black pepper and parsley.
4. Drizzle with olive oil and place flesh down on a baking sheet. Poke some holes in the skin side with a fork and bake for 45-60 min until they smell very fragrant and the skin has wilted. Let cool
5. Meanwhile, prepare you other ingredients. 1/2 Spanish onion, diced. 1 14 oz can of diced tomatoes, drained, and toast pine nuts.
6. Sauté the onion in a pan with some olive oil. Once eggplant is cool, remove skin and finely chop all of the flesh. Once onion is translucent, add the eggplant. Cook off some of the liquid and brown eggplant slightly. About 3 min in, add the diced tomatoes and continue to gently cook for 3 min, using a wooden spatula to mash the tomatoes and eggplant.
7. Season this mixture with 1 TBSP apple cider vinegar, and OPTIONAL: add 1 TBSP capers and 1 TBSP chopped green olives.
8. Remove eggplant mixture from heat and let cool in a bowl. Add a generous amount of chopped parsley and the juice AND zest of 1/2 lemon.
9. Let this cool in fridge for 20 min. Once complete serve in a shallow bowl with feta cheese, more parsley, good olive oil, coarse salt, and toasted pine nuts. Eat with warm pita or a baguette.
Eggplant Rolls with Mozzarella and Prosciutto (Low Carb)
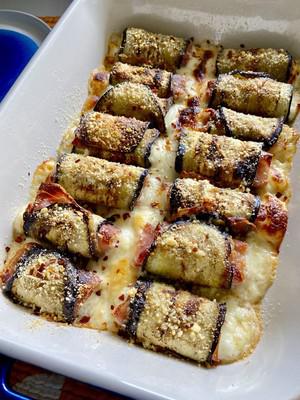
-
2 medium eggplants
-
4 tbs olive oil (divided)
-
salt, pepper and onion powder to taste
-
20 slices prosciutto
-
16 oz mozzarella, sliced into 1/4" square logs
-
1/3 cup panko (or almond flour)
-
1/3 cup pecorino cheese, grated
-
olive oil spray
-
chili pepper flakes fresh basil for garnish
-
Slice your eggplant lengthwise into slices with 1/2 inch thickness. You don't want them too thin or too thick. Keep in mind they shrink while cooking.
-
In a large pan, heat 1 tbs olive oil over medium high and add in as many slices of eggplant as can fit. Season with salt, pepper and onion powder to taste. Cook for 3 minutes and then flip them over. Season again. You may need to add more olive oil if the slices are too dry. Don't over do the oil though – you don't want them soaked in oil – just want to give them that yellow color. Remove cooked slices to a platter and repeat with the process with the rest of the eggplant.
-
Preheat your oven to 350° F. Spray a 9×13" baking dish with olive oil, sprinkle with panko and pecorino.
-
On a flat surface top each eggplant with prosciutto and then place the mozzarella stick on the narrow side of the eggplant. Roll toward the wider side and place the roll in the dish, seam side down. Repeat. Sprinkle top of the rolls with panko, pecorino and spray with olive oil. Bake for 25 minutes then broil for 5 minutes to get that golden brown color.
-
SPONSORED BY VOLKSWAGEN.COM.AU
Faggots
-
110 g (4 oz) fatty pork shoulder, roughly chopped
-
110 g (4 oz) pig's liver, roughly chopped
-
250 g (8oz) fatty belly pork, roughly chopped
-
110 g (4 oz) bacon scraps
-
110 g (4 oz) bread crumbs
-
1 medium onion, finely chopped
-
1/2 teaspoon mace
-
1 teaspoon allspice
-
2 tablespoon chopped parsley
-
2 sage leaves, finely chopped
-
1 small red chilli, de-seeded and finely chopped
-
Salt and Pepper
-
Caul fat* or streaky bacon
-
Mince all the roughly chopped meats in a hand mincer. If you do not have a mincer, then chop using a food processor but do take care not to over mix or you will create a mush, rather than a firm minced meat mix.
-
Place the minced meat into a large bowl. The, into the bowl, add the breadcrumbs, the onion, the herbs, spices and a pinch of salt and pepper. Mix thoroughly.
-
Wet your hands under running cold water, then divide and roll the minced meat mixture into 8 evenly sized balls.
-
Wrap each ball in caul or streaky bacon making sure the caul or bacon overlaps and is secure. This wrapping is the container for the faggot and needs to be strong. The bacon or caul will seal the faggot as it cooks thus holding them together.
-
Place the faggots onto a baking sheet and bake in the hot oven for 50 - 60 minutes. Once cooked, remove from the oven and serve immediately. If you are not ready to eat the faggots then wrap in foil and keep warm.
Fermented Carrots/Vegetables
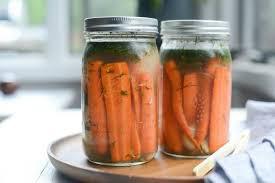
-
500ml water
-
10g salt
-
500g carrots, thinly sliced
-
1 brown onion, thinly sliced
-
40g fresh turmeric, finely grated
-
40g ginger, finely grated.
-
Make a brine by adding the salt to 500ml water in a non-reactive saucepan.
-
Bring to the boil, then remove from the heat and leave to cool to room temperature.
-
Meanwhile, sterilise your jars and leave them to cool completely.
-
Mix together your carrots, onions, turmeric and ginger.
-
Pack the carrot mixture into the jars.
-
Fill the jars with the brine until vegetables are completely covered.
-
Wipe the rims of the jars with paper towel and seal.
-
Let the jars sit at room temperature, but out of direct sunlight for 2-4 days.
-
During this time, the lids will start to pop up, which is a sign of the fermenting process.
-
Transfer the jars to the fridge and leave for a week before using.
-
Refrigerated, the fermented carrots will keep for up to 6 months.
Fermented Hot Sauce
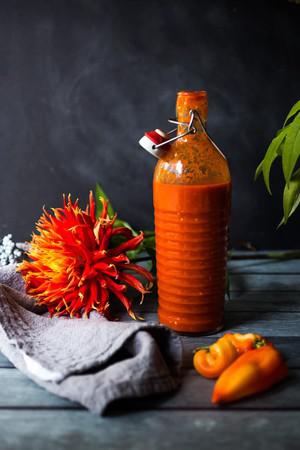
-
5 cups filtered water, warmed ( see notes)
-
5 teaspoons finely ground sea salt (or Pink Himalayan salt) – use 1 teaspoon salt, per cup of warm water.
-
1 pound chili peppers, sliced in half ( about 6– 7 cups) see notes ( do not use frozen)
-
1 carrot, very thinly sliced (do not peel)
-
4– 6 garlic cloves, cut in quarters
-
1– 2 shallots, sliced ( or ½ an onion)
-
optional: herbs (oregano, cilantro, celery leaves)
-
1– 3 tablespoons apple cider vinegar, more to taste
-
sugar to taste
-
Heat the water and stir the sea salt into the warm water until dissolved. Let cool to room temp.
-
Wearing gloves, slice the small hot peppers in half, and remove stems and seeds if you like (for less heat). I left the seeds in mine. If adding bell peppers to temper the heat, cut into thin strips. Thinly slice the carrot (do not peel), slice the shallots and slice the garlic.
-
Layer all into a 2 quart jar. Pour the salt water brine into the jar over the chilies, pressing them down under the liquid. If you need to add more brine, remember to use the ratio of 1 teaspoon salt per 1 cup of water.
-
Weight the chilies down with canning weights (or use a small ziplock bag filled with water, to weigh the veggies down). You want the veggies completely submerged under the brine. Cover lightly with a lid and place the jar in a pan or bowl to collect any liquid that may spill over.
-
Place in a cool dark place (or cover with a kitchen towel and leave in a cool kitchen) for 5-7 days or until brine appears slightly cloudy. Tap the container and see if there is any activity, bubbles, or effervescence.
-
You will know it is fermenting by the cloudy water and little bubbling and activity. You can always ferment longer for even more flavor! The longer the ferment, typically the tangier this will become.
-
After 5-7 days, strain the brine, saving it. Place the fermented peppers, onions, garlic and carrot into a blender. Add 1 cup of the brine and blend until smooth as smooth as possible. Add the vinegar if using, (and sugar if you prefer a sweeter hot sauce like Sriracha), and more brine to desired thickness.
-
The heat level will mellow a bit with time, as it continues to ferment in the fridge.
-
Place in a squeeze bottle and store in the fridge. Do not place in a sealed jar unrefrigerated– this will result in an explosion– and great big mess- as sauce is still fermenting! BE WARNED!
-
I have the best luck with using in squeeze bottles and leaving the cap off in the fridge. Cover opening with your finger and shake before using.
-
If transporting to a friend as a gift, it is ok to seal for short periods of time (a few hours) but make sure they burp it and refridgerate it pretty soon after receiving.
-
The flavors will continue to develop and get more complex over time.
-
This will keep up to 12 months in the fridge (probably even longer).
-
Regular tap water may containe too much chorine in it, inhibiting the fermentation process. Try to use filtered water if possible.
-
I use fine ground sea salt or Pink Himalayan salt . If using course ground salt you may need to add a pinch more.
-
Use any chili pepper you like, or a blend of different peppers (in the same color palate) . To temper the heat, feel free to add a similar colored bell pepper. Substitute sweet red, yellow or green bell pepper. Keep in mind, you will be blending the sauce, so I perfect to stick with the same color scheme to make a vibrant colored sauce. For example, I prefer not to mix red and green peppers (which equal brown) but up to you. Also, keep in mind, the fermentation will mellow the heat a little.
-
If you need more water to cover or fill the jar, use 1 teaspoons salt per cup of warm water.
-
You could easily halve this recipe or use two quart sized jars.
Fermented rice and lentil pancakes. Dosa.

-
For the dosa, I used a ratio of 1 part lentils to 4 parts rice, so ¼ cup red lentils (it’s what was in the cupboard) and 1 cup long-grain rice. Be sure to use long grain rice because the short stuff will become too sticky and thick when blended.
-
The ratios are flexible, you just need a base of rice and some lentils. Urid dal is the most popular.
-
Soak the lentils and rice separately, for at least 4 hours, up to overnight. Once soaked, drain the rice and place into a blender or food processor (high powered preferred), then add the lentils and some of the lentil soaking water. The lentil water will help kickstart fermentation.
-
Blend until smooth, adding extra lentil water till you achieve the consistency of thick pancake batter. The mix may get hot while blending as it will take a little while to get things nice and smooth. Be careful that it doesn’t get too warm or you’ll kill off the bacteria that will help it ferment. Let cool and blend again if need be.
-
Put the mix into a large container with extra room for it to rise – ideally you want it to almost double in size, but it's ok if it only rises by half or so.
-
Sit in a warm spot overnight to ferment – this could take anywhere between 1-3 nights, especially if its cold. I’m in Melbourne during winter so it’s taken a lot longer than it would for someone in FNQ or Darwin.
-
This recipe for coriander and mint chutney has to be the number one Indian dip. It goes with almost everything - I even eat chutney sandwiches - and you can serve it with meat, chicken, fish, vegetables or plain naan.
-
A classic Indian dish where dosa is filled with a spicy potato curry and served with an array of delectable accompaniments.
-
Once it's puffed up, smelling a touch funky (don't take it too far) and you can see little air bubbles in the mix, thin out with water if needed and season with salt. Using a scoop with a flat bottom (a 1/3 cup measure works well), spoon the dosa batter into the middle of a hot pan, pushing the batter out from the centre in a circular motion to flatten.
-
Cook on one side and when almost cooked through, spoon a little ghee or melted butter on top of the dosa and let it sizzle until the underside is nice and evenly browned.
-
As you remove them from the pan, optionally fold while hot to set into shape.
-
Fill with spiced potato mix or chutneys, or really anything you like! They have the most addictive crispy-chewy texture like if tahdig was a pancake, so even as a vehicle for leftovers they’d be great. And you know, there may even be a dosa ice-cream taco in your future.
Feta & Sun-Dried Tomato Salad
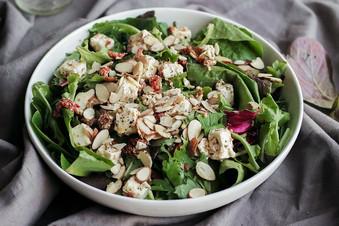
-
2 ounces feta cubed
-
15 grams sun-dried tomatoes diced
-
¼ teaspoon dried basil
-
¼ teaspoon dried oregano
-
¼ teaspoon garlic powder
-
3 tablespoons olive oil
-
2 teaspoons lemon juice
-
4 cups spring mix leafy greens
-
1 ounce slivered almonds
-
Salt and pepper to taste
-
Combine the cubed feta, sun dried tomatoes, herbs, and 2/3 of the olive oil.
-
Toss gently to coat the feta in the herbs and oil.
-
Allow the feta to marinate while you wash and prep your greens and almonds, about five minutes.
-
In a large bowl, or two small bowls, plate your greens and top with the marinated feta and slivered almonds.
-
Drizzle the remaining olive oil and lemon juice over the greens then toss to coat. Season with salt and pepper to taste!
Fettuccine boscaiola
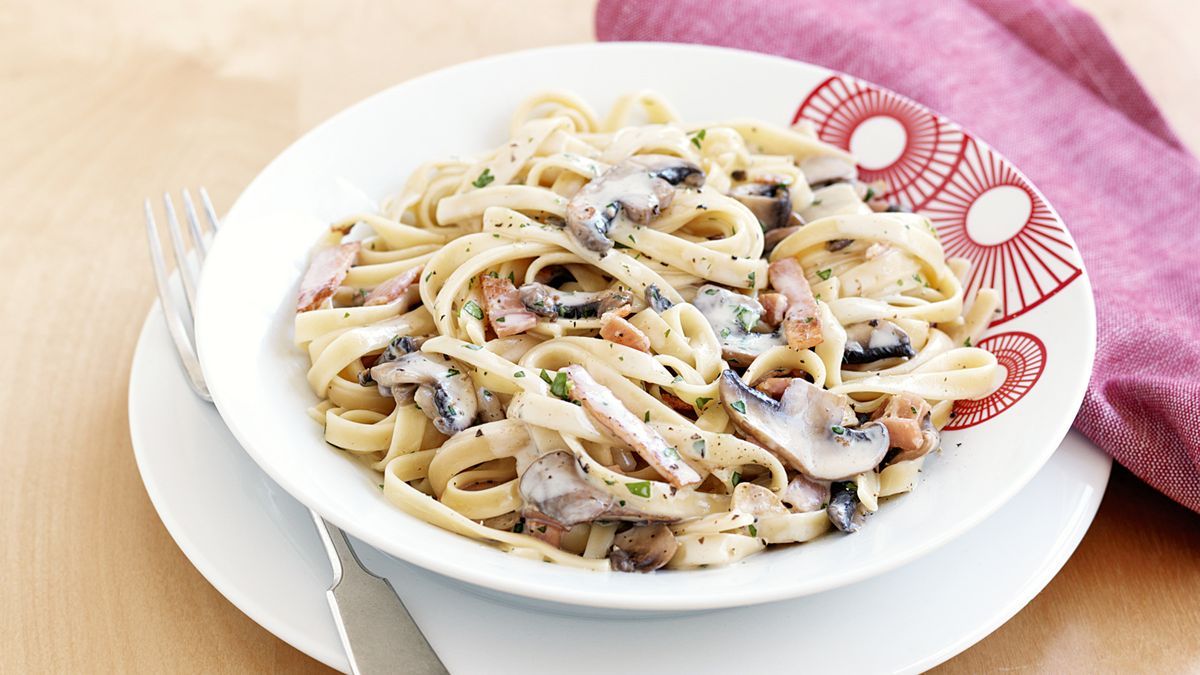
-
350g Italian Pasta Fettuccine
-
9.20 gm olive oil
-
4 middle bacon rashers, rind removed, thinly sliced
-
200g Swiss brown mushrooms, thinly sliced
-
4 garlic cloves, thinly sliced
-
300ml light thickened cream
-
40.00 ml finely chopped fresh flat-leaf parsley leaves
-
Cook pasta in a saucepan of boiling, salted water following packet directions until tender. Drain, reserving 1/3 cup liquid.
-
Meanwhile, heat oil in a large, deep frying pan over medium heat. Add bacon. Cook, stirring, for 4 to 5 minutes or until golden and crisp. Add mushrooms and garlic. Cook, stirring, for 3 to 4 minutes or until tender. Add cream and reserved liquid. Cook for 2 minutes or until heated through. Add pasta and parsley. Cook, tossing, for 1 minute or until heated through. Season with salt and pepper. Serve.
Fig and Raspberry Oat Slice
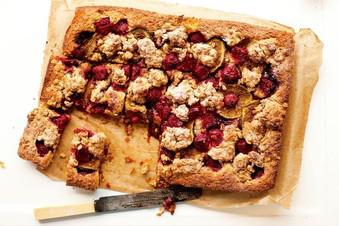
-
11/2 cups (225g) plain flour
-
25g cornflour
-
1 tsp baking powder
-
100g rolled oats, plus 1 tbs extra
-
225g chilled unsalted butter, roughly chopped
-
2/3 cup (150g) caster sugar
-
2 eggs, lightly beaten
-
1 tsp vanilla extract
-
1/4 cup (80g) good-quality raspberry jam
-
250g raspberries
-
3 large figs, quartered
-
1 tbs demerara sugar
-
Preheat oven to 180°C. Grease and line a 20cm x 30cm lamington pan.
-
Combine the flours, baking powder and 100g oats. Using your fingertips, rub in butter until it resembles crumbs. Stir in caster sugar, then add egg and vanilla, and stir to form a sticky, clumpy mixture. Using damp hands, smooth three-quarters of the mixture into the pan. Spread jam over the top, then scatter with the berries and figs. Mix remaining oat mixture with demerara sugar and extra 1 tbs oats, then dot over the fruit. Bake for 40-45 minutes until golden and crisp. Cool in the pan for 10 minutes, then slice and serve.
Fish and Prawn Pie with Tarragon and Spinach
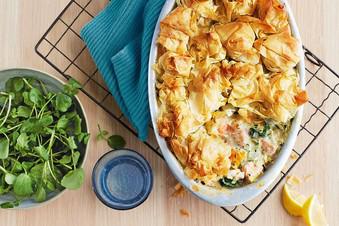
-
150g unsalted butter
-
50g plain flour
-
500ml milk
-
1 pinch nutmeg
-
25g parmesan, grated
-
1 leek, sliced
-
300g smoked cod fillet, skin removed, cut into chunks
-
300g salmon fillet, skin removed, pinboned and cut into chunks
-
300g snapper fillet, skin removed, pinboned and cut into chunks
-
8 large green prawns, peeled, deveined and halved
-
100g baby spinach
-
1½ tbs finely chopped tarragon leaves
-
16 sheets filo pastry
-
Watercress or rocket, to serve
-
Lemon, to serve
-
Preheat oven to 180°C.
-
Melt 50g butter in a saucepan over medium heat, then add flour and stir until combined. Cook for 1 minute, then gradually add the milk. Bring to a simmer and cook 4-5 minutes until thick. Season. Add the nutmeg and parmesan. Stir to combine, then set aside.
-
In a separate saucepan melt 25g butter over medium heat, add the leek and cook for 2-3 minutes until tender, then season. Add leek to white sauce along with diced fish, prawns, baby spinach and tarragon. Season with salt and plenty of pepper.
-
Tip into a baking dish. Melt remaining butter and brush over filo pastry, then scrunch each sheet and place on top of the pie.
-
Bake for 20-35 minutes until golden.
-
Serve with watercress and lemon wedges.
Fish Cakes

-
500g / 1 lb white fish fillets , skinless boneless, cut into 3cm / 1.2″ pieces (Note 1)
-
60g / 4 tbsp unsalted butter
-
1/2 tsp salt
-
1/4 tsp black pepper
-
800g / 1.6 lb potatoes – Sebago (Aus), Russet (US), Maris Piper / King Edwards (UK) (Note 2) (makes 500g flesh)
-
2 garlic cloves , finely minced
-
1/2 cup green onion , finely sliced (~1 large stem)
-
2 large red chillis , deseeded and finely chopped (can omit)
-
1 tbsp thyme leaves , chopped
-
1 tbsp parsley , finely chopped
-
3/4 tsp salt
-
1 cup flour
-
2 eggs , lightly whisked
-
1 1/4 cups panko breadcrumbs (sub ordinary breadcrumbs)
-
1 cup vegetable or canola oil , for frying (~ 1cm / 0.4" depth)
-
Bake potatoes in a 220°C / 430°F (200°C fan) oven for 75 minutes or until they can be pierced with a knife with no resistance. Cut in half and scoop flesh out into a large bowl.
-
Turn oven down to 200°C / 390°F (180°C fan) – fish cakes are finished in the oven.
-
Set a rack over a tray. Sprinkle fish with salt and pepper.
-
Melt butter in a large non-stick skillet over medium high heat. Add half the fish and cook, turning, for 4 minutes in total. It should be just cooked inside (ie. flakes easily) but not golden.
-
Transfer to rack to cool. Repeat with remaining fish.
-
Sauté garlic: In the same skillet, add garlic, chilli ,thyme and green onion into the leftover butter. Cook for 1 minute until garlic is golden, then pour over the potato, being sure to scrape out every drop of butter!
-
Roughly mash potato: Add parsley and salt, then use a wooden spoon to roughly mash the potato. Don't use a potato masher, we want some chunks, not smooth mashed potato.
-
Mix in fish: Add fish then gently stir through, breaking it up a bit so you have some nice flakes mixed throughout the potato. Don't mash the fish up too enthusiastically – we want fish chunks!
-
Form fish cakes: Scoop out 1/4 cup of mixture. Pack it in firmly, pop out onto hand and shape firmly into a 1.75cm / 2/3" thick cake. The potato will make it hold together, if you press firmly. You should make 13 to 15.
-
Crumb: Coat in flour (shake off excess), dip in egg (let excess drip off) then coat in breadcrumbs, pressing to adhere.
-
Pan fry 3 minutes: Heat oil in skillet over medium high heat. Cook fish cakes in batches for 1 1/2 minutes on each side until golden, then transfer to a paper towel-lined tray. If you're pedantic like me, stand them on their side and roll slowly to cook and make the sides golden too.
-
Bake 10 minutes: Remove paper towel from under the fish cakes. Bake for 10 minutes (this heats all the fish cakes all the way through into the middle + reheats the first batch cooked).
-
Serve with lemon wedges, tartare sauce, plain mayonnaise (Kewpie!), sour cream, ketchup or tomato sauce.
Fish Tikka Masala (Salmon Tikka Masala)

-
1 lb fish cubed (about 450 grams) (any large variety)
-
¾ teaspoon red chilli powder
-
½ to ¾ teaspoon GARAM MASALA
-
⅛ teaspoon turmeric
-
½ teaspoon GINGER GARLIC PASTE
-
1 tablespoon lemon juice
-
1 to 2 tablespoon greek yogurt (thick curd)
-
½ teaspoon salt (adjust to taste)
-
1½ tablespoons Oil as needed
-
½ teaspoon cumin (optional)
-
2 green cardamoms (optional)
-
1 cup onions chopped or cubed (1 large)
-
1 teaspoon GINGER GARLIC PASTE
-
½ cup tomatoes , chopped (2 medium)
-
⅛ teaspoon turmeric
-
½ to ¾ teaspoon red chili powder
-
½ to ¾ teaspoon GARAM MASALA
-
1 teaspoon coriander powder (optional)
-
¼ to ½ teaspoon salt to taste
-
½ teaspoon dried fenugreek leaves (kasuri methi) (optional)
-
¼ cup cream or (cashew milk made by blending 12 cashews)
-
Heat oil in a deep pan, then add the cumin and cardamoms.
-
When the spices sizzle, add the onions and very little salt.
-
Saute until they turn translucent. Then saute ginger garlic for a minute.
-
Add ginger garlic paste and fry for a min.
-
Then add in the tomatoes & turmeric. Saute till the tomatoes turn fully mushy.
-
Add red chili powder and saute for 2 minutes till the raw smell goes away.
-
Blend this with ¾ cup water to a smooth mixture. If using a blender, then cool this completely & then blend.
-
Pour this back to the same pan. Then pour ½ to ¾ cup water and add garam masala.
-
Cook this until the gravy thickens and you see some traces of oil over it.
-
Stir in the cream and kasuri methi. Taste it and adjust salt if needed.
-
Meanwhile, mix together all the ingredients mentioned for fish. Smear this over the fish and rest for 5 to 6 mins.
-
Heat a nonstick pan with 1 tablespoon oil and place the fish over the pan. Fry the fish on both sides until golden and the marinade is cooked well. Alternately you can also thread the fish on to skewers and grill them in a preheated oven at 370 F or 190 C for 12 mins. Move to the top rack and grill or broil for another 3 to 4 mins.
-
Ensure the fish is cooked through and slightly charred to get the right flavors.
-
Transfer the fish along with any juices or oil left in the pan to the tikka masala gravy.
-
Let the fish rest in the gravy for at least 30 mins before you serve. Sprinkle coriander leaves. Serve gently as the fish turns delicate after resting.
-
Serve salmon tikka masala with roti, chapathi or butter naan
Flatbread
-
1/2 teaspoon active dry yeast
-
1/2 cup warm water
-
1 teaspoon olive oil
-
1/2 teaspoon salt
-
1/3 cup rye flour
-
1 cup all-purpose flour
-
In a small bowl, dissolve yeast in warm water. Add the oil, salt, whole wheat flour and 3/4 cup all-purpose flour; beat on medium speed for 3 minutes. Stir in enough remaining flour to form a firm dough.
-
Turn onto a lightly floured surface; knead until smooth and elastic, about 6-8 minutes. Place in a large bowl coated with cooking spray, turning once to coat the top. Cover and let rise in a warm place until doubled, about 45 minutes.
-
Punch dough down. Turn onto a lightly floured surface; divide into 8 portions (40gms each). Roll each into a circle.
-
Heat a large nonstick skillet over medium heat; add a portion of dough. Cook for 30-60 seconds or until bubbles form on top. Turn and cook until the second side is golden brown. Remove and keep warm. Repeat with remaining dough, adding cooking spray as needed.
Flour Tortillas

-
3 cups all-purpose flour
-
1 teaspoon salt
-
1 teaspoon baking powder
-
⅓ cup extra virgin olive oil, vegetable oil or other fairly neutral flavored oil
-
1 cup warm water
-
Combine flour, salt and baking powder in the bowl of a stand mixer. Using the dough hook, mix dry ingredients until well combined.
-
Add oil and water with mixer running at a medium speed. After about 1 minute, or when mixture comes together and begins to form a ball, decrease mixing speed to low. Continue to mix for 1 minute or until dough is smooth.
-
Transfer dough to a lightly floured work surface. Divide into 16 equal portions. Turn each piece to coat with flour. Form each piece into a ball and flatten with the palm of your hand. Cover flattened balls of dough with a clean kitchen towel and allow to rest for at least 15 minutes (or as much as 2 hours) before proceeding.
-
After the rest period, heat a large pan over medium heat. Roll each dough piece into a rough circle, about 6-7 inches in diameter, keep work surface and rolling pin lightly floured. Don’t stack uncooked tortillas on top of each other or they will stick together.
-
When the pan is hot, place one dough circle into the pan and allow to cook about 1 minute or until the bottom surface has a few pale brown spots and the uncooked surface is bubbly. If browning too fast, reduce the heat a bit. If it’s taking longer than a minute to see a few pale golden brown spots on the underside of tortillas, increase the heat a bit. Flip to other side and cook for 15-20 seconds. The tortillas should be nice and soft but have a few small brown spots on the surface.
-
Remove from pan with tongs and stack in a covered container or zippered bag to keep the tortillas soft.
-
Serve warm or allow to cool for later use. When ready to use, place a slightly damp paper towel in the bottom of a microwave-safe container (with a cover) that will hold the stacked tortillas. Microwave uncovered for 15-30 seconds (start with 15) or until warm, then keep covered to hold heat while serving.
-
Store in an airtight container or zippered bag at room temperature for 24 hours or refrigerate for up to 1 week. To freeze, separate tortillas with parchment paper or waxed paper and place in a zippered bag before placing in the freezer.
Flour Tortillas
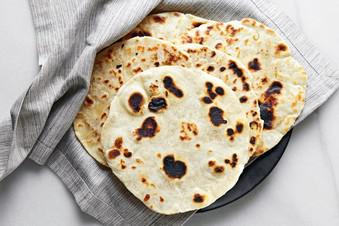
-
450gm All-purpose flour
-
1.6 cups of warm water (a little more if needed)
-
1 teaspoon of salt
-
450 gm of Lard
-
Mix flour and salt.
-
Chop up lard and rub through.
-
Add water gradually to make a sticky dough.
-
Knead for 10 minutes.
-
Cover and let rest for 30 minutes.
-
Divide into 40gm balls using bubble technique.
-
Dip finger in lard and roll each ball on the benchtop.
-
Cover and rest for 10 minutes.
-
Squash and pinch each ball with fingers before rolling to size.
-
Cook on hot cast iron turning once only.
Flourless Orange Cake
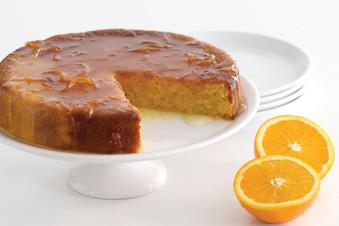
-
Melted salted butter, to grease
-
2 oranges
-
3 eggs
-
215g (1 cup) caster sugar
-
300g (3 cups) almond meal
-
1 tsp gluten-free baking powder
-
Orange Syrup
-
1 orange
-
155g (3/4 cup) caster sugar
-
Preheat oven to 170°C. Brush a round 22cm (base measurement) springform pan with melted butter to lightly grease. Line base with non-stick baking paper.
-
Place the oranges in a saucepan and cover with cold water. Bring to the boil over medium heat. Cook for 15 minutes or until tender. Drain. Return to pan and cover with cold water. Bring to the boil and cook for 15 minutes (this will reduce the bitterness of the peel). Refresh under cold water. Drain. Coarsely chop oranges. Remove and discard any seeds.
-
Place the orange in the bowl of a food processor and process until smooth.
-
Use an electric beater to whisk the eggs and sugar in a bowl until thick and pale. Add the orange, almond meal and baking powder and gently fold until just combined. Pour into prepared pan.
-
Bake for 1 hour or until a skewer inserted into the centre comes out clean. Set aside for 15 minutes to cool.
-
Meanwhile, to make the orange syrup, use a zester to remove the rind from the orange . (Alternatively, use a vegetable peeler to peel the rind from orange. Use a small sharp knife to remove white pith. Cut rind into thin strips.) Juice orange.
-
Place rind in a saucepan of boiling water and cook for 5 minutes or until soft. Drain. Return to pan with orange juice and sugar. Place over low heat and cook, stirring, for 2-3 minutes or until the sugar dissolves and the syrup thickens.
-
Turn cake onto a serving plate. Use a skewer to gently prick the top. Spoon over syrup. Cut into wedges to serve.
Food Processor Carrot Cake
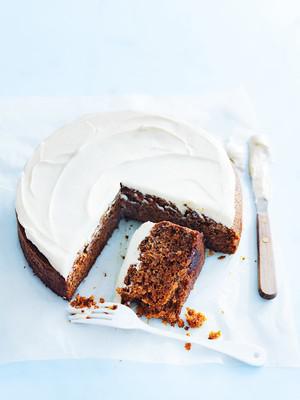
-
400G CARROTS, PEELED AND ROUGHLY CHOPPED
-
1 CUP (120G) PECANS
-
1 CUP (175G) BROWN SUGAR
-
½ CUP (110G) CASTER (SUPERFINE) SUGAR
-
1½ CUPS (225G) PLAIN (ALL-PURPOSE) FLOUR
-
1 TEASPOON BAKING POWDER
-
1 TEASPOON BICARBONATE OF (BAKING) SODA
-
2 TEASPOONS GROUND CINNAMON
-
½ CUP (125ML) VEGETABLE OIL
-
¼ CUP (70G) NATURAL GREEK-STYLE (THICK) YOGHURT
-
2 EGGS
-
2 TEASPOONS VANILLA BEAN PASTE
-
250G CREAM CHEESE, CHOPPED AND SOFTENED
-
¼ CUP (50G) FRESH RICOTTA
-
⅓ CUP (55G) ICING (CONFECTIONER’S) SUGAR
-
1 TABLESPOON LEMON JUICE
-
1 TEASPOON VANILLA BEAN PASTE
-
Preheat oven to 160°C (325°F). Place the carrot and pecans in a food processor and process until finely chopped. Add the flour, bicarbonate of soda, baking powder, brown sugar, caster sugar, cinnamon, vanilla, oil, eggs and yoghurt, and process, scraping down the bowl until combined.
-
Pour the mixture into a 22cm round springform cake tin lined with non-stick baking paper and bake for 55–60 minutes or until just cooked when tested with a skewer. Allow to cool in the tin.
-
To make the cream cheese frosting, place the cream cheese, lemon juice, ricotta, sugar and vanilla in a food processor and process until smooth. Spread the frosting over the cooled cake to serve. Serves 10–12.
Fouée

Tags:
Bread
-
7 g fresh yeast
-
300 g (2 cups) plain flour
-
200 ml water
-
5 g salt
-
To make the dough, place yeast in a small bowl and add a little water to dissolve.
-
Place flour, water, salt and dissolved yeast in the bowl of an electric mixer and mix for 10 minutes.
-
Set aside to rest for 40 minutes.
-
Preheat a woodfired oven to 300-350°C.
-
Divide dough into 12 x 80 g balls.
-
On a lightly floured work surface, roll each ball to form a thin disk.
-
Divide the dough to 80g balls, then roll each dough on a floured bench until a thin disk like shape is formed.
-
Place dough, two pieces at a time, on a baking tray and cook for 1 minute or until puffed and browned. (If it takes longer than this, the oven is not hot enough.)
-
Remove from oven and use a knife to slice open the top, forming a pocket.
French Brioche Bread
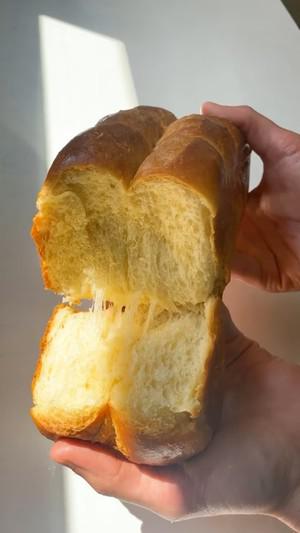
-
75 g Whole Milk
-
15 g Fresh Yeast OR 7g Instant Yeast
-
500 g Plain Flour / All Purpose Flour
-
12 g Salt
-
300 g Whole Eggs
-
350 g Soft Unsalted Butter
-
30 g Caster Sugar
-
Add the flour, sugar and salt to the bowl of a stand mixer fitted with a dough hook attachment. Add in the eggs, milk and yeast, then knead on a low speed for 5 minutes, then on a medium speed for 10 minutes. Scrape the sides every couple of minutes.
-
Slowly add in the butter, a piece at a time and again scrape down the bowl as needed, then continue kneading for 7-8 minutes or until shiny and glossy.
-
Lift the dough onto a lightly floured work surface and shape into a rough ball. Add it to a lightly oiled bowl and proof for 2 hours.
-
After 2 hours, knock the dough back, shape it into a rough ball again, then add it back into a lightly oiled bowl and refrigerate overnight.
-
The next day, split the dough into 65g balls. Lift them into a tin (8 per tin - it will make 2 loaves), egg wash and proof for another 1.5 hours.
-
Once proofed, egg wash the dough again and bake them in a preheated oven, non fan assisted at 200C for 15 minutes then at 185C for another 20-30 minutes or until golden. Allow to cool to room temperature if you can wait, or serve warm with lashings of butter!
French Onion Mushroom Tart

-
3 tablespoons ghee or butter, divided use
-
2 medium onions, halved and sliced thinly
-
Salt
-
Black pepper
-
¼ cup sherry (or white wine)
-
¼ cup beef stock
-
12 ounces shiitake or cremini mushrooms, or combo of both
-
2 cloves garlic
-
1 tablespoons fresh thyme leaves, divided use
-
1 (14 ounce) package all-butter puff pastry (1 large sheet), thawed according to package instructions
-
1 ¼ cups grated Gruyere cheese
-
1 whisked egg, for egg wash
-
Begin by gathering and prepping all of your ingredients (keeping the puff pastry cold) according to the ingredient list above to have ready and organized for use.
-
Place a large, heavy-bottom skillet over medium-high heat (cast iron is terrific for this), and add in 1 ½ tablespoons of the ghee or butter. Once melted, and the skillet is hot, add the sliced onions plus a sprinkle of salt and black pepper.
-
Cook the onions, stirring quite frequently, until cooked down and deeply caramelized and jammy, roughly 20 minutes. Once caramelized, pour in the sherry, and allow it to bubble up for a moment. Next, add in the beef stock, and allow it to bubble up.
-
Reduce the heat to low for a moment, and spoon the onions into a dish or bowl to hold and to cool.
-
To the same skillet, add the remaining 1 ½ tablespoons of ghee or butter and bring the heat back up under it to medium-high once more.
-
Add in the sliced mushrooms plus a sprinkle of salt and pepper, and saute the mushrooms for about 5 to 7 minutes, until golden but still meaty with some texture. Stir in the garlic and sprinkle in 1 teaspoon of the fresh thyme into the mushrooms. Once aromatic, turn off the heat.
-
Spoon the mushrooms into a separate bowl or dish lined with paper towel (to absorb excess moisture) to cool.
-
Preheat the oven to 400°.
-
To prepare the tart, place a piece of parchment paper the size of your baking sheet (I use an 18 by 13 inch baking sheet) in front of you on a work surface, and sprinkle lightly with flour. Place the thawed puff pastry sheet in front of you on the parchment, and give it a gentle roll with a rolling pin, just enough to even the edges and make it symmetrical. (You want a size that's roughly 10 x 13 inches, and ⅛” thick.)
-
Create a border for your tart by using a sharp knife to gently score the pastry about ½ inch from the edge, all the way around, taking care not to cut all the way through the pastry (you just want to make a light line with the your knife). Use a fork to prick the center of the puff pastry a few times (not the border) to help it to bake flat. (Place the pastry into the fridge to chill for a few minutes if it is becoming warm.)
-
Lightly sprinkle ¾ cup of the cheese on the bottom, then top with the sautéed mushrooms and the caramelized onions. Sprinkle over this another ½ cup of cheese.
-
Gently egg wash the border you created, and bake the tart for 26 to 30 minutes (mine took about 28 minutes), or until a deep, golden brown.
-
Allow the French onion mushroom tart to cool on the baking sheet for 10 minutes, then sprinkle over the remaining 2 teaspoons of the thyme leaves as garnish, and cut the tart into 8 pieces. Serve hot, or at room temp.
French Onion Soup
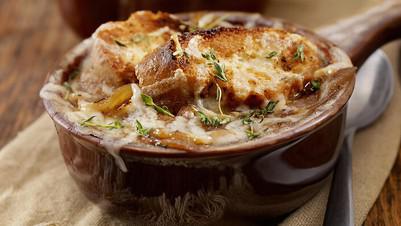
-
4 large brown or white onions, thinly sliced and separated into rings
-
6 tbsp unsalted butter
-
1 tbsp white sugar
-
2 cloves garlic, minced
-
½ cup cooking sherry
-
1.5 litres salt-reduced beef broth
-
3 sprigs fresh thyme
-
2 dried bay leaves
-
Salt and black pepper, to taste
-
6 slices of French bread
-
¾ cup grated Gruyere cheese
-
Fresh parsley or thyme leaves
-
Melt butter in a large saucepan over medium heat. Cook the onions in the butter for around 15 minutes, stirring occasionally until the onions are translucent.
-
Add sugar to the pan. Cook, stirring constantly for a minimum of 30 minutes until onions are caramelised and browned.
-
Add garlic to the onions and cook for one minute.
-
Pour in the sherry and deglaze the pan.
-
Place the onion mixture in a slow cooker, turned on low. Pour in beef broth, before adding seasoning, bay leaf and thyme. Season with salt and pepper.
-
Put the lid on the slow cooker and cook for eight to 10 hours.
-
Once the soup has finished cooking and you’re ready to serve, preheat the grill (choose grill oven if that setting is available. Otherwise opt for the grill setting).
-
Ladle a few generous spoons of broth and onion into a heat-proof serving bowl. Float the bread in the soup, so that its base is embedded in the broth and its top is above the liquid. Generously top the bread with cheese to the corners.
-
Place the soup bowl – with cheese-topped bread – under the grill.
-
Grill the bread until the cheese has melted (about 2-5 minutes depending on your grill). It should have some brown spots and be bubbling. Serve warm, garnished with fresh thyme.
-
Cheese: If you can't source Gruyere cheese, opt for Swiss cheese instead.
-
Alcohol: Sherry can be substituted with Marsala wine. Other recipes also use dry white wine.
-
Herbs: If you don't have fresh thyme for the soup, use ¼ teaspoon dried thyme. Fresh sage is another option if you have it on hand.
-
Flour: There is no flour in this slow-cooker recipe, but if you're doing it on a stovetop pot then you can create a roux first equal parts butter and flour.
-
Bread type: once your dish is complete, your spoon should easily cut through the bread in the soup. So the softer the bread the better.
-
Bread size: Use common sense to match the bread slice size with the bowl you’re using. If you’re using a baguette and a large bowl for soup, scatter a few slices of bread into the broth. But if you’re using a standard size bowl and store-bought loaf of fresh bread from a bread-maker, use one thick slice.
French Tomato Tart
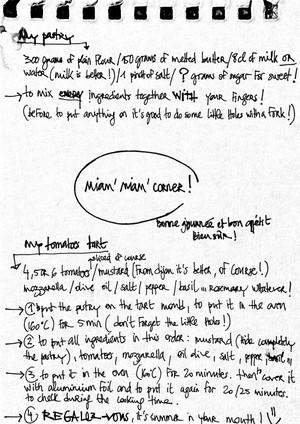
-
300 grams of plain flour
-
150 grams of melted butter
-
8cl of milk or water (milk is better!) (80ml)
-
1 pinch of salt
-
? grams of sugar for sweet!
-
4, 5 or 6 tomatoes - sliced of course
-
Mustard (From Dijon it's better, off course!)
-
Mozzarella
-
Olive oil
-
Salt
-
Pepper
-
Basil, Rosemary whatever
-
To mix every ingredients together with your fingers!
-
(Before to put anything on it's good to do some little holes with a fork!)
-
To put the pastry on the mould, to it in the oven (160°C) for 5 min (Don't forget the little holes!)
-
To put the ingredients in this order: mustard (hide completely the pastry), tomatoes, mozzarella, olive oil, salt, pepper, basil
-
To put it in the oven (160°C) for 20 minutes, then to cover it with aluminium foil and to put it again for 20/25 minutes. To check during the cooking time.
-
Regalez-vous, it's summer in your mouth.
French-Style Apple Tart (Tarte Tatin)

-
1 sheet puff pastry, thawed
-
1.5 kg apple (1.5 kg), preferably Honeycrisp or Granny Smith
-
3 tablespoons water
-
½ cup sugar (100 g)
-
3 tablespoons unsalted butter
-
vanilla ice cream, for serving
-
Using a 9-inch (23 cm) flat-sided cake pan as a template, cut a circle out from the puff pastry. Using a fork, poke holes all over to provide ventilation. Set aside.
-
Peel and quarter the apples, using a spoon or melon baller to remove the cores.
-
Preheat oven to 375°F (190°C).
-
In a large saucepan over medium heat, distribute the water and sugar evenly and cook until light amber in color, stirring to help melt any lumps, 5-7 minutes. Add the butter, stirring constantly until the color is a creamy light brown. Add the apples, stirring until they are coated in a thick layer of caramel.
-
Cook for about 15-20 minutes, turning the apples constantly so that they bathe in the caramel. Remove from the heat when the caramel has reduced and little remains in the bottom of the pan. Be careful not to burn the caramel, tasting it from time to time to ensure it does not taste bitter.
-
Arrange the apple slices in concentric circles on the bottom of the cake pan. Press the apples tightly against each other, then pour the remaining caramel over the top.
-
Lay the circle of puff pastry on top. Tuck the puff pastry down the sides of the pan.
-
Bake for 45-50 minutes, until the pastry is golden brown and firm. Cool for about 1 hour, then invert onto a plate.
-
Slice and serve with vanilla ice cream.
-
Enjoy!
Fresh Lemon-Blueberry Dutch Baby
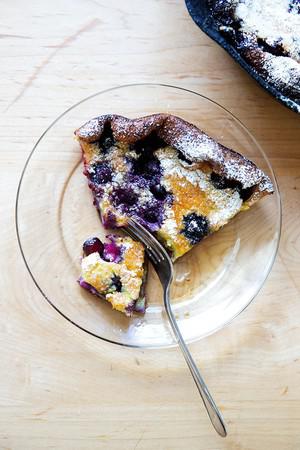
-
4 tablespoons butter, divided
-
1/2 cup ( 125 g) whole or 2% milk
-
1/2 cup ( 64 grams) all-purpose flour
-
4 large eggs
-
3 tablespoons ( 43 g) granulated sugar
-
1 teaspoon vanilla
-
1/4 teaspoon salt
-
the zest of one lemon
-
1 cup ( 154 g) blueberries
-
Confectioners sugar for dusting
-
Cook Mode Prevent your screen from going dark
-
Place an oven rack in the middle position and preheat the oven to 450°F. Place a 9- or 10-inch cast iron skillet over low heat on your stovetop. Keep it over low heat while you prepare the batter.
-
Melt two tablespoons of the butter in a small skillet, then transfer to a blender. Add the milk, flour, eggs, granulated sugar, vanilla, salt, and lemon zest, and blend until smooth. (Do not skip this step — the batter will be lumpy if you do.)
-
Place the remaining 2 tablespoons of butter into the cast iron skillet. Turn the heat up to medium-high. Let the butter melt, add the blueberries, and give the skillet a shake. Immediately pour the batter over the blueberries and transfer the skillet to the oven. Bake until the pancake is puffed and golden, about 15 minutes.
-
Remove pan from the oven, and dust with confectioners sugar, if you wish. Cut and serve immediately with maple syrup.
Fried Cabbage
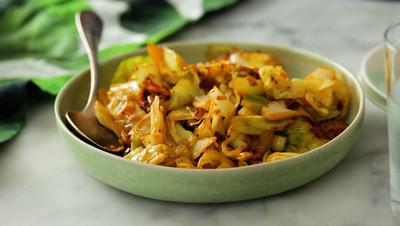
-
1 small yellow onion
-
1/2 medium (2- to 3-pound) head green cabbage (about 8 cups chopped)
-
6 slices bacon (about 6 ounces)
-
1/2 teaspoon garlic powder
-
1/4 teaspoon smoked paprika
-
1/4 teaspoon kosher salt
-
1/4 teaspoon freshly ground black pepper
-
Shop Recipe
-
Finely dice 1 small yellow onion. Core and chop 1/2 head green cabbage into rough 1-inch pieces (about 8 cups). Cut 6 slices bacon crosswise into 1/2-inch pieces.
-
Cook the bacon in a large cast-iron skillet over medium heat, stirring occasionally, until browned and most of the fat has rendered out, about 10 minutes. Use a slotted spoon to transfer the bacon to a paper towel-lined plate. Do not discard the grease.
-
Add the onion to the bacon grease and cook, stirring occasionally, until softened, about 3 minutes.
-
Add the cabbage, 1/2 teaspoon garlic powder, 1/4 teaspoon smoked paprika, 1/4 teaspoon kosher salt, and 1/4 teaspoon black pepper, and cook, stirring occasionally, until tender and lightly browned, 8 to 10 minutes.
-
Return the bacon to the skillet and stir into the cabbage. Serve warm.
Fruit Kvass
-
Enough ripe fruit to fill a quart jar by one quarter to one third
-
Pure water to almost fill the jar
-
1 tablespoon unpasteurized honey
-
Several thin ginger slices or other seasonings (optional)
-
Place the fruit, honey and seasonings (optional) in a quart jar. Add enough water to fill all but the top inch of the jar; this critical “head room” safely allows pressure to build. There’s no need to stir in the honey; it will dissolve.
-
Tightly cover the jar, set it on your countertop and give it a shake 2 or 3 times a day to prevent undesirable bacteria from forming on the surface. Once it starts bubbling, press on the center of the lid to gage CO2 pressure buildup. When the lid bulges up rather than giving to light pressure, open the lid to release CO2 and then retighten the lid.
-
In approximately 24 hours, you’ll see bubbles in the mixture. It’s ready after 2 to 3 days or when the mixture is vigorously bubbling and the fruit looks “cooked” rather than raw and has a pleasing flavor. Taste your brew as often as you wish.
-
Warm weather and high sugar content cause faster fermentation. If the mixture is actively bubbling in just one day, it contained too much sugar (next time use less fruit and/or honey) and will sour and start to become alcoholic rather than develop the healthful and tangy lacto-bacteria.
-
When it’s ready, strain out and discard the fruit solids ( you could eat them but their essence is gone). Serve kvass as is or keep refrigerated for up to a week.
-
Option: To increase carbonation, decant the kvass into a wine bottle, beer or soda bottle and cork it. Leave at room temperature until you can see a rim of bubbles at the top of the bottle. Refrigerate until use. (Or pour it into bail-top beer bottle available from home-brewing supply stores and online. If using a bail-top bottle, it’s imperative to get full directions regarding safety as over carbonated bottles can explode.)
Gado Gado (Indonesian Salad with Peanut Sauce)
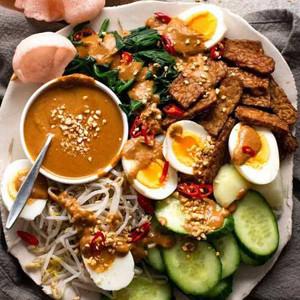
-
1/3 cup natural peanut butter, smooth or crunchy (your choice) (Note 1)
-
4 tsp red curry paste , store bought (Maesri brand best, Note 2)
-
3 tsp Kecap Manis (Indonesian sweet soy sauce, Note 3)
-
1 tsp sambal oelak or other chilli paste (adjust spiciness to taste)
-
1/2 tsp salt
-
1 large garlic clove , pressed using garlic press (~ 3/4 tsp)
-
1 1/2 tbsp lime juice (Note 4)
-
1/2 cup coconut milk , full fat (Ayam brand best)
-
1/2 cup water
-
1 bunch spinach , roots trimmed
-
4 cups beansprouts
-
200g / 7 oz potato - small halved, large peeled chopped 2 cm / 1" cubes OR 1.5cm / 1/2" slices
-
1 cucumber , sliced on the diagonal ( or 1/2 long cucumber ie Telegraph/English)
-
2 - 3 boiled eggs , peeled and halved
-
15 prawn crackers , optional (Note 6)
-
2 tbsp vegetable or peanut oil
-
200g / 7 oz tempeh (or firm tofu, Note 7)
-
1 tbsp finely chopped peanuts (highly recommended)
-
Red chilli , finely sliced, optional (small = spicy, large = less spicy)
-
Mix all ingredients in a small saucepan over medium low heat. Bring to simmer then cook for 5 minutes, stirring regularly so the bottom doesn't catch, until it thickens. If too thick, just add more water - should be able to drizzle it (see video for thickness).
-
Taste and adjust as follows: lime for more sour, salt, sugar for sweet.
-
Cover and keep warm.
-
Bring a saucepan of water to the boil.
-
Add potatoes and cook for 5 minutes or until cooked through. Use a slotted spoon to transfer to colander to drain.
-
Cook beansprouts for 3 minutes or until just wilted. Transfer to colander, press out excess water.
-
Add spinach, push under to submerge - will instantly wilt. Remove, transfer to colander, press out excess water.
-
Slice into 0.75 x 5 cm / 1/3 x 2" slices (or thereabouts).
-
Heat oil in a skillet over medium high heat. Cook tempeh 2 min on each side until deep golden and crispy. (Tofu ~ 1 1/2 min)
-
Either make one platter for sharing, or individual. Vegetables and egg can be served warm or at room temp, sauce should be served warm (it thickens when cool).
-
Place vegetables and tempeh on serving plate, top with egg.
-
Pour sauce into serving bowl.
-
Serve Gado Gado Salad with peanut sauce, peanuts for sprinkling, fresh chillies and prawn crackers on the side.
-
Peanut butter - use natural / pure peanut butter with no added sugar, oil or other additives. It has a more intense peanut flavour so the sauce is tastier. If you use Kraft or another peanut butter spread with sugar etc added, it's still tasty but:
-
a) the sauce won't be as peanutty (and if you add more, sauce will be too thick); and
-
b) skip kecap manis, use dark soy instead, otherwise the peanut sauce will be too sweet.
-
Red Curry Paste - regular readers know I am very loyal to Maesri brand Thai Curry pastes! By far the best available to the general public (here in Australia), and also happens to be the cheapest. Little tins ~$1.50, sold at large Woolworths, Coles, all Harris Farms and Asian stores. I use it for Red, Green and Massaman Curry (also the epic Lamb Shank Massaman from Friday!).
-
Kecap Manis (sometimes called Ketjap Manis) is an Indonesian sweet soy sauce that is thicker than other soy sauces. Sometimes just labelled as "sweet soy sauce". Consistency resembles maple syrup, available in most supermarkets in Australia (Woolworths, Coles, Harris Farms).
-
Easy sub for this recipe: 2 tsp dark soy sauce plus 1 tbsp honey.
-
Also use for Nasi Goreng (Indonesian fried rice), Mie Goreng (noodles), Indonesian Satay Chicken.
-
Lime subs - or 1 tbsp cider vinegar, or 2 tsp white vinegar.
-
Vegetables:
-
Spinach - hard to measure, I use one whole standard bunch sold at the supermarkets (a big standard bunch). Diameter of the stems of the bunch is around the size of a tennis ball. It will look like a lot but will wilt down about 80% in volume.
-
Beansprouts - again, hard to measure! Use 2 big handfuls.
-
Other vegetables - blanched: carrot (diagonal slice), green beans, broccoli/broccolini, cauliflower, asparagus, any Asian greens, cabbage (fairly finely sliced), zucchini, corn, baby corn, kale, silverbeet/Swiss chard, sweet potato, pumpkin.
-
Raw veg: tomato wedges or cherry tomatoes, radish.
-
Prawn crackers - traditionally served on the side, great crunch factor / to build bites. Either buy them or make (sold in large Aussie grocery stores in Asian section). Make per packet by frying OR make a NO FAT version using the microwave - place 8 to 10 around the edges of turntable, microwave 20 to 30 seconds. They will puff up and be crispy, just like they're fried!
-
Tempeh - traditional Indonesian ingredient made from fermented soy beans, it's like really firm tofu except it tastes nutty (sort of like sunflower seeds). Pan fries golden with a beautiful crispy outside. Vegetarians are mad for it! Best served hot out of the skillet - it is very addictive (especially with the peanut sauce!).
-
Tofu - dust with flour to make crispy. Pat dry, sprinkle with table salt and pepper, then just before cooking, dust lightly with flour.
-
Storage - makes more sauce than you will need (hard to make less), keeps 5 days in the fridge or 3 months in freezer. Use it for a quick veg side salad, or dunking!
-
Reheating cooked veg - spinach and beansprouts leach water when reheated, so reheat them separately before plating up.
-
Nutrition per serving, assuming half the sauce is used (it's about 1/3 cup per serve - quite generous!). Most of the calories is in the sauce due to the peanuts, then the oil for cooking the tempeh, then egg and potato. This is a filling serve for a main course!
Garlic/Chilli Prawns

-
36 green prawn tails
-
1/2 garlic, peeled
-
2 lemons, juice and zest
-
50g butter, melted
-
100ml olive oil
-
1/4 bunch parsley, chopped
-
1 small chili, red, chopped
-
100ml aioli
-
Peel the prawns, remove vein and place in a bowl.
-
Clean and peel the cloves of garlic, roughly chop and place in a food processor. Add the chopped chilli, melted butter, olive oil and lemon juice and zest.
-
Once pureed add the chopped parsley and pour mixture over the prepared prawns. Allow to marinate for an hour or so.
-
To cook, place a sheet of aluminium foil on the BBQ and allow to heat. Once hot enough drain the prawns from the marinade and place on the hot foil. Carefully turn the prawns once and then fold the corners up to make a parcel.
-
Allow the prawns to cook for another 3-4 minutes then remove from the BBQ and place on a serving platter.
Ginger and Pear Cobbler
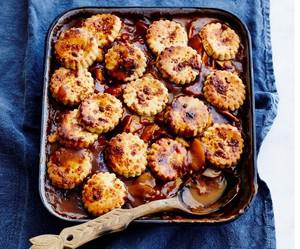
-
1 cup (160g) CSR Rapadura Sugar
-
100 grams butter, diced
-
⅔ cup (160g) sour cream
-
2 tablespoons CSR Golden Syrup
-
2 tablespoons whisky
-
2 tablespoons finely grated fresh ginger
-
1 teaspoon vanilla bean paste
-
juice of ½ lemon
-
1½ tablespoons White Wings Plain Flour
-
1.2 kg ripe pears, peeled, cored and thinly sliced
-
vanilla ice-cream, to serve
-
2 cups (300g) White Wings Self-Raising Flour
-
2 tablespoons CSR Rapadura Sugar, plus extra for sprinkling
-
1 teaspoon ground ginger
-
100 grams chilled butter, chopped
-
¾ cup (185ml) buttermilk, plus extra for brushing
-
1 Preheat oven to 180°C/160°C fan. Combine sugar, butter, sour cream, syrup, whisky, ginger, vanilla and ½ teaspoon salt flakes in a large saucepan. Stir over medium-high heat until smooth and combined. Bring to a simmer; cook for 3 minutes or until slightly thickened. Remove from heat. Stir in lemon juice; transfer to a large bowl. Cool slightly. Whisk in flour until smooth and combined. Add pears, stirring to coat. Transfer to a 2-litre (8-cup) ovenproof dish; place dish on an oven tray.
-
Combine flour, sugar, ginger and a pinch of salt in a bowl. Rub in butter with your fingertips. Stir buttermilk through flour mixture until a soft dough forms. Turn onto a lightly floured work surface; knead lightly until smooth.
-
Roll topping on lightly floured baking paper to 5mm thick. Cut out rounds with a 6cm fluted cutter; place rounds over pear mixture, leaving some gaps.
-
Brush pastry with a little extra buttermilk; sprinkle with a little extra sugar. Bake for 35-40 minutes or until golden. Stand for 5 minutes.
-
Serve cobbler with vanilla ice-cream.
-
CSR Rapadura Sugar is an unrefined cane sugar, which means more of the natural nutrients remain. The molasses content in the sugar cane gives it its golden colour and delicate caramel flavour.
Ginger Beef Stir Fry
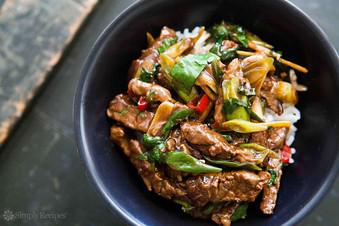
-
2 tablespoons unseasoned rice vinegar
-
5 tablespoons soy sauce (use gluten-free soy sauce if cooking gluten free)
-
1 tablespoon honey
-
1 tablespoon peeled, grated fresh ginger
-
1 teaspoon chili pepper flakes
-
1 teaspoon ground cumin
-
1 (1 1/4 to 1 1/2 pound) top sirloin steak
-
1 tablespoon cornstarch
-
2 tablespoons vegetable oil (preferably peanut)
-
1 tablespoon dark toasted sesame oil, optional
-
3 to 4 green onions, cut on a diagonal, 1/2-inch apart, including the greens
-
2 cloves garlic, thinly sliced
-
2 to 3 hot chilies, preferably red serranos, seeded, sliced
-
1- inch knob of ginger, peeled, cut lengthwise into matchstick shapes
-
1/2 cup loosely packed, chopped cilantro
-
Chill the steak in the freezer for 30 minutes before you slice it, this will make it easier to cut in thin slices. Slice the steak first crosswise in 1/2-inch thick slices. The cut each slice lengthwise into strips.
-
In a medium bowl, whisk together the marinade ingredients; the soy sauce, vinegar, grated ginger, honey, red chile flakes, and cumin. Mix the beef in with the marinade to coat and let it sit for at least 30 minutes, and up to 4 hours, in the fridge.
-
In a small bowl, mix the cornstarch with 2 tablespoons of cold water to make a slurry.
-
Heat the oil in a wok (vegetable oil plus dark sesame oil if using), or a large sauté pan, over high heat until it is nearly smoking. As the oil is heating up, pat the beef dry and separate it into small batches no larger than what can fit into the palm of your hand. Working in batches, sauté beef until just brown outside but rare inside, no more than 1 minute. Transfer beef to a bowl.
-
When all of the beef is cooked, put the chilies and garlic into the pan and stir-fry 30-45 seconds. Add the julienned ginger and cook for 30-45 seconds more.
-
Add the beef back to the pan. Add the cornstarch slurry. Add the scallions and mix everything together. Cook for 1 minute.
-
Turn the heat off and mix in the cilantro. Serve at once with steamed white rice.
Ginger Beer
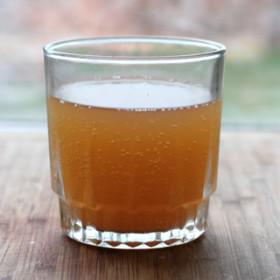
-
Warm water
-
2 tsp brewers yeast
-
2 tsp sugar
-
2 tsp ground ginger
-
3 cups sugar
-
2 tsp cream of tartar
-
1L boiling water and
-
5L cold water
-
Juice of 2 lemons, strained
-
Fill a large glass jar ¾ full with warm water. Add the yeast, sugar and ginger. Cover loosely with a lid or tea-towel – do not screw tight or it won’t be able to breathe. Sit in a warm place, such as the kitchen table or similar.
Feed your bug every day for seven days with 1 tsp sugar and 1 tsp ground ginger.
After a week, you are ready to make your first batch of beer.
-
In a large bowl or bucket, put the sugar and cream of tartar, then add the boiling water. Stir to dissolve the sugar before adding the cold water. Get your bug and pour all the liquid (not the sludge in the bottom) into a bucket and add the lemon juice.
-
Stir well and then pour into your clean bottles – it makes six 750ml bottles.
-
Store in a cool, dark place for two weeks before drinking. Make sure you open the bottle in the kitchen sink as it might overflow. Open the cap bit by bit to allow the air to escape.
-
Take the jar with the sludge in it and fill with water to the top. Tip out half or give to a friend so that they can make their own bug. Fill back up to ¾ and feed for another week.
-
If you are too busy to make a batch of ginger beer one week, don’t just keep feeding and hope for the best, as your bug won’t survive. Pour it out after a week – as you would if you were making some ginger beer – and follow the above instructions for restoring your bug all over again.
Ginger Beer - Grain Style
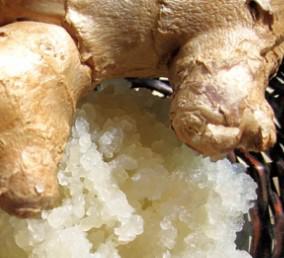
-
2 T ginger beer plant grains
-
100g ginger pieces and
-
⅓ cup brown sugar or molasses
-
1 litre water
-
Place 2 tablespoons of the ginger beer plant into a quart sized or larger glass jar.
-
Pour 1 litre of water into the jar.
-
Add sugar and stir to dissolve the sugar. It doesn't have to be perfect. Some undissolved sugar is just fine. It won't hurt the grains to stir them, but you can mix the sugar before adding the grains if desired.
-
Let sit for 3-7 days. Shorter in the summer and longer in the winter. Taste to see if its ready.
-
Strain the liquid from the grains. That liquid is the finished water kefir.
-
If the grains have grown, place only 2 tablespoons of ginger beer plant back into the jar and repeat the whole process.
-
You can drink the finished ginger beer right away or store in a closed bottle to build carbonation or meld flavors. Or you can try a second ferment.
Ginger Sponge
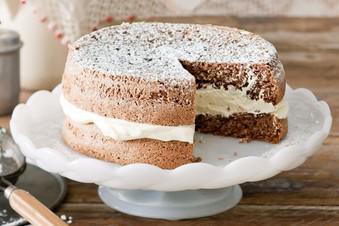
-
wheaten cornflour, for dusting
-
4 eggs
-
3/4 cup caster sugar
-
1/3 cup wheaten cornflour
-
2/3 cup plain flour
-
1 tsp cream of tartar
-
1/2 tsp bicarbonate of soda
-
2 tsp cocoa powder
-
2 tsp ground ginger
-
1/2 tsp ground cinnamon
-
300ml thickened cream
-
1 tsp vanilla extract
-
2 tbsp icing sugar mixture
-
Preheat oven to 180°C/160°C fan-forced. Grease two 22cm (base) round cake pans. Dust sides of pan with a little cornflour.
-
Using an electric mixer, beat eggs and caster sugar for 8 to 10 minutes or until thick and creamy.
-
Meanwhile, sift flours, cream of tartar, bicarbonate of soda, cocoa, ginger and cinnamon together 3 times (see tip). Gently fold into egg mixture to combine. Divide mixture between prepared pans. Bake for 18 to 20 minutes or until sponges spring back when touched. Line a wire rack with baking paper. Turn sponges out onto wire rack to cool.
-
Using an electric mixer, beat cream, vanilla and half the icing sugar until soft peaks form. Place 1 sponge on a plate. Spread with cream mixture. Top with remaining sponge. Dust with remaining icing sugar. Serve.
Goan Fish Curry

-
1 kilograms king fish (surmai)
-
1 tablespoon tamarind paste
-
4 teaspoon coriander seeds
-
1/2 teaspoon cumin seeds
-
7 cloves garlic
-
2 pinches salt
-
1 1/2 tablespoon refined oil
-
4 cup water
-
1 large chopped onion
-
5 dry red chili
-
2 tablespoon grated coconut
-
1 sliced & slit green chilli
-
1/2 teaspoon powdered turmeric
-
To prepare this delicious curry, start by slicing the fish into pieces. Once done, marinate the pieces using salt and turmeric powder. Keep it aside for a while.
-
Meanwhile, prepare the masala for the curry. In a mixer, add all the spices, grated coconut along with the chopped onion and green chillies with little water and make a fine paste.
-
Next, take a skillet and heat the oil in it over medium flame. Add the prepared masala paste to the heated oil and cook for a few minutes. Keep stirring the mixture.
-
Add the marinated fish to the pan and let the fish soak in all the masala. Let it get cooked for few minutes. Once done, add 3 cups of water and salt as per your taste.
-
Cook the fish till its done over low flame. Once done, transfer it to a serving platter and garnish with coriander leaves. Serve it with steamed rice.
Golden Syrup Microwave Mug Cake

-
30g butter
-
1 egg
-
60ml (1/4 cup) golden syrup, plus extra, to drizzle
-
1 tbsp milk
-
1 tsp vanilla extract
-
75g (1/2 cup) self-raising flour
-
Vanilla ice-cream, to serve
-
Select all ingredients
-
Lightly grease two 375ml (1 1/2 cups) microwave-safe mugs. Place the butter in a small microwave-safe bowl and microwave on High for 10 seconds or until melted.
-
Use a fork to lightly whisk the egg in a bowl. Whisk in the golden syrup, milk and vanilla until combined. Add the flour and whisk until smooth. Add the melted butter. Whisk until combined. Divide mixture evenly between the prepared mugs. Microwave on High for 1 minute and 20 seconds or until puffed and just firm when lightly touched.
-
Top each cake with ice-cream then drizzle over a little extra golden syrup to serve.
Gourmet Mushroom Risotto
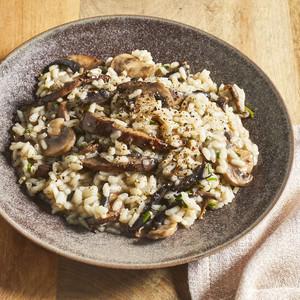
-
6 cups chicken broth, or as needed
-
3 tablespoons olive oil, divided
-
1 pound portobello mushrooms, thinly sliced
-
1 pound white mushrooms, thinly sliced
-
2 medium shallots, diced
-
1 ½ cups Arborio rice
-
½ cup dry white wine
-
4 tablespoons butter
-
3 tablespoons finely chopped chives
-
⅓ cup freshly grated Parmesan cheese
-
sea salt and freshly ground black pepper to taste
-
Warm broth in a saucepan over low heat.
-
Meanwhile, warm 2 tablespoons olive oil in a large saucepan over medium-high heat. Add portobello and white mushrooms; cook and stir until soft, about 3 minutes. Remove mushrooms and their liquid to a bowl; set aside.
-
Add remaining 1 tablespoon olive oil to the saucepan. Stir in shallots and cook for 1 minute. Add rice; cook and stir until rice is coated with oil and pale, golden in color, about 2 minutes.
-
Pour in wine, stirring constantly until wine is fully absorbed. Add 1/2 cup warm broth to the rice, and stir until the broth is absorbed. Continue adding broth, 1/2 cup at a time, stirring constantly, until the liquid is absorbed and the rice is tender, yet firm to the bite, about 15 to 20 minutes.
-
Remove from heat. Stir in reserved mushrooms and their liquid, butter, chives, and Parmesan cheese. Season with salt and pepper and serve immediately.
Gratin Dauphinois
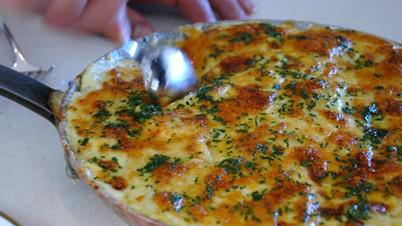
-
500 ml milk
-
250 ml cream
-
1 garlic clove, half finely sliced, half left whole
-
1 kg desiree potatoes, peeled and finely sliced
-
pinch of freshly grated nutmeg
-
140 g gruyère, grated
-
butter, for greasing
-
sea salt and freshly ground white pepper
-
chopped flat-leaf parsley, to serve
-
Bring the milk and cream to the boil in a large saucepan over medium heat. Remove from the heat and stir in the sliced garlic, followed by the potatoes, nutmeg and a handful of the grated cheese. Stir well, then return to the heat and simmer until the potatoes have started to soften.
-
Preheat the oven to 200°C. Rub the inside of a large baking dish with butter, then rub with the remaining half clove of garlic. Season the potato mixture to taste and spoon a layer into the dish. Sprinkle with some cheese and add more potatoes. Continue to layer until you have used up the potatoes, finishing with a layer of cheese. Bake in the oven for 20–30 minutes, or until golden brown and crisp on top. Sprinkle with parsley to serve.
Greek Beef Stew Kokinisto
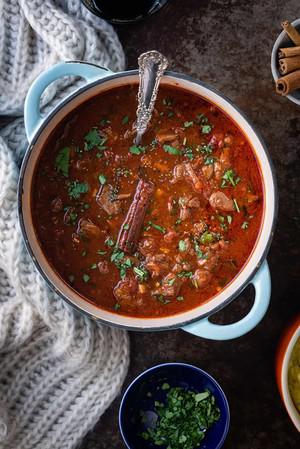
-
1.3 kg | 3 lb cubed stewing beef
-
5 shallots or 1 large onion , diced
-
1 tbsp granulated sugar , or sweetener
-
3 garlic cloves , minced
-
1 bay leaf
-
1 large cinnamon stick
-
1/4 tsp ground cloves
-
1 tsp salt
-
¼ tsp ground pepper
-
400 g | 14oz can chopped tomatoes in tomato juice
-
3-4 tbsp tomato paste
-
3 tbsp olive oil , or as needed
-
125 ml | 1/2 cup beef stock (broth)
-
125 ml | 1/2 cup red wine
-
2 tbsp flat leaf parsley , chopped
-
Brown the meat and sauté the onion and garlic then add all the ingredients to the slow cooker pot and cook for 5 hours on high or up to 7-8 hours on low.
Greek Mashed Potato & Feta Casserole
-
1 tbsp olive oil
-
1 medium onion
-
2 3/4 lbs (1 1/4 kg) potatoes
-
2 eggs
-
3/4 cup grated pecorino romano or graviera
-
¼ cup crumbled feta
-
1 tbsp dry oregano
-
¾ tsp salt
-
½ tsp freshly ground pepper
-
¼ cup chopped parsley
-
2 tbsp fresh mint chopped
-
2 tbsp olive oil
-
In a medium pan, over medium heat warm 1 tbsp olive oil. Sauté the onion until soft for about 5-7 minutes. Set aside.
-
Wash the potatoes and place them in a pot (whole with the skin on), add cold water covering the potatoes by about an inch, add a bit of salt, boil them until they can be pierced with a fork for about 20 minutes (it may take a bit longer for larger potatoes. Drain, run cold water over them and cool until you can handle them, then twist the potato and the skin comes right off. Or place the potatoes in an ice bath for a few seconds and peel.
-
Preheat oven at 400 F (200 C).
-
Mash the potatoes with a potato masher or food mill. Place mashed potatoes in a large bowl.
-
Lightly beat the eggs and add to the potatoes. Add the onion, cheese, herbs, salt and pepper. Mix well.
-
Coat the baking dish with some olive oil and empty potato mixture in the dish. Spread evenly. Make triangle shapes with a fork. *I used a 8 X 12 inch (30 X 22 cm dish).
-
Drizzle 2 tablespoons olive oil over casserole.
-
Bake in the oven until golden for about 50 minutes to an hour.
-
Let it cool for at least 30 minutes before slicing.
-
Make ahead of time: You can assemble this a day ahead and store in the refrigerator. Then all you have to do is bake it. Take it out of the refrigerator a 1/2 hour before baking it, so it reaches room temperature. Bake it at 400 F (200 C) for 50-60 minutes.
-
Storage. You can store leftovers in an airtight container in the refrigerator for 3-4 days. To freeze, cut in square pieces and wrap in plastic wrap and aluminum foil. Freeze for 4 months. You can also freeze the whole casserole in a tin pan.
-
Reheat. You can reheat individual portions at 350 F (175 C). If straight out of the freezer it may take about 40-50 minutes or you can defrost overnight and bake for about 35 minutes.
Greek Zucchini Fritters with Tzatziki Recipe
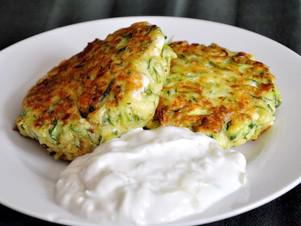
Kolokithokeftedes
-
3 cups packed, grated zucchini (from about 6 large zucchini)
-
6 tablespoons dill, chopped
-
1 bunch (about 8) scallions, white and light green parts finely chopped
-
1/2 teaspoon nutmeg
-
1 1/2 cups crumbled feta
-
4 large eggs, lightly beaten
-
1 cup flour (plus more if needed)
-
Salt and pepper
-
4 tablespoons olive oil
-
2 cups greek yogurt
-
1 clove of garlic, minced
-
1/2 cup grated, peeled cucumber
-
1 teaspoon red wine vinegar or lemon juice
-
1 tablespoon extra virgin olive oil
-
Salt and pepper
-
Make Tzatziki: Squeeze excess moisture from cucumber. In a small bowl, mix yogurt, garlic, cucumber and vinegar or lemon juice. Stir in olive oil. Add salt and pepper to taste.
-
Make Fritters: Lay out a layer of paper towels and spread out grated zucchini. Sprinkle zucchini with salt and let sit for at least thirty minutes and up to an hour. Squeeze out all excess moisture from zucchini.
-
Put drained zucchini in a large bowl with dill, scallions, nutmeg, and feta. Mix to combine. Stir in eggs. Season with salt and pepper. Stir in flour until dough comes together, adding slightly more flour if dough is too wet to form patties. Form dough into 3-4 inch patties.
-
Heat olive oil in a large skillet over medium high heat. Fry patties until golden brown on both sides and cooked through but still moist, about 2-3 minutes per side. Serve hot with tzatziki alongside.
Greek-Style Lamb, Spinach and Feta Pie
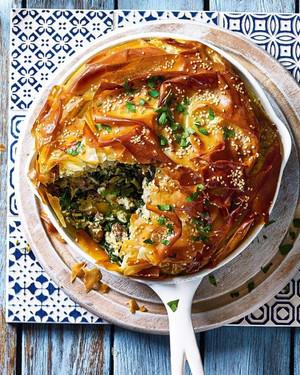
-
500g lamb neck fillet
-
1 large red onion, roughly sliced
-
3 fat garlic cloves, roughly chopped
-
Olive oil for drizzling
-
500g cooked basmati rice (or, as a timesaver, use 2 x 250g packs Tilda ready-cooked basmati rice pouches)
-
500g spinach
-
Bunch spring onions, chopped
-
20g fresh dill, chopped, plus extra to serve
-
Large bunch fresh flatleaf parsley, chopped, plus extra to serve
-
1 tsp ground allspice
-
1 tsp ground coriander
-
1 tsp ground cumin
-
200g feta, crumbled
-
3 large free-range eggs, beaten
-
Finely grated zest 1 lemon, juice ½
-
3cm piece fresh ginger, grated
-
7 filo pastry sheets (we used Jus-Rol)
-
100g butter, melted
-
2 tbsp sesame seeds to sprinkle
-
Baking dish in which the lamb fits snugly
-
23cm ovenproof frying pan, brushed liberally with butter
-
Heat the oven to 200°C/180°C fan/gas 6. Put the lamb neck fillet in the baking dish with the red onion and garlic, season well with salt and pepper, then drizzle with olive oil. Roast for 45 minutes, then set aside to cool.
-
Once cooled, chop the lamb into rough 2cm chunks and put in a large mixing bowl. Roughly chop the cooled onion, then add it to the lamb, along with the chopped garlic and cooked rice.
-
Wilt the spinach in its bag in the microwave on high for a few minutes (or wilt spinach in batches in a large pan – add a few drops of water, cover and put over a medium heat for 2-3 minutes). Tip into a colander, then use a wooden spoon to press out as much liquid as possible from the spinach. Put the drained spinach in a clean J-cloth or tea towel, then squeeze out as much water as you can. Roughly chop the spinach, then add to the bowl. Add the rest of the ingredients (except the filo, butter and sesame seeds) to the bowl and mix until well combined.
-
Unroll the filo pastry on a clean work surface and brush one sheet at
a time with the melted butter (keep the remaining pastry covered with
cling film or a slightly damp tea towel). Layer 5 sheets in the base of the buttered ovenproof frying pan, allowing the sheets to overhang the edge of the pan, giving the pan a quarter-turn as you work so the sheets overlap slightly. Push each new sheet into the sides of the pan. Reserve the remaining 2 sheets of filo for the top.
-
Spoon in the lamb/rice/spinach mixture, then fold the edges of the pastry into the middle to encase the filling. Brush the remaining 2 filo sheets with butter, scrunch them up and lay on top of the pie to cover any gaps. Brush over any remaining melted butter and scatter over the sesame seeds.
-
Bake for 40 minutes until golden brown and crisp. Leave to cool in the pan for 10 minutes, then scatter over the extra chopped herbs and serve.
-
delicious. tips
-
Look out for spinach sold in microwaveable packs. Pierce the top of the bag, then microwave according to the pack instructions – it saves washing up another pan.
-
We love the rich, meaty addition of roast lamb but you could omit it and add another pack of crumbled feta and some roasted red peppers to make the pie vegetarian.
-
Complete the pie up to 2 days ahead, then leave to cool, wrap well in cling film or put in an airtight container and keep in the fridge. Reheat in a hot oven to serve.
Green Tomato Cake
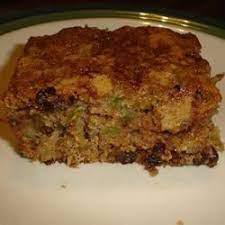
-
4 cups chopped green tomatoes
-
1T salt
-
2 eggs
-
½ butter
-
2 cups flour
-
2 cups white sugar
-
1t cinnamon
-
1t nutmeg
-
1t baking soda
-
¼t salt
-
½ cup chopped walnuts
-
Preheat oven to 180°C.
-
Place chopped tomatoes in a bowl and sprinkle with 1T salt.
-
Let it stand for 10 minutes.
-
Rinse in a colander with cold water and drain.
-
Cream butter, sugar and eggs.
-
Add flour, cinnamon, nutmeg, soda and ¼t salt and mix well - it will be a stiff dough.
-
Add tomatoes and mix through.
-
Bake for 45-65 minutes.
-
Options: Can add nuts, raisons or oatmeal cake top.
Haggis - Easy
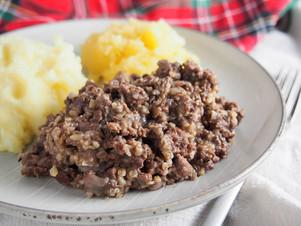
-
200 g sheep's liver
-
100 g beef suet
-
2 large onions
-
100 g toasted oatmeal salt and white pepper
-
Boil the liver in a pan filled with water for around 40 minutes.
-
Retain this water once the liver is cooked and remove the liver from the pan.
-
Mince the liver finely.
-
Cook the onions on a low heat in a frying pan with a little of the suet. Don't brown the onions, but cook then till they are soft. Chop them finely with the rest of the suet.
-
Toast the oatmeal in a frying pan.
-
Combine all the ingredients in a bowl and season with the salt and pepper. Fine black pepper powder will give a more authentic taste than freshly ground black pepper.
-
Moisten the mixture using the liquid in which the liver was cooked.
-
Press the mixture lightly into a pudding basin, cover the top with aluminium foil, pleated once to allow expansion and tied in place, and place in a large pot, one third full of water, and boil for 2 hours.
-
Serve with mashed potato and mashed turnip and butter, or with clapshot.
Ham
-
Fresh pork roast
-
Curing salt #1 - 1 teaspoon per 2 1/5kg
-
5 litres of water
-
1 1/2 cups salt
-
1 1/2 Brown sugar
-
1/2 Molasses
-
2 T Allspice berries
-
Cure in fridge with a plate on top of meat for 1 day per kilogram - I reckon longer
-
Soak wood chips for 2 hours and then drain.
-
Cook in smoker at 165°C for 2 hours or internal temperature is 65°C.
Ham and Cheese Buttermilk Biscuits
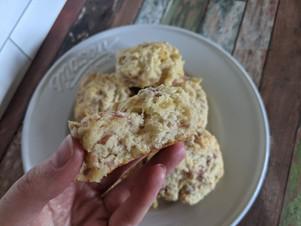
-
2 cups all-purpose flour
-
4 teaspoons baking powder
-
1 teaspoon salt
-
¼ teaspoon baking soda
-
¼ teaspoon garlic powder
-
⅓ cup cold butter
-
⅔ cup shredded pepper Jack cheese
-
⅔ cup finely diced ham
-
1 cup buttermilk, or more as needed
-
Preheat the oven to 400 degrees F (200 degrees C).
-
Combine flour, baking powder, salt, baking soda, and garlic powder in a bowl. Whisk to combine.
-
Dice the cold butter up into chunks, and cut it into the dry mixture with your fingers, a fork, or a pastry cutter, until the mixture resembles coarse sand, and butter is well blended in. Stir in cheese and ham, gently stirring to evenly coat all the cheese and ham pieces with the flour mixture.
-
Use a fork and stir in 1 cup buttermilk. If the mixture is still dry, add a little more liquid at a time until the dough just comes together (it should be a little bit sticky, but not "wet").
-
Shape dough into a ball by hand, handling the dough gently. Then pat the dough out on a lightly floured surface to 1/2- to 3/4-inch thickness. Use a small biscuit cutter to cut 12 to 15 biscuits out, and arrange them on a baking sheet with sides just barely touching.
-
Bake in the preheated oven until just golden brown around the edges/tops/bottoms and cooked through in the center, 12 to 15 minutes.
-
Cool briefly on the baking sheet before moving to a platter or cooling rack. Best served warm!
Harissa
-
4 long fresh red chillies
-
2 garlic cloves, crushed
-
1 teaspoon salt
-
1 teaspoon ground cumin
-
1 teaspoon ground coriander
-
1 tablespoon olive oil
-
Halve chillies. Remove the seeds and discard. Finely chop the chilli.
-
Combine the chilli, garlic, salt, cumin, coriander, olive oil in a mortar and use a pestle to pound until a smooth paste forms.
Hollandaise sauce
-
3 egg yolks , from large eggs
-
1/4 tsp cayenne pepper or white pepper
-
1/4 tsp salt, or
-
1 1/2 tbsp lemon juice , plus more to taste
-
1 1/2 tbsp water
-
175 g/ 1 1/2 sticks unsalted butter
-
Place egg yolks in a tall narrow container that the blender stick fits in all the way to the base.
-
Add water, lemon juice, cayanne pepper and salt. Blitz briefly to combine.
-
Melt butter in a heatproof jug until hot (be very careful to ensure it doesn't explode if using microwave!). If you use a stove, pour into a jug.
-
Let butter stand for just 15 seconds or so until the milky whites settles at the bottom of the jug. (Note 2)
-
With the blender stick going on high, slowly pour the butter in a thin stream into the eggs over around 45 seconds. Leave behind most of the milky whites in the butter – about 1 1/2 tbsp. (Note 2) Once all the butter is in, the sauce should be thick, creamy, smooth and pale yellow.
-
Now blitz for a further 10 seconds, moving the stick up and down.
-
Thickness: If too thick, mix in warm tap water 1 teaspoon at a time.
-
Salt adjustment: Add a touch of extra salt if using for something non salty like asparagus, leave salt as is if pairing with salty foods like Eggs Benedict, steak, fish.
-
Lemon adjustment: Make it slightly more tangy that you want if using for something like Eggs Benedict, steak or salmon (because it's diluted when you eat it, and also balances the rich food). But make it perfectly lemony to your taste if using for something like Asparagus.
-
Using: Use immediately, or keep warm until required – if covered and wrapped in a tea towel, it will stay warm for 15 minutes. Use warm or at room temperature. Use warm tap water for loosening. See note for storing and reheating.
Homemade Apple Butter Recipe {Hints for an Easy Slow Cooker Recipe}
-
6 1/2 pounds apples peeled, cored and sliced
-
1/2 cup granulated sugar
-
1/2 cup packed brown sugar
-
1 1/2 tablespoons ground cinnamon
-
1/4 teaspoon salt
-
1 tablespoon vanilla extract
-
Place the apples in a slow cooker.
-
Add the sugars, cinnamon, salt and vanilla to the crockpot. Mix well.
-
Cook in slow cooker on low for about 10 hours, stirring every couple hours. The apple butter should be thick and dark brown.
-
If desired, use a blender to puree the apple butter until smooth.
-
Cover and refrigerate for up to two weeks or freeze in small containers.
-
Adjust the sugar to your liking!
Homemade Bbq Sauce
-
1x
-
2x
-
3x
-
2 cups ketchup
-
1/2 cup apple cider vinegar
-
1/4 cup packed brown sugar
-
2 tablespoons honey
-
1 tablespoon Worcestershire sauce or coconut aminos
-
1 tablespoon lemon juice
-
1 teaspoon Stone House Seasoning
-
1/4 teaspoon hot sauce optional
-
Whisk together all ingredients in a medium saucepan situated over medium heat. Allow to come to a bubble and then reduce the heat to low. Allow to simmer until thickened, about 10 minutes.
-
Serve immediately or allow to cool slightly and store in an airtight container in the refrigerator for up to a week.
Homemade Fruit Kvass

-
Quart size mason jars
-
1.5 to 2 cups mixed berries (blueberries, raspberries, blackberries)
-
1 tbsp raw honey
-
1/2 tsp sea salt (use less if you have culture starter)
-
4 c purified water (40mls)
-
Half a lime, sliced
-
4 mint leaves
-
Optional but recommended for quick fermentation–> 1/4 c or less kombucha or brine from previous fermented source (i.e or kefir water). You can also use a whey, probiotic, or culture starter. ( Culture started, Source and tips)
-
Clean and sterilize your mason jars.
-
Divide your ingredients into 2 quart size mason jars, or one larger mason jar. Add mint leaves last, 2 in each Jar.
-
Cover with purified water and shake it up to mix the honey, mint, and berries together.
-
Seal jar with lid let it sit on the counter for 2-7 days. I let it sit for 5 days.
-
When you start to see bubbles (usually after 1 day) release the lid and let a little air out so it won’t get over carbonated. If you don’t see any bubbles, just keep it sealed until the 2nd day.
-
When your fruit looks cooked and your brew is bubbly, open lid and strain out the fruit. Place liquid in a seal proof bottle. This is your kvass.
-
Leave the fruit kvass liquid sealed in an airtight bottle on the counter for another 1-3 days to build up more carbonation, or just feel free to go ahead and keep in fridge.
-
Add more mint leaves and/or berries before serving, if desired. it in the fridge and enjoy!
-
The longer it ferments, the less sweet it gets. Taste kvass after 2-3 days on counter.
-
If you are using a culture starter, you cut the salt in half or not use at all.
Homemade Slime

-
1 teaspoon borax powder
-
1 1/2 C water divided
-
4 oz 1/2 C Elmer's glue, clear or white
-
food coloring
-
Add borax powder to 1 cup of water and stir to dissolve. Set aside. Pour glue into a medium mixing bowl and add 1/2 C water. Add a few drops of food coloring until desired color is reached and then stir to mix glue solution until smooth.
-
Pour the borax mixture into the glue mixture and watch the solids start to form. Stir for a few moments and then use your hands to gather the mass. The mixture will be very soft and wet.
-
Keep kneading until it firms up and feels dry. Discard excess liquid in bowl. The more you knead and play with the slime the firmer it will become. Store in a ziplock bag or air tight container and the slime will keep indefinitely.
-
Note: that this is not a recipe for human consumption. It is for play purposes only. Make sure to supervise young children.
Homemade Strawberry Cake
-
2 and 1/2 cups (250g) sifted cake flour ( spoon & leveled)*
-
2 teaspoons baking powder
-
1/2 teaspoon baking soda
-
1 teaspoon salt
-
3/4 cup ( 1.5 sticks; 170g) unsalted butter, softened to room temperature
-
1 and 3/4 cups (350g) granulated sugar
-
5 large egg whites, at room temperature
-
1/3 cup (75g) sour cream or plain yogurt, at room temperature
-
2 teaspoons pure vanilla extract
-
1/2 cup (120ml) whole milk, at room temperature*
-
1/2 cup reduced strawberry puree (see note)*
-
optional: 1-2 drops red or pink food coloring
-
1 cup (10-12g) freeze-dried strawberries*
-
one 8-ounce block full-fat cream cheese, softened to room temperature
-
1/2 cup ( 1 stick; 115g) unsalted butter, softened to room temperature
-
3 cups (360g) confectioners’ sugar
-
1– 2 Tablespoons milk
-
1 teaspoon pure vanilla extract
-
salt, to taste
-
Make the reduced strawberry puree and allow it to cool completely. See note.
-
Preheat the oven to 350°F (177°C). Grease and lightly flour two 9-inch cake pans.
-
Whisk the cake flour, baking powder, baking soda, and salt together. Set aside.
-
Using a handheld or stand mixer fitted with a whisk attachment, beat the butter and sugar together on high speed until smooth and creamed, about 2 minutes. Scrape down the sides and up the bottom of the bowl with a rubber spatula as needed. Beat in the egg whites on high speed until combined, about 2 minutes. Then beat in the sour cream and vanilla extract. Scrape down the sides and up the bottom of the bowl as needed. With the mixer on low speed, add the dry ingredients until just incorporated. With the mixer still running on low, slowly pour in the milk *just* until combined. Do not overmix. Whisk in 1/2 cup of reduced strawberry puree, making sure there are no lumps at the bottom of the bowl. The batter will be slightly thick. Stir in food coloring, if desired. (I use 1 small drop.)
-
Pour batter evenly into cake pans. Bake for around 24-25 minutes or until the cakes are baked through. To test for doneness, insert a toothpick into the center of the cake. If it comes out clean, it is done. Allow cakes to cool completely in the pans set on a wire rack. The cakes must be completely cool before frosting and assembling.
-
Make the frosting: Using a blender or food processor, process the freeze-dried strawberries into a powdery crumb. You should have around 1/2 cup crumbs. Set aside. In a large bowl using a hand-held or stand mixer fitted with a paddle or whisk attachment, beat the cream cheese for 1 minute on high speed until completely smooth and creamy. Beat in the butter until combined. Add the confectioners’ sugar, strawberry powder, 1 Tablespoon milk, and vanilla and beat on medium-high speed until combined and creamy. Add 1 more Tablespoon of milk to slightly thin out, if desired. Taste, then add a pinch of salt if needed. Yields about 3 cups of frosting.
-
Assemble and frost: First, using a large serrated knife, slice a thin layer off the tops of the cakes to create a flat surface. Discard (or crumble over ice cream!). Place 1 cake layer on your cake stand or serving plate. Evenly cover the top with frosting. Top with 2nd layer and spread the remaining frosting all over the top and sides. Refrigerate for at least 45 minutes before slicing. This helps the cake keep its shape when cutting– it could slightly fall apart without time in the fridge.
-
Cover leftover cake tightly and store in the refrigerator for 5 days.
-
Make Ahead Instructions: The cake layers can be baked, cooled, and covered tightly at room temperature overnight. Likewise, the frosting can be prepared then covered and refrigerated overnight. Light it sit at room temperature to slightly soften for 10 minutes before assembling and frosting. Frosted cake or unfrosted cake layers can be frozen up to 2 months-3. Thaw overnight in the refrigerator and bring to room temperature before decorating/serving.
-
Special Tools: KitchenAid Stand Mixer | Ninja Food Processor | Measuring Cups | Egg Separator | Glass Mixing Bowls | 9-inch Cake Pans | Marble Cake Stand | Eat Dessert First Fork
-
Cake Flour: I strongly suggest using cake flour in this recipe. It’s sold right next to the all-purpose flour in the baking aisle. And you use it a lot in my recipes! In a pinch, you can use this homemade cake flour substitute.
-
Whole Milk: If needed, buttermilk works in its place. Do not substitute a lower fat milk.
-
Where to Buy Freeze-Dried Strawberries? I always find them in my regular grocery store in the dried fruit aisle. Wegmans, Giant, Trader Joe’s and Target carries them. Keep your eyes peeled– they’re more commonly found that you think! Do not use the chewy/gummy dried strawberries. You need FREEZE-dried strawberries which grind into a powder. If you can’t find them anywhere, just leave them out of the frosting and add another 1/2 cup of confectioners’ sugar.
-
Reduced Strawberry Puree: puree 1 lb of strawberries. You should have a little over 1 cup. Stirring occasionally, simmer the puree over low-medium heat for 25-30 minutes until you’re left with 1/2 cup or a little over 1/2 cup Allow to cool completely before using in cake batter. I always make the reduced puree the day before so it has plenty of time to cool down. I cover and place in the refrigerator overnight. Use 1/2 cup in the cake. Discard any leftovers or spoon on ice cream/yogurt/add to smoothie. Yum! You can use frozen strawberries, but they will take longer to reduce even if you thaw them first.
-
9×13 Cake: Simply pour the batter into a greased and lightly floured 9×13 pan and bake for 40 minutes or until a toothpick inserted in the center comes out clean.
-
Cupcakes: Fill cupcake pans 2/3 full with batter. Bake for 20-22 minutes. Makes 2 and 1/2 dozen cupcakes. For 14-15 cupcakes, follow my strawberry cupcakes recipe, which is adapted from this strawberry cake.
Homemade Worcestershire Sauce
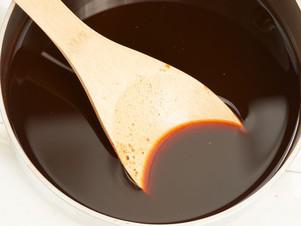
-
½ cup apple cider vinegar
-
2 tablespoons water
-
2 tablespoons soy sauce
-
1 tablespoon brown sugar
-
1 teaspoon mustard powder
-
¼ teaspoon onion powder
-
¼ teaspoon garlic powder
-
¼ teaspoon ground cinnamon
-
ground black pepper to taste
-
Combine apple cider vinegar, water, soy sauce, brown sugar, mustard powder, onion powder, garlic powder, ground cinnamon, and black pepper together in a saucepan over medium heat. Bring to a boil, then reduce heat and simmer until fragrant, about 45 seconds.
-
Cool to room temperature before serving.
Hommus
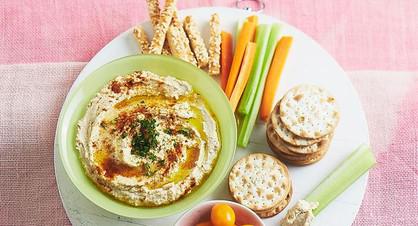
-
400g can chickpeas, drained and rinsed
-
1/3 cup tahini
-
2 tablespoons lemon juice
-
2 cloves garlic, chopped
-
1/2 teaspoon ground cumin
-
Place all ingredients into the bowl of a food processor along with 2 tablespoon olive oil and a pinch of sea salt and pepper. Process until mostly smooth.
-
With the motor running, slowly pour in up to 2 tablespoons water until you reach your desired consistency, adding extra water if required.
-
Spoon hommus into a bowl if serving immediately or place into an airtight container and refrigerate for up to 3 days. Garnish top with olive oil, chopped parsley and a sprinkle of paprika.
Honey Loaf
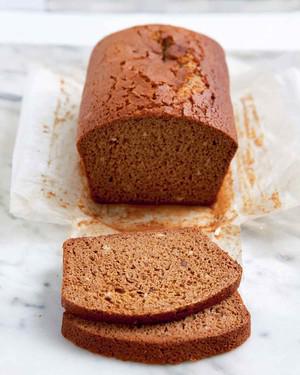
-
1 cup milk
-
1/2 cup raw sugar
-
1/3 cup honey
-
2 1/4 cups SR flour
-
Place 1/2 the milk in a saucepan with sugar and honey.
-
Sift flour into bowl.
-
Add warmed milk and blend thoroughly.
-
Stir in remaining milk.
-
Pour into a greased loaf tin.
-
Bake 1 hour 180°C.
-
Serve hot with butter.
Hot Cross Buns

Tags:
Bread
-
4 cups plain flour
-
2 x 7g sachets dried yeast
-
1/4 cup caster sugar
-
1 1/2 teaspoons mixed spice
-
pinch of salt
-
1 1/2 cups currants
-
40 g butter
-
300 ml milk
-
2 eggs, lightly beaten
-
1/2 cup plain flour
-
4 to 5 tablespoons water
-
1/3 cup water
-
2 tablespoons caster sugar
-
Combine flour, yeast, sugar, mixed spice, salt and currants in a large bowl. Melt butter in a small saucepan over medium heat. Add milk. Heat for 1 minute, or until lukewarm. Add warm milk mixture and eggs to currant mixture. Use a flat-bladed knife to mix until dough almost comes together. Use clean hands to finish mixing to form a soft dough.
-
Turn dough out onto a floured surface. Knead for 10 minutes, or until dough is smooth. Place into a lightly oiled bowl. Cover with plastic wrap. Set aside in a warm, draught-free place for 1 to 1 1/2 hours, or until dough doubles in size.
-
Line a large baking tray with non-stick baking paper. Punch dough down to its original size. Knead for 30 seconds on a lightly floured surface until smooth. Divide into 12 even portions. Shape each portion into a ball. Place balls onto lined tray, about 1cm apart. Cover with plastic wrap. Set aside in a warm, draught-free place for 30 minutes, or until buns double in size. Preheat oven to 190°C or 170˚C fan-force.
-
Make flour paste: Mix flour and water together in a small bowl until smooth, adding a little more water if paste is too thick. Spoon into a small snap-lock bag. Snip off 1 corner of bag. Pipe flour paste over tops of buns to form crosses. Bake for 20 to 25 minutes, or until buns are cooked through.
-
Make glaze: Place water and sugar into a small saucepan over low heat. Stir until sugar dissolves. Bring to the boil. Boil for 3-4 minutes. Brush warm glaze over warm hot cross buns. Serve warm or at room temperature.
How to Cook a Goat Shoulder
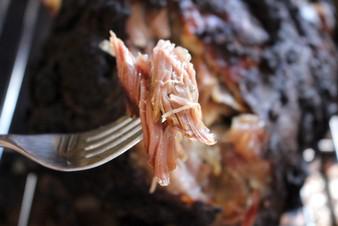
-
1 goat shoulder (3 1/2 to 4 lbs)
-
2 tbsp preserved lemon, minced (or lemon zest)
-
2 tbsp Baharat spice mix (see note)
-
2 tsp salt
-
2 tsp garlic powder
-
Make a paste by mixing the spices with the preserved lemon (or a dry rub without the preserved lemon). Rub the shoulder refrigerate for 12 to 24 hours to allow the rub to season the meat.
-
Place the goat shoulder on a wire rack above a roasting pan with a bit of water at the bottom. Roast the goat shoulder at 325 degrees for about 4 hours, until the meat is fork tender.
-
2 tsp allspice
-
2 tsp cumin
-
1 tsp pepper
-
1/2 tsp cinnamon
-
1/4 tsp nutmeg
-
1/4 tsp cardamom
-
1 pinch cloves
-
Preserved lemon
-
Make a paste and rub into goat
How to Cook and Eat an Artichoke

-
1 or more large globe artichokes
-
1-2 cloves garlic, cut in half (can leave skin on)
-
1 bay leaf
-
1 slice lemon
-
If the artichokes have little thorns on the ends of their leaves, take kitchen scissors and cut off the tips. This step is mostly for aesthetics as the thorns soften with cooking and pose no threat to the person eating the artichoke. But snipping them off will make the artichokes easier to handle.
-
Slice about 3/4 inch to an inch off the tip of the artichoke. A serrated bread knife works great for this.
-
Pull off any smaller leaves towards the base and on the stem.
-
Cut off excess stem, leaving up to an inch on the artichoke. The stems can be more bitter than the rest of the artichoke, but some people like to eat them. The inner cores of the stems taste like the heart.
Alternatively, you can leave the whole long stem on the artichoke, just cut off the very end of the stem, and peel the tough outside layer of the stem with a vegetable peeler.
-
Rinse the artichokes in running cold water. While you rinse them, open up the leaves a little so that the water gets inside more easily. (This is where it helps to have cut off the thorny tips, it makes the artichoke easier to open without getting poked!)
-
In a large pot, put a couple inches of water, the garlic, a slice of lemon, and a bay leaf (this adds wonderful flavor to the artichokes). Insert a steaming basket.
-
Place artichokes on top of the steaming basket. Cover the pot. Bring to a boil and reduce heat to simmer.
Cook for 25 to 35 minutes or longer, until the outer leaves can easily be pulled off. Note you may need to add more water to the pot if the level drops too low, so keep an eye on it.
Note: artichokes can also be cooked in a pressure cooker (about 5-15 minutes at high pressure). Cooking time depends on how large the artichokes are. The larger, the longer they take to cook.
-
Artichokes may be eaten cold or hot, but I think they are much better hot. They are served with a dip, either melted butter or mayonnaise. My favorite dip is mayo with a little bit of balsamic vinegar mixed in.
-
Pull off the outer leaves, one at a time. Dip the white fleshy end in melted butter, a vinaigrette, or sauce.
-
Tightly grip the other end of the petal. Place in mouth, dip side down, and pull through teeth to remove soft, pulpy, delicious portion of the petal. (Why dip-side down? Your tongue is where most of your taste buds are, so you'll get a fuller flavor if you strip the leaves that way.) Discard remaining petal.
Continue until all of the petals are removed.
When you get to the tender inner leaves with the purple tips, you can remove them all at once. Dip and eat just the light colored parts of these leaves.
-
With a knife or spoon, scrape out and discard the inedible fuzzy part (called the "choke") covering the artichoke heart.
-
Underneath the artichoke choke is the heart. Cut the heart into pieces and dip into melted butter, a vinaigrette, or a sauce to eat.
My favorite artichoke dipping sauce? Some mayonnaise with a little balsamic vinegar stirred in.
How to Make Taco Seasoning Mix
-
6 tbsp chili powder
-
2 tbsp cumin
-
2 tbsp garlic powder
-
2 tbsp paprika
-
1 tbsp dried oregano
-
1 tbsp onion powder
-
2 tsp salt
-
2 tsp pepper
-
2 tsp crushed red pepper flakes
-
Measure all ingredients into a small bowl, stir to mix evenly and store in an airtight jar.
-
Calorie count is per tablespoon.
How to Roast Pork

-
One of the most important things to remember, is to get the rind as dry as possible before the cooking process.
-
Remove your roast from the packaging and pat dry with paper towel. With a small sharp knife, deeply score the rind at 1cm intervals, being careful to not cut into the meat. If time allows, leave the scored roast uncovered in the fridge for 1 hour, or ideally overnight. This process further dries the rind and aids the crackling process.
-
When you’re ready to cook, put your pork on a wire rack in the sink and pour a jug of boiling water over the rind. Pat dry thoroughly with paper towel.
-
Rub the roast with 1 tablespoon of vegetable oil and half a tablespoon of salt (more if you like salty crackling), making sure the oil and salt penetrate the scores.
-
Place the roast on a wire rack inside a baking tray and cook at 240°C (max 250°C conventional) until the rind just starts to crackle, up to 50 minutes. If the roast is over 2kg, take 10 minutes off this initial crackling time.
-
Turn the oven down to 180°C and cook for 30-35 minutes per kg, depending on how well you like your roast cooked.
-
Once cooked, let the roast rest for 10 minutes before slicing.
-
Note: to achieve great crackling, getting the oven temperature correct is critical. We recommend the use of an “oven thermometer” to verify that the stated oven temperature is accurate.
-
Preheat oven to 180°C
-
Gently sear roast in a hot pan
-
Place in oven and cook for 45 minutes per kg to finish
-
Rest for 5-10 minutes and enjoy!
Hungarian Goulash
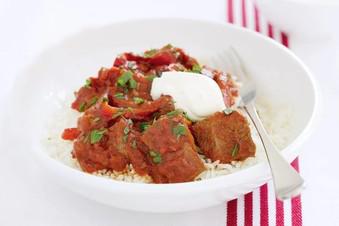
-
20g butter
-
1 tablespoon olive oil
-
700g beef skirt steak, cut into 5cm pieces
-
2 medium brown onions, halved, sliced
-
1 garlic clove, crushed
-
2 tablespoons sweet paprika
-
2 large red capsicums, sliced
-
2 tablespoons tomato paste
-
425g can diced tomatoes
-
1/2 cup Massel beef stock
-
2 dried bay leaves
-
2 tablespoons chopped fresh flat-leaf parsley leaves
-
Steamed white rice, to serve
-
Sour cream, to serve
-
Place butter and oil in a large, heavy-based saucepan.
-
Heat over medium-high heat until butter has melted.
-
Add half the beef.
-
Cook, stirring occasionally, for 4 to 5 minutes or until browned.
-
Using a slotted spoon, transfer beef to a heatproof bowl. Repeat with remaining beef.
-
Reduce heat to medium.
-
Add onion to pan.
-
Cook, stirring occasionally, for 10 minutes or until tender.
-
Return beef and any juices to pan.
-
Add garlic and paprika.
-
Cook, stirring, for 1 minute or until fragrant.
-
Add capsicum, tomato paste, tomato, stock and bay leaves.
-
Bring to the boil. Reduce heat to low.
-
Cook, covered, stirring occasionally, for 2 hours or until beef is tender.
-
Remove and discard bay leaves.
-
Sprinkle with parsley.
-
Divide rice between bowls.
-
Top with goulash and a dollop of sour cream. Serve.
Impossible Pumpkin Pie
-
¾ cup white sugar
-
3 tablespoons butter, softened
-
2 eggs, beaten
-
1 (15 ounce) can pumpkin puree
-
1 (12 fluid ounce) can evaporated milk
-
2 teaspoons vanilla extract
-
½ cup all-purpose flour
-
¾ teaspoon baking powder
-
⅛ teaspoon salt
-
1 teaspoon ground cinnamon
-
1 teaspoon ground allspice
-
½ teaspoon ground ginger
-
½ teaspoon ground nutmeg
-
Preheat oven to 350 degrees F (175 degrees C). Grease one 9-inch pie pan, and set aside.
-
Sift together the flour, baking powder, salt, cinnamon, allspice, ginger and nutmeg.
-
In a large bowl, beat together the sugar, butter and eggs. Mix in the pumpkin, milk and vanilla. Add the sifted ingredients, and beat until smooth. Pour into the prepared pan.
-
Bake at 350 degrees F (175 degrees C) for 50 to 55 minutes, or until a toothpick inserted in center comes out clean.
Indian Beef Stir Fry

-
450 gm beef steak
-
2 clove garlic
-
1 1/2 cup mushroom
-
1 teaspoon sugar
-
2 tablespoon lime juice
-
40 ml virgin olive oil
-
2 pinches powdered black pepper
-
3 green chilli
-
4 spring onions
-
1/2 cup capsicum (green pepper)
-
1/2 cup American corn kernels
-
20 ml soy sauce
-
4 pinches salt
-
To prepare this amazingly delicious appetizer cum main dish recipe, wash the mushroom and capsicum, and thinly slice them. Take the beef and slice it too in a bowl. Next, chop the green chilli, spring onion and garlic in another bowl. Now, take the beef bowl and sprinkle salt and pepper on it. Let it marinate for about 15 to 30 minutes.
-
On the other hand, take a bowl and mix together lime juice, green chilies, sugar and soy sauce. Then, evenly coat the beef with this mixture.
-
Put a pan over medium flame and heat some oil in it. When the oil is hot enough, add the marinated beef slices in it and stir fry them. Make sure you stir in between and cook for 3 to 5 minutes. Transfer the cooked beef in a bowl and put the same pan back on medium flame.
-
After the liquid remaining in the pan has thickened, add spring onions, garlic and cook them by stirring from time to time.
-
Next, it is time to add the mushrooms, cook them for 2 minutes. After that add American corns along with capsicum and cook again for 2 minutes. Finally, add the stir-fried beef and cook for about 2-3 minutes. Your Beef Stir fry is ready to be served. Enjoy!
Indian Butter Chicken

-
6 tablespoons butter, divided
-
2 lbs boneless/skinless chicken thighs, cut into 1” chunks
-
1 yellow onion, diced
-
3 garlic cloves, minced
-
1 Tbsp garam masala
-
1 Tbsp fresh grated ginger
-
1 tsp chili powder
-
1 tsp ground cumin
-
1/2 tsp cayenne pepper
-
1 1/2 cups tomato sauce**** (or one 14 oz can would work)
-
2 cups cream*
-
salt & pepper
-
lime & cilantro, for garnish
-
naan & rice for serving
-
Using 2 Tbsp of butter in a large skillet over medium-high heat, brown the pieces of the chicken so each side is browned. They do not need to be fully cooked all the way through. Work in batches, and set aside when you’re done.
-
Melt another 2 Tbsp of butter in the pan over medium heat. Add the onion, and cook until beginning to soften — about three minutes. Add the garlic, garam masala, ginger, chili powder, cumin, and cayenne. Stir to combine, and cook for about 45 seconds before adding the tomato sauce.
-
Bring the mixture to a simmer and let cook for five minutes before adding the cream. Bring the mixture back to a simmer, add the browned chicken, and let simmer for 10-15 minutes. Keep the heat low here — not a rolling boil.
-
Stir in the remaining 2 Tbsp of butter, and season with salt and pepper, to taste.
-
Serve garnished with lime and cilantro, alongside rice and naan.
-
I used 1 cup HEAVY cream, and 1 cup water. You could use table cream, or sub 1 cup for milk (but be careful for curdling if you lessen the fat content!).
-
*** There have been MANY questions about tomato sauce. If you aren’t in the USA, you probably call it something else (maybe passata?). This is not ketchup. I used something very very similar to this product.
Indian Oven-Baked Flat Bread
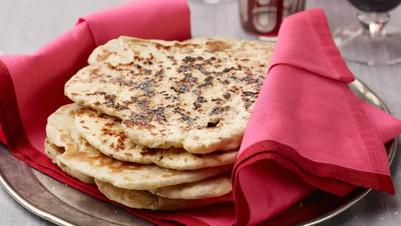
Tags:
Bread
-
1 teaspoon active dry yeast
-
2 teaspoons sugar
-
2 cups all-purpose flour, plus more for rolling, see Cook's Note*
-
1 teaspoon fine sea salt
-
1/8 teaspoon baking powder
-
3 tablespoons plain yogurt
-
2 tablespoons extra-virgin olive oil
-
1 teaspoon kalonji (nigella seeds), optional, see Cook's Note**
-
1 teaspoon fennel seeds, optional, see Cook's Note**
-
Melted butter for slathering on the finished naans
-
Coarse sea salt for sprinkling
-
In a large glass, dissolve the dry yeast and 1 teaspoon sugar with 3/4 cup warm water (about 100 degrees F). Let it sit on your counter until it's frothy, about 10 minutes.
-
Meanwhile, sift the flour, salt, remaining 1 teaspoon of sugar and baking powder into a large, deep bowl.
-
Once the yeast is frothy, add the yogurt and the olive oil into the glass, and stir to combine. Pour the yogurt mixture into the dry ingredients and add the kalonji and fennel seeds, if using, and gently mix the ingredients together with a fork. When the dough is about to come together, use your hands to mix. It will feel like there isn't enough flour at first, but keep going until it transforms into a soft, slightly sticky and pliable dough. As soon as it comes together, stop kneading. Cover the dough with plastic wrap or a damp tea towel and let it sit in a warm, draft-free place for 2 to 4 hours.
-
When you're ready to roll, make sure you have two bowls on your counter: one with extra flour in it, and one with water. The dough will be extremely soft and sticky-this is good! Separate the dough into 6 equal portions and lightly roll each one in the bowl of extra flour to keep them from sticking to each other.
-
Shape the naan. Using a rolling pin, roll each piece of dough into a teardrop shape, narrower at the top than at the bottom. It should be 8 to 9-inches long, 4-inches wide at its widest point and about 1/4-inch thick. Once you've formed the general shape, you can also pick it up by one end and wiggle it; the dough's own weight will stretch it out a little. Repeat this method with the rest of the dough. (If you're making the gluten-free version, you'll have better luck pressing the dough out with your fingertips, than rolling.)
-
Warm a large cast-iron skillet over high heat until it's nearly smoking. Make sure you have a lid large enough to fit the skillet and have a bowl of melted butter at the ready.
-
Dampen your hands in the bowl of water and pick up one of your naans, flip-flopping it from one hand to the other to lightly dampen it. Gently lay it in the skillet and set your timer for 1 minute. The dough should start to bubble.
-
After about 1 minute, flip the naan. It should be blistered and somewhat blackened, don't worry - that's typical of traditional naan! Cover the skillet with the lid and cook 30 seconds to 1 minute more.
-
Remove the naan from the skillet, brush with a bit of butter and sprinkle with a little coarse sea salt. Place the naan in a tea towel-lined dish. Repeat with the rest of the naans and serve.
Indian Spiced Greens
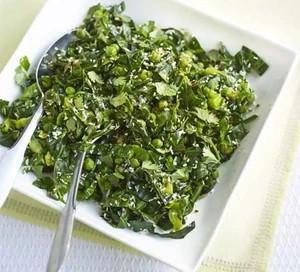
-
1 tbsp vegetable oil
-
1 tsp cumin seed
-
½ tsp mustard seed
-
4 green chillies , finely chopped
-
large piece fresh root ginger , grated
-
½ tsp turmeric
-
500g shredded greens, such as kale , Brussels sprouts, or any other
-
100g pea
-
juice 1 lemon
-
½ tsp ground coriander
-
small bunch coriander , roughly chopped
-
2 tbsp unsweetened desiccated coconut
-
Heat the oil in a large non-stick pan or wok, sizzle the cumin and mustard seeds for 1 min, then add the chilli, ginger and turmeric. Fry until aromatic, then add the greens, a pinch of salt, a splash of water and the peas.
-
Cover the pan and cook for 4-5 mins until the greens have wilted. Add the lemon juice, ground coriander, half the fresh coriander and half the desiccated coconut, then toss everything together. Pile into a serving dish and scatter with the rest of the coconut and coriander.
Indian-Spiced Beef Stew

-
2 pounds beef Stew Meat, cut into 1-inch pieces
-
2 tablespoons vegetable oil, divided
-
1/2 teaspoon salt
-
1/2 teaspoon pepper
-
1-1/2 cups chopped onions
-
2 tablespoons minced fresh ginger
-
4 cloves garlic, minced
-
1 can (14-1/2 ounces) tomato sauce
-
1 tablespoon garam masala
-
1 cup frozen peas
-
1 cup fat-free half-and-half (a mix of heavy cream and milk)
-
Hot cooked basmati rice, naan or lime wedges (optional)
-
Heat 1-1/2 teaspoons oil in stockpot over medium heat until hot. Brown 1/2 of beef; remove from stockpot. Repeat with additional 1-1/2 teaspoons oil and remaining beef. Remove beef from stockpot. Season with salt and pepper.
-
Heat remaining 1 tablespoon oil in same stockpot over medium heat until hot. Add onions, ginger and garlic; cook and stir 3 to 5 minutes until onions are tender. Add tomato sauce and garam masala; cook and stir 1 to 2 minutes or until browned bits attached to stockpot are dissolved. Return beef to stockpot; bring to a boil. Reduce heat; cover tightly and simmer 1-3/4 to 2 hours or until beef is fork-tender.
-
Add peas and half-and-half; continue simmering, uncovered, 1 to 2 minutes or until heated through.
-
Serve stew with Serving Suggestions, as desired.
Irish Barmbrack (Fruit Loaf)
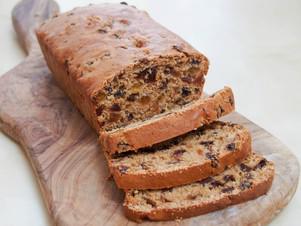
-
8 oz mixed fruit 225g (see notes)
-
1 cup black tea 240ml, cold
-
¾ cup soft brown sugar 120g
-
1 egg lightly beaten
-
8 oz self raising flour 225g, or 1 ½ cups all-purpose flour plus 2 ¼tsp baking powder and a ¼ tsp, rounded, of salt
-
Put the fruit into a bowl with the tea and sugar, stir to dissolve sugar and leave to soak overnight.
-
Preheat oven to 325F/160C and grease and/or line a loaf tin (approx 8 ½ x 4 ½in/ 21 x 11cm, sometimes called a 1lb tin).
-
Add the egg and the flour (or flour, baking powder and salt) to the fruit and tea mixture and mix until combined but try not to overmix.
-
Tip the mixture into the prepared loaf tin, smooth the top a little and bake for 1 ½hours.
-
If you can't find mixed fruit (UK-style, as discussed further above) then I suggest using 7oz/200g mix of raisins, golden raisins (sultanas), currants - any 2 is good or all 3 (should come to around 1 ¼ cups) - and 1oz/30g chopped candied peel or dried papaya (around 2tbsp). If using papaya, make sure you cut it very small as it does swell up quite a lot. Some mixed fruit has glace cherries in the mix - personally I don't like them in this but to your own taste.
-
You can also use a slightly larger loaf tin for this (as in some of the photos, I use a 9x5in (23x13cm) tin), it will just give a slightly shallower loaf. Be aware the loaf does rise quite a bit in baking.
Italian Salad Dressing
-
6 tablespoons olive oil
-
2 tablespoons white wine vinegar
-
2 tablespoons chopped fresh parsley
-
1 tablespoon fresh lemon juice
-
2 garlic cloves, chopped
-
1 teaspoon dried basil, crumbled
-
1/4 teaspoon dried crushed red pepper
-
Pinch of dried oregano
-
Combine all ingredients in small bowl and whisk to blend. Season to taste with salt and pepper. (Can be prepared 1 day ahead. Cover and refrigerate.)
Jamaican Goat Curry

-
1/4 cup vegetable oil
-
6 to 8 tablespoons curry powder
-
1 tablespoon allspice (see Step 1)
-
3 pounds goat stew meat (use lamb or beef if you can't find goat)
-
Salt
-
2 medium onions, chopped
-
1 to 2 habanero or Scotch bonnet peppers, seeded and chopped
-
1 (2-inch) piece ginger, peeled and minced
-
1 head garlic, peeled and chopped
-
1 to 2 (15-ounce) cans coconut milk
-
1 ( 15-ounce ) can tomato sauce or crushed tomatoes
-
1 tablespoon dried thyme
-
3 to 4 cups water
-
5 Yukon gold potatoes, peeled and cut into 1-inch chunks
-
If you can find Jamaican curry powder, definitely use it. If not, use regular curry powder and add the allspice to it. You will need at least 6 tablespoons of spices for this stew, and you can kick it up to 8-9 depending on how spicy you like it.
-
Cut the meat into large chunks, maybe 2-3 inches across. If you have bones, you can use them, too. Salt everything well and set aside to come to room temperature for about 30 minutes.
-
Heat the oil in a large pot over medium-high heat. Mix in 2 tablespoons of the curry powder and heat until fragrant.
-
Pat the meat dry and brown well in the curried oil. Do this in batches and don’t overcrowd the pot. It will take a while to do this, maybe 30 minutes or so. Set the browned meat aside in a bowl. (When all the meat is browned, if you have bones, add them and brown them, too.)
-
Add the onions and habanero to the pot and sauté, stirring from time to time, until the onions just start to brown, about 5 minutes. Sprinkle some salt over them as they cook. Add the ginger and garlic, mix well and sauté for another 1-2 minutes.
Put the meat (and bones, if using) back into the pot, along with any juices left in the bowl. Mix well.
-
Pour in the coconut milk and tomatoes and 5 tablespoons of the curry powder. Stir to combine. If you are using 2 cans of coconut milk, add 3 cups of water. If you’re only using 1 can, add 4 cups of water. Add the thyme.
Bring to a simmer and let it cook until the meat is falling-apart tender, which will take at least 2 hours. Longer if you have a mature goat.
-
Once the meat is close to being done – tender but not falling apart yet – Add the potatoes and mix in. The stew is done when the potatoes are. Taste for salt and add some if it needs it.
-
You might need to skim off the layer of fat at the top of the curry before serving. Do this with a large, shallow spoon, skimming into a bowl. Also, be sure to remove any bones before you serve the curry.
The stew is better the day after, or even several days after, the day you make it.
Serve with Jamaican rice and peas, a coconut rice with kidney beans.
Japanese Coleslaw

Tags:
Green Connect
-
1/2 daikon radish -finely shredded or peelings)
-
1 small carrot - shredded or peel
-
Handful of cabbage -shredded
-
2tbs white vinegar
-
1tsp sugar
-
1tsp sesame seed - dry roasted
-
1/2 red caprisum cut into strips
-
Salt to taste
-
Dry roast sesame until fragrant and set aside
-
Put the grated vegetables and salt in a bowl and let sit for 10 minutes
-
Squeeze out any water and transfer to a bowl
-
Combine the vinegar and sugar in a cup and stir till the sugar dissolves
-
Pour over the daikon, carrot and cabbage mix.
-
Add capsicum strips.
-
Top with roasted sesame and serve
Jiffy Tea Cake
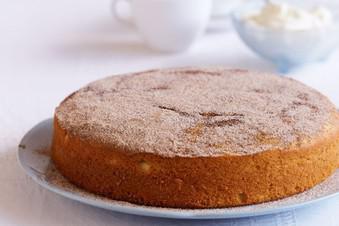
-
1 egg
-
½ cup sugar
-
2 T butter
-
½ milk
-
1 cup SR flour
-
Sultanas (optional)
-
Cinnamon
-
Beat eggs and sugar together
-
Add melted butter and milk and beat well
-
Add flour
-
Pour into greased tin
-
Bake in a moderateoven 25-30 minutes.
-
Serve spread with butter, cinnamon and sugar.
Jumbuck Lamb Stew
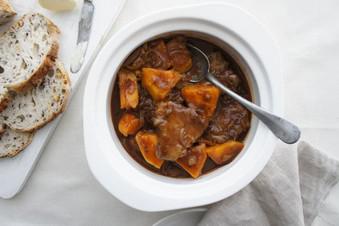
-
Trim chops of any fat.
-
Mix flour with salt and pepper, curry powder and ginger and coat chops.
-
Heat half the butter in a heavy based pan and brown lamb chops on both sides. Remove to a plate.
-
Add remaining butter to pan and cook onion gently until soft. Return lamb to pan.
-
Mix vinegar, sauces, sugar and stock and pour over lamb. Cover and bring to simmer, reduce heat to low and simmer gently for 1 hour.
-
Skim any fat off surface and add pumpkin.
-
Cover and cook for a further 30 minutes or until lamb chops and pumpkin are tender.
-
View all notes NOTES
-
Can be cooked in a slow cooker as well.
Junket

-
1 quart of raw organic milk (pasteurized will work, but homogenized will not)
-
1 tablespoon active kefir or whey optional if using raw milk but necessary if using pasteurized, non-homogenized milk
-
1/2 cup maple syrup or honey or to taste
-
1/4 teaspoon salt
-
1 teaspoon ground cinnamon
-
1/2 teaspoon ground nutmeg
-
1/2 teaspoon cardamom
-
2 drops liquid rennet or 1/16th of a rennet tablet
-
Warm your milk up gently on the stove in a small saucepan until it reaches 90 degrees.
-
If using kefir or whey to culture your milk, add it into the milk, cover the pot, and allow it to incubate for 1 hour. This will allow the good bacteria time to grow and flourish! It’s like microbial science right on your stovetop.
-
After incubating the milk, mix in the maple syrup, salt, and spices. Stir to combine.
-
Dissolve the rennet in 1/4 cup of filtered water and add this to the milk. Gently stir to combine.
-
Pour the junket into cups or serving dishes of your choice. I used coffee mugs.
-
Let the junket set for 1-2 hours, or until firm. Junket can be kept in the refrigerator until you’re ready to serve, but I enjoy it best at room temperature and right away!
Kafta

-
1 lb. Ground Beef
-
1 cup Chopped Onions
-
1/2 bunch Parsley
-
2 tsp. 7 Spices
-
1 1/2 tsp. Salt
-
1/2 tsp. Black Pepper
-
1 tb. Vegetable Oil
-
Finely chop a medium/large onion and ½ bunch of parsley.
-
Put the ground beef in a large bowl for mixing. Add chopped onion, parsley and remaining ingredients. Mix well using hands.
-
Form Kafta into patties or fingers.
-
If grilling, grill on medium heat for 10-15 minutes. Make sure to keep flipping the kafta to get grill marks on all sides.
-
If cooking in a skillet, Saute in a large skillet on medium-high heat for about 5 minutes. Flip the Kafta over and cook for an additional 5 minutes. Add 2 tablespoons of vegetable oil to the Kafta and a large sliced onion and cook for an additional 5-7 minutes until the onion is tender. Lastly, add a sliced tomato and cook for a few more minutes. Season with salt and pepper to taste.
Kaukau: Papua New Guinean Sweet Potato
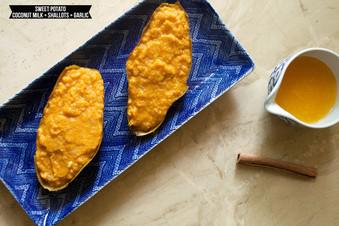
Tags:
Green Connect
-
2 sweet potatoes, washed and dried
-
3 tablespoon coconut oil, melted
-
½ cup coconut milk
-
1 small shallot, finely chopped
-
2 cloves garlic, crushed
-
1-inch piece of fresh ginger, grated
-
2 tablespoons orange juice
-
1 teaspoon cinnamon
-
1 teaspoon sea salt
-
1 teaspoon black pepper
-
Preheat your oven to 400 degrees Fahrenheit
-
Rinse your sweet potatoes thoroughly, then wrap in tinfoil
-
Place your tinfoiled sweet potatoes into the oven and bake for 30 minutes. You'll want to turn them over at the halfway point, but otherwise you can leave them to bake until they're soft enough to poke through with a fork
-
Once the sweet potatoes have cooked, remove them from the oven (keep the oven on, though) and peel the sweet potatoes out of the tinfoil
-
Slice your kaukau very carefully lengthwise
-
Take a spoon and hollow out your sweet potato into a bowl. For presentation's sake, try to keep the skin of your sweet potato intact, although this is optional
-
Begin to puree your sweet potato insides with a whisk. As the sweet potato begins to puree, add your coconut oil and continue to whisk
-
Add your coconut milk, shallots, garlic and ginger and whisk in well
-
Next, add your orange juice, cinnamon, salt and pepper, and whisk again
-
Very carefully and gently scoop your kaukau coconut mash back into the sweet potato skins (which will have cooled and slightly hardened again)
-
Place your filled kaukau canoes into the oven for another 5 minutes, then remove and let cool. Enjoy!
Kedgeree

-
4 eggs
-
2 tbsp olive oil
-
1 large onion, finely chopped
-
2 cloves garlic, crushed
-
3 tsp mild curry powder
-
1 ½ cups (250g) basmati rice
-
650ml chicken stock
-
Salt and pepper
-
1 cup (120g) frozen peas
-
150g hot smoked salmon, skin removed, flaked
-
Chopped fresh parsley, to garnish
-
Greek yoghurt and lemon wedges, to serve
-
Place eggs in a saucepan and cover with water. Bring to a gentle boil and cook for 5 minutes (medium boiled eggs), or until cooked to your liking. Drain and immerse in cold water. Peel and slice eggs in half.
-
Meanwhile, heat oil in a large, non-stick frying pan over a medium heat. Add onion and garlic. Cook, stirring for 3 minutes, or until soft. Add curry powder. Cook, stirring for 1 minute, or until fragrant. Stir in rice.
-
Add stock to pan and stir to combine. Simmer gently covered, for 10 minutes. Remove lid. Stir in peas. Cover and cook for a further 3 to 5 minutes, or until rice is tender and peas are cooked. Remove from the heat. Scatter over flaked salmon.
-
Top with eggs. Garnish with chopped parsley. Serve with yoghurt and lemon wedges.
-
Replace salmon with flaked tuna or canned salmon.
-
Garnish with chopped green chilli or drizzle with green sriracha just before serving.
-
Replace chopped parsley with chopped coriander.
-
Kedgeree can be served warm or cold. Great for lunchboxes or picnics.
-
To increase the eggs in recipe, stir 3 chopped boiled eggs through rice with salmon and serve another 3 eggs halved on top.
Kefir Fruit Cake

-
1 kg dried mixed fruit
-
2 ¾ cup milk kefir
-
¼ cup coconut flour
-
2 cups gluten free flour
-
1 ½ tsp mixed spice
-
Soak fruit in milk kefir for 2-3 hours
-
Sift the flour into the fruit and gently mix with the mixed spice
-
Preheat oven to 160 degrees Celsius
-
Bake in a small tin for approx 40 minutes
Keto Eggs Benedict with Mug Bread

-
1 tsp butter
-
1 tbsp almond flour
-
1 tbsp coconut flour
-
¾ tsp baking powder
-
1 pinch salt
-
1 egg
-
1 tbsp heavy whipping cream
-
85 g butter
-
2 egg yolks
-
1 tbsp water
-
1 tbsp lemon juice
-
salt and pepper
-
1 pinch cayenne pepper (optional)
-
1 tbsp white vinegar 5%
-
water
-
2 large eggs
-
1 tbsp butter, for frying
-
28 g smoked deli ham
-
1 tbsp microgreens (optional)
-
Grease a large cup or glass dish with a flat bottom with butter. Mix all dry ingredients in the cup with a fork or spoon. Crack in eggs and mix well. Stir in cream. Combine until smooth and make sure there are no lumps.
-
Microwave on high (approximately 700 watts) for 2 minutes. Check if the bread is done in the middle — if not, microwave for another 15-30 seconds.
-
Let cool and remove from the cup. Slice in half.
-
Melt butter in a saucepan or microwave oven and let cool for a few minutes.
-
Mix egg yolks and water in a pot and place in a water bath.
-
Simmer while stirring constantly until sauce thickens slightly.
-
Remove the pot from the water bath and slowly drizzle the butter into eggs while whisking constantly.
-
Season with lemon, salt, pepper, and some cayenne pepper.
-
Add plenty of water with vinegar in a saucepan. Bring to a simmer but make sure the water is not boiling.
-
Crack in eggs one at a time. First crack into a cup, then carefully pour into the water. Let simmer for 3 minutes.
-
Remove eggs with a slotted spoon and plunge into cold water. Put the eggs on a plate and trim any rough edges.
-
Fry mug bread halves in butter. Place a slice of bread on each plate, top each half with smoked ham, poached egg, and hollandaise sauce. Sprinkle with watercress.
Keto Pizza Base
-
140g ground almonds
-
60g psyllium husk
-
2 tsp baking powder
-
1 tsp fine sea salt
-
3 egg whites
-
200ml warm water
-
50ml olive oil
-
2 tsp cider vinegar
-
Preheat the oven to 200°C/fan 180°C.
Mix all the dry ingredients together in a bowl. Add the egg whites, warm water, olive oil and cider vinegar and give it all a quick mix until well combined. It should form a dough-like ball.
With a few drops of olive oil on your hands to prevent sticking, divide the mixture into five balls. Place one ball on a piece of non-stick baking paper and place another piece of baking paper on top.
Press down with your hands, then use a rolling pin to roll out the base until it is just 1-2mm thick.
Repeat with the remaining balls or store them in the fridge or freezer for another day.
Kimchi
-
3 tablespoons sea salt
-
1 head Chinese Cabbage, halved lengthwise
-
3 garlic cloves, julienned
-
1 teaspoon julienned ginger
-
8 spring onions, 6 cut into 5cm pieces and 2 thinly sliced
-
250 g. Korean radish, julienned
-
2 tablespoons fish sauce
-
3 tablespoons hot red chilli powder
-
3 tablespoons hot water
-
6 to 8 round slices Korean radish,. 1/2cm thick and peeled.
-
Sprinkle salt all over cabbage (lift leaves to sprinkle inside) Place in a large dish and allow to stand at room temperature for 3 hours.
-
Rinse cabbage with cold water and press out liquid. Set aside.
-
To make stuffing, combine garlic, ginger, spring onions, radish, fish sauce, chilli powder and hot water, and toss well.
-
Take a handful of stuffing and rub it all around the exterior of the cabbage, pushing some between the leaves. Fold over the outer leaves still attached to the core to enclose the stuffing.
-
Rub the radish slices with some of the stuffing and place them in the bottom of a large glass or plastic container.
-
Place the cabbage on the radish and top with remaining stuffing.
-
Cover with a tight-fitting lid.
-
Mature in fridge for 3 days before serving.
-
During cool weather, mature the kim chi at room temperature for 24 hours then refrigerate for 5 days before using.
Kimchi Chicken Stir Fry
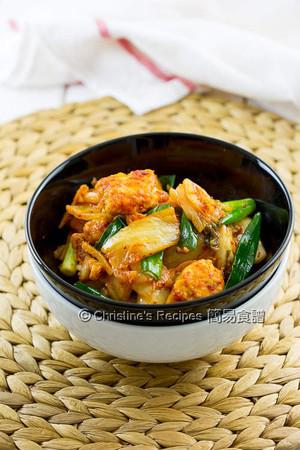
-
230 gm chicken breast
-
⅛ tsp salt
-
pepper, to taste
-
½ egg, whisked
-
2 ½ Tbsp plain flour / all purpose flour
-
1 Tbsp julienned ginger
-
1 tsp minced garlic
-
180 gm Kimchi, store-bought or homemade
-
1½ tsp light soy sauce
-
2 tsp mirin
-
sesame oil, to taste
-
1 stalk spring onion, roughly chopped
-
Cut chicken breast into 2.5-cm (1-inch) chunks. Season with salt and pepper. Lightly coat with whisked egg, followed by plain flour.
-
Heat enough oil covering a pan over medium heat. Shallow-fry the chicken until all sides are golden brown and cooked through. Place on kitchen paper to absorb excess oil.
-
Discard the excess oil in the pan, leaving about 1 tablespoon of oil. Saute ginger and garlic over medium high heat. Don’t burn the ginger. Toss back the chicken in pan. Add Kimchi and spring onion. Stir to combine. Season with light soy sauce and mirin. Add a dash of sesame oil to increase the fragrance. Serve immediately. Enjoy!
-
Make sure not to cook the Kimchi too long in order to keep as much nutrients as possible. Simply combine it with other ingredients.
-
Don’t cut chicken into too large chunks. Otherwise it takes quite long to cook them through. You can test the chicken with a chopstick. If it can easily poke through, it’s cooked.
-
Mirin is a Japanese condiment with a very light sweet taste and low alcohol content, available at supermarkets or Asian grocers. (See the picture of mirin here.)
-
**If you make this recipe, snap a photo and hashtag it #christinesrecipes — We love to see your creations on Instagram, Facebook, Twitter!!!
Koji Mushroom Sauté - Option 1
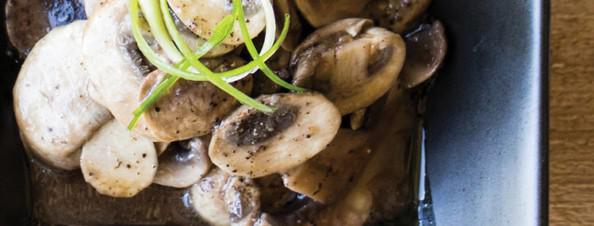
-
500g Mushrooms (sliced)
-
1 tbsp of Shio-koji or Garlic-koji
-
1 tsp oil
-
Combine and leave about 15min (until moistures come out)
Heat oil and sauté mushrooms for 5 minutes
Serve as side dish
Koji Mushrooms Sauté - Option 2
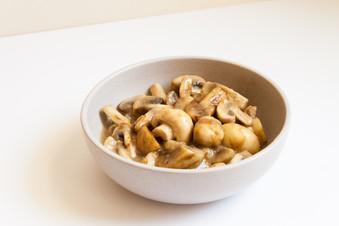
-
250g Mushrooms - Any mushrooms work but standard cup or swiss brown are our go-to choices
-
1 Tbsp Shio Koji (1 Tbsp Umami Salt made into a paste using 2 tbsp of water)
-
2 tbsp Olive Oil or a knob of butter
-
Heat a small saucepan over high heat.
-
Add the olive oil or knob of butter and cook the mushrooms until they just start to release their juices. Reduce the heat slightly.
-
Add the Shio Koji (or Umami Salt as a paste) and cook until the Shio Koji starts to stick to the bottom of the pot and goes a deep caramel colour - about 1 to 2 minutes
-
Take the saucepan off the heat and put a lid on the pot. The mushrooms will start releasing their juices and this will deglaze the saucepan and eventually make a rich gravy to coat the mushrooms.
-
After about three minutes, give the mushrooms a stir and scrape all the caramelised Shio Koji off the base of the saucepan.
-
Return to a medium heat and cook with the lid off for another five minutes or until the mushrooms are coated in a delicious umami rich gravy.
-
Serve with eggs for breakfast or use in any recipe that calls for mushrooms.
Korean Bulgogi Beef Stir Fry
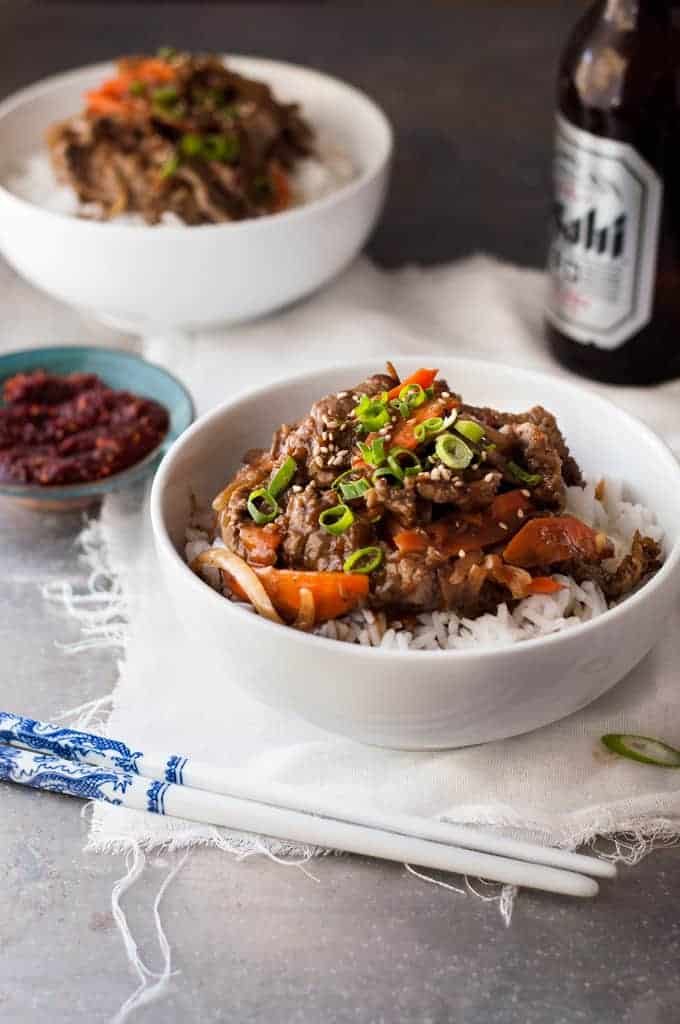
-
14 oz / 400 g thinly sliced beef (, any good quality tender cut suitable for grilling (Note 1))
-
1 scallion/shallot stem (, green and white part separated, both finely sliced (Note 2))
-
1/2 large onion ((brown, yellow or white), peeled and thinly sliced)
-
1/2 medium carrot (, peeled, cut vertically then cut into thin slices on the diagonal)
-
1 tbsp cooking oil ((I use peanut or vegetable oil))
-
1/2 tbsp sesame seeds
-
3 tbsp ordinary soy sauce ((I use Kikkoman))
-
1 1/2 tbsp brown sugar
-
1 tbsp mirin ((Note 3))
-
1/2 tbsp sesame oil
-
2 tbsp grated onion ((brown, white or yellow))
-
2 cloves garlic (, minced)
-
3 tbsp grated red apple ((not green - they are too tart) OR nashi pears)
-
1/2 tsp minced ginger
-
Black pepper
-
Blot the beef dry using a paper towel then place into a bowl.
-
Mix together the Marinade ingredients in a small bowl, then add the beef. Stir gently to coat the beef, cover with cling wrap and set aside to marinate for at least 1 hour, preferably overnight. Because the meat is thin, you still get good flavour even with 1 hour of marinating.
-
Heat the oil in a wok or large fry pan over high heat.
-
Add the onion and white part of the scallion/shallots. Cook for 1 minute.
-
Then add the beef, including the Marinade, and carrots. Cook for around 3 to 5 minutes, stirring constantly, until the beef is just cooked.
-
Remove from heat, then toss through the sesame seeds.
-
Serve immediately with rice - or for a low carb, low cal option, try Cauliflower Rice! Sprinkle with extra sesame seeds and the reserved green part of the scallions.
Korean Chicken and Kimchi-Fried Rice Bowls

-
2 tablespoons soy sauce
-
2 tablespoons sesame oil
-
2 teaspoons brown sugar
-
4 garlic cloves, minced
-
2 tablespoons minced ginger
-
4 scallions, finely chopped
-
Ground black pepper, to taste
-
1 pound boneless skinless chicken breast, thinly sliced
-
Vegetable oil
-
1 cup chopped kimchi, plus 1/2 cup kimchi juices
-
1/4 cup gochujang (red chilli paste)
-
3 cups steamed rice
-
2 teaspoons sesame oil
-
2– 3 sunny-side up eggs (or eggs cooked to your liking)
-
1 sheet dried seaweed, sliced into matchsticks
-
6 baby rainbow carrots, cut into matchsticks
-
Scallion and/or cilantro, chopped, to taste
-
Toasted sesame seeds, to taste
-
Gochujang, to taste, (optional)
-
In a sealable plastic back, combine all of the chicken marinade ingredients. Place the chicken in the marinade, seal, and refrigerate until ready to cook, at least one hour.
-
While the chicken marinates, prepare the Kimchi-Fried Rice. Heat a teaspoon of vegetable oil in a pan or wok over medium-high heat.
-
Make sure that the kimchi is as drained of liquids as possible (but reserve them!) and add it to the pan. Stir fry for about 2 minutes, or until the kimchi begins to caramelize.
-
In a small bowl, mix together the 1/2 cup of kimchi juices and the gochujang. Add it to the pan with the kimchi. Mix in the rice.
-
Cook the rice mixture until no longer liquidy and the rice is beginning to crisp, about 8-10 minutes. Remove from heat and mix in the sesame oil. Transfer the rice to bowls and set aside.
-
In the same skillet, add a tablespoon of vegetable oil and heat over medium-high heat. Remove the chicken from marinade. Cook and stir chicken until no longer pink and fully cooked through, about 6-8 minutes. Place the chicken on top of the rice.
-
Top with eggs, seaweed, carrots, scallion, cilantro, sesame seeds, and gochujang, as desired. Serve warm.
Korean Ground Beef and Kimchi Bowl
-
1 1/2 pounds Lean Ground Beef
-
1/2 cup up to 1 cup chopped Korean Kimchi made with cabbage
-
1 yellow onion medium dice
-
1 bunch scallions chopped (save some green tops for garnish)
-
1 carrot finely julienned
-
1 medium zucchini finely diced
-
1 Tbs grated fresh ginger
-
1/2 Tbs grated fresh garlic
-
4-6 Tbs soy sauce (adjust to taste)
-
1 Tbs rice vinegar
-
1 Tbs brown sugar (adjust to taste)
-
1 heaping Tbs Korean Hot Pepper Paste ( Gochujang)
-
1 Tbs Korean Hot Pepper Flakes ( Gochugaru)
-
Toasted Sesame Seeds
-
Green Onions sliced
-
Brown ground beef in a large pan or wok. Season lightly with salt and black pepper.
-
Cut and prep all veggies.
-
Add grated fresh ginger and garlic to browned beef and cook for 1 minute.
-
Add 1-2 Tbs canola oil to pan if needed. Next add the prepared vegetables.
-
Then add the Korean Hot Pepper Paste, Hot Pepper Flakes, brown sugar, vinegar and soy sauce. Stir well. Finally add the chopped store bought or homemade cabbage kimchi (add a couple of tablespoons of the kimchi juice too)
-
Stir well. Adjust seasoning as needed. Serve with rice or quinoa.
-
Garnish with roasted sesame seeds and green onions tops. Enjoy.
Korean Seasoned Spinach (Sigumchi Namul)
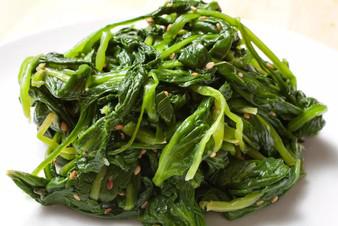
-
1 lb. of spinach
-
2 tbsp. of soy sauce
-
1 tbsp. of sesame oil
-
1 tbsp. of sesame seeds
-
1 tbsp. of sesame salt*
-
2 cloves garlic (finely chopped)
-
2 tsp. of sugar
-
Gather the ingredients.
-
Blanch the spinach in boiling water for 30 seconds.
-
Remove the spinach quickly and rinse it in cold water. The easiest way to do this might be putting the spinach in a colander, turning on your kitchen tap and then letting the water run over it.
-
Gently squeeze the vegetable to remove excess water. You can also try to shake the excess water from the spinach in the colander if you don't have the time or inclination to do so by hand.
-
Mix the soy sauce, sesame oil, seeds, salt, garlic, and sugar, and mix all of these ingredients into the spinach. Use more or fewer of these ingredients depending on your preference or the preference of those dinner guests to which you plan to serve the salad.
-
Serve and enjoy!
Korean Style Pan-Fried Pork Belly
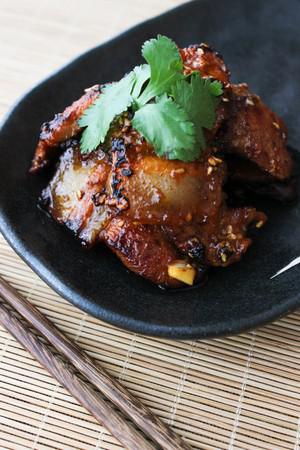
-
½ pound pork belly (with or without skin)
-
cilantro for topping (optional)
-
½ teaspoon minced garlic
-
½ teaspoon minced ginger
-
1 tablespoon Korean hot pepper paste
-
1 tablespoon honey
-
1 tablespoon soy sauce
-
1 tablespoon sesame oil
-
1 tablespoon toasted white sesame seeds
-
Marinate the pork belly with garlic, ginger, Korean hot pepper paste, honey, soy sauce, sesame oil and sesame seeds for about 20 minutes.
-
Turn to medium-low heat, and place the pork belly slices onto a non-stick pan.
-
Pan fry for about 4-5 minutes each side.
-
Top with cilantro to serve.
Kransky

-
2500 g pork shoulder with bacon
-
500 g beef, streaky
-
300 g cheese (butter cheese)
-
250 g ice (ice water or ice snow)
-
87 ½ g curing salt
-
7 grams of sugar
-
3 ½ g paprika powder, hot pink
-
7 g pepper, white
-
3 ½ g caraway powder
-
4 grams of garlic powder or 7 cloves of fresh garlic
-
n. B. intestine (string 24/26 caliber)
-
Cut the beef to the size of the wolf, salt it with 15 g of curing salt and let it redden overnight. Grind the pork with the remaining ingredients with the pea slice and let it redden overnight.
-
Freeze the cheese and cut into 0.5 cm pieces. The beef is chopped with the ice water or ice snow and mixed well with the pork and frozen cheese, then the sausage meat is filled into 24/26 caliber strings using a sausage filler.
-
The sausages are now smoked at 40 - 60 ° C for 0.5 - 0.75 hours. Then brewed for 20 minutes at 80 ° C and cooled in cold water, the sausages should be completely under water because of the color.
Kvass - Russian Bread Style

-
2 cups stale sourdough rye bread cut into chunks
-
1 cup raw cane sugar
-
filtered water 6-8 cups
-
Boil a kettle of water; allow to cool slightly.
-
Combine sugar with 2 cups of hot water, and mix until sugar dissolves completely.
-
Place bread chunks into a half-gallon jar, and pour sugar water over the bread.
-
Fill the jar with the hot water just above the curve. Close tightly.
-
Allow to sit at room temperature for up to 7 days, burping daily, to allow pressure to escape.
-
Once the liquid tastes tart and pleasant to you, strain the bread.
-
For more carbonation, add several raisins after the bread is strained, close the jar airtight, and allow to ferment at room temperature for one or two more days.
-
Chill before serving.
-
The remaining bread is now a starter culture.
-
Just take a gallon of filtered water, a cup of your wet starter bread, 3/4 cup sugar, and 2 cups of water and repeat the process. This round it will take less time, you can probably get a strong fizzy kvass in about 5 days. Fermentation time always depends on the temperature of your house.
-
People who like darker bread kvass would toast their bread very dark. I don’t. You can. Recipes are guidelines, framework for experimentation. Feel free to do what you wish.
Lacto-Fermented Limes

-
5 limes
-
3 Tbsp. sea salt
-
2 Tbsp. kombucha or apple cider vinegar
-
½ cup lime juice
-
Wash limes. Slice thin, turn, and cut the slices again, lengthwise.
-
Place limes in a clean quart jar and compress slightly with the back of your hand. Mix kombucha or vinegar with lime juice in a bowl. Add salt.
-
Pour the lime juice mixture into the jar. Release any air bubbles. Top off with room temperature filtered water to 1 inch below the rim of the jar. Swirl to mix.
-
Cover jar with a tight lid, airlock lid, or coffee filter secured with a rubber band.
-
Culture at room temperature (60-70°F is preferred) for about 2 weeks. If using a tight lid, burp daily to release excess pressure.
-
Once the limes are finished, put a tight lid on the jar and move to cold storage. The flavor will continue to develop.
-
When you are ready to use your limes, scoop the pulp away and cut skin into a julienne. Or use both the pulp and skin according to your taste.
Lamb Bolognese
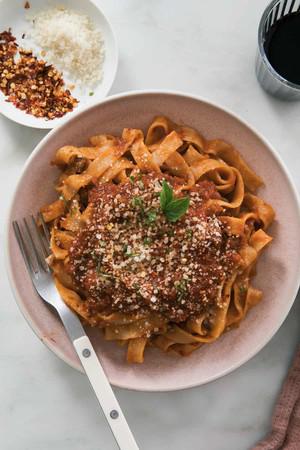
-
1 yellow onion, peeled and minced
-
6 garlic cloves, peeled and minced
-
2 carrots, peeled and minced
-
2 anchovy filets, minced
-
1 1/2 teaspoon kosher salt, plus more to taste
-
1 pound ground lamb
-
1/2 teaspoon crushed red pepper
-
1/4 cup tomato paste
-
Pinch sugar
-
3/4 cup red wine
-
1 (24-ounce) can crushed tomatoes
-
2 tablespoons unsalted butter
-
1 pound pasta, of choice
-
Parmesan-Reggiano, as garnish
-
Basil leaves, as garnish
-
I like to mince everything up in a food processor. If you don’t have one, mince the onion, garlic cloves and carrots by hand—no biggie!
-
Add the onion, garlic cloves, carrots and anchovies to a food processor. Blitz until pureed.
-
In a large Dutch oven or medium pot set over medium heat, add the olive oil. When the oil is warm, add the onion/carrot mixture. Add 1 1/2 teaspoons of kosher salt and allow to cook until softened, about 5 to 7 minutes, stirring it every so often.
-
Then add the ground lamb, breaking it up with your spatula. Mix everything together and cook until the meat has browned, about 5 minutes. Pour in the crushed red pepper and tomato paste and mix; pour in the red wine and scrape the bottom of the pot to lift up any bits.
-
Pour in the can of crushed tomatoes. And then fill the can about halfway up with water, swishing it around to pick up any leftover tomato and pour into the pot. Give it a good mix, bring it to a simmer and then immediately drop the heat to low. Cover the pot with a lid and let it cook at a gentle simmer for 1 hour.
-
It’ll be super fragrant and delicious at that point. Give it a taste and adjust the salt according to your liking. I added a few more pinches.
-
To neutralize the acid, I like to add a few tablespoons of butter. This is totally optional. You can also add a tablespoon of sour cream or creme fraiche, if you have it. Or you could skip this part all together.
-
Meanwhile, bring a pot of salted water to a boil. Drop in your pasta and cook until al dente. Drain the pasta, reserving about 1 cup of pasta water. In the same pot that you cooked the pasta, add a few ladles of the sauce and add the drained pasta. Toss it in the sauce until it’s covered. If needed, add a splash or two of pasta water.
-
Divide the pasta amongst bowls. Top it with a ladle of the bolognese and top with fresh basil (if you have it) and a sprinkling of Parmesan cheese.
-
This makes delicious leftovers. Bring the entire bolognese to room temperature and then store in an airtight container in the fridge for up to 3 days OR you can freeze it for up to 3 months. To thaw, transfer to the fridge overnight and then warm up in a sauté pan or in the microwave.
Lamb Burgers with Tzatziki
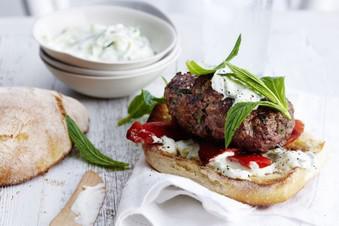
-
1kg lamb mince
-
1 onion, finely chopped
-
2 garlic cloves, finely chopped
-
2 tsp ground cumin
-
1 tsp ground coriander
-
1/4 tsp ground cinnamon
-
1/2 tsp ground allspice
-
1/2 tsp dried chilli flakes
-
2 tbsp chopped flat-leaf parsley
-
1 egg
-
6 sourdough rolls, split
-
2 roasted capsicums, cut into strips
-
1 cup (280g) thick Greek-style yoghurt
-
1 Lebanese cucumber, grated
-
2 garlic cloves, grated
-
2 tbsp chopped mint, plus extra leaves to garnish
-
Select all ingredients
-
Place the lamb, onion, garlic, spices, parsley, egg and some salt and pepper in a bowl. Mix with your hands until well combined, then form into six patties. Chill for 30 minutes.
-
For the tzatziki, combine yoghurt, cucumber, garlic and chopped mint. Season, then chill until serving. Preheat a chargrill pan or barbecue to medium-high. Cook patties for 3-4 minutes each side until cooked through. Toast buns, spread with tzatziki and fill with roast capsicum, lamb patties and extra mint leaves.
Lamb Kofta Meatballs

-
1/2 onion , grated using a box grater
-
500 g / 1 lb lamb mince (ground lamb), or beef
-
1/4 cup panko breadcrumbs (sub regular breadcrumbs)
-
2 cloves garlic , finely minced
-
2 tbsp coriander/cilantro , finely chopped
-
2 tsp cumin
-
2 tsp coriander
-
2 tsp paprika (plain, sub smoked)
-
1 1/2 tsp ground cinnamon
-
3/4 tsp cayenne pepper (a bit spicy, reduce to taste or leave out)
-
3/4 tsp cooking salt / kosher salt
-
1/2 black pepper
-
1 large red capsicum , deseeded, sliced into 1 cm thick slices
-
1 large yellow capsicum , deseeded, sliced into 1 cm thick slices
-
1 red onion , cut into thin wedges
-
1 tbsp extra virgin olive oil
-
1/4 tsp each cooking/kosher salt and pepper
-
Olive oil spray (for the meatballs)
-
4 flatbreads or rice, couscous or cauliflower rice
-
1 quantity Tahini sauce or lemon yogurt sauce (or even just plain yogurt)
-
3 cups shredded iceberg lettuce (or other leafy greens)
-
2 tomatoes , halved, cut into thin slices
-
1 tbsp coriander/cilantro leaves , finely chopped, optional (for sprinkling)
-
Preheat oven to 200°C/400°F (180°C fan-forced).
-
Kofta meatballs – Place the Kofta ingredients and spices in a bowl. Use your hands to combine thoroughly then roll 16 large-ish meatballs (I scoop all mixture onto a tray, then roll into balls). Spread them out on a large tray.
-
Vegetables – Toss the vegetables with the oil, salt and pepper. Scatter around the meatballs.
-
Bake – Spray the meatballs with oil. Bake for 15 minutes then switch the oven to the grill/broiler on high. Cook for a further 5 minutes to get some colour on the surface.
-
Serve – Sprinkle with the chopped coriander then serve! To make wraps, stuff with lettuce, tomato, meatballs, and the cook capsicum and onion. Drizzle with lots of tahini sauce then tuck in! Other ideas: rice or couscous bowls or big salads – see below.
Lebanese Chicken with 7-Spice
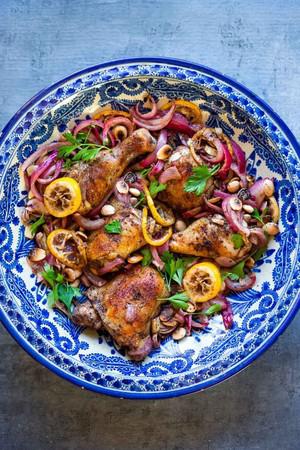
-
2 lbs chicken, skin on, bone-in thighs or legs (see notes, for boneless, skinless options )
-
2 tablespoons olive oil
-
2 1/2 teaspoons salt (use 1 teaspoon salt per pound of chicken plus an extra 1/2 teaspoon for the onions)
-
1– 2 teaspoons cracked pepper
-
2 tablespoons Lebanese 7-spice ( see below)
-
1 extra-large red onion, sliced into 1/2 inch wedges
-
4 garlic cloves, rough chopped
-
1 tablespoon preserved lemon, chopped (totally optional)
-
1 lemon, sliced thinly
-
1/4 cup Marcona almonds, or slivered almonds or pinenuts
-
parsley for garnish
-
1 teaspoon cumin
-
1 teaspoon allspice
-
1 teaspoon cinnamon
-
1 teaspoon coriander
-
1/2 teaspoon ground cloves
-
1/2 teaspoon nutmeg
-
1/4 teaspoon cardamom
-
These are in order of importance. Feel free to sub paprika (not smoked) for something, or leave the cardamom cloves or nutmeg out.
-
Preheat oven to 400 F (see notes for grilling)
-
Place the chicken in a bowl and toss with olive oil, salt, and 7-spice mix. Add onion, garlic, preserved lemon and sliced lemon and toss again well. Spread out on a parchment-lined sheet-pan.
-
Bake for 35-45 minutes- or until cooked through. Broil for a few minutes to get the skin crispy and nicely golden, turning if necessary (especially if using skin-on chicken)
-
While the chicken is baking, warm and toast the almonds/ pinenuts in a little butter or olive oil. Season with salt and pepper. Set aside.
-
Place the fragrant chicken on a platter, scattering with the onions and lemon slices (which are edible.) Pour any juices from the pan, over top. Garnish with the toasted nuts and sprinkle with a few parsley leaves.
-
CHICKEN: Feel free to use skinless boneless chicken, but note that cooking times will shorten, so just check sooner. 20-25 mins for skinless breasts, boneless 30-35 minutes for thighs.
-
GRILLING: Set grill to med-high. If grilling skin-on chicken, skip the oil, make a rub out of the salt, pepper and spices. Add 2 teaspoons granulated garlic to the rub. Make sure to use 1 teaspoon salt per pound of chicken. Rub spices generously over the chicken. In a bowl, toss the onions and lemon slices with a little olive oil, salt and pepper and a pinch of the 7-spice. Grease the bbq grates. Sear the skin side of the chicken until deeply marked, 3 minutes or so, turn over, move to a cooler part of grill (or lower heat to medium) and continue cooking, covered, until cooked through (to 165F). Grill the lemon slices and the onions, at the same time. Let chicken rest 10 minutes before serving. Platter like above.
-
If grilling skinless chicken, make a paste. Mix the salt, pepper, spices and 2 teaspoons granulated garlic in a bowl. Add just enough oil to make a thick paste, stir. Rub this paste all over the chicken. You could do this the day before for extra flavor. Grill like above, along with onions and lemon slices.
-
For a little heat, sprinkle with Aleppo chili flakes if you like.
Lebanese Salad with Sumac
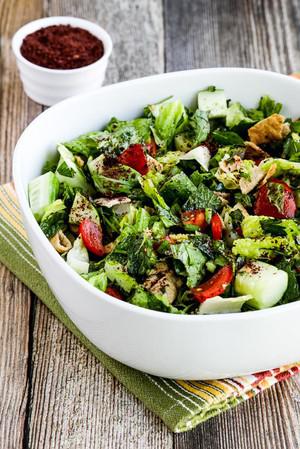
-
2 Joseph's Flax, Oat Bran, and Whole Wheat pita bread, cut into strips about 3/4 inch wide, then toasted and crumbled (see notes)
-
2 heads Romaine lettuce, chopped
-
1/2 cup thinly sliced green onion
-
1 cup diced tomatoes (let drain a minute or two if extra juicy)
-
1 cup diced cucumber (same size as tomatoes)
-
1/2 cup coarsely chopped fresh mint leaves
-
1/2 cup coarsely chopped flat-leaf parsley (leaves only, no stems)
-
1 tsp. chopped garlic (2-4 cloves garlic)
-
1 tsp. salt (I used fine grind sea salt)
-
1/2 cup fresh squeezed lemon juice, about 2 large lemons (I love lemon, so adjust the amount to your own taste)
-
1 tsp. powdered Sumac, plus more for sprinkling on individual salads if desired)
-
1/2 cup extra virgin olive oil
-
Preheat oven or toaster oven to 400F/200C.
-
Cut whole wheat pita into strips about 3/4 inch wide and arrange on baking sheet. (Some recipes call for brushing the pita with olive oil, but I didn't do that.)
-
Bake until pita strips are crisp but only barely starting to brown, less than 10 minutes. Watch carefully because they can go from crisp to overly brown rather quickly. Let pita bread strips cool, then crumble into bite-sized pieces.
-
Chop tomatoes and let them drain a bit if they're extra juicy. Chop cucumbers.
-
For dressing, mash together the chopped garlic and salt using a mortar and pestle, or the side of a knife or spoon. Put garlic-salt paste in a small bowl, then add lemon juice and 1 tsp. Sumac (affiliate link). Whisk in olive oil and set dressing aside. (You can also make the dressing in a glass jar and shake to combine.)
-
Remove outer leaves from Romaine, trim stem end, then wash and spin dry or dry with paper towels. Cut Romaine into fourths lengthwise, then turn and chop crosswise into small pieces. (If you have a salad spinner (affiliate link), you can chop the Romaine first, then wash.)
-
Put chopped Romaine into salad bowl large enough toss all ingredients.
-
Wash and chop the fresh mint, fresh parsley, and green onions. (Use the ingredients you prefer.)
-
Add tomatoes cucumber, fresh herbs, and green onions to bowl.
-
Add about half of the dressing and toss, then add crumbled pita chops and toss again with more dressing. (You may not want all the dressing, but this salad should be quite wet.) At this point the salad should sit for a few minutes (or longer) to let flavors blend and so the pita chips absorb some of the dressing.
-
To serve, arrange salad on individual plates and sprinkle with a bit more Sumac. You can also serve it in a large bowl with the Sumac sprinkled over.
-
When I made this for guests I tossed the salad together before they arrived, and it was perfect when I served it about 30 minutes later.
-
I use My Favorite Low-Carb Pita Bread to make this. Carbs are calculated based on 7 net carbs per pita from that brand. You can buy Ground Sumac (affiliate link) at Amazon.com if you don't see it in your store.
-
Optional ingredients for this salad include chopped green pepper or radishes. (I didn't use either of these but Lori's recipe had green peppers and I saw several recipes that added chopped radishes.)
Lebanese Seven Spices
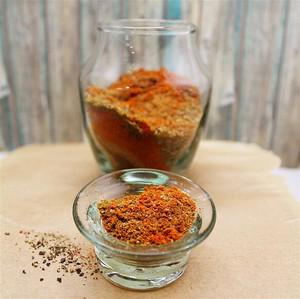
-
½ cup ground black pepper
-
½ cup ground cumin
-
½ cup paprika
-
¼ cup ground coriander
-
¼ cup ground cloves
-
4 teaspoons ground nutmeg
-
4 teaspoons ground cinnamon
-
2 teaspoons ground cardamom
-
Stir the black pepper, cumin, paprika, coriander, clove, nutmeg, cinnamon, and cardamom together until evenly blended. Store the spice mix in an airtight container.
-
Use our scaling feature to adjust this recipe to your needs. One serving of this recipe is 1 teaspoon of the spice mix.
Lemon and Coconut Brownies
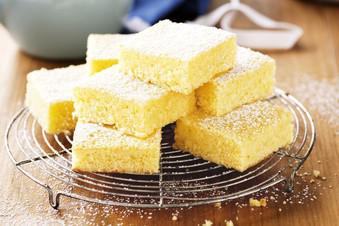
-
250g butter
-
430g (2 cups) caster sugar
-
4 eggs
-
225g (1 1/2 cups) plain flour
-
85g (1 cup) desiccated coconut
-
3 tsp finely grated lemon rind
-
60ml (1/4 cup) fresh lemon juice
-
Icing sugar, to dust
-
Select all ingredients
-
Preheat oven to 180ºC. Line a 20 x 30cm (base measurement) slab pan with non-stick baking paper.
-
Melt the butter in a saucepan over medium heat. Remove from heat. Stir in sugar. Add eggs, 1 at a time, and stir until mixture is thick and glossy.
-
Sift the flour over the egg mixture and stir until well combined. Stir in coconut, lemon rind and lemon juice. Spread over base of prepared pan.
-
Bake for 30 minutes or until a skewer inserted into the centre comes out clean. Set aside in the pan to cool completely. Cut into pieces. Dust with icing sugar.
Lemon Delicious

-
150g unsalted butter, melted
-
2 tsp finely grated lemon rind
-
1/3 cup lemon juice
-
1 1/2 cups caster sugar
-
3/4 cup self-raising flour, sifted
-
1 1/2 cups milk
-
4 eggs, separated
-
icing sugar mixture, to serve
-
Select all ingredients
-
Preheat oven to 180°C/160°C fan-forced. Grease six 1 cup-capacity ovenproof dishes.
-
Place butter, lemon rind, lemon juice, sugar, flour, milk and egg yolks in a bowl. Whisk to combine.
-
Using an electric mixer, beat egg whites on high speed until soft peaks form. Using a metal spoon, fold one-quarter of the egg white into lemon mixture. Gently fold in remaining egg white.
-
Spoon mixture into prepared dishes. Place dishes in a large baking dish. Pour boiling water into baking dish until halfway up sides of smaller dishes. Bake for 25 to 30 minutes or until golden and just set. Dust with icing sugar. Serve.
Lemon Meatballs
-
-300g ground beef
-
-180g boiled potatoes
-
-1 egg
-
-the juice and zest of 1 lemon
-
-a small bunch of fresh parsley
-
-salt and pepper (to taste)
-
-50g all purpose flour
-
-60g butter
-
-olive oil
-
-a small bunch of fresh rosemary
-
In a food processor, mix together the potatoes with the beef, the egg, the lemon zest, parsley, salt and pepper. Form some meatballs, flour them and cook them in a pan over medium heat with a drizzle of oil, butter and rosemary. Cook for about 5 minutes in each side, add the juice of one lemon and cook for 7-8 more minutes (cooking time may vary depending on the size of your meatballs). Buon appetito!
Lemon Poppy Seed Almond Cookies
-
- 2 cups almond flour
-
- 2 tbsp poppy seeds
-
- ¼ cup coconut oil or unsalted butter, melted
-
- ¼ cup honey or sugar-free maple syrup
-
- Zest of 1 lemon
-
- 2 tbsp fresh lemon juice
-
- 1 tsp vanilla extract
-
- Pinch of salt
-
1. Preheat the oven: Preheat your oven to 350°F (175°C) and line a baking sheet with parchment paper.
2. Mix dry ingredients: In a medium bowl, combine almond flour, poppy seeds, and a pinch of salt.
3. Prepare wet ingredients: In another bowl, whisk together melted coconut oil (or butter), honey (or syrup), lemon zest, lemon juice, and vanilla extract.
4. Combine: Add the wet ingredients to the dry ingredients and stir until a dough forms.
5. Shape cookies: Roll the dough into small balls and flatten them slightly. Place on the prepared baking sheet.
6. Bake: Bake for 10-12 minutes until the edges are golden brown. Let the cookies cool on the sheet for a few minutes before transferring them to a cooling rack.
-
Prep Time: 10 minutes | Cook Time: 12 minutes | Servings: 16
Lemon Posset
-
2 lemons Zest of
-
50g sugar
-
550ml thickened cream
-
125ml lemon juice
-
Combine cream, sugar, and lemon zest in saucepan. Note: You may add more sugar, if you want it to be sweeter.
-
Bring to boil and continue simmering for 2 minutes. Cool for at least 10 mins.
-
Strain lemon juice and when the cream mixture is cool, stir through.
-
Pour into individual serve glasses, cups or moulds and chill for 4-5 hours, but best left overnight.
Lemon Pudding Cake
-
1 large egg, separated, room temperature
-
1/2 cup sugar
-
1/3 cup whole milk
-
2 tablespoons all-purpose flour
-
2 tablespoons lemon juice
-
1 teaspoon grated lemon zest
-
1/8 teaspoon salt
-
Optional: Confectioners' sugar, lemon slices and whipped cream
-
Preheat oven to 325°. In a bowl, beat egg yolk. Add sugar, milk, flour, lemon juice, zest and salt; beat until smooth. Beat egg white until stiff peaks form; gently fold into lemon mixture. Pour into 2 ungreased 6-oz. custard cups (cups will be very full).
-
Place the cups in an 8-in. square baking pan. Pour boiling water into pan to a depth of 1 in. Bake until a knife inserted in the center comes out clean and top is golden, 40-45 minutes. If desired, top with confectioners' sugar, lemon slices and whipped cream.
Lemon Ricotta Cake
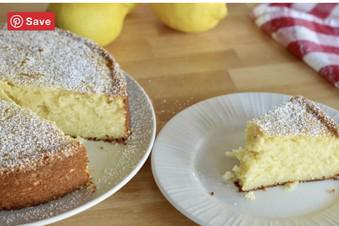
Flourless
-
300g Ricotta (11/2 Cups)
-
100g Sugar (1/2 Cup)
-
40g Butter (3 T)
-
3 Eggs
-
50g Cornstarch (1/3 cup)
-
Vanilla
-
Juice of lemon
-
Lemon Zest
-
Line a springform tin
Separate eggs
Beat egg yolks and sugar
Add Ricotta, lemon zest, vanilla and juice
Beat until smooth
Mix in sifted flour and soft butter
Beat egg whites until light and stiff
Fold into cheese mixture
Bake in preheated oven 180C for 50min
Cool in tin
Lemon Shortbread
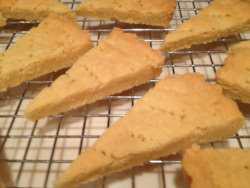
-
275g plain flour
-
2 tablespoons ground almonds
-
225g butter, slightly softened
-
85g caster sugar
-
1 large lemon, grated zest only
-
Preheat the oven to 180 degrees C. Lightly flour a 25.5 x 30 cm baking tray.
-
If you have a food processor: Place the flour, almonds, butter, sugar and lemon zest in the bowl then mix until it all comes together.
-
If you are making it by hand: Cream the butter and sugar together until it is light and fluffy. Sift the flour and almonds into the mixture, then mix it together with your hands until the dough comes together.
-
Place the mixture in the tray and spread it out evenly.
-
Bake for 20 minutes or until golden brown. Mark the shortbread into squares while it is still soft, then leave to cool in the tray for about 10 to 15 minutes. Then transfer to a wire cooling rack to cool completely.
Lime Pickle
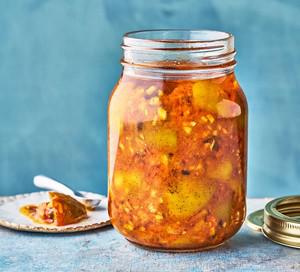
-
500g limes
-
(about 7)
-
8 large garlic cloves
-
finely chopped
-
2 tsp Kashmiri chilli powder
-
1 tsp ground turmeric
-
30g fine sea salt
-
1 tsp black mustard seeds
-
½ tsp fenugreek seeds
-
1 tsp cumin seeds
-
1 star anise
-
1 tsp caster sugar
-
125ml vegetable oil
-
plus 30-50ml extra, if needed
-
30g root ginger
-
peeled and finely chopped
-
3 green chillies
-
deseeded and chopped
-
50ml white wine vinegar
-
70g granulated sugar
-
Ad
-
Put the limes in a saucepan and cover with water. Place a small heatproof plate on top of the fruit to keep them submerged and then bring to a boil over a medium heat and simmer for 20-30 mins until the limes are tender. Scoop out the limes, pat them dry with kitchen paper, and discard the cooking water.
-
Once the limes are cool enough to handle, chop them (peel and pith included) into 3cm chunks and tip everything, including any juice, into a mixing bowl. Stir in the chopped garlic, chilli powder, turmeric and salt, and leave to one side for 1 hour.
Ad
-
Heat a sturdy and dry frying pan over a medium-low heat, and add the mustard seeds, fenugreek, cumin and star anise, Stir and toast the spices for about 40 seconds until aromatic. Tip them into a mortar, add 1 teaspoon of sugar and pound to a powder with a pestle – you can also use an electric spice grinder for this, too.
-
Add this ground spice mix to the limes, stir well, spoon everything into a sterilised jar and then seal. Leave the pickle in a warm place or on a sunny window ledge for 2-3 days so that flavours mature. Stir the limes once a day with a metal spoon to ensure they are evenly coated in the spice mix.
-
Heat the oil in a wok or karahi over a medium-high heat and fry the ginger and green chillies for 2-3 mins, until the ginger starts to turn golden. Add the vinegar and sugar and simmer over a medium-low heat until the sugar has dissolved, then boil for 2 mins.
-
Turn the heat off and add the steeped limes and masala. Leave on one side to cool and then spoon the pickle back into the same jar. Using a metal spoon, push the limes down into the jar so that they are covered by the spicy oil – you might need to add a little extra oil. Seal the jar and leave the pickle for 3-4 days before tasting. It will keep for 3 months at room temperature.
-
Across South Asia, homemade pickles are fermented in the sunshine. As the UK doesn’t have such predictable weather, this method for making lime pickle has been adapted to suit a damp climate.
-
Traditionally, mustard oil is used for pickling in North India and untoasted sesame oil in South India. However, in the UK, mustard oil is not licenced for use in cooking.
Liverwurst
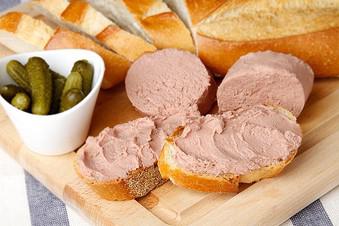
-
1 1/2 kg 80-85% lean pork shoulder
-
900 g fresh (or fresh frozen) pork liver
-
1 medium onion, grated
-
2 tablespoons salt
-
1 tablespoon fine ground black or white pepper
-
1 teaspoon allspice
-
1 teaspoon dried marjoram
-
1/2 teaspoon ground sage
-
1 cup ice water
-
sausage casings (natural pork or collagen)
-
Cut the liver into easily handled pieces and simmer it in about 2 cups of water. The liver should be cooked but still be slightly pink inside.
-
Cut the pork into 1 inch cubes.
-
Pass the liver and pork through the fine plate of your meat grinder at least twice. You want a very finely ground mixture.
-
Combine the spices in a 1 liter container and mix with the 1 cup of ice water.
-
Pour the spice and water combination into the ground meat and mix thoroughly for at least 2 minutes. Use your hands for mixing to assure even distribution.
-
Once the sausage is fully mixed, stuff it into 38-42 mm natural pork casings or comparable collagen casings.
-
Simmer the stuffed sausage in water just below the boil until the internal temperature reaches at least 152 degrees F (66 C).
-
Once your liverwurst has finished cooking, cool it to room temperature and package it. It will keep well in the refrigerator for a week and freezes nicely.
Lorenzo's Meatballs
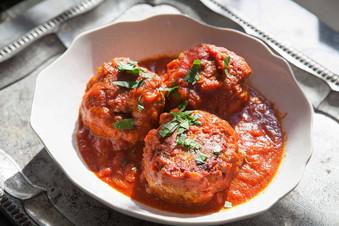
-
1 kg pork neck finely minced
-
1/2 kg beef finely minced
-
200 g double smoked ham finely sliced
-
2 grated onions
-
2 garlic cloves crushed
-
6 tblsp parsley finely chopped
-
4 eggs
-
1 cup breadcrumbs
-
Salt/Pepper
-
2 cups tomato sauce
-
Chopped parsley
-
Add all ingredients to a large bowl and mix well
-
Season the mix again after resting for 30 minutes
-
Weigh the meat at 35 gms and shape into neat balls
-
Refrigerate to dry out
-
Coat in flour then shallow fry in vegetable oil till well browned turning so that totally cooked on exterior
-
Transfer to a baking tray and cover with tomato sauce then place in a pre-heated 180c oven for 30 minutes
-
Leave to cool then refrigerate
-
To reheat place meatballs in small pot with some sauce plus extra snack and slowly bring back to heat
-
Serve with chopped parsley
Low-Carb Cloud Bread

-
3 eggs
-
130 g (130 ml) cream cheese
-
1 pinch salt
-
½ tbsp ground psyllium husk powder
-
½ tsp baking powder
-
¼ tsp cream of tartar (optional)
-
Separate the eggs, with the egg whites in one bowl and the egg yolks in another.
-
Whip egg whites together with salt until very stiff. You should be able to turn the bowl over without the egg whites moving.
-
Mix the egg yolks and the cream cheese well. If you want, add the psyllium seed husk and baking powder (this makes it more bread-like).
-
Gently fold the egg whites into the egg yolk mix – try to keep the air in the egg whites.
-
Place as many dollops of the mixture as servings in the recipe on a paper-lined baking tray. Spread out the circles with a spatula to about ½ inch (1 cm) thick pieces.
-
Bake in the middle of the oven at 300° F (150° C) for about 25 minutes – until they turn golden.
-
You can store the cloud bread in the refrigerator for 2-3 days or in the freezer for up to 3 months. Put a layer of parchment paper between each bread to avoid the pieces sticking together. That way you can grab as many pieces as you want and there's no need to thaw them all at once.
Macadamia Nut Biscuits
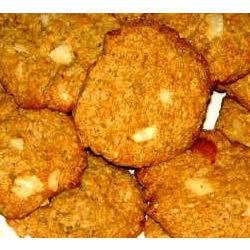
-
1 1/2 cups (185g) plain flour
-
1 teaspoon salt
-
1 teaspoon bicarb soda
-
3 cups rolled oats
-
1/2 cup chopped macadamia nuts
-
1 cup (220g) packed brown sugar
-
1 cup (200g) white sugar
-
250g margarine
-
2 eggs
-
1 teaspoon vanilla essence
-
Sift flour, resift with salt and bicarb soda. Stir in oats and nuts and set aside.
-
Cream together sugar and margarine. Add eggs and vanilla. Add dry ingredients and beat until thoroughly mixed.
-
Roll dough in baking paper like logs, shaping as you roll. Refrigerate overnight.
-
Unroll dough and slice 5mm thick and place on an ungreased baking tray. Bake at 180 degrees C for 10 to 12 minutes.
Macaroni Casserole
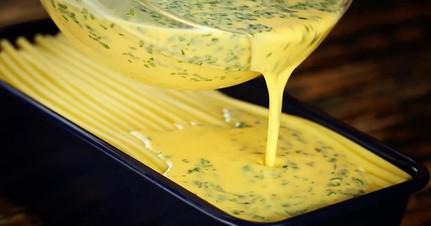
-
1 eggplant
-
salt and pepper
-
10 oz cooked long macaroni
-
12 slices ham
-
6 eggs
-
1 cup cream
-
2/3 cup parsley
-
1 garlic clove, chopped
-
1 and 1/4 cups grated mozzarella
-
Cut the eggplant into thick slices and sprinkle with salt.
-
Place the cooked macaroni in three layers in a bread pan, followed by a layer of eggplant.
-
Tightly roll up the ham slices and create a layer on top of the eggplant. Repeat the whole layering process, ending with a layer of macaroni at the very top of the pan.
-
In a bowl, mix the eggs, cream, parsley, garlic, and salt and pepper. Pour the mixture over the macaroni and finally, sprinkle the mozzarella cheese over the top.
-
Bake for one hour at 320°F.
-
Alternatively, this recipe can be made using other meat and veggies. The egg and cream mixture can also be poured onto each individual ayer for better distribution. Once finished, cut into slices, serve with a bit of fresh salad, and enjoy!
Madeleines Recipe
-
7 tablespoons unsalted butter (100g)
-
¾ cup all-purpose flour plus 1 tablespoon (100g)
-
¼ teaspoon baking powder
-
pinch salt
-
2 large eggs room temperature
-
½ cup granulated sugar (100g)
-
1 teaspoon vanilla extract
-
1 teaspoon lemon zest
-
Powdered sugar for dusting
-
Melt the butter in either in your microwave or in a small pot over medium heat. Once melted, pour the butter into a bowl and allow it to cool to room temperature.
-
In a medium bowl, sift together the flour, baking powder and salt. Whisk it together and set aside.
-
In the bowl of a stand mixer fitted with a whisk attachment (or in a large bowl using a handheld mixer), combine the eggs and sugar. Beat on high speed for 4 to 5 minutes until the mixture is a very pale yellow color with a thick silky texture. (This may take closer to 5 to 7 minutes with a handheld mixer.) When you lift the beaters, the mixture will leave thick ribbons on the surface when it’s ready. Mix in the vanilla and lemon zest on low speed just until combined.
-
Fold the dry ingredients into the egg mixture and mix until just combined. (You can sift the flour mixture into the eggs while you fold to avoid getting lumps or over-mixing the delicate batter.)
-
Drizzle the butter into the batter and gently mix until just combined.
-
Cover and refrigerate the batter for 1 hour.
-
Spray inside the cavities of the Madeleine pans with nonstick baking spray. (Alternatively, you can brush them 1 tablespoon of melted butter). Refrigerate the pans for about 1 hour while the batter is chilling.
-
After the batter has chilled for 40 minutes, preheat the oven to 350°F.
-
Scoop a generous tablespoon of batter into each of the scallop-shaped wells. Bake for 8 to 10 minutes until golden brown on top and the cakes spring back slightly when pressed with your finger.
-
Let the madeleines cool in the pan for about 3 minutes, then turn out of the pan to cool completely (not on the scalloped side.)
-
Serve with a light dusting of powdered sugar.
Magic Custard Cake Slice

-
4 eggs at room temperature, separated
-
1 cup (220g) caster sugar
-
1 tbsp water
-
125g unsalted butter, melted and cooled
-
2 teaspoons vanilla extract
-
¾ cup (110g) plain flour
-
2 cups (500ml) lukewarm milk
-
Pure icing sugar for dusting
-
Preheat oven 160°C /140°C (fan forced) and grease and line a square 20cm baking dish with 6cm high sides with baking paper. making sure to leave a 2cm overhang on two of the sides.
-
Beat egg yolks, sugar and water together with electric beaters for about 5 minutes until mixture is almost white and with a fluffy texture.
-
Reduce speed to low, slowly drizzle in the melted butter and continue beating for a further 1-2 minutes until well combined. Add flour and continue beating until completely incorporated.
-
Gradually pour in warmed milk and vanilla. Beat on low speed until all the milk has been added.
-
Place egg whites into a separate mixing bowl and using cleaned electric beaters, whisk until stiff peaks form. Add to the egg yolk and flour mixture and mix gently with a whisk, making sure to leave distinct lumps of unmixed egg white. Do not over stir or overmix.
-
Pour into prepared baking dish and bake for 60-70 minutes or until the edges are set, and the top is golden brown. The cake should feel firm to touch but centre should still wobble when the pan is jiggled.
-
Cool completely at room temperature before covering with cling wrap and refrigerating for at least 4 hours or preferably overnight.
Remove from baking dish and dust in icing sugar, cut into squares and top with fresh strawberries.
-
Ovens can vary greatly, and this may affect the cooking times. Start checking slice at 45 minutes cook time
-
Whip those egg yolks.
-
Stir, don’t fold, the whipped egg whites. You want to see unmixed clumps of egg white in the batter.
-
Allow magic custard slice to stand at room temperature to cool. Refrigerate
-
Keep magic custard slice, cover or in a sealed container for 3-4 days
Manu's Gruyère Cheese Flan
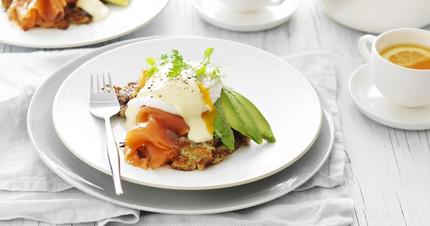
-
240ml pouring cream
-
240ml full fat milk
-
4 sprigs fresh thyme
-
1 small clove of garlic, slightly crushed
-
3 whole eggs
-
2 egg yolks
-
60g grated cheese, either Gruyère, Comté or Emmental
-
60g grated Parmesan
-
Baby leaf and herb salad, to serve
-
Pre-heat oven to 150°C, lightly grease 4 x 160ml ramekins and bring a kettle of water to boil.
-
Pour the cream and milk into a small saucepan over a medium heat. Add garlic and thyme and heat until the mixture begins to steam.
-
Crack the eggs into a medium bowl, season with salt and give it a good whisk. Stir in cheese.
-
Remove thyme and garlic from the cream. Gradually pour the hot cream into the egg mixture, whisking constantly. Pour the mixture back into a saucepan over a medium heat and whisk until cheese is completely melted.
-
Strain the mixture through a fine sieve and into a heatproof jug.
-
Pour the mixture into prepared ramekins.
-
Place ramekins in a deep baking tray and fill it with boiling water, until the water is about 1 inch off the top of the ramekins. Bake for 25-30 minutes or until the mixture is just set but still jiggles in the middle. Leave to sit for 10-15 minutes to cool slightly before serving.
-
To serve, invert flans onto plates and finish with a salad of baby herbs and greens.
Marmalade Pudding
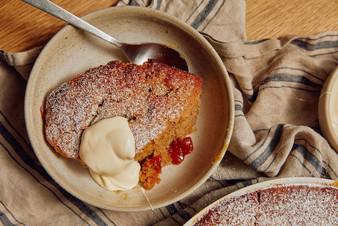
-
200g Seville orange marmalade, see tips above
-
Juice of an orange
-
300g self-raising flour
-
1 teaspoon ground ginger
-
1 teaspoon ground cloves
-
1 teaspoon ground cardamom
-
1 teaspoon ground cinnamon
-
Pinch sea salt
-
200g unsalted butter, softened
-
100g caster sugar
-
100g brown sugar
-
1 vanilla pod, split and seeds scraped, or 1 teaspoon vanilla extract
-
3 eggs
-
300g natural yoghurt
-
Pure icing sugar, to serve
-
Double cream, to serve
-
Preheat the oven to 180˚C.
-
Gently warm the marmalade and orange juice together in a small saucepan over a medium heat for 1–2 minutes or until well combined, stirring often to avoid the marmalade catching on the base of the saucepan. Pour into a round 28cm baking dish and spread across the base to create an even layer. Set aside to cool.
-
Combine the flour with the ground spices and sea salt in a medium bowl and set aside.
-
Combine the butter and sugars together in a large bowl. Cream them together until pale and fluffy, either by hand with a wooden spoon or ideally in a stand mixer fitted with a paddle attachment. Add the vanilla (add the seeds if using a vanilla bean, discarding the tough stalk) and mix to combine. Add the eggs, one at a time, beating well between each addition. Add one-third of the yoghurt, mixing well, then add one-third of the flour mixture and mix to combine. Continue adding in this alternating fashion until everything is mixed in. Ensure that towards the end you combine very gently to avoid over-mixing the batter.
-
Spoon the batter onto the marmalade and gently spread it across to form an even layer.
-
Bake in the preheated oven for 35–40 minutes or until the cake is golden and springs back when gently pressed in the centre. Dust with icing sugar and serve hot with plenty of double cream.
Meat Loaf with Bacon
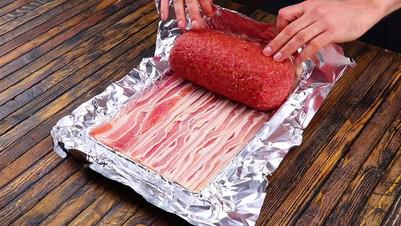
-
2¼ lbs ground beef
-
1⅓ cups breadcrumbs
-
1 tbsp salt
-
1/2 tbsp pepper
-
2 eggs
-
7 oz ham
-
5 oz cheese (6 slices)
-
3.5 oz baby spinach
-
14 oz bacon
-
Mix the ground beef with breadcrumbs, salt, pepper and eggs.
-
Line a baking tray with aluminum foil and press the ground beef mixture into a thin, flat surface. Then add a layer each of ham, cheese, and baby spinach.
-
Using the aluminum foil, roll the entire sheet of beef into a giant log, sealing the ends with ground beef so the other ingredients don't seep out during cooking.
-
Replacing the aluminum foil flat on the baking tray, cover the entire surface with bacon, overlapping the slices so that the bacon layer forms a continuous sheet. Then place the meatloaf at one end and roll along the bacon, holding the aluminum foil as a guide, until the bacon is wrapped around the entire meatloaf.
-
Wrap in aluminum foil and bake at 390 °F for 60 minutes, removing the foil after 30 minutes so that the bacon crisps up nicely.
Mediterranean Brown Rice Salad
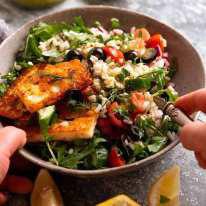
-
3 cups cooked brown rice , cooled but not cold
-
2 tomatoes , diced
-
2 cucumbers , diced (or 1 long English/continental cucumber)
-
1/2 red onion , chopped (sub 2 stems green onion)
-
40g/ 4 cups tightly packed baby rocket/arugula , roughly chopped (or baby spinach)
-
1/3 cup coriander/cilantro leaves , roughly chopped (Note 2)
-
1/3 cup fresh dill leaves , roughly chopped (Note 2)
-
3 tbsp lemon juice
-
5 tbsp extra virgin olive oil
-
1 garlic cloves , minced using garlic press
-
1/2 tsp Dijon mustard (Note 3)
-
3/4 tsp salt , kosher/cooking salt (1/2 tsp table salt)
-
1/2 tsp black pepper
-
1/2 cup black olive slices
-
200g/7oz halloumi , sliced then pan fried in a little olive oil until golden and crispy
-
Other topping options: feta, parmesan, nuts (Note 4)
-
Place Dressing ingredients in a jar and shake well to combine.
-
Place Salad ingredients in a big bowl. Drizzle over Dressing, toss well.
-
Transfer to serving bowl. If using Halloumi, pile on top.
-
Serve!
-
Salad veg - customisable with other raw or cooked veg (sautéed in a little oil, garlic, salt & pepper, or roasted).
-
Fresh herbs - this is one of my favourite fresh herb combinations for salads, they go together brilliantly and it really makes this salad something special. But if you don't have them / have an aversion to coriander/cilantro, try one of these:
-
parsley or chives and dill
-
chives and parsley
-
just coriander/cilantro or dill (double up)
-
Dijon mustard - sub yellow mustard, or omit. Makes the dressing a wee bit thicker which is great for fine-grain type salads because it helps coat better.
-
Nut option suggestions - flaked almonds, walnuts, pine nuts, pistachios, cashews, sunflower seeds, pepitas. I feel like peanuts would be odd, but someone may prove me wrong.
-
Storage - keeps for 3 days, though the tomato does looks perky juiciness the next day. I also like to either hold back some dressing to give it a fresh drizzle just before serving, or even a squeeze of fresh lemon and drizzle of olive oil will do the trick.
-
Most importantly though, SERVE AT ROOM TEMP. Cold rice is hard and not pleasant. If need be, give it 3 x 10 second zaps in the microwave to take the chill out of it.
-
LEFTOVER HALOUMI- pro tip: refrigerate cooked halloumi, then chop it into small batons and reheat in microwave. Toss through salad. So good!
-
Nutrition per serving, assuming 8 servings. Excellent veg starch side dish for meals.
Mediterranean Chicken Bake
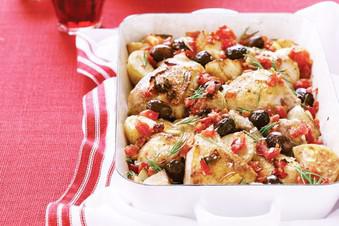
-
1 tbsp olive oil
-
6 small (about 600g) chicken drumsticks
-
6 (about 1.5kg) chicken thigh cutlets
-
1kg chat (small coliban) potatoes, halved
-
2 ripe tomatoes, finely chopped
-
95g (1/2 cup) kalamata olives
-
2 garlic cloves, peeled, thinly sliced (see notes for Low FODMAP substitution)
-
2 sprigs fresh rosemary, leaves picked
-
125ml (1/2 cup) dry white wine
-
Sea salt flakes
-
Freshly ground black pepper
-
Preheat oven to 200°C. Heat the oil
-
in a 3L (12-cup capacity) flameproof, ovenproof baking dish over medium heat. Add the chicken drumsticks and cook, turning occasionally, for 5 minutes or until browned all over. Transfer to a plate and cover with foil to keep warm. Repeat with the chicken thigh cutlets.
-
Add the potato to the dish and cook, turning occasionally, for 5 minutes or until golden. Remove from heat. Add the chicken to the potato in the dish and top with tomato, olives and garlic. Sprinkle with rosemary. Pour over the wine. Season with salt and pepper.
-
Bake in oven for 45 minutes or until the chicken is cooked through and potato is tender. Serve immediately.
Mediterranean Fish Salad
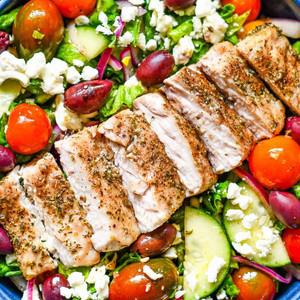
-
8 ounces boneless, skinless fish fillets, 1 to 1 ½ inches thick
-
2 Tablespoons olive oil
-
½ teaspoon kosher salt
-
½ teaspoon black pepper
-
½ teaspoon garlic powder
-
1 teaspoon dried oregano leaves
-
3 Tablespoons extra-virgin olive oil
-
1 ½ Tablespoons red wine vinegar
-
½ teaspoon dried oregano leaves
-
½ teaspoon kosher salt
-
¼ teaspoon black pepper
-
¼ teaspoon garlic powder
-
1 head of green leaf lettuce or romaine lettuce, chopped (about 3 cups)
-
1 cup cherry tomatoes
-
½ English cucumber, sliced into ¼-inch-thick half-moons
-
½ cup thinly sliced red onion
-
½ cup pitted kalamata olives, plus 2 tablespoons of the juice from the jar
-
½ cup crumbled feta cheese
-
Preheat the oven to 400 degrees F.
-
In a large zip-top bag, combine the fish with the olive oil, salt, pepper, garlic powder, and oregano. Marinate in the refrigerator for 15 minutes.
-
Shake off any excess marinade before placing the fish on a rimmed baking sheet lined with parchment paper. Bake for 12 to 15 minutes until center is just opaque and fish registers 135 degrees F internal temperature using a meat thermometer.
-
While the fish is in the oven, make the salad dressing. In a small bowl, whisk together the olive oil, red wine vinegar, oregano, salt, pepper, and garlic powder. Set aside at room temperature for the flavors to meld while you prepare the remaining salad components.
-
In a large bowl, combine the lettuce, tomatoes, cucumber, red onion, olives, feta, and salad dressing. For the extra punch of flavor, add the kalamata juice and toss well.
-
Remove the fish from the oven and transfer to a cutting board and let it rest for 5 minutes. Slice the fish into bite-size pieces and place on top of the salad. Serve immediately.
Mediterranean Meatloaf
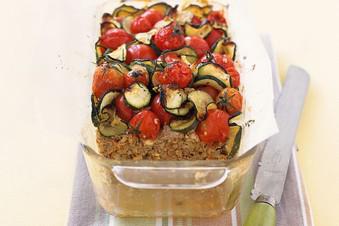
-
1/2 cup brown rice
-
1 small red onion, grated
-
350g lean beef mince
-
1 carrot, peeled, grated
-
60g low-fat feta cheese, crumbled
-
2 tablespoons tomato sauce
-
1 tablespoon worcestershire sauce
-
1 egg, lightly beaten
-
2 tablespoons basil leaves, shredded
-
1 zucchini, thinly sliced
-
375g cherry tomatoes
-
1 garlic clove, crushed
-
olive oil cooking spray
-
Cook rice following absorption method on packet. Set aside to cool.
-
Preheat oven to 200°C. Grease base and sides of a 7cm-deep, 10cm x 18cm (base) loaf pan. Line with baking paper, allowing a 2cm overhang at both long ends.
-
Combine rice, onion, mince, carrot, feta, sauces, egg and basil in a bowl. Mix well. Press into prepared pan.
-
Place zucchini, tomatoes and garlic in a bowl. Spray with oil. Toss to combine. Spoon over meatloaf. Bake for 60 to 80 minutes or until meatloaf is firm. Stand for 10 minutes. Slice and serve.
Melting Moments with Lemon Buttercream Biscuits

-
180 g salted butter, softened at room temperature
-
1/4 cup 40g icing sugar, sifted
-
1 tsp vanilla bean extract
-
200 g gluten free plain flour, sifted, or regular all purpose flour, I use ‘Bob’s Red Mill Baking 1-1 Gluten Free Flour’*
-
1/4 cup 40g cornflour, sifted
-
50 g salted butter, softened at room temperature
-
2 cups icing sugar (confectioners sugar)
-
2 tsp finely grated lemon zest
-
1 Tbsp fresh lemon juice
-
Preheat oven to 180ºC (356ºC). Line a large baking tray with parchment paper, set aside.
-
In a large mixing bowl, or the bowl of an electric stand mixer (if using), add softened butter, sifted icing sugar and vanilla. Beat on medium-high for 2-3 minutes or until mixture turns light/pale yellow and fluffy in texture. Scraping down the sides as needed.
-
Sift over flour and cornflour. Beat until well combined and mixture forms a soft dough. NOTE: the dough will be quite smooth/soft, still holding it’s shape when rolled into rounds. If dough is too wet/sloppy, add a little more plain flour until it comes together.
-
Pick up approx. 2 tablespoons worth of dough (weighing approx. 25g each) and roll into small rounds. Place on lined tray and repeat with remaining dough. Leaving a small 2-inch gap between each to allow for spreading during cooking.
-
Take a lightly floured fork and gently press the back of the fork down on each round to slightly flatten.
-
Bake for 8-12 minutes or until very lightly golden around the edges. Some cracks will appear on top.
-
Remove and cool on tray for 5 minutes.
-
Carefully transfer to a wire rack to cool completely. Biscuits will be quite delicate to handle when still warm.
-
In a mixing bowl, or the bowl of an electric stand mixer (if using), add softened butter. Beat on medium-high for a few seconds until butter turns creamy.
-
Add 1 cup icing sugar and beat until just combined.
-
Add remaining 1 cup icing sugar, lemon zest and lemon juice. Beat for 1 minute until light and creamy. NOTE: if needed, add extra lemon juice if mixture is too dry or add more icing sugar if mixture is too wet/sloppy and won’t hold it’s shape.
-
Spoon frosting into a piping bag fitted with a medium sized open star nozzle.
-
Pair up cooled biscuits. Recipe makes 8 melting moments.
-
Pipe frosting on the underside of 1 biscuit in each pair.
-
Very gently sandwich together with second biscuit.
-
Serve and enjoy!
-
Store in an airtight container, in the pantry or refrigerated, for 4-5 days.
-
I use Bob’s Red Mill Gluten Free 1-to-1 Baking Flour.
Mexican Layer Dip
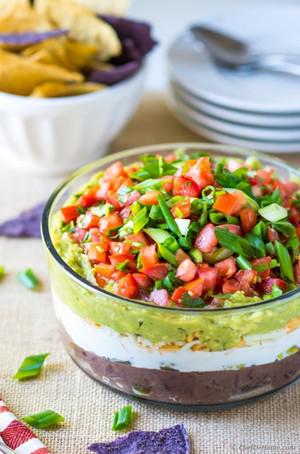
-
1 can refried beans
-
300ml sour cream
-
1 sachet taco seasoning mix
-
250g Philadelphia cream cheese
-
2 avocados
-
5ml lemon juice
-
60g tasty cheese, grated
-
2 spring onions, chopped
-
1 tomato, chopped
-
Corn chips, to serve
-
Into a casserole dish, spread a layer of refried beans.
-
Mix sour cream and seasoning mix together and spread across the refried bean layer.
-
Place the cream cheese, avocado and lemon juice in a separate bowl and blend until combined.
-
Spread over sour cream layer.
-
Top the avocado mixture with cheese, spring onions and chopped tomato. Serve with corn chips.
Milk Arrowroot Biscuits
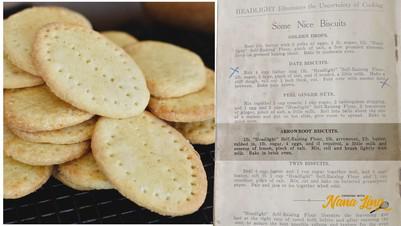
-
1 cup SR flour (140 grams)
-
1 cup Arrowroot (Tapioca Flour) (140 grams)
-
100 grams butter (cubed)
-
1/2 cup caster sugar
-
1 egg
-
1 tablespoon milk
-
extra milk for brushing biscuits
-
Pre-heat oven to 190 degrees celsius, fan-forced.
-
Combine flour and arrowroot, and rub in butter.
-
Add sugar and stir to combine.
-
Whisk egg and milk together. Add to dry ingredients and stir to combine with a butter knife to form a dough. You may need to add a little extra milk (up to 1/2 tablespoon) so that mixture forms a dough and holds together.
-
Flour your work bench and then break dough into two parts. Use a rolling pin to roll mixture out until it is approximately 3mm thick.
-
Cut out with an oval or circle-shaped cutter and place on a baking tray lined with baking paper.
-
Brush the biscuits with a little extra milk and then prick each biscuit with a fork.
-
Bake for 10-12 minutes.
Mini Raspberry Friands

-
Melted butter, to grease
-
Plain flour, to dust
-
195g (1 1/2 cups) pure icing sugar, sifted
-
75g (1/2 cup) plain flour, sifted
-
155g (1 1/2 cups) almond meal
-
3 eggs, lightly whisked
-
180g unsalted butter, melted, cooled
-
100g frozen raspberries
-
2 tbsp flaked almonds
-
Icing sugar, to dust
-
Select all ingredients
-
Preheat oven to 180°C. Brush thirty 40ml-capacity mini muffin pans with melted butter to grease. Dust with plain flour.
-
Combine the sugar, flour and almond meal in a bowl. Make a well in the centre. Add egg and butter. Stir until well combined.
-
Divide among the prepared pans. Divide the raspberries among the centres. Sprinkle with the flaked almonds.
-
Bake for 15-20 minutes or until light golden. Set aside in the pans for 5 minutes to cool slightly before transferring to wire racks to cool completely.
-
Dust the friands with icing sugar to serve.
Mixed Greens with Indian-Style Green Chutney
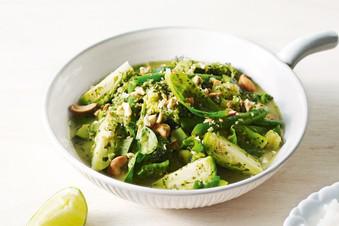
-
1 tablespoon sunflower oil
-
300g broccoli, cut into florets
-
150g Brussels sprouts, halved
-
2 zucchinis, chopped
-
100g green beans, halved
-
300ml vegetable stock
-
100g baby spinach leaves
-
100ml light coconut milk
-
2 tablespoons toasted cashews, roughly chopped
-
Lime wedges, to serve
-
1 onion, roughly chopped
-
1 teaspoon finely grated ginger
-
2 garlic cloves, chopped
-
1 long green chilli, chopped
-
2 cups coriander leaves
-
1 cup mint leaves
-
1 tablespoon desiccated coconut
-
2 teaspoons ground cumin
-
2 teaspoons ground coriander
-
1 tablespoon lime juice
-
For the chutney, whiz all the ingredients and 1/3 cup (80ml) cold water in a food processor until a thick paste. Season.
-
Heat oil in a frypan over medium-high heat. Cook broccoli, sprouts and zucchini for 3-4 minutes. Add beans and stock, reduce heat to medium and cook for 6-8 minutes until liquid is slightly reduced and vegetables are tender. Add spinach, coconut milk and chutney, then cook, tossing, for 2 minutes or until spinach is wilted. Serve with cashews and lime wedges.
Molten Chocolate Cakes

-
1 stick (4 ounces) unsalted butter
-
6 ounces bittersweet chocolate, preferably Valrhona
-
2 eggs
-
2 egg yolks
-
1/4 cup sugar
-
Pinch of salt
-
2 tablespoons all-purpose flour
-
Preheat the oven to 450°. Butter and lightly flour four 6-ounce ramekins. Tap out the excess flour. Set the ramekins on a baking sheet.
-
In a double boiler, over simmering water, melt the butter with the chocolate. In a medium bowl, beat the eggs with the egg yolks, sugar and salt at high speed until thickened and pale.
-
Whisk the chocolate until smooth. Quickly fold it into the egg mixture along with the flour. Spoon the batter into the prepared ramekins and bake for 12 minutes, or until the sides of the cakes are firm but the centers are soft. Let the cakes cool in the ramekins for 1 minute, then cover each with an inverted dessert plate. Carefully turn each one over, let stand for 10 seconds and then unmold. Serve immediately.
-
Make Ahead
-
The batter can be refrigerated for several hours; bring to room temperature before baking.
Moroccan Carrot and Cucumber with Orange, Thyme and Black Olives Salad
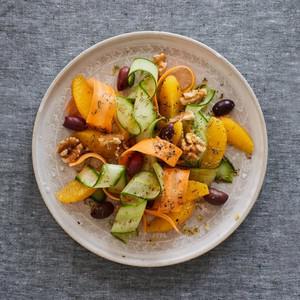
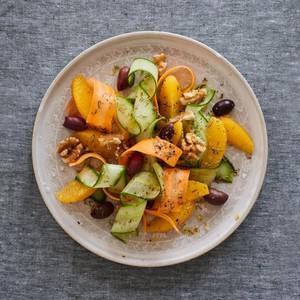
-
5 oranges, peeled and segmented
-
3 large carrots (200g), topped, tailed, peeled
-
1 large cucumber (500g), peeled
-
3 tbsp olive oil
-
1 tbsp dried thyme
-
1 tsp lemon juice
-
150g black olives, drained, pitted and roughly chopped
-
80g shelled walnuts, roughly chopped
-
Sea salt flakes
-
Peel and segment the oranges, then refrigerate until ready to use.
-
Using a vegetable peeler, cut the carrots lengthways into wide ribbons. Repeat with the cucumber, except, when you reach the seeds, turn the cucumber 45 degrees and repeat on the other sides. Discard the seedy core and set aside.
-
In a small bowl, stir together the olive oil, thyme and lemon juice, until smooth.
-
Just before you are ready to serve, toss the orange segments, carrot and cucumber ribbons, olives, walnuts and dressing in a large bowl. Lightly sprinkle with sea salt flakes and serve immediately.
Moroccan Fish Stew
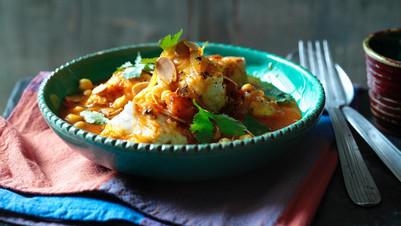
-
1 tbsp olive oil
-
1 large onion, thinly sliced
-
1 garlic clove, crushed
-
2 tsp grated fresh ginger
-
1 tsp ground cumin
-
1 tsp turmeric
-
1 cinnamon stick
-
pinch cayenne pepper
-
400g/14oz can chopped plum tomatoes
-
pinch salt
-
500g/1lb 2oz firm white fish fillets (cod, snapper or ling) cut into chunks
-
400g/14oz can chickpeas, rinsed and drained
-
2 tsp honey
-
salt and freshly ground black pepper
-
fresh coriander leaves
-
flaked almonds, lightly toasted
-
Heat the olive oil in a large heavy-based pan over a medium heat. Add the onion and cook, stirring occasionally, for five minutes, or until the onion is translucent.
-
Add the garlic, ginger, cumin, turmeric and cinnamon stick and cook for two minutes, stirring regularly.
-
Add the cayenne pepper, tomatoes, salt and 250ml/9oz of water and cook, stirring frequently, for ten minutes.
-
Add the fish and simmer for five minutes, or until the fish is almost cooked through and tender.
-
Add the chickpeas and honey and cook for a further 2-3 minutes, then season, to taste, with salt and freshly ground black pepper.
-
To serve, spoon out the tagine into bowls and garnish with fresh coriander leaves and flaked almonds.
Moroccan Vegetable Soup

-
vegetable oil 2 tsp
-
onion 1, finely chopped
-
celery 3 sticks, finely chopped
-
garlic 3 cloves, finely chopped
-
preserved lemons 2, flesh discarded and rind finely chopped
-
red chillis 2, deseeded and finely chopped
-
tomato purée 1 tbsp
-
ground cumin 2 tsp
-
ground turmeric 1 tsp
-
ground cinnamon ½ tsp
-
chopped tomatoes 400g tin
-
potato 1 large (350g), cut into 2cm chunks
-
chickpeas 400g tin, drained and rinsed
-
spinach 80g
-
flat-leaf parsley a bunch, roughly chopped
-
lemon 1 ½ juiced and ½ wedged to serve
-
Heat the vegetable oil in a large pan and add the onion, celery and a pinch of salt. Put on a lid and cook gently for 10 minutes, stirring regularly. Add the garlic, preserved lemons and red chillies, and cook for 2 minutes. Add the tomato purée and spices, and cook for a further 2 minutes before adding the chopped tomatoes, potato, chickpeas and 1.25 litres of boiling water.
-
Bring to the boil, then turn down and simmer for 30 minutes until the potatoes are tender. Tip in the spinach, flat-leaf parsley and a little seasoning, and stir for 1 minute until wilted. Add the lemon juice, then spoon into bowls with lemon wedges for squeezing.
Moussaka
-
1kg lamb leg chops
-
1 large eggplant
-
salt
-
90g butter
-
1 large onion
-
1clove garlic
-
470g can whole tomatoes
-
1 cup dry white wine salt, pepper
-
1/2 teaspoon nutmeg
-
oil for frying
-
185g cheddar cheese
-
1/2 cup packaged dry breadcrumbs
-
30g butter, extra
-
90g butter
-
1/2 cup flour
-
2 cups milk
-
1/2 teaspoon nutmeg
-
one lightly beaten egg
-
Cut eggplant into slices, salt leave 30 minutes, rinse and dry.
-
Melt butter in pan.
-
Add meat, onion and garlic and brown.
-
Add tomatoes, white whine, salt, pepper and nutmeg.
-
Fry eggplant and place in dish.
-
Sprinkle 1/3 of cheese and brreadcrumbs.
-
Spoon meat on top.
-
Spread white sauce on top.
-
Sprinkle remainder of cheese mix
-
Bake 20-25 mins in hot oven
Muesli Slice
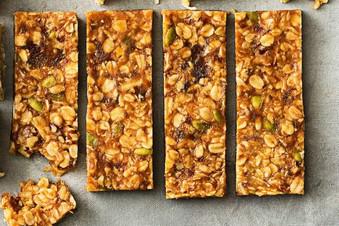
-
1 cup rolled oats
-
1 cup rice bubbles
-
4 weetbix - crushed
-
1 cup coconut or flaked almonds
-
¾ cup brown sugar
-
¼ cup dried apricots
-
¼ cup dried apples or cranberries
-
125gm butter
-
½ cup honey
-
½ cup peanut butter
-
In a saucepan bring to boil butter, honey and peanut butter
-
Reduce heat and simmer, stirring constantly, for 5 minutes or until mixture thickens
-
Add honey mixture to mixed dry ingredients.
-
Press evenly into a tray and refrigerate until set before cutting
Mujadara Recipe (Authentic Lebanese Lentil and Rice)
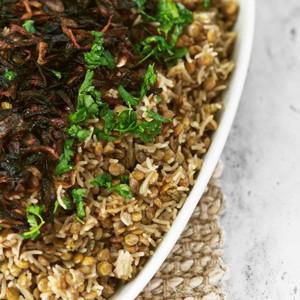
-
2.5 cups Brown lentils
-
2 cups Basmati rice
-
6 cups water 3 cups for soaking and 3 cups for cooking
-
600 g Onion divided (½ finely sliced & ½ finely diced)
-
½ cup Olive Oil
-
¾ tbsp Salt
-
Metric - US Customary
-
Over high heat olive oil in pot and add finely sliced onion, fry until dark brown, set onion aside
-
In the same pot, using same oil fry finely diced onion until lightly golden
-
Add lentils and salt. Submerge in water (covering lentils at least 1cm above), cook on med-high heat until lentils are par boiled
-
Add rice and bring to the boil, reduce heat to low and allow contents to cook, stirring no more than three times. This should take around 15 minutes
-
Serve topped with caramelised onion
-
It's best to wash lentils in cold water and then soak for about 30 minutes prior to cooking
-
- you may require to add an additional tsp of olive oil if too much was taken out at step 1
-
& 4 - you may need to add additional water to ensure all contents is submerged in 1cm of water
-
To identify par boiled lentils, simply pick out a couple of lentils using your thumb and index finger, squeeze between the two and if the lentil has a soft outer and hard inner, then it is par boiled
-
Be careful when caramelising onion, toward the end it will brown fast and it's often a matter of seconds before it burns
-
When cooking mujadara, the entire recipe is always cooked in one pot. No need to fuss about additional washing. Get yourself a bottom heavy pot, thin pots will burn the rice and may turn out mushy.
-
Do not over stir the rice as this will cause it to break apart and become mushy
-
Don’t use quick cook microwave rice
-
Serving suggestion will yield left overs
Mushroom Cauliflower Risotto
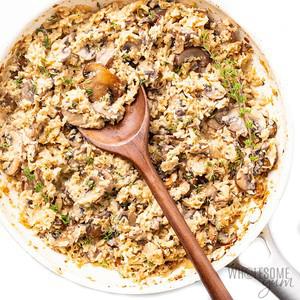
-
2 tbsp Butter
-
1/2 large Onion (diced finely; ~3/4 cup)
-
1 lb Portobello mushrooms (sliced thinly)
-
2 cloves Garlic (minced)
-
1 tsp Fresh thyme
-
1 medium head Cauliflower (riced; ~4 cups)
-
1/2 cup Chicken bone broth
-
3/4 cup Heavy cream
-
1/3 cup Grated Parmesan cheese
-
3/4 tsp Sea salt (to taste)
-
1/4 tsp Black pepper (to taste)
-
Tap on the times in the instructions below to start a kitchen timer while you cook.
-
Melt the butter in a saute pan over medium heat. Add the mushrooms and onions, and saute for about 10 to 15 minutes, until the onions are translucent and browned, and the mushrooms are soft and browned. The mushrooms should reduce in size by at least half, and no liquid should remain. (If needed, you can increase heat at the end to help evaporate the liquid.)
-
Add the minced garlic and thyme. Saute for about 1 minute, until fragrant.
-
Add the cauliflower and bone broth. Increase heat to bring to a simmer, then simmer, stirring occasionally, until the cauliflower is tender and liquid is reduced, about 3-5 minutes.
-
Reduce heat to low. Stir in the cream and Parmesan. Continue to heat, stirring constantly, for about a minute, until the cheese melts and sauce is smooth. Season with sea salt and black pepper to taste.
Mushroom Risotto
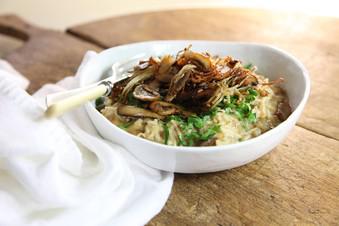
-
80g unsalted butter
-
1 brown onion finely chopped
-
1 1/4 cup arborio rice
-
7 tbspn Verjuice
-
To taste sea salt
-
3 cups Chicken Stock
-
60g parmesan freshly grated
-
2 tbspn Extra Virgin Olive Oil
-
1 tray oyster mushrooms
-
200g enoki mushrooms
-
100g portobello mushrooms
-
To serve freshly chopped flat leaf parsley and extra virgin olive oil
-
Heat 50g butter in a large, shallow, wide-based saucepan. Add the onion and sauté over a low to medium heat until golden.
-
When the onion is cooked, add the rice and stir to coat with the onion mixture. Cook for 1-2 minutes, then increase the temperature to high.
-
Make a well in the centre of the rice and add 100mL of Verjuice, continuing to stir until the liquid is absorbed.
-
Season with salt and reduce heat to low, add a ladle of hot stock and stir until absorbed. Continue adding the stock one ladleful at a time, stirring until each has been absorbed and you've used the whole amount. When the rice is cooked, remove the pan from the heat and stir in the Parmigiano Reggiano.
-
Heat the remaining amount of butter in a large, shallow, wide-based saucepan. When the butter starts to colour and smell nutty add the olive oil and the mushrooms. Cook the mushrooms until golden and tender, then add the remaining amount of Verjuice. Remove from pan.
-
To serve, place the risotto on a large dish and top with the mushrooms and flat leaf parsley before drizzling with Extra Virgin Olive Oil.
Mushroom, Pumpkin and Spinach Risotto
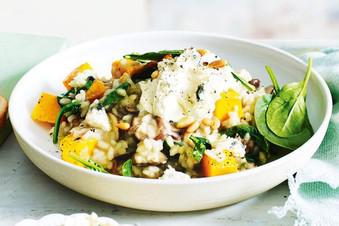
-
500g butternut pumpkin, peeled, cut into 2cm pieces
-
1 tbsp olive oil
-
4 cups (1L) vegetable stock
-
200g Swiss brown mushrooms, thinly sliced
-
1 brown onion, finely chopped
-
2 garlic cloves, crushed
-
1 cup (200g) arborio rice
-
1/2 cup (125ml) white wine
-
60g pkt Coles Australian baby spinach
-
1/2 cup (40g) finely grated parmesan (or vegetarian hard cheese)
-
1/4 cup (40g) pine nuts, toasted
-
100g mascarpone
-
50g blue cheese, crumbled
-
Baby spinach leaves, extra, to serve
-
Select all ingredients
-
Preheat oven to 180C. Line a baking tray with baking paper. Place the pumpkin on the tray and drizzle with 1 teaspoon of the oil. Toss to combine. Bake for 20 mins or until tender.
-
Meanwhile, bring stock to the boil in a saucepan over medium heat. Reduce heat to low and keep at a gentle simmer.
-
Heat half the remaining oil in a large saucepan over high heat. Add the mushroom and cook, stirring, for 5 mins or until lightly browned and tender. Transfer to a bowl.
-
Add the remaining oil to the pan. Add the onion and garlic. Cook, stirring, for 5 mins or until onion softens. Add the rice and cook, stirring, for 2 mins or until the grains of rice appear glassy. Add the wine and cook, stirring constantly, for 2-3 mins or until the wine has been absorbed. Add 1/2 cup (125ml) of the simmering stock to the rice mixture and stir constantly with a wooden spoon until the liquid is completely absorbed before adding more. Continue adding 1/2 - cupfuls of stock for 20 mins or until the rice is tender yet firm to the bite and risotto is creamy.
-
Add the mushroom, pumpkin, spinach, parmesan and half the pine nuts to the risotto. Stir to combine.
-
Combine the mascarpone and blue cheese in a small bowl. Divide the risotto among serving bowls. Spoon over the mascarpone mixture and sprinkle with remaining pine nuts and extra spinach.
My Favourite Tomato Salad

-
4 ripe tomatoes (180g/ 6oz each) (Note 1)
-
1 1/2 tsp finely minced eschalots (US: shallots) (Note 2)
-
1/2 tsp finely minced garlic (use a knife, not garlic press)
-
1 tbsp white wine vinegar (Note 3)
-
3 tbsp extra virgin olive oil
-
3/4 tsp cooking / kosher salt
-
2 pinches white pepper
-
1 1/2 tbsp finely sliced basil leaves , plus extra for garnish (Note 4)
-
Cut the tomatoes into 8 or 10 wedges, cutting out the core. Place in a large bowl.
-
Sprinkle over eschallots, garlic, salt and pepper. Drizzle with olive oil and vinegar.
-
Gently toss to coat tomatoes. Add basil, toss again to disperse.
-
Pour into bowl and serve immediately! (Tip: Bread for mopping up the tomato juices is on point).
-
Tomatoes – Obviously the riper the better! But honestly, I made this yesterday in the middle of Aussie winter with just-okay, greenhouse-grown tomatoes and it was still so, so good. If you’ve got cherry tomatoes or grape tomatoes, try my Cherry Tomato Salad instead (it’s designed for them).
-
Eschallots – also known as French Onions and called “shallots” in the US. More delicate and sweeter than brown onions. Substitute with the white part of green onions, finely minced, or very finely minced red onions.
-
Vinegar – Or apple cider vinegar, sherry vinegar or champagne vinegar. Balsamic vinegar is fine too from a flavour perspective but will stain the tomatoes brown.
-
Basil – worth making even without. I like to add a pinch of dried oregano instead.
-
Nutrition per serving.
Nasi Goreng (Indonesian Fried Rice)

-
1 tbsp oil
-
5 oz / 150g chicken breast , thinly sliced (or other protein)
-
1 tbsp kecap manis (sweet soy sauce, Note 1)
-
1.5 tbsp oil
-
2 garlic cloves , finely chopped
-
1 tsp red chilli , finely chopped (Note 2)
-
1 onion , small, diced
-
3 cups cooked white rice , day old, cold (Note 3)
-
2 tbsp kecap manis (sweet soy sauce, Note 1)
-
2 tsp shrimp paste , optional (Note 4)
-
4 eggs , fried to taste
-
1 green onion , sliced
-
Tomatos and cucumbers, cut into wedges/chunks
-
Fried shallots , store bought (optional) (Note 3)
-
Lime wedges
-
Heat oil in a large skillet or wok over high heat.
-
Add chilli and garlic, stir for 10 seconds.
-
Add onion, cook for 1 minute.
-
Add chicken, cook until it mostly turns white, then add 1 tbsp kecap manis and cook for a further 1 minute or until chicken is mostly cooked through and a bit caramelised.
-
Add rice, 2 tbsp kecap manis and shrimp paste, if using. Cook, stirring constantly, for 2 minutes until sauce reduces down and rice grains start to caramelise (key for flavour!).
-
Serve, garnished with garnishes of choice (green onions, red chilli, fried shallots).
-
Serve as a side for Asian main dishes or as part of a large spread, Asian or not! See in post for suggestions.
-
Make it a meal - traditional Indonesian style!: Serve with a fried egg sunny side up (runny yolk!), tomato wedges and slices of cucumber on the side.
-
Kecap Manis (sometimes called Ketjap Manis) is an Indonesian sweet soy sauce that is thicker than other soy sauces. Sometimes just labelled as "sweet soy sauce". Consistency resembles maple syrup, available in most supermarkets in Australia ( Woolworths, Coles, Harris Farms).
-
Also easy to make your own! Just combine 1/4 cup ordinary soy sauce (I use Kikkoman) and 1/4 cup brown sugar over medium heat. Bring to a simmer and reduce until it becomes a maple syrup consistency. It will thicken more when it cools.
-
Chilli - I use 2 birds eye or Thai red chillies, adds a mild warmth, doesn't make it spicy. Adjust to taste. Chilli paste can also be used instead - add it when you add the rice.
-
Day old cooked rice - All types of fried rice are best made using day old cooked rice that has been refrigerated overnight. It dries it out, making it easier to stir fry to evenly coat the grains with the flavourings. TIP: Keep bags of cooked rice in the freezer! Fabulous for fried rice, or even using plain.
-
Shrimp paste - Adds depth of flavour and complexity, but is optional. Traditional dish uses belacan which is dried shrimp blocks, requires crumbling then toasting prior to use. Same flavour achieved with any shrimp paste which you can just dollop in. Any shrimp paste brand/type is fine.
-
Still tasty WITHOUT shrimp paste. SUB with more kecap mans OR 1 tbsp fish sauce!
-
Fried shallots are slices shallots that have been fried until crunchy. They are a great garnish and add a pop of texture to the dish but are optional because it's not traditional! Fried shallots can be purchased at most supermarkets in Australia (see here for Woolworths).
-
Make this GLUTEN FREE by making your own kecap manis (Note 1) using Tamari.
-
Storage - as with all fried rice, it keeps great for a day or two in the fridge then I find it gets a bit dry. Salvage it with a sprinkle of water then microwave it - makes it all steamy and moist again! Do the same if you freeze it.
-
Nutrition per serving including egg.
Oak Lettuce Salad with Apples, Toasted Walnuts, & Gorgonzola Cheese
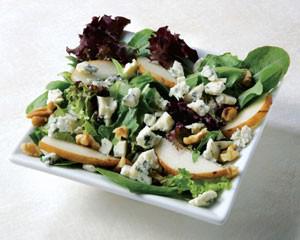
-
1 head oak leaf lettuce
-
2 apples
-
1 cup walnut halves
-
2 cups crumbled gorgonzola cheese
-
juice of one lemon
-
salt and pepper to taste
-
1 tbsp dijon mustard
-
1/4 cup apple cider vinegar
-
1/2 tsp chopped fresh thyme
-
1/4 cup mayonnaise
-
3/4 cup extra virgin olive oil
-
1 cup crumbled gorgonzola cheese
-
Toast the walnuts in an oven for 5-7 minutes. Allow them to cool and then lightly chop.
-
Cut or tear the leaves from the stem of the lettuce, wash and spin them dry. Place the lettuce in a medium size salad bowl.
-
Peel, core and quarter the apples. Cut apple quarters into small cubes, toss with lemon juice to prevent browning, then add them to the salad bowl.
-
Dressing: Combine the mustard, vinegar, thyme and mayonnaise in a bowl and whisk together. Whisk the olive oil into the vinaigrette in a slow steady stream to emulsify. Stir in the crumbled Gorgonzola, and season with salt and pepper to taste.
-
Add the crumbled cheese, toasted walnuts and dressing and toss lightly to coat the lettuce. Season to taste with salt and pepper.
Olive Pickling
-
2 kg uncured olives, preferably Kalamata or similar
-
1.25 litres water
-
3 tbsp table salt, approximately
-
600 ml white vinegar
-
4 cloves garlic, chopped
-
1 tbsp dried oregano
-
1 to 4 small red chillies
-
240 ml olive oil
-
Slit the olives on both sides, a fine slit at the top of each side will do. This will help release their bitter juice. You can also 'crack' them by pounding each one enough to split the flesh slightly.
-
Leave them to soak in plenty of salted water, changing the water each day, for a week.
-
Wash and drain the olives and place them in the clean glass jars.
-
Fill a bowl with the water and add the salt. Float an egg in the bowl, when it is submerged to the point that only a 10 cent piece-sized circle of the egg's surface remains above the water, there is enough salt in the water.
-
Add the vinegar. Cover the olives in the jars with the salted water and vinegar mix, add chillies, garlic and oregano and finish with a layer of olive oil to seal. Set aside for about 3 to 4 weeks or until the olives are ready.
One Pan Tomato Basil Chicken & Rice

-
6 chicken thighs , skin on, bone in
-
1 tablespoon olive oil
-
2 cloves garlic , chopped
-
1 onion , diced
-
1 red bell pepper (capsicum) , deseeded and chopped
-
1/3 cup sun dried tomato strips in oil , chopped (optional: but adds flavour)
-
1 1/3 cup uncooked long grain rice , rinsed (arborio rice may also be used for a risotto-like consistency)
-
14.5 ounce (400g) tin crushed tomatoes, with liquid
-
1 3/4 cups chicken broth (or chicken stock)
-
1-2 teaspoons salt (adjust to your taste)
-
1/2 teaspoon pepper , (adjust to your taste)
-
1 teaspoon dried basil
-
1/4 cup fresh basil leaves , chopped
-
extra chopped fresh basil (to serve)
-
Preheat oven to 200°c | 400°F. Heat the oil in a large, deep ovenproof cast iron skillet/or pan (over 30 cm or 12-inches). Add the chicken, skin side down; sear for 3-4 mins on medium-high heat. Turn each thigh and sear until golden all over. Transfer the chicken onto a warm plate.
-
Add the garlic; fry until fragrant (about 30 seconds). Add the onion and red peppers / capsicum; fry for about 3 minutes or until and onion is transparent. Stir in the sun dried tomatoes, rice, crushed tomatoes and chicken broth (stock). Season with salt, pepper and dried basil. Bring to a simmer and allow the rice to soak up all the tomato flavours.
-
Place chicken thighs, skin side up, over rice. Bring to the boil; rotate the chicken in the tomato sauce to coat; cover with foil; transfer to preheated oven and allow to bake for about 40 minutes, or until the rice has softened and absorbed the liquid and the chicken is cooked through. Stir through an extra 1/4 cup of water to the rice ONLY if needed (if rice hasn't cooked fully).
-
Remove cover; change oven settings to broil / grill on medium heat for a further 8-10 minutes or until the chicken is crispy and golden.
-
Season with extra salt to taste; sprinkle with freshly chopped basil to serve.
-
Adapted from this One Pot Italian Chicken and Rice recipe
Oobleck
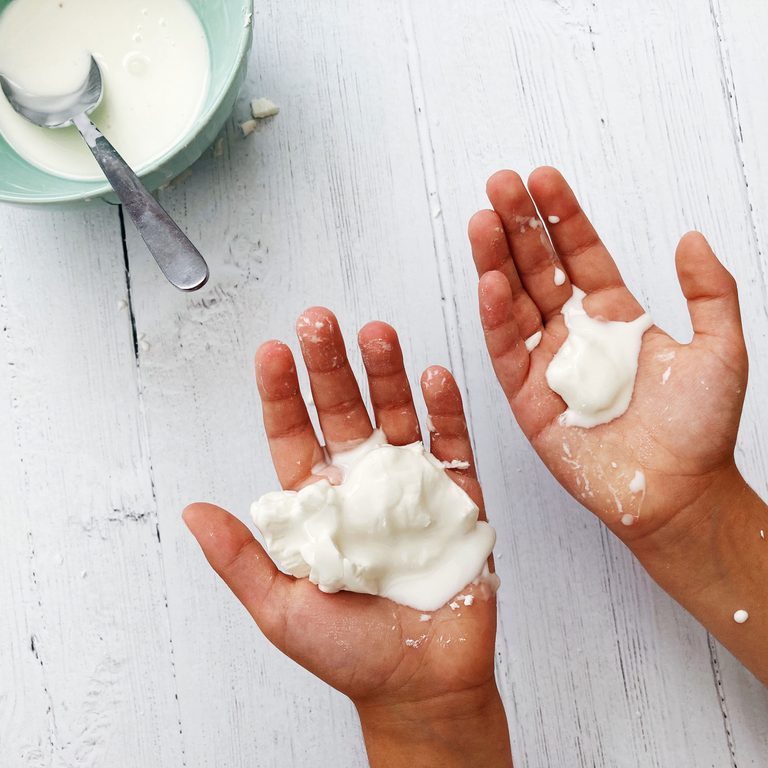
-
75g cornflour,
-
120g water
Osso Bucco
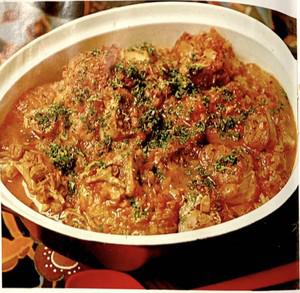
-
6 veal shanks or knuckles
-
90g butter
-
2 tablespoons oil
-
flour
-
salt, pepper
-
2 medium carrots
-
2 large onions
-
3 sticks celery
-
2 cloves garlic
-
1 cup dry red wine
-
1½ cups water
-
3 beef stock cubes
-
2x 470g cans whole tomatoes
-
1 teaspoon basil
-
1 teaspoon thyme
-
1 bayleaf
-
2.5cm strip lemon rind
-
1 teaspoon grated lemon rind
-
3 tablespoons chopped parsley
-
60g butter
-
1 large onion
-
500g rice
-
1.25 litres boiling water
-
3 chicken stock cubes
-
½ cup dry white wine
-
¼ teaspoon saffron
-
30g grated parmesan cheese
-
salt, pepper
-
30g butter, extra
-
Ask butcher to cut each shank into three equal pieces. Coat with flour seasoned with salt and pepper. Heat 60g of the butter in pan with oil. Add shanks a few at a time, brown well on all sides; remove from pan. Repeat with remaining shanks.
-
Add remaining butter to pan, add peeled and chopped carrots, peeled and finely chopped onions, finely chopped celery and one crushed garlic clove. Saute gently until onions are golden brown. Remove from heat. Transfer vegetables to large ovenproof dish.Carefully pack veal shanks on top of vegetables.
-
Drain all fat from pan in which veal was cooked. Add wine, water, crumbled stock cubes, undrained tomatoes, basil, thyme, bayleaf and strip of lemon rind.Bring sauce to boil, mashing tomatoes well, and stirring in brown pieces from pan. Season with salt and pepper. Pour sauce over veal shanks.
-
Cover casserole, bake in moderate oven 1½ hours or until veal is very tender, stirring occasionally. To serve, sprinkle over combined remaining crushed garlic, chopped parsley and grated lemon rind.
-
Heat butter in large, saucepan, add peeled and finely chopped onion. Saute gently until onion is transparent. Add rIce; cook, stirring, 2 minutes. Dissolve chicken stock cubes and saffron in water. Gradually add stock to rice, about I cup at a time; wait until liquid has absorbed before adding next cup. Stir at each addition; add wine. Cover pan for remainder of cooking time. The rice should cook about 20 minutes from the time the first cup of stock is added. When cooked, the rice should be very tender and creamy with all liquid absorbed. Season with salt and pepper. Add extra melted butter and parmesan cheese, mix in carefully with fork.
Oven Baked Salmon with Lemon Cream Sauce
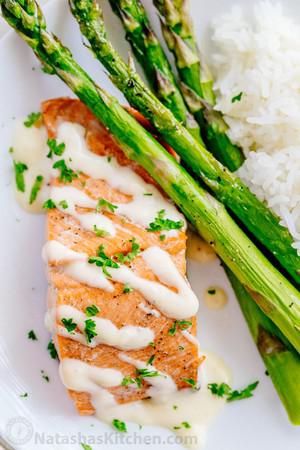
-
2 to 3 lb salmon fillet
-
salt and black pepper to taste
-
1 Tbsp olive oil for drizzling salmon
-
1 Tbsp parsley finely chopped, to garnish
-
1 small onion or 2 medium shallots super finely diced (about 1/4 cup diced)
-
1/4 cup fresh lemon juice from 2 medium or 1 large lemons
-
1/4 cup dry white wine such as chardonnay or pino grigio
-
1/2 cup heavy cream
-
1/2 cup 8 Tbsp cold unsalted butter cut into 8 pieces
-
Line baking sheet with foil or parchment. Arrange salmon skin-side-down, season with salt and pepper and drizzle the tops with oil. Bake uncovered at 425 for 10-15 min (depending on thickness of salmon) or until salmon is cooked through. My thick wild caught salmon took 14 min.
-
In a small sauce pan, combine 1/4 cup finely diced onion, 1/4 cup lemon juice, 1/4 cup wine and simmer over medium heat until reduced to a thick mixture (7-8 min).
-
Whisk in 1/2 cup cream and as soon as it comes to a simmer, reduce to low heat and slowly whisk in the 8 Tbsp butter, one tablespoon at a time (whisking constantly). Add 1/4 tsp salt or to taste and remove from heat. Cover with a lid to keep warm until ready to serve.
-
Plate salmon and drizzle generously with the lemon sauce, garnish with freshly chopped parsley then serve.
Pad Thai

-
250g packet rice stick noodles
-
2 tablespoons lime juice
-
2 tablespoons fish sauce
-
2 tablespoons brown sugar
-
2 tablespoons peanut oil
-
2 Lilydale Free Range Chicken Breast
-
500g green prawns, peeled, deveined
-
3 green onions, thinly sliced diagonally
-
2 small red chillies, deseeded, finely chopped
-
2 eggs, lightly beaten
-
1 cup bean sprouts, tails removed
-
1/4 cup roasted peanuts, finely chopped, optional
-
1/2 cup coriander leaves
-
lime wedges, to serve
-
Place noodles into a heat-proof bowl. Cover with hot water. Stand until tender. Drain. Rinse under cold water.
-
Combine lime juice, fish sauce and sugar in a jug. Whisk with a fork to combine.
-
Heat a wok over high heat. Add oil. Swirl to coat. Add chicken. Stir-fry for 2 minutes until golden. Add prawns, onions and chillies. Stir-fry for 2 to 3 minutes or until prawns turn pink. Add noodles. Stir-fry for 2 minutes.
-
Add lime juice mixture to wok. Toss to combine. Slowly pour eggs over noodles. Stir-fry for 1 minute. Add sprouts. Toss well.
-
Spoon pad Thai onto plates. Sprinkle with peanuts and coriander leaves. Serve with lime wedges.
Pan-Fried Liver with Onions and Sage
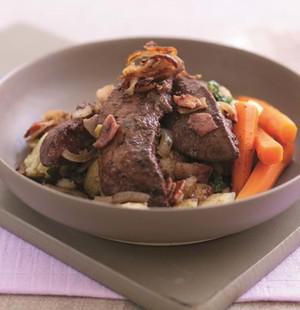
-
450g/1lb lambs liver, sliced
-
15ml/1tbsp plain flour
-
Salt and freshly milled black pepper
-
1 small handful fresh sage leaves, finely chopped
-
175g/6oz smoked back or streaky bacon, cut into pieces, or pancetta cubes (optional)
-
1 medium onion, peeled and finely sliced
-
5ml/1tsp olive oil
-
45ml/3tbsp good, aged balsamic vinegar
-
350ml/12floz good, hot lamb stock
-
In a shallow bowl mix together the flour, seasoning and sage leaves. Toss the liver in the seasoned flour.
-
Heat a large non-stick frying pan and dry fry the bacon or pancetta (if using) with the onions for 3-4 minutes until crispy. Remove and keep warm.
-
In the same pan heat the oil and cook the liver for 1-2 minutes on each side, to seal. Remove the liver from the pan and keep warm with the bacon.
-
Add the balsamic vinegar to the pan and stir in the stock, return the liver and bacon to the pan and simmer for 5 minutes.
-
Serve with crispy onions, crushed new potatoes and carrots.
Pane Di Casa
Tags:
Bread
-
4 cups flour
-
2 teaspoons dried yeast
-
14 ounces cool water
-
1/2 teaspoon salt
-
Extra Virgin Olive Oil, for greasing bowl
-
Place 3 1/2 cups flour in a large bowl. Make a well in the middle. Mix the yeast slightly into the flour and slowly add the water until the dough comes together. Add the remaining 1/2 cup flour if the dough is too sticky. The desired consistency should still be tacky.
-
Place the dough on a floured countertop. Add a little more flour and knead for 10 minutes. Use the palm of your hand to stretch it and turn it over.
-
Spread the dough out slightly and add the salt. Dust with more flour and continue to knead for several minutes. Knead into a smooth ball and let rise for 1 to 2 hours, in a bowl greased with EVOO and covered with a kitchen towel. You’ll know it’s ready when the dough springs back when you touch it gently with your finger. The temperature of the dough is about 80°F and has doubled in size.
-
Remove the dough from the bowl and cut it in half. Press it down and roll up each piece. Turn them on their sides and roll them up again – this rolls the gas out of them.
-
Place each dough in their own greased bowls and cover with kitchen towel for 30 minutes, until they have again doubled in size.
-
To make the final rounds, fold the dough two times, shaping them into balls. Then place the balls seam side down on a greased baking sheet. Dust with flour. Let sit 30 minutes more, covered.
-
Preheat oven to 450°F.
-
Sprinkle the rounds with more flour, and press a little air out the sides. Score the tops of the rounds with a sharp knife several times. Bake 25-30 minutes or until golden brown. Check after 20 minutes. Tap the bottoms and listen to hear if they sound hollow; if they do, their ready. Remove them and let cool to room temperature before slicing.
Panettone Pudding
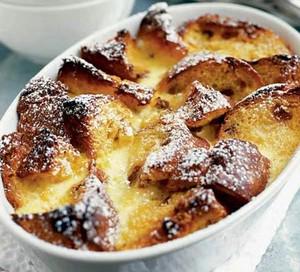
-
50g butter, softened (optional)
-
250g panettone (about 5 medium slices)
-
2 eggs
-
142ml carton double cream
-
225ml milk
-
1 tsp vanilla extract
-
2 tbsp caster sugar
-
icing sugar, for sprinkling
-
softly whipped cream, to serve
-
Heat the oven to 160C/ 140C fan/ gas 3 and grease a 850ml/1½ pint shallow baking dish with a little of the 50g butter.
-
Cut 250g panettone into wedges, leaving the crusts on.
-
Butter the slices lightly with the rest of the butter. Cut the slices in half and arrange them in the dish, buttered side up.
-
In a bowl, whisk together 2 eggs, 142ml double cream, 225ml milk, 1 tsp vanilla extract and 2 tbsp caster sugar and pour evenly over the panettone.
-
Put the dish in a roasting tin and pour hot water around it to a depth of about 2.5cm/1in. Bake for 35 minutes until the pudding is just set - it should be yellow inside and nicely browned on top.
-
Dust with icing sugar and serve with spoonfuls of whipped cream.
Pappardelle with Chicken Livers (Pappardelle Con I Fegatini)
-
1tablespoon Butter
-
1 tablespoon Olive oil
-
1 Brown onion - chopped
-
Chicken livers
-
Handful sage leaves - whole
-
Splash of White wine
-
1/2 cup Cream
-
Pappardelle pasta
-
1 cup parmesan cheese - grated
-
Caramelise onions in butter and oil.
-
Add livers and toss.
-
Add sage.
-
As the ingredients simmer deglaze with white wine.
-
Add cream.
-
Don't cook livers too long as they will become tough.
-
Add pasta.
-
Add grated parmesan before mixing so that it sticks to the pasta.
-
Give a bit of a toss.
-
Serve.
Parmesan Cheese Biscuits

-
125 grams chilled butter, cubed
-
60 grams (½ cup) cheddar cheese
-
50 grams (½ cup) grated Parmesan cheese
-
150 grams (1¼ cups) plain flour
-
1 teaspoon paprika
-
¼ teaspoon salt
-
Place the butter, cheddar, parmesan, flour, paprika and salt in a food processor.
-
Using the pulse action, process until the ingredients just come together. Remove the dough and form it into a ball.
-
Divide in half, then roll and shape each portion into a sausage 23 cm long x 3 cm wide.
-
Roll in baking paper and chill for 1 hour. The dough can be frozen at this point until ready to use.
-
Preheat the oven to 180C. Line a baking tray with baking paper. Unwrap the dough rolls and cut into 5 mm slices. Spread slices on the baking tray and bake for 12-15 minutes or until pale gold. Transfer the biscuits to a wire rack to cool.
-
Store in an airtight container untill ready to serve.
Parmesan-Spinach Polenta Chips
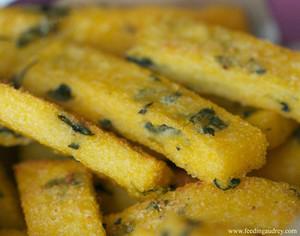
-
4 cups water
-
¾ teaspoon salt
-
1 cup quick cooking polenta (I use this)
-
1 cup packed baby spinach leaves, chopped
-
¼ cup grated parmesan cheese, plus more for sprinkling
-
Freshly ground black pepper, optional
-
Olive oil or cooking spray
-
Lightly coat a baking sheet with oil (or cooking spray).
-
In a medium saucepan, bring water and salt to a gentle simmer over medium heat. Very slowly whisk in polenta until fully incorporated. Lower heat and continue to whisk until smooth, about 5 minutes. Stir in spinach, parmesan cheese and a pinch of pepper, if using.
-
Pour mixture onto prepared baking sheet and spread with an oiled rubber spatula until even and smooth. You want it about ¼" - ½" thick. Allow to cool for 20-30 minutes. (This can be made in advance and stored in the fridge for up to 2 days)
-
Preheat broiler.
-
Very carefully invert sheet of cooled polenta onto a clean cutting board. Cut polenta into fry-shaped chips, about ½" x 3".
-
Line same baking sheet with foil and brush with oil (or cooking spray). Space chips evenly on baking sheet and lightly brush with oil or cooking spray. Sprinkle with additional parmesan cheese.
-
Broil about 10cm from heat until golden and crisp, 10 minutes per side.
-
Alternatively, you can bake these at 210°C for 30 minutes - flipping once.
Passionfruit Butter

-
1/2 cup passionfruit pulp
-
2 tablespoon lemon juice
-
1/4 cup castor sugar
-
1/2 cup/125 grams butter
-
4 extra-large eggs (lightly beaten)
-
Gather the ingredients.
-
Place a heatproof bowl over a saucepan of water. Make sure the bottom of the bowl isn't touching the water. Bring water to the boil over medium heat.
-
Turn heat down to medium-low. Add butter and sugar to the bowl and stir with a wooden spoon to melt and combine.
-
Mix together passionfruit pulp, lemon juice, and eggs in a small mixing bowl. Add to butter/sugar mixture and stir continuously with a wooden spoon until the mixture thickens and coats the back of the spoon. This should take about 10 to 2 minutes over medium-low heat.
-
Once thickened, remove bowl from heat and allow butter to cool completely before storing in sterilized airtight jar.
-
Refrigerate to store.
Pasta Carbonara
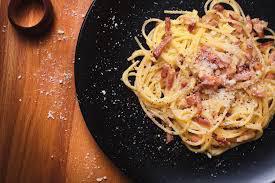
-
400g spaghetti
-
1 tablespoon olive oil
-
200g sliced Primo Gourmet Selection Pancetta, cut into 1cm-wide strips
-
2 garlic cloves, finely chopped
-
3 eggs, plus 1 extra yolk
-
100ml thickened cream
-
2/3 cup (50g) freshly grated parmesan, plus extra to serve
-
2 tablespoons chopped flat-leaf parsley leaves
-
Cook pasta in a large pan of boiling salted water according to the packet instructions. Meanwhile, heat oil in a frypan over medium heat. Cook pancetta, stirring, for 2-3 minutes until beginning to crisp. Add garlic for 30 seconds, then set pan aside.
Pea and Ham Eggs

-
2 tsp olive oil, plus extra to drizzle
-
100g thick cut ham or bacon, diced
-
1 cup chicken stock
-
2 cups frozen peas
-
4 eggs
-
Salt and pepper, to season
-
Freshly grated parmesan
-
Toasted sourdough
-
Heat your oven to 200°C (fan-forced).
-
Heat a small ovenproof frying pan over medium heat, add the oil and fry the ham or bacon until lightly browned. Remove and set aside.
-
Place the stock in a small saucepan and bring to a simmer. Add the peas and simmer for 3 minutes until the peas are tender. Reserve about a ¼ cup of the peas and transfer the remainder to a blender, along with the stock. Blend to a smooth puree (be very careful blending hot ingredients – start slow and allow steam to escape) then season with salt to taste.
-
Transfer the warm pea puree to the same frying pan that you used to fry the ham or bacon and make 4 small indentations in the top of the puree. Crack an egg into each and bake in the oven for 8 minutes or until the eggs are cooked to your liking.
Peach Melba
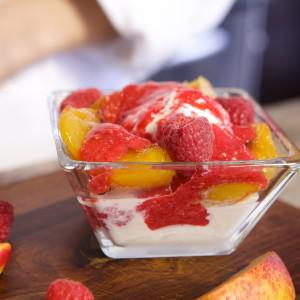
How to Make Escoffier's Legendary
-
1 ½ cups water
-
1 ¾ cups sugar
-
2 tbsp lemon juice
-
½ tsp vanilla extract
-
4 peaches
-
1 pint vanilla ice cream
-
1 ½ cups fresh raspberries
-
2 tbsp confectioner’s sugar
-
½ tbsp lemon juice
-
Combine water, sugar, lemon juice and vanilla extract into a large saucepan and heat on low until sugar has dissolved. Increase heat to medium and bring to a boil. Let cook at boiling for about 3 minutes and then turn back down to a simmer.
-
Cut peaches in half. Place in the syrup and let poach for about 2 to 3 minutes per side. Test doneness with a knife. When finished poaching, remove to a plate.
-
After the peaches have cooled, peel off the skin and remove the stones. Set aside.
-
For the raspberry sauce—combine all ingredients in a food processor or blender and puree until very smooth. Strain through a colander and into a container.
-
Assemble the dish by putting 2 peach halves in a bowl along with a scoop of the ice cream. Spoon the raspberry sauce generously on top and serve immediately.
Peanut Butter Chicken Meatballs

-
1 pound ground chicken
-
1 large egg, beaten
-
1/2 cup panko bread crumbs
-
1/4 cup creamy peanut butter
-
1/4 cup sweet Thai chili sauce
-
1 tablespoon minced fresh ginger
-
Preheat the oven to 450 degrees F (230 degrees C). Line a baking sheet with parchment paper.
-
Mix ground chicken, egg, bread crumbs, peanut butter, sweet Thai chili sauce, and ginger together in a large bowl.
-
Form the mixture into 1 1/2-inch balls and arrange on the prepared baking sheet.
-
Bake in the preheated oven until browned and no longer pink in the center, about 15 minutes. An instant-read thermometer inserted into the center should read at least 165 degrees F (74 degrees C).
Peanut Butter Cookies
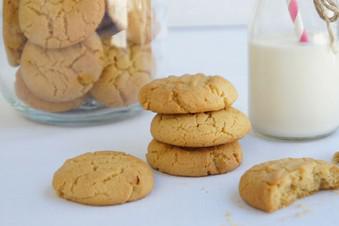
-
1/2 cup brown sugar
-
1/2 cup caster sugar
-
1/2 cup butter, melted
-
1/2 cup peanut butter
-
1 egg
-
1 1/2 cups self-raising flour
-
1 tsp vanilla essence
-
Combine sugars.
-
Add melted butter and lightly beaten egg. Mix well.
-
Gradually add sifted flour and remaining ingredients, mixing thoroughly.
-
Place teaspoonfuls of mixture onto a greased tray, flattening with a fork.
-
Bake for about 12-15 minutes at 160C.
Peanut Noodles with Chicken (20 Minute Recipe!!)

-
1 ½ pounds chicken breast
-
12 ounces linguini
-
2 cloves garlic (minced)
-
½ cup peanut butter
-
¼ cup red wine vinegar
-
2 Tablespoons sesame oil (divided)
-
6 Tablespoons soy sauce
-
2 teaspoons hot chili oil (plus additional for serving)
-
4 teaspoons honey
-
3 Tablespoons vegetable oil
-
¼ cup water
-
1 cup shredded red cabbage
-
4 scallions (thinly sliced)
-
Salt and pepper (to taste)
-
Bring two large pots of salted water to a boil (one for the pasta, one for the chicken). Once boiling, add chicken, cover pot, and remove from heat. Set aside for 15 minutes to poach the chicken.
-
Add linguini to the other pot of boiling water and cook until al dente, 9-11 minutes.
-
Meanwhile, combine garlic, peanut butter, vinegar, 1 tbsp. sesame oil, soy sauce, chili oil, honey, vegetable oil and ¼ cup water in a small bowl. Whisk until combined.
-
Using two forks, shred the chicken.
-
Drain linguini and return to the pot, toss with the remaining 1 tbsp. sesame oil. Add shredded chicken, red cabbage and sauce mixture and toss to combine. Serve garnished with green onions and additional hot chili oil, if desired.
Peanut Sauce
-
1/2 cup salted creamy peanut butter
-
1-2 Tbsp tamari (osoy sauce)
-
1-2 Tbsp maple syrup (or other sweetener of choice)
-
1 tsp chili garlic sauce (or 1 red Thai chili, minced // or 1/4 tsp red pepper flake // adjust to preferred spice level)
-
2-3 Tbsp lime juice
-
~1/4 cup water (to thin)
-
In a saucepan combine peanut butter, tamari (or soy sauce, maple syrup, lime juice, chili sauce (or chili or red pepper).
-
Stir a low heat to combine and simmer for a few minutes.
-
Add water a little at a time until a thick but pourable sauce is achieved and return to boiling point.
Pear and Almond Impossible Pie

-
1/2 cup plain flour
-
2 teaspoon ground cinnamon
-
1 cup caster sugar
-
1 cup desiccated coconut
-
2 cup milk
-
4 eggs, beaten lightly
-
125 gram butter, melted
-
2 tablespoon golden syrup
-
425 gram can pear slices, drained, chopped, plus extra to serve
-
1/4 cup flaked almonds
-
icing sugar, to dust
-
thick cream, to serve
-
Preheat oven to moderate, 180°C (160°C fan-forced). Lightly grease a 24cm pie dish.
-
Sift flour and cinnamon together into a large mixing bowl. Stir in sugar and coconut.
-
In a jug, blend together milk, eggs, butter and syrup. Whisk into flour mixture with pears.
-
Pour mixture into prepared pie dish. Sprinkle evenly with almonds. Bake 40-45 minutes, or until golden and set. Serve warm or cold, dusted with icing sugar. Top with extra pear slices and thick cream.
-
This is delicious with other canned fruit such as peaches, apricots, apple or berries. Drain fruit well and chop before adding to the mixture.
Pear and Custard Tart
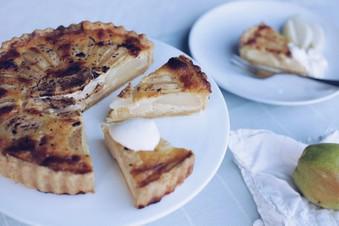
-
1 sheet shortcrust pastry
-
1/2 cup cream
-
1 tsp cornflour
-
1 tsp vanilla extract
-
2 eggs, lightly beaten
-
2 tbs caster sugar
-
4 pears, cored, peeled, sliced
-
ground cinnamon, to sprinkle
-
Preheat oven to 180ºC.
-
Line a 20cm flan tin with the pastry and trim edges. Prick base with a fork a few times and rest for 15 minutes.
-
Place a sheet of baking paper over the centre and weigh down with rice or dried beans. Bake for 15 minutes then remove centre weights and bake a further 5 minutes.
-
Remove and set aside.
-
Reduce oven temperature to 160ºC.
-
Whisk cornflour into cream and add vanilla extract, eggs and sugar.
-
Arrange pears on the pastry base and pour custard mixture over the top. Shake cinnamon over the tart and bake for 20-25 minutes. Best served warm.
-
SHOW MORE NOTES Notes
-
This pear and custard tart recipe can be made easily from ingredients in your pantry.
-
The tart looks lush but has very simple flavours and is a great afternoon tea centrepiece.
Pear Custard Tart

-
cooking oil spray
-
4 free-range eggs 200 grams
-
300 mls thickened reduced fat cream
-
3 tbsp honey 60 mls
-
1 tsp vanilla extract
-
3 tbsp plain wholemeal flour 30 grams
-
2 pears 200 grams
-
1/2 tsp cinnamon 0.5 grams
-
Preheat oven to 160C fan forced. Lightly grease a pie dish with cooking oil spray.
-
Place eggs, honey, cream and vanilla in a bowl and beat well.
-
Whisk through sifted flour, then pour 2/3 of this mix into the prepared pie dish and bake for 5 to 7 minutes to set the custard.
-
Cut pears into slices while baking first custard cream layer.
-
Remove pie dish from the oven and scatter pear slices over the custard.
-
Pour the remaining custard cream over the pears and then sprinkle with cinnamon.
-
Return to oven and bake for a further 15 minutes or until custard has set.
-
Serve warm. Divide into 6 pieces, 1 piece is 1 serve.
-
261 calories per serve.
Pear Kvass Soda
-
12 Pears
-
1 Tablespoon Sugar or Honey
-
Mash your pears. Don’t worry about seeds, skin, stems– they will be strained out.
Put in a large jar or crock, and cover with water. There aren’t rules. The less water, the more syrupy the consistency and stronger the flavour; the more water, the lighter.
Add sugar or honey — the more sugar you add, the crazier the bubbles, it would seem.
Stir everything and let it steep, lightly covered, for several days. Taste periodically. As you go the mass of pears will give itself up to the water, as I tried to describe when I wrote about Gooseberry Kvass.
Strain out the pulp when it is flavourless, and bottle the kvass. For me this time it was Day 3.
Close the bottles and in Day 4 or Day 5 you will have something very carbonated, perhaps explosively so– so be careful, My Friend!
Peking Duck
-
Duck
-
2 cups of vinegar
-
2 cups of honey
-
2 cups of water
-
1 Maltose
-
2 tbsp sugar
-
2 tbsp garlic powder
-
1 tbsp white pepper
-
1 tbsp five spice powder
-
1 tbsp ginger powder
-
1 tbsp salt
-
4 tbsp hoisin sauce
-
Licorice
-
Star Anise
-
Dried Citrus Peel
-
Cucumber
-
Green Onion
-
Ginger
-
2 cups honey
-
1 tbsp lemon juice
-
2 cups vinegar
-
1 cup maltose.
-
1 1/2 cups flour
-
Pinch of salt
-
2/3 cup boiling water
-
1 teaspoon oil
-
Pump air underneath the skin through the neck cavity to separate the skin from the fat and the flesh. This process will make the skin very crispy.
-
Cut off the wings and the feet.
-
Then make a incision on the bottom as shown here, remove the innards. Keep the hearts and gizzard, I'm going to make a dish off of them in the future episode.
-
Wash the duck thoroughly. Wash the cavity a few times to remove any residue.
Here are the ingredients we are going to put inside the duck.
-
Next, combined the ingredients into the hoisin sauce. Then put the mixture inside the duck's cavity. Put in 1 slice of ginger and one green onion. This will give it an aromatic flavour on the inside.
-
Use a skewer to sew up the cavity. First, hold the skin together then slowly puncture through, then overlap the skin and continue sewing until there is no holes left. Make sure there is nothing leaking out of it. I use a hook to hang the duck, if you don't have one you can just use strings and tied it around it's wings and neck.
-
Next, refrigerate the duck for 24 hrs laying the duck belly side down.
-
Next in a pot add in 2 gallon of water, add Licorice, star anise, and dried citrus peel. This add an aromatic flavor to the skin.
-
Boil for about 15 to 20 min.
-
We are going to make glazing for the duck. In a bowl add honey, lemon juice, vinegar and maltose. The maltose is very sticky so we want to make it into a more manageable form. Boil 2 cup of water and add maltose into the hot water. Then mix the maltose with the other ingredients.
-
Next, soaked the duck in boiling water for 15-20 secs. This process quickly tightens the skin back up.Then pour the mixture over the duck one at a time.
-
Hang the duck to dry for a minimum of 5 hrs. use a fan to blow the duck dry until the skin become springy.
-
Preheat the oven to 350F, after you put in the duck turn the temperature to 300F and cook for 40-45 min.
-
Put a drip pan underneath to catch the fat. Turn the duck 180 degree after 20min of cooking, this ensure even cooking and browning of the skin. After the duck is fully cooked, turn the fire off and leave it in the oven for additionally 15 min. This will let the juice be reabsorb into the meat making the meat very juicy and tender.
-
Mix the flour and salt in a heatproof bowl.
-
Pour the boiling hot water into the flour mixture and use chopsticks or a spatula to mix until a dough ball
forms.
-
Once it is cool enough to handle, knead the dough for 8 minutes until smooth, adding flour if the dough is too sticky.
-
Cover with plastic and allow the dough to rest at room temperature for at least 1 hour.
-
Roll the dough into a cylinder and cut into 12 equal pieces.
-
Form each piece into a dough ball, then flatten them out into a small disc about 2 inches in diameter.
-
Lightly brush 6 of the discs with oil, ensuring the sides of the discs are also brushed with oil.
-
Layer the remaining 6 discs over the 6 oiled discs so you have 6 pieces, each comprised of 2 discs.
-
Use a rolling pin to roll the discs into 7-inch circles, flipping the pancakes frequently so both of the dough discs are rolled into the same size.
-
Heat a wok or frying pan over medium low heat, and place one pancake into the pan.
-
After 30 to 45 seconds, you should see air pockets begin to form between the two pancakes.
-
Flip the pancake; it should be white with just a couple of faint brown patches. Any more than that, and they are overcooked.
-
After another 30 seconds, the air pockets should be large enough to separate the two pancakes.
-
Remove the pancake to a plate, and let it cool for another 30 seconds.
-
Now carefully pull apart the two pancakes at the seams.
-
Place finished pancakes onto a plate and cover with a warm kitchen towel.
-
Repeat until all pancakes are done.
Peking Duck Pancakes

-
1/2 cup plain flour
-
2 tablespoons cornflour
-
1/4 cup water
-
1/4 cup milk
-
2 eggs
-
2 tablespoons butter, melted
-
1 Peking duck (see note)
-
6 green onions, washed
-
1/2 cup hoisin sauce
-
Combine flour, cornflour, water, milk, eggs and half the butter in a food processor. Process until batter is smooth. Pour into a jug. Cover and stand for 15 minutes.
-
Heat a non-stick frying pan over medium heat. Brush with remaining butter. Pour a tablespoonful of batter into frying pan. Spread to form a thin pancake, about 16cm in diameter. Cook for 2 minutes. Turn and cook for a further 1 minute. Transfer to a plate. Repeat with remaining batter.
-
Remove skin and meat from duck. Thinly slice both skin and meat. Cut onions into 10cm lengths.
-
Place some duck skin and meat, 2 pieces of onion and 1 teaspoon of hoisin sauce onto each pancake. Roll up. Serve.
Contains gluten Contains milk Contains soy Contains egg Contains wheat
-
Peking duck is available form Asian grocery stores. You could also use barbeque chicken.
Peri Peri Sauce
-
300 grams seeded and chopped red bell pepper
-
100 grams chopped onion
-
50 grams African red chili (Use any other spicy variety if these are not available)
-
10-12 whole garlic cloves
-
1 tablespoon smoked paprika
-
½ teaspoon black pepper powder
-
¼ cup white vinegar
-
2 teaspoon regular salt
-
¼ cup light olive oil
-
1 tablespoon dried oregano
-
1 teaspoon lemon zest
-
1 tablespoon lemon juice
-
Start by preparing the ingredients. Chop the top of the bell peppers and cut the peppers in half. Discard the seeds. Chop the peppers into small pieces. Chop the onions.
-
Discard the top green part of the African red chilies. I used Thai bird’s eye chilies to make this sauce. You can use any spicy pepper. Discard the green part of whichever pepper you are using.
-
Add all the ingredients that are 300 g chopped red bell pepper (approximately 2 peppers), 100 g chopped onion (approximately 1 large onion), 50 g African red chilies, 10-12 cloves of garlic, 1 tbsp smoked paprika, ½ tsp black pepper powder, ¼ cup white vinegar, 2 tsp salt, ¼ cup light olive oil, 1 tbsp dried oregano, 1 tsp lemon zest, and 1 tbsp lemon juice in the medium jar of a grinder or a blender.
-
Blend to make a smooth puree.
-
Transfer the sauce to a nonstick pan.
-
Cook for 15-20 minutes on medium-low heat. Keep stirring at regular intervals to avoid the sauce from sticking to the pan and getting burned at the bottom. Remove the pan from the heat and let the sauce cool down. Piri Piri Sauce is ready. Store it in a glass jar and use it as required.
Pesto Cauliflower & Potato Salad
Tags:
Green Connect
-
½ pound/225 g cauliflower
-
1 tablespoon olive oil
-
½ pound/225 g waxy yellow or white potatoes, unpeeled
-
1 cup/200 g fresh or frozen green peas
-
¼ cup/30 g chopped toasted walnuts or toasted pine nuts
-
1½ cups/150 g lightly packed fresh basil leaves
-
1 tablespoon white wine vinegar or white balsamic vinegar
-
1 tablespoon freshly squeezed lemon juice
-
4 teaspoons olive oil
-
3 cloves garlic, peeled
-
½ teaspoon freshly grated lemon zest
-
½ teaspoon salt
-
salt and freshly ground black pepper to taste
-
Remove the thick inner stem from the cauliflower, slice into thick 1-inch slabs. Preheat a cast-iron grill pan over high heat. Rub the cauliflower with olive oil and arrange the pieces in a single layer in the preheated pan. Grill the cauliflower until charred on the outside and crisp-tender inside, about 4 to 5 minutes, flipping halfway through. Transfer the cauliflower to a cutting board, chop into bite-size pieces, and place in a large mixing bowl.
-
Peel and dice the potato into ½-inch pieces, transfer to a large saucepan, cover with 4 inches of cold water, and bring to a rolling boil over high heat. Reduce the heat to medium and cook the potatoes for 6 to 8 minutes, or until almost tender. Stir in the peas and cook another minute. Reserve ¼ cup of cooking water, then drain the potatoes and peas and rinse with cold water. Add these vegetables to the cauliflower.
-
In a food processor, pulse together the pesto ingredients plus 2 tablespoons of the potato cooking water until smooth. Spoon onto the vegetables, add the nuts, and combine thoroughly. Cover and chill for 10 minutes to blend flavours. Serve the salad slightly chilled or at room temperature. Garnish each serving with a few nuts.
Pickled Beetroot
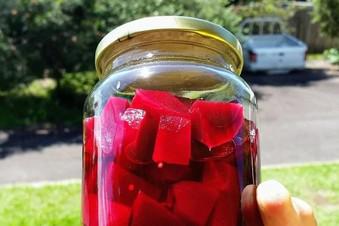
-
4 beetroots large
-
3/4 cup water
-
1 1/2 cups white vinegar
-
3/4 cup sugar
-
1/2 tsp peppercorns
-
1 bay leaf
-
2 whole cloves
-
1/2 tsp mustard seeds
-
1/2 cinnamon stick
-
1/4 tsp salt
-
Wash beetroot thoroughly and cook in water until tender.
-
Cool and remove skin (either by hand or use a knife).
-
Cut beetroot into slices or julienne strips.
-
Place all other ingredients in a saucepan and bring to the boil.
-
Simmer for 5 minutes and then strain.
-
Pack beetroot into hot sterilised jars and top up with vinegar mixture.
-
Seal and store in a cool place.
-
View all notes NOTES
-
Keeps well in fridge for many months.
Pickled Mu
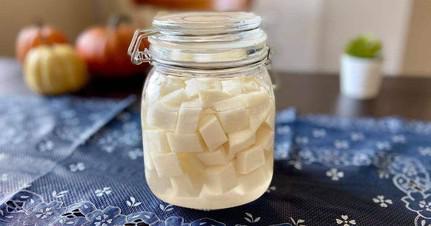
-
4 cups Korean radish
-
⅓ cup white vinegar
-
⅓ cup white sugar
-
1¼ teaspoon salt
-
1 tablespoon sriracha Optional
-
1.5 tablespoon chilli flakes Optional
-
Wash the korean radish. Peel and cut the radish into half-inch pieces. Exact cubes are not required. If using some other radish in place of Mu, season each of the cut surfaces with black pepper.
-
In a ziplock bag or airtight plastic container, mix together the vinegar, sugar, and salt. If making a spicy pickle, add the sriracha or chilli flakes now (not both, or the spice will be overwhelming). If all the sugar does not dissolve, don’t worry. The water from the radish will dissolve the rest.
-
Add the radish to the pickling liquid. Seal the container or bag to prevent oxidation from contact with air. This will greatly affect the taste and texture of the pickle, so be careful!
-
Open the container to stir the liquid every half hour to encourage moisture loss from the Korean radish. Flip this if you're using a bag. After stirring/flipping 4 times, you are free to leave it unattended overnight in the refrigerator. Serve chilled and enjoy!
-
Make sure to store this in the fridge overnight for the radish to absorb the flavors. If you have more time, leave this for a further 24 hours.
-
You can adjust the amount of sriracha and chili flakes used to your preference.
Pickled Onions

© Lindsay Carroll Jones
This Recipe is supplied to Mr Jim Hucker on the condition it is for his personal use alone.
-
2 kg onions
-
2 litres of white vinegar (Cornwells)
-
1 kg of sugar
-
1 teaspoon of peppercorn
-
1 teaspoon of crushed ginger
-
1 teaspoon of all spice
-
2 teaspoons of cloves
-
Peel skins off and put into salt and water for 24 hours (use 125 G about 1/3 of a cup of salt to 2 kg of onions - use this ratio of salt and water to completely cover the onions) drain and rinse well pack onions into a jars.
-
In a large saucepan put all other ingredients.
-
Bring to the boil and boil quickly for about 5 minutes.
-
Pour over onions in jars and seal immediately.
-
If the vinegar mixture is not sufficient boil another lot of vinegar mixture.
Pickled Seaweed
-
1 kg common kelp (Ecklonia radiata
-
650 ml water
-
250 ml (1 cup) white wine vinegar
-
100 g white sugar
-
1 tsp black peppercorns
-
1 tsp coriander seeds
-
1 tsp mustard seeds
-
Oven temperatures are for conventional; if using fan-forced (convection), reduce the temperature by 20˚C. | We use Australian tablespoons and cups: 1 teaspoon equals 5 ml; 1 tablespoon equals 20 ml; 1 cup equals 250 ml. | All herbs are fresh (unless specified) and cups are lightly packed. | All vegetables are medium size and peeled, unless specified. | All eggs are 55-60 g, unless specified.
-
Thoroughly rinse the seaweed in fresh water to remove any sand and trim off any tough stems. Slice the kelp into thin ribbons.
-
Combine the water, vinegar, sugar and spices in a saucepan and bring to the boil. Once the sugar has dissolved, remove from the heat.
-
Add the seaweed into the hot pickling liquid. At first the seaweed will be a vivid green, though this will dull quickly. Transfer the seaweed to sterilised jars (see Note), being sure to pack it in firmly. Top with the pickling liquid, making sure the seaweed is fully submerged, then seal.
-
To sterilise jars, 20 minutes before you need them, preheat the oven to 110°C and line an oven tray with baking paper. Place the jars and lids (and seals, if using) in a large stockpot, cover with plenty of water, bring to the boil and boil rapidly for 10 minutes. Drain and place the jars and lids, upturned, being careful not to touch the lips or insides of the jars and lids, on the lined tray and leave in the oven to dry completely. Keep in the oven until ready to fill.
Pineapple Upside Down Cake
-
⅓ cup of butter
-
½ cup brown sugar
-
Pineapple
-
2 eggs
-
⅔ cup sugar
-
6 dstsp. juice from pineapple
-
1 tsp. vanilla
-
1 cup S.R. flour
-
¼ tsp. salt.
-
Melt butter in 20cm round pan.
Sprinkle brown sugar over melted butter.
Arrange drained pineapple in an attractive pattern on top of butter and sugar topping.
-
Beat eggs until thick and lemon coloured (about 5 min.).
Gradually beat in sugar then juice and vanilla together.
Stir and beat in flour and salt together.
Pour over pineapple.
Bake 180°C for 40-50 min.
Immediately turn upside down on cake plate.
Do not remove pan for a few minutes.
Serve warm with plain or whipped cream.
Pineapple Vinegar

-
250g raw cane sugar
-
1 Pineapple (about 2Kg)
-
500 mL distilled or spring water
-
15 mL Brewer's Yeast
-
30 mL raw vinegar or vinegar mother
-
Place the sugar in the blender.
-
Cut off the outer skin of the pineapple, no need to be perfect.
-
Rough chop the pineapple and place in the blender.
-
Pureé the ingredients and then add the water.
-
Pour the mixture into a clean / sanitised jar with a lid and airlock.
-
Stir in Brewer's Yeast
Leave on the kitchen counter at room temp for 5-7 days, while the yeast converts the sugar to alcohol.
-
Remove the airlock and - if desired - strain out the solids and transfer to a clean wide mouth container.
-
Stir in the raw vinegar or mother, cover with cheesecloth and leave on the counter for another 5-6 weeks (or longer if you want).
Strain out the ‘mother’ that has developed and use it for your next batch.
Pizza Dough
-
2 1/4 cups plain flour
-
1/2 teaspoon salt
-
1 tablespoon dried yeast
-
3/4 cup (186 ml) warm water
-
1 tablespoon olive oil
-
Pour warm water into a bowl.
-
Sprinkle yeast over water and leave for a few minutes.
-
Add the flour to the bowl with the salt and olive oil.
-
Knead for ten minutes.
-
Put in a warm place until it has doubled in size.
Poached Eggs in Tomato Sauce
-
1 onion, finely chopped
-
3 tablespoons (45 ml) olive oil
-
3 cloves garlic, finely chopped
-
1 teaspoon (5 ml) sweet paprika
-
1 teaspoon (5 ml) ground turmeric
-
1/2 teaspoon (2.5 ml) ground cumin
-
1/4 teaspoon (1 ml) crushed red pepper flakes
-
3/4 cup (180 ml) chicken or vegetable broth
-
1 can 28 oz (796 ml) diced tomatoes
-
4 to 6 eggs
-
1/2 cup (125 ml) crumbled feta cheese
-
2 tablespoons (30 ml) chopped parsley (optional)
-
4 toasted baguette slices rubbed with garlic
-
Salt and pepper
-
Select all
-
In a large skillet, soften the onion in the oil. Add the garlic and spices and cook for 1 minute. Deglaze with the chicken broth. Add the tomatoes and bring to a boil. Season with salt and pepper. Simmer for about 20 minutes or until the sauce thickens.
-
With a ladle, shape four or six wells in the tomato sauce. Break an egg in each well and sprinkle with the cheese. Cover and simmer gently for 5 to 6 minutes or until the egg white is cooked. Sprinkle with the parsley. Serve with toasted bread.
Pork and black bean stew
Tags:
Green Connect
-
500g dried black beans, soaked overnight, rinsed and drained
-
3 onions, 1 peeled and left whole and 2 diced
-
4 garlic cloves, 2 peeled and left whole and 2 crushed
-
2 bay leaves
-
1 thyme spring
-
40g butter
-
500g pork, it can be diced shoulder meat, pork belly, or pork sausage, or best of all a selection cuts. (adding some speck or bacon is much recommended)
-
1-2 birds eye chillies, seeded and chopped
-
2 teaspoon cumin seeds
-
Put the black beans in a large saucepan with the whole onion, whole garlic cloves, bay leaves and thyme.
-
Cover with plenty of water, bring it to the boil and let simmer for about 1-1 /2 hours, or until tender but not completely mushy.
-
Drain well, reserve the cooking liquid and discard the onion, garlic and herbs.
-
Heat the butter in a large saucepan over high heat and cook the pork until it starts to brown. Add the diced onion and continue to cook until it starts to colour.
-
Add the chilli, crushed garlic and cumin seed and cook for another 1-2 minutes, stirring constantly.
-
Add the black beans and their cooking liquid and top up with water if needed, just to cover the beans.
-
Season with salt and ground black pepper and simmer for 30 min or until the beans become creamy.
-
Serve the stew with cooked basmati rice, and some yoghurt on the side.
Pork Chops baked with stout and mustard
Tags:
Green Connect
-
1 tbsp olive oil
-
4 x pork chops (if they are not very thick, lower the cooking time)
-
4 garlic cloves
-
3 tablespoons Dijon or wholegrain mustard
-
125ml stout or other dark beer
-
2-3 thyme springs
-
Preheat oven to 200°C.
-
Heat the olive oil in a large pan over high heat and sear the chops until brown on both sides.
-
Lay the chops in a roasting tin that fits tightly, you can even layer them, and season with salt and pepper.
-
Rub a garlic cloves on top.
-
Whisk together the mustard and stout in a bowl and spoon evenly over the surface of the chops, then toss the thyme in.
-
Cook the chops in the centre of your oven for 20-25min turning them occasionally, you want the sauce to reduce and stick to the chops. If your pan is big and the chops are starting to catch on the bottom, just add some water.
-
Serve with roasted potatoes or mash and some boiled kale or other greens.
Pork Fillet with Potatoes and Balsamic Dressing
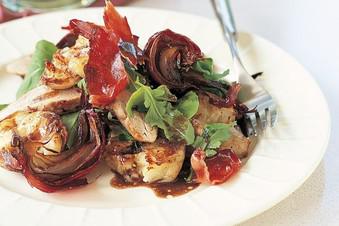
-
2 tbsp olive oil
-
1 large sprig rosemary
-
4 garlic cloves, sliced
-
750g piece pork fillet, trimmed
-
500g chat potatoes
-
1 red onion, cut into wedges
-
4 slices prosciutto
-
Rocket leaves, to serve
-
Salt, to season
-
Balsamic dressing
-
2 1/2 tbsp olive oil
-
1 1/2 tbsp balsamic vinegar
-
1 tsp grainy mustard
-
Select all ingredients
-
Preheat the oven to 190°C.
-
Mix 1 tablespoon of the olive oil with the rosemary leaves and sliced garlic. Brush a little over the pork fillet.
-
Par-boil the potatoes for 10 minutes, then drain and lightly crush. Toss the potatoes and onion wedges with the remaining garlic and rosemary oil, then place on a large baking tray and roast in the oven for 25 minutes, turning occasionally.
-
Meanwhile, heat the remaining olive oil in a frypan over medium-high heat. Add the pork fillet and cook for 2-3 minutes, turning to brown all over. Season well with salt and pepper.
-
Remove the pork and add to the baking tray with the potatoes and onion, and roast for the remaining cooking time (20 minutes). For the final 5 minutes, add the slices of prosciutto to the tray to crisp.
-
While everything is cooking, make the dressing. Place the olive oil, balsamic and mustard in a jar and season with salt and pepper. Shake well.
-
To serve, place some rocket onto each plate and divide the potatoes and onion among them. Slice the pork thickly, place on top and drizzle with the balsamic dressing. Place a shard of crisp prosciutto on top of each.
Pork in a Wrapper
-
1 lb lean pork
-
1 tablespoon sugar
-
1½ tablespoons soy sauce
-
Salt
-
½ teaspoon monosodium glutamate
-
1 tablespoon sherry
-
1 egg yolk
-
Cornflour, for coating
-
Cut pork into cubes (approximately ¾ inch).
-
Marinate in a mixture of sugar, soy sauce, monosodium glutamate and sherry for 20 minutes.
-
Add egg yolk and mix well.
-
Roll each piece of pork in cornflour.
-
Fry in hot oil until almost cooked. Drain and re-fry.
-
Place on a platter.
Potato Bread - Fermented
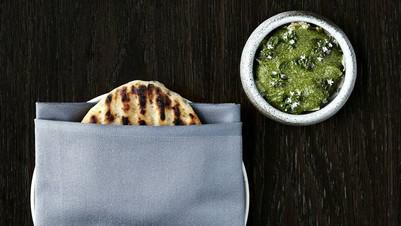
-
550 grams medium Yukon Gold potatoes (about 6)
-
1 1/2 tablespoons (30 grams) fine sea salt
-
300 grams plain yogurt
-
7 grams)active dry yeast
-
550 grams all-purpose flour
-
3 tablespoons (42 grams) unsalted butter, melted
-
Place potatoes in a saucepan, cover with water, bring to a boil, lower heat to a simmer, and cook until the potatoes are tender when pierced with a knife, about minutes. Drain potatoes and set aside to cool.
-
Peel potatoes, sprinkle with 1/2 tablespoon of salt, and place in a zipper-close plastic bag. Press down on potatoes to crush them while sealing the bag.
-
Stir the yogurt and yeast in a mixing bowl and set aside 5 minutes. Remove potatoes from bag and place in the bowl of a stand mixer outfitted with a paddle attachment. Process on low speed while adding the yogurt mixture, remaining salt and about 3 2/3 cups of flour.
-
Remove dough from bowl and knead by hand, adding the rest of the flour to keep it from sticking, until a smooth ball forms. Cover with plastic wrap and let sit for 3-4 hours, then refrigerate it overnight and up to 2 days.
-
Remove dough from refrigerator 2 hours before baking bread. Cover a baking sheet with parchment paper, and turn dough onto a floured surface. Divide dough into 8-10 balls, then form each one into a disk: Stretch one side of the disk out and fold it back on top. Turn disk and repeat 9 times. Each final disk should be about 3 1/2 inches in diameter and about 1/2 inch thick. Place disks on the baking sheet.
-
Heat a grill or stovetop grill pan on medium-high. Place disks of dough on grill or pan for a minute or so, enough for a crust to form on the outside without coloring. Turn and repeat on the other side. Transfer rounds to the baking sheet. Heat oven to 400 degrees. Brush dough with melted butter on both sides. Bake rounds 5 minutes. Turn over, brush tops with more butter and continue baking 6 to 10 minutes more, until a knife slipped into the side comes out clean.
Potato Bread - Kartoffelbrot

Tags:
Bread
-
300 g potatoes, peeled, boiled
-
1 tsp dried fast-action yeast
-
1 tsp sugar
-
1 tbsp olive oil, plus extra for greasing
-
1 tsp fine sea salt
-
300g all-purpose flour, plus extra for kneading
-
Cut the potatoes into equal chunks and boil. Drain them in a colander over a bowl and reserve the cooking liquid. Return the potatoes to the pan and toss over a very low heat for 2-3 minutes until any excess liquid has evaporated.
-
Pour 5 tbsp of the warm cooking liquid into a large bowl and leave to cool for a few minutes. When it’s lukewarm, sprinkle in the yeast. Stir in the sugar and leave in a warm place for about 10 minutes until a light foam appears on the surface.
-
Mash the potatoes with the oil in the saucepan until the mass is as smooth as possible, then stir in the yeast mixture and salt.
-
Mix well with a spoon and gradually add the flour, a few tablespoons at a time, stirring well before adding more. When the dough becomes too stiff to stir in the flour, turn it out onto the work surface and knead the remaining flour into the dough. Do not add more water, or the dough will become too sticky to work with.
-
Knead the dough for 10 minutes until soft and pliable. Place it in a lightly oiled bowl, cover loosely with a kitchen towel and leave to rise in a warm place for 45–60 minutes, or until well-risen and spongy to touch.
-
Knead back the dough and shape it into a rough ball. Flatten the ball on a floured surface until it is about 2 cm thick, then bring the sides up to the middle to give a rustic surface to the bread. Pinch lightly to seal and sprinkle on some wholemeal flour, for additional texture, on the outside of the loaf. Place it on a lightly oiled and floured baking sheet, rough-side up, and leave to prove in a warm place for a further 30 minutes.
-
Preheat the oven to 220°C. Score the dough with a knife along the pinched line. Bake the loaf for 35 minutes until well-risen and crusty on top. Cool on a wire rack.
-
Increase by half for a bigger loaf:
-
300 becomes 450
Potato Gnocchi Recipe

-
2kg old potatoes, or red potatoes like desiree
-
200g plain flour, plus a little more for dusting
-
a touch grated nutmeg
-
50g parmesan, grated
-
pinch salt
-
2 eggs
-
Boil the potatoes in their jackets until soft.
-
Peel and push them through a potato ricer or a mouli and leave to cool.
-
When almost cool, sprinkle the flour over the top and lightly work into the potato. Do not overwork the dough, just until the potato and flour are amalgamated.
-
Meanwhile, bring a small pot of salted water to the boil. You’ll need it to test the gnocchi, to check if they hold together.
-
Break off a small piece of dough and use your hands to roll it out like a sausage no less than 1 cm thick.
-
Cut into 1.5 cm pieces.
-
Adjust the heat so the water is simmering and drop in the gnocchi. They should rise to the surface in a few minutes and not break up. If they do, add a little more flour to the dough, again being careful not to overwork.
-
Cook the gnocchi in batches, allowing them room to swell. If cooking in large quantities, lift each batch out of the water with a slotted spoon, drain for a moment, tip into a buttered dish and keep warm.
-
Serve the gnocchi with your chosen sauce.
-
One of the best sauces, in my view, is made with gorgonzola. Alternatively, my all-time favourite is gnocchi al ragu di carne, the classic bolognese.
Preserved Lemon & Cranberry Loaf Cake
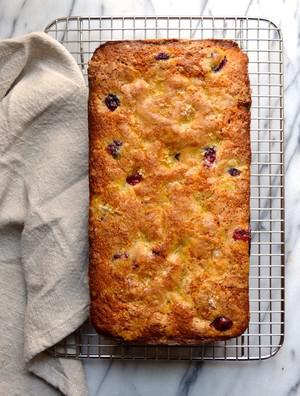
-
1 cup granulated white sugar
-
1/2 cup preserved lemons, coarsely chopped (peel and pulp)
-
1 tablespoon fresh lemon zest
-
1 teaspoon kosher salt
-
2 teaspoons vanilla extract
-
1/2 cup butter, melted
-
1 large egg
-
2 cups all-purpose flour
-
1 1/2 teaspoons baking powder
-
1/2 teaspoon baking soda
-
1/4 teaspoon kosher salt
-
1/4 cup apple cider or orange juice
-
1/4 cup freshly squeezed lemon juice
-
2 1/2 cups fresh cranberries
-
1 tablespoon fresh lemon zest
-
1 tablespoon granulated white sugar
-
2 tablespoons butter, cut into small cubes
-
Preheat oven to 350 degrees. Grease a 9x5” loaf pan and line with parchment paper.
-
Combine the sugar, preserved lemons, lemon zest, kosher salt, vanilla, and melted butter in a large bowl or the base of a mixer. Beat rapidly until ingredients are smooth and evenly combined. Beat in the egg.
-
In a separate bowl, whisk together the flour, baking powder, and baking soda. Stir into the wet ingredients along with the apple cider and lemon juice. Mix until completely incorporated.
-
Stir in the cranberries. Pour batter into the prepared loaf pan.
-
In a small bowl, combine the remaining lemon zest and white sugar. Use your fingers to rub together then sprinkle over the cake batter. Dot with the cubed butter.
-
Bake 45-55 minutes or until the top is golden and a tester inserted the center comes out clean.
-
Let cool in pan 5 minutes, then remove and let cool completely on a rack before serving.
Preserved Lemon and Almond Cake
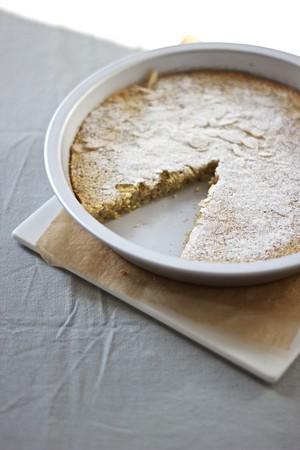
-
4 preserved lemons
-
6 eggs
-
250g ground almonds
-
1 tsp baking powder
-
250g sugar
-
1/2 tsp ground coriander
-
In a medium saucepan boil the preserved lemons for ca. 20 minutes or until soft. Drain and set aside.
-
Pre-heat the oven to 180 degrees Celsius. Grease a round springform and line with parchment paper.
-
Cut the lemons in half, remove the seeds, then add the lemons to the bowl of a food processor. Process until roughly chopped. Add the eggs, ground almonds, baking powder, sugar and ground coriander and process until combined.
-
Pour the batter into the prepared springform. Bake for ca. 1 hour or until a skewer inserted into the middle of the cake comes out clean. Cool in the springform before serving.
-
The cake will keep ca. 5 days at room temperature.
-
(The recipe is easily halved. If so, reduce the baking time to ca. 30 minutes and start checking for doneness around 25 minutes.)
Pressed Tongue
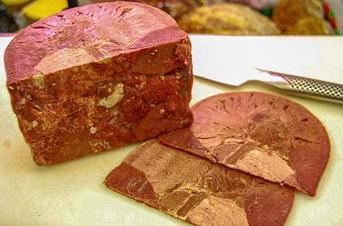
-
12 Cloves
-
12 Peppercorns
-
12 Juniper berreis
-
4 Bay leaves
-
500gm brown sugar
-
600gm salt
-
2 litres water
-
Cold water
-
2 small onion
-
8 Cloves
-
2 Carrots
-
Small bunch parsley
-
6 peppercorns
-
2 Tongues
-
Butter
-
Onion
-
Flour
-
Red currant jelly
-
Stock from poaching
-
Capers
-
Cream
-
Parsley
-
Boil all ingredients.
-
Allow to cool.
-
Place tongue in brine, cover and allow to pickle for seven days
-
Add all ingredients to pot, bring to boil.
-
Simmer for 11/2 hours, skimming occasionally.
-
Reduce liquid for 1/2 hour.
-
Place tongues in cold water and peel.
-
Cut tongues in half lengthwise and fit tightly into sealed press.
-
Pour some of the stock over tongues to just cover them.
-
Place follower on top of tongues.
-
Press firmly enough for the liquid to cover the follower.
-
Place press in fridge overnight.
-
Remove tongue from press, slice and eat.
Pulled Lamb Tacos

-
1 Lamb shoulder (See note 1)
-
1 Medium Onion Peeled
-
1 Bulb Garlic
-
1 Cinnamon stick
-
3 Star anise
-
1 Orange
-
2 teaspoon Ground cumin
-
1 teaspoon Dried oregano
-
1 teaspoon Mild chilli powder
-
2 teaspoon Smoked paprika
-
Good oinch of salt and pepper
-
4 tablespoon Olive oil
-
1 cup Corn kernels (Frozen) (See note 2)
-
bunch Fresh coriander (Optional, save a few leaves to put on top of the finished tacos)
-
1 Lime Juice only
-
1 Tomato Deseeded and diced
-
1 small Red onion Peeled, fine dice
-
½ Red chilli finely sliced
-
2 tablespoon Canola oil
-
Salt and pepper to taste
-
Sour cream
-
Tortillas
-
White cabbage Finely shredded
-
Guacamole
-
Mexican tomato salsa
-
Pre heat oven to 150 °C / 302°F
-
Grab your roasting dish and place a piece of baking paper on the base.
-
Cut your onion into ¼, cut your garlc bulb through the middle and place into your roasting dish.
-
In a small bowl add the cinnamon stick, star anise, zest and juice of your orange, ground cumin, dried oregano, chilli powder, smoked paprika, salt and pepper and oil. Give it a good mix and rub all over the lamb shoulder.
-
Place the seasoned lamb onto your cut onion and garlic and cover with another piece of baking paper, then seal the dish with tin foil.
-
Place into your pre heated oven for 4 hours to cook.
-
Once cooked remove and allow to rest for 20 minutes.
-
Remove the foil and paper from the dish, shred the lamb meat using a fork, make sure you mix the cooked onion and garlic through the meat as well.
-
Defrost your corn kernels
-
Heat a fry pan and add a little oil. Add the corn kernels to the hot oil and sautee to get some colour (careful as they will pop and spit a little).
-
Once you have good colour, remove from the heat and squeeze in the lime juice. Add the diced tomato, finely diced red onion and sliced chilli. Roughly chop the coriander and mix through, add the oil and season with a pinch of salt and pepper.
-
Heat the tortillas as per the instructions, add a little bit of shredded cabbage, top with the pulled lamb, sprinkle over your roasted corn salsa.
-
Add as much mexican tomato salsa and sour cream as you like and tuck in!
-
Note 1 - You can use a bone in or out lamb shoulder or use a bone out leg of lamb.
-
Note 2 - You can also use tinned sweetcorn.
Pulled Pork
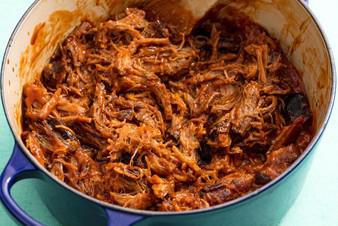
-
1 large sweet onion, thinly sliced
-
2 tablespoons dijon mustard
-
1 12-oz. bottle chipotle or regular barbecue sauce (1 cup)
-
3/4 cup ketchup (1 cup)
-
3/4 cup water (1/2 cup stock)
-
1/3 cup cider vinegar
-
1 teaspoon garlic salt
-
1/2 teaspoon pepper
-
1 (5 to 6 lb.) boneless pork shoulder roast, any netting or string removed - remove fat
-
1 1/2 tablespoons packed dark brown sugar
-
1/4 teaspoon coarse salt
-
4 dried chipotle - cut in half and deseeded. Remove halfway through cooking.
-
Combine onion, barbecue sauce, ketchup, water, vinegar, garlic salt and pepper in large (6-quart) slow cooker.
-
Add pork; turn to coat with sauce. (No need to pre-brown meat.)
-
Cook, covered, on low 7 to 8 hours or until pork is fork-tender.
-
Remove pork.
-
When cool enough to handle, cut or shred meat, discarding any large pieces of fat.
-
Place pork in shallow casserole dish.
-
Skim fat from sauce in slow cooker; carefully pour sauce into large skillet.
-
Add brown sugar and salt; bring to a boil over high heat.
-
Boil 5 to 10 minutes or until reduced by half.
-
Pour over pork.
Pulled Pork with Bbq Sauce

-
3.5-4.5kg/ 5-7lb pork butt / pork shoulder , bone in, fat cap on (Note 1)
-
1 cup beer , apple cider or apple juice (Note 2)
-
3 tbsp brown sugar
-
1 tbsp paprika powder
-
1 tbsp garlic powder
-
2 tsp onion powder
-
2 tsp mustard powder
-
1 tsp cumin powder
-
1 tbsp salt
-
1 tsp black pepper
-
1 cup apple cider vinegar (Note 3)
-
3 cups tomato ketchup (or Aussie tomato sauce)
-
1 cup water (or use remaining beer!)
-
3 tbsp molasses , orginal (not blackstrap, Note 4)
-
2/3 cup brown sugar
-
4 tsp mustard powder
-
3 tsp garlic powder
-
4 tsp Worcestershire sauce
-
2 tsp salt
-
2 tsp black pepper
-
2 tsp Tabasco or cayenne pepper (optional, for spiciness)
-
Mix the Rub together, then rub all over the pork.
-
Place in a slow cooker, pour over beer. Slow cook on low for 10 hours. Pork should be tender enough to easily shred.
-
Preheat oven to 180°C / 350°F.
-
Transfer from slow cooker into a roasting pan (reserve liquid).
-
Scoop fat off surface of juices in slow cooker and drizzle over pork (about 1/3 cup), then roast pork for 20 minutes.
-
Remove from oven, cut thick layer of fat off top and discard. Spoon over 1/4 cup fat from slow cooker juices, then roast 15 minutes.
-
Shred pork using 2 forks. Pour over BBQ sauce, toss gently.
-
Serve stuffed in sliders with Coleslaw, or make a Southern dinner plate with Coleslaw, Mac and Cheese, Corn bread, steamed corn & green beans tossed in butter, with Margaritas to quench your thirst!
-
Place all ingredients in a saucepan and simmer over medium heat, stirring occasionally, for 45 minutes or until thickened.
-
Add 3/4 - 1 cup of juices from slow cooker until sauce is syrup consistency.
-
Adjust to taste: sweetness with brown sugar / honey, salt and sour with vinegar. Use per recipe.
-
Pork - Pork Butt (aka Boston Butt) or pork shoulder are the best for this recipe. They are nicely marbled with fat and need to be slow cooked in order to become tender enough to shred with little effort. Get bone in (pork butt almost always is, shoulder is sometimes not). Leave the thick layer of fat because it does all sorts of wonderful things to the meat as it slow cooks (it self bastes!).
-
If it's got skin, best to remove if you can (so spice can infuse better) BUT not the tend of the world if you don't.
-
Smaller pork - use recipe scaler if your pork is much less than 2.5kg/5lb.
-
Will also work well with pork scotch fillet roast (aka pork neck) - 8 hours slow cook on low. Recipe will also work for leaner cuts of pork like loin and tenderloin but will require shorter cook times and end result not as juicy (because the meat isn't fatty enough).
-
Liquid - Braising liquid for flavour infusion. Any beer other than dark beers like stout and Guinness. Hard or non alcoholic cider is also terrific (or pear cider). For non alcoholic, apple juice is my favourite. Emergency fallback: just use water!
-
Vinegar - white wine or champagne vinegar also works well here. Plain white vinegar can also be used but reduce by 1 tbsp as it is a bit sharper.
-
Molasses adds an extra richness to the Barbecue Sauce and also deepens the sauce colour to the dark brown we know and love about barbecue sauce!
-
Other cook methods:
-
Pressure cooker / instant pot - With a slightly smaller pork (2-2.5 kg/4-5lb), I make this in my pressure cooker, 1 hr 20 minutes on high.
-
Oven - 7 to 8 hours at 130C/270F, covered with double foil in a roasting pan with 2 cups of water (plus the beer per recipe). I rarely do this simply because of logistics - I don't like to leave the house or sleep with the oven on! But by roasting, you do get an amazing crust which I compensate for by roasting the pork briefly after slow cooker. Note: slow cooker yields juicier pork.
-
Servings - This recipe makes a LOT! Partly because pork butts are BIG anyway, also because if you make this with a smaller piece, it cooks faster = less flavour.
-
A 3.5kg/7lb bone in pork shoulder will comfortably feed 12 people if making a plate with sides.
-
If making sliders with Coleslaw, it will easily make 20.
-
Storage - freezes brilliantly, even after tossing with sauce. Or keeps in fridge for 4 days. Best reheated in microwave to keep things juicy and moist!
-
Nutrition per serving, pork and sauce only. Calories are quite overstated. A lot of fat gets discarded with the slow cooker juices you don't use. But I have no way of calculating how much! So just know that the actual calories is less than shown below.
Pupusa
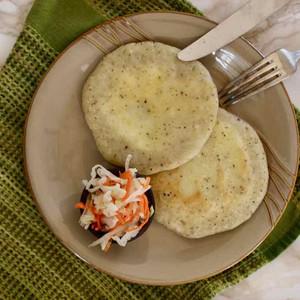
-
4 cups maize flour (masa harina)
-
A pinch of salt
-
3 cups water (warm)
-
2 cups grated cheese (ideally quesillo or mozzarella)
-
Vegetable oil
-
Combine maize flour, salt and 2½ cups (600ml) water in a mixing bowl.
-
Knead to form a smooth wet paste with the consistency of playdough.
-
If the mixture is too dry, add the remaining water, a tablespoon at a time. If the mixture is too sticky, add a little more flour, a tablespoon at a time.
-
Cover the bowl and let stand for 10 minutes.
-
With lightly oiled hands, form the dough into 8 to 10 balls.
-
Form small patties. Place a tablespoon of cheese, refried beans and/or pork and wrap the dough around the filling to seal.
-
Ensure that the filling does not leak, pat the dough between your hands to form a disk about ¼-inch (5mm) thick. Repeat with the remaining patties.
-
Heat a lightly oiled frying pan over medium-high heat. Cook pupusas for 3 to 4 minutes on each side until golden brown.
Queso Blanco

-
4 litres/1 gallon of whole milk
-
1/4 teaspoon mesophilic starter
-
1/4 – 1/2 cup of white vinegar
-
1 teaspoon of cheese salt
-
Warm milk to 85 degrees Celsius/185 degrees Fahrenheit.
-
Add culture and stir in thoroughly
-
Leave to ripen for 45 minutes
-
Slowly add the vinegar, 1/4 cup at first and up to 1/2 cup if needed, stirring constantly until the milk coagulates.
-
Leave to rest for 10 minutes once a curd has formed.
-
Ladle the curds into a colander lined with cheese cloth
-
Hang to drain the whey for 30 minutes
-
Move the curds to a bowl with the cheese salt, working the salt into the curds with your hands.
-
Line 2 cheese molds with cheese cloth
-
Fill the molds with the curds and press lightly for 1 hour
-
Cover the molds with plastic wrap and chill in the fridge.
Quick and Easy Anzac Biscuits

I used SR flour
-
Sift the flour into a bowl. Add the sugar, rolled oats and coconut.
-
Melt the butter in a saucepan, then add golden syrup and water.
-
Stir the bicarbonate of soda into the liquid mixture.
-
Add the liquid to the dry ingredients and mix thoroughly.
-
Place walnut-sized balls of mixture on a greased tray and bake at 175C for 15-20 minutes.
-
Biscuits will harden when cool.
Quick Butterflied Roast Chicken
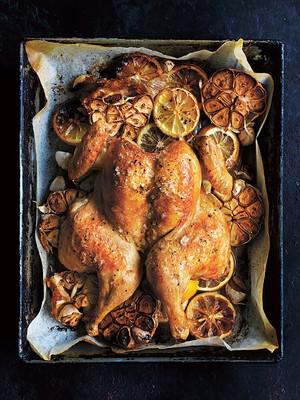
-
1 X 1.6KG WHOLE CHICKEN
-
4 BULBS GARLIC, HALVED HORIZONTALLY
-
3 LEMONS, SLICED INTO 2CM ROUNDS
-
2 TABLESPOONS EXTRA VIRGIN OLIVE OIL
-
SEA SALT AND CRACKED BLACK PEPPER
-
Preheat oven to 220°C (425°F).
-
Place the chicken, breast-side down, on a board so the back is facing up and the drumsticks are pointing towards you.
-
Using sharp kitchen scissors or chicken shears, cut closely along each side of the backbone. Remove and discard the backbone.
-
Turn the chicken, breast-side up, and press down firmly on the breastbone to flatten the chicken.
-
Arrange the garlic and lemon on an oven tray lined with non-stick baking paper. Top with the chicken, breast-side up, tucking in the wing tips.
-
Brush the chicken with the oil and sprinkle with salt and pepper. Roast for 35–40 minutes or until golden brown and cooked through. Serves 4–6
-
Butterflying a chicken allows it to roast more quickly and evenly.
-
Placing the chicken on a ‘bed’ of lemon and garlic infuses it with amazing flavour as it roasts.
Quick Pickled Carrots
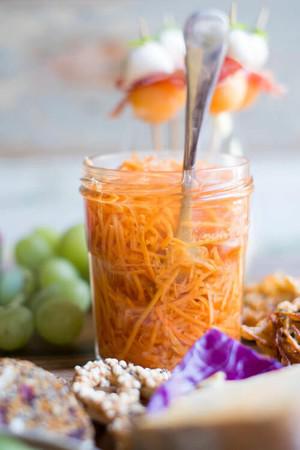
-
150 g Just Veg Carrot Shred (half a bag)
-
1 cup apple cider vinegar
-
pinch of salt
-
2 tbs coconut sugar (or sugar of your choice)
-
pinch of pepper
-
2/3 cup water
-
In a saucepan, gently heat vinegar, sugar, salt, water and pepper together until simmering and sugar and salt has dissolved.
-
Pack your carrot shred into a mason jar, then top with vinegar mixture.
-
Leave for 30 mins (minimum) and serve.
-
You may have vinegar mixture leftover depending on the size of your jar so you can always add more carrot and utilise it in another jar.
Quick Rhubarb Cake

-
⅔ cup granulated sugar , plus 2 tablespoon for top of rhubarb
-
3 eggs
-
3 tablespoons butter , melted
-
2 tablespoons milk or buttermilk
-
1 teaspoon vanilla or vanilla bean paste
-
1 cup plus 2 tablespoon all-purpose flour
-
¾ teaspoon baking powder
-
pinch of salt
-
2 cups diced rhubarb
-
Preheat oven to 350 degrees F.
-
In a bowl mix eggs and ⅔ cup of sugar until light.
-
Add melted butter, vanilla, and milk.
-
Stir in flour, baking powder and salt and mix to combine.
-
Pour into a 8 or 9 inch cake pan that has been sprayed with nonstick cooking spray.
-
Spread diced rhubarb around the top of the batter and sprinkle with 2 tablespoon sugar.
-
Bake at 350 degrees for 30 minutes or until a knife comes out clean.
Quick Satay Peanut Stir Fry (any protein)
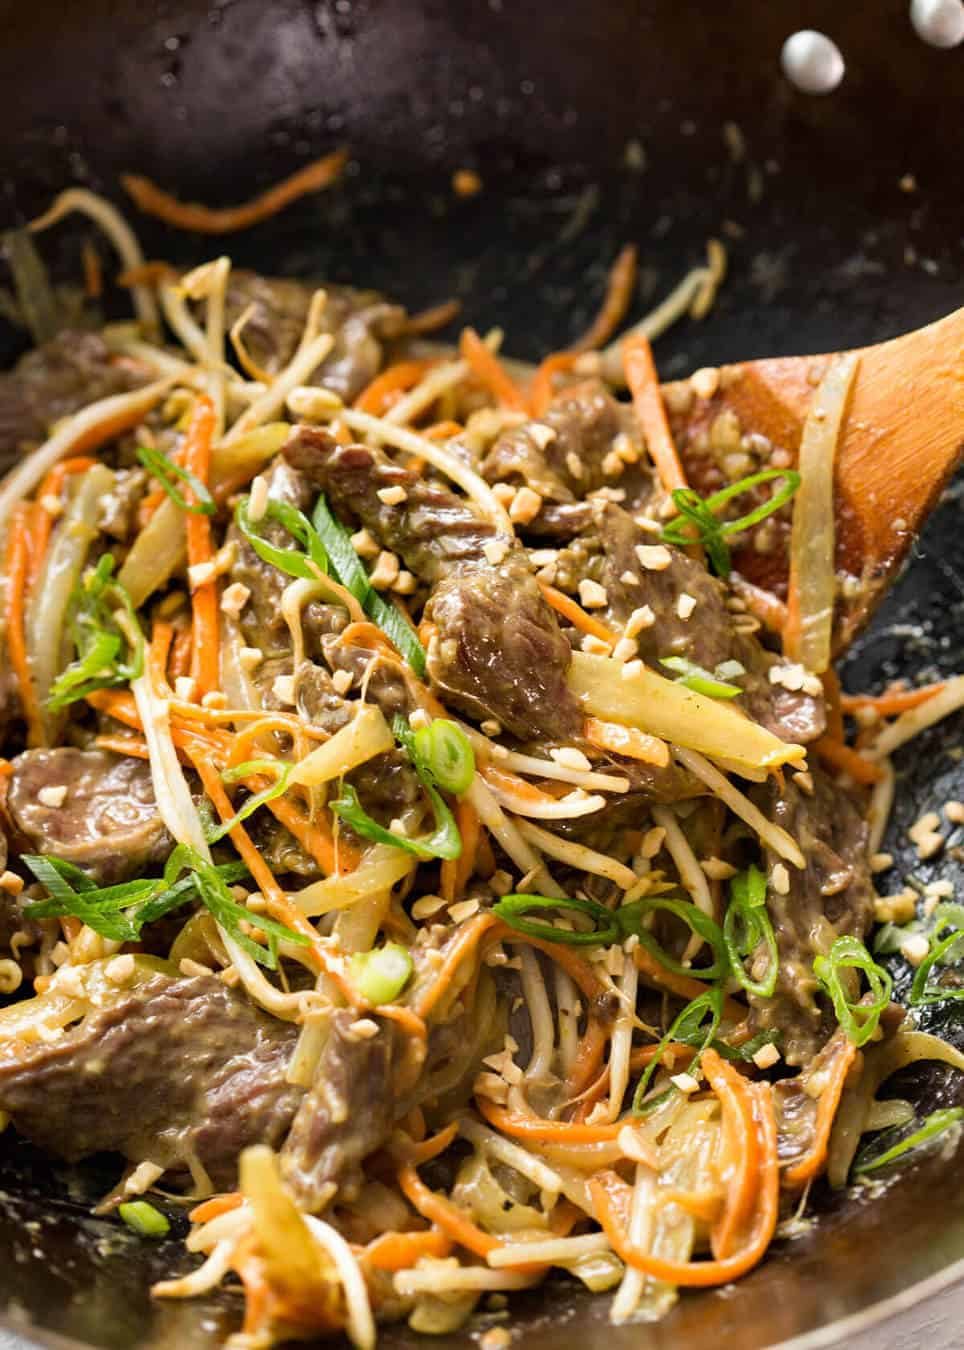
-
1 1/2 tbsp fish sauce ((Note 1))
-
1 1/2 tsp sugar
-
2 tsp cornflour / cornstarch
-
1 garlic clove (, minced)
-
1 tsp grated ginger
-
1 tsp curry powder ((any - I use hot!))
-
1 1/2 tbsp crunchy peanut butter ((smooth also ok))
-
2 tbsp water
-
300 - 350 g / 10 - 12 oz beef (, chicken or pork thinly sliced (or peeled prawns/shrimp) (Note 2))
-
2 tbsp oil
-
1 garlic (, finely chopped (Note 3))
-
1 large onion (, sliced)
-
1 large carrot (, julienned (Note 4))
-
1 big handful bean sprouts ((~1 1/2 cups packed))
-
1/2 cup finely sliced shallots / green onions ((plus more for garnish))
-
1/4 cup crushed peanuts (, plus more for garnish (optional))
-
Mix Sauce ingredients EXCEPT WATER together in a small bowl. Then mix in water (easier to combine).
-
Place beef in a bowl, add 1 tbsp Sauce. Mix, set aside 10 minutes.
-
Heat oil in a wok or large heavy based skillet over high heat. Add garlic and stir until golden (~10 sec) then add onion. Cook for 1 minute.
-
Add beef. Cook for 1 1/2 minutes or until it mostly turns brown (some red spots ok). If using pork, chicken or prawns, cook until almost cooked through.
-
Add carrots, bean sprouts and Sauce. Cook until veggies are wilted.
-
Add peanuts and shallots, stir.
-
Serve immediately with rice or noodles, garnished with extra shallots and peanuts if desired. (For a low carb, low cal option, try Cauliflower Rice!)
Ranch Dressing

-
½ cup sour cream
-
¼ to ½ cup buttermilk, depending on your desired consistency
-
2 tablespoons mayonnaise
-
1 tablespoon minced fresh parsley
-
1 tablespoon minced fresh cilantro or dill, or a combination of the two
-
1 tablespoon minced fresh chives
-
1 garlic clove, pressed or minced
-
1 to 2 teaspoons fresh lemon juice, to taste
-
½ teaspoon fine salt
-
Freshly ground black pepper, to taste
-
In a bowl, combine the sour cream, ¼ cup buttermilk, mayonnaise, fresh herbs, garlic, 1 teaspoon lemon juice, salt, and about 5 twists of black pepper. Whisk to combine.
-
Taste, and add up to ¼ cup more buttermilk if you desire a thinner, more drizzly consistency. Add up to 1 teaspoon more lemon juice if you would like more zing, and/or more pepper to kick it up a notch.
-
This dressing tastes great immediately and even better after a 10-minute rest. Use as desired, and store leftovers in an air-tight jar in the refrigerator, covered, for 5 to 7 days.
Raspberry Ricotta Microwave Mug Cake Recipe!

-
Flour
-
Ricotta
-
Melted butter
-
Maple syrup
-
Egg
-
Raspberries
-
Powdered sugar
-
Whisk ¼ cup each flour and ricotta, 2 tablespoons each melted butter and maple syrup, and 1 large egg. Top with ⅓ cup raspberries. Microwave on high for 2 minutes. Dust with powdered sugar and serve immediately. Serves 1.
Rava Dosa
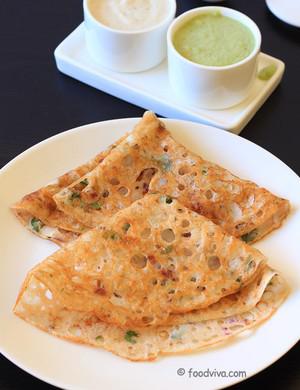
-
1/2 cup Rava (sooji/semolina)
-
1/2 cup Rice Flour
-
1/4 cup Maida (all purpose flour)
-
1 teaspoon Cumin Seeds
-
1 Green Chilli, finely chopped
-
1/4 inch Ginger, grated or finely chopped (approx. 1/2 teaspoon)
-
5-6 Curry Leaves, chopped
-
2 tablespoons finely chopped Coriander Leaves
-
1 Onion, finely chopped (approx. 1/4 cup), optional
-
2¼ – 2½ cups Water (approx.)
-
Oil, for roasting dosa
-
Salt to taste
-
Assemble all the ingredients to make the batter.
-
Add 1/2 cup rava (sooji), 1/2 cup rice flour and 1/4 cup maida in a large bowl.
-
Add salt (approx. ½ teaspoon or to taste) and 2 cups water. Mix well using a large spoon or a wire whisk until there are no flour lumps.
-
Add 1 teaspoon cumin seeds, 1 chopped green chilli, 1/4 inch chopped/grated ginger, 5-6 chopped curry leaves, 2 tablespoons finely chopped coriander leaves and 1/4 cup finely chopped onion.
-
Mix well and check the batter for consistency. It should have pouring buttermilk like consistency (NOT like simple dosa batter). Add more water until batter attains pouring consistency. Cover it with a plate and let it rest for 20 minutes. After about 20 minutes, check for the consistency again. Rava (semolina) absorbs water after soaking so batter may become thick. If required, add more water to bring it to pouring consistency. Stir the batter and mix well.
-
Heat a non-stick dosa tawa/skillet over medium flame. Ensure that tawa is hot otherwise the batter will stick to the pan and dosa will not come out easily. You can check whether tawa is sufficiently hot or not to make dosa, sprinkle few drops of water on it. If water droplets evaporate immediately, it means tava is hot and ready to make dosas. Take ladle full batter and pour from about 3-4 inch height on in a circular motion starting from edge to the center.
-
Pour the batter until it covers the center. Maintain some holes here and there. These holes steam to escape and makes dosa crispy.
-
Sprinkle 1/2-teaspoon oil around edges of dosa. Cook until it turns light golden brown and crispy, for approx. 2-minutes.
-
Flip it on another side and cook for another minute or until it turns little crispy.
-
Transfer hot thin crispy rava dosa to a serving plate and serve it with coconut chutney.
-
Repeat the process from step-4 to step-9 for remaining batter. Stir and mix the batter well before making each dosa.
-
Tips and Variations:
-
Pour batter on hot surface of tawa from about 3-4 inches height. This allows batter to form small holes that allow steam to escape and this in-turn makes dosa crispier and tastier.
-
Sprinkle chopped onions on tawa before pouring the batter in step-7 instead of adding and mixing them to batter. This prevents dosa from sticking to the tawa.
-
Add 1-tablespoon grated carrot, 1-tablespoon grated fresh coconut, 1-tablespoon grated beetroot and other preferred vegetables to the batter to make vegetable rava dosa.
Rhubarb and Orange Frangipane Tart
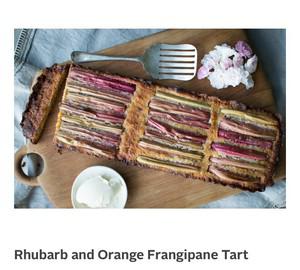
-
Bunch young rhubarb, trimmed to 10cm pieces
-
140 g (11/4 cup) almond meal
-
30 g (1/4 cup) arrowroot
-
1 tablespoon sweetener (rice malt, maple syrup or honey)
-
35 g butter, room temperature
-
1 to 2 tablespoons water
-
100 g butter, room temperature
-
85 g (1/4 cup) sweetener (rice malt, maple syrup or honey)
-
1 free-range or organic egg
-
1 teaspoon vanilla essence
-
1/2 teaspoon cardamon, ground
-
Zest one orange
-
115 g (1 cup) almond meal
-
2 tablespoons sweetener (rice malt, maple syrup or honey)
-
2 tablespoons orange juice
-
Begin with the base. In a food processor mix the almond meal, arrowroot, sweetener and butter until well combined.
-
Add 1 tablespoon of water and mix again. It should come together into a dough that holds together when pinched. If it’s still a little dry, add the second tablespoon of water.
-
Press firmly into a greased, springform tart tin and pop into the fridge whilst you make the frangipane.
-
Pre-heat your oven to 180℃ (fan-forced).
-
Without washing your food processor (from making the base), beat the butter, sweetener, egg, vanilla, cardamon and orange zest until it is thick and creamy.
-
Fold in the almond meal. Remove the base from the fridge and speed the frangipane over the base.
Arrange the rhubarb over the top of the tart.
-
Mix the orange juice and sweetener together until combined. Drizzle over the tart and place into the oven immediately.
-
Bake for 20-30 minutes until the tart is golden brown on top and the frangipane is set (in the middle it will puff up and be golden).
-
Serve warm with creme fraiche or coconut yogurt
Rhubarb Crumble
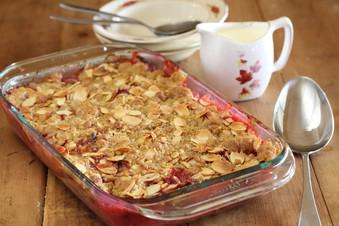
-
1 large bunch ripe rhubarb, leaves discarded, stems washed and cut into 4 cm pieces
-
1/2 cup caster sugar or 1/4 cup honey
-
Zest and juice of 2 oranges plus extra juice if needed
-
1/2 cup plain flour
-
1 tspn ground cinnamon
-
1/3 cup brown sugar
-
100g rolled oats
-
140g chilled unsalted butter chopped
-
1/3 Cup flaked almonds
-
To serve double cream
-
Maggie Beer's Rhubarb Crumble recipe is the perfect winter warmer dessert. Maggie uses rhubarb and oranges to create an indulgent dish.
-
For more recipes like this, Join Maggie's Food Club
-
Preheat fan-forced oven to 180 C.
-
Spread rhubarb in a baking dish, sprinkle with caster sugar or honey and orange juice and bake for 20 minutes or until tender, then set rhubarb and pan juices aside. Add a little extra orange juice if there are no juices left in the pan.
-
Combine flour, cinnamon, sugar, orange zest and oats, then rub the butter into the flour using your fingertips. Add almonds to the crumble mix and combine.
-
Place cooked rhubarb and pan juices in a buttered 1 litre ovenproof dish for four 250ml ramekins, sprinkle with crumble, then bake for 15 minutes (for ramekins) or 25 minutes (if baking in one dish) or until golden.
-
Serve crumble in bowls with double cream passed separately.
Rich Fruit Cake (3 Ingredient Cake)
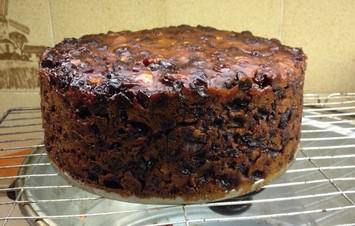
-
1 kilo mixed fruit (and nuts if wanted)
-
750mls fluid - I used orange and apple juice and brandy
-
2 cups Self Raising Flour
-
Soak fruit in fluid of choice for 24 hours
-
Stir in flour and put into a loose bottom cake tin .
-
Put in SC and cook for 8 hours on low ,with water 1/2 way up cake tin .
-
Cook using the Tea Towel Trick in place
-
Cool and turn out .
-
A non coffee alternative to our other 3 Ingredient Christmas Cake
Ricotta Cups
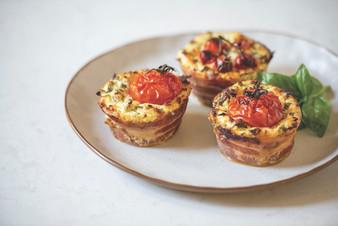
-
250g ricotta cheese
-
2 med eggs
-
42g parmesan
-
72g cheddar or another cheese
-
100g leeks
-
100g chorizo
-
50g yellow pepper
-
Salt and pepper
-
Garlic x 2
-
1 tsp olive oil
-
Chop chorizo into small chunks and fry with leeks, yellow pepper and garlic until very soft about 20 mins. Allow to cool
-
In a bowl mix cheese and ricotta with pepper and beaten eggs. Mix the chorizo mix into cheese mix.
-
Spoon into greased fairy cake tins x 12 and bake at 180 for 15-25 mins until tops are brown. Leave to cool for 5 mins in tin. Remove cool completely and store in fridge.
-
This recipe could be adapted to any meaty filling but you need something stringy like leeks to help it knit together. Bacon and leek, chicken and curry powder - all nice.
Ridiculously Easy Farmhouse Buttermilk Cake
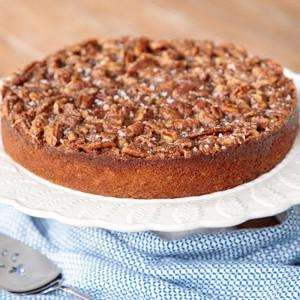
-
¼ cup butter very soft
-
1 cup light brown sugar firmly packed
-
1 large egg
-
1 cup buttermilk
-
1 teaspoon vanilla extract
-
1 teaspoon baking soda
-
½ teaspoon salt
-
1 ½ cups all-purpose flour
-
3 tablespoons melted butter
-
½ cup light brown sugar firmly packed
-
2 tablespoons half and half
-
⅛ teaspoon salt
-
¾ cup diced pecans
-
Preheat the oven to 350°F. Spray a 9" round cake pan (with at least 2-inch tall sides) with baking spray and line with parchment paper. Set aside.
-
Combine the butter and brown sugar and stir until well combined (the mixture will not be fluffy at this point).
-
Add the egg, stirring until nice and smooth.
-
Stir in the buttermilk and vanilla extract until well combined.
-
Sprinkle the flour, baking soda and salt evenly over the top and stir until well combined.
-
Pour the batter into the prepared pan.
-
Bake the cake for 30 minutes or until a toothpick inserted in the center comes out clean and/or the cake springs back when lightly touched in the center.
-
During the last 10 minutes of baking time, prepare the topping. Stir the butter and the sugar together. Add the milk, pecans, and salt. The glaze will be thick, but pourable.
-
After the cake has baked for 30 minutes, pour the topping over the cake and return it to the oven for another 10 minutes (for a total baking time of 40 minutes). Remove cake from the oven and allow to cool for 20 minutes in the pan. Sprinkle lightly with flaky sea salt, if desired and serve warm or at room temperature. Topping will firm up as the cake cools.
-
Cake can be served in the pan or on a serving platter or cake stand. To serve on a platter, invert cake onto a dinner-size plate then invert again so that topping is up.
-
Adapted from King Arthur Flour.
-
See Café Tips above for further instructions and tips.
Rissoles!!
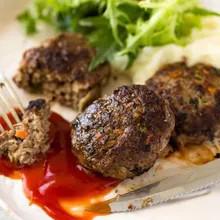
-
1 small brown onion
-
1/2 cup panko breadcrumbs (or normal)
-
500 g / 1 lb beef mince (ground beef) (Note 1)
-
1 small zucchini
-
1 small carrot
-
1 egg
-
1 large garlic clove , minced
-
1/2 tsp dried thyme
-
1/2 tsp oregano (or sub with other favourite herbs)
-
1/2 tsp each salt and pepper
-
2 tsp Worcestershire Sauce
-
1 – 2 tbsp oil
-
Tomato Ketchup!
-
Grate the onion into a large bowl using a box grater (see video). Add panko, mix briefly to coat in the onion juices.
-
Grate zucchini and carrot into the bowl. Add remaining Rissoles ingredients. Mix well. Scoop up about 1/4 cup of mixture, form a 1.7cm / 2/3″ thick pattie. Indent the middle slightly (Note 2, see photos in post). Repeat with remaining mixture – you should make 10 – 12.
-
Heat oil in a skillet over medium heat. Add half the patties and cook for 4 minutes or until dark golden. Press LIGHTLY with spatula, if you press hard, you’ll press the juices out!
-
Flip and cook the other side for 3 – 4 minutes until golden.
Roast Pork Hints

-
One of the most important things to remember, is to get the rind as dry as possible before the cooking process.
-
Remove your roast from the packaging and pat dry with paper towel. With a small sharp knife, deeply score the rind at 1cm intervals, being careful to not cut into the meat. If time allows, leave the scored roast uncovered in the fridge for 1 hour, or ideally overnight. This process further dries the rind and aids the crackling process.
-
When you’re ready to cook, put your pork on a wire rack in the sink and pour a jug of boiling water over the rind. Pat dry thoroughly with paper towel.
-
Rub the roast with 1 tablespoon of vegetable oil and half a tablespoon of salt (more if you like salty crackling), making sure the oil and salt penetrate the scores.
-
Place the roast on a wire rack inside a baking tray and cook at 240°C (max 250°C conventional) until the rind crackles, up to 50 minutes. If the roast is over 2kg, take 10 minutes off this initial crackling time.
-
Turn the oven down to 180°C and cook for 30-35 minutes per kg, depending on how well you like your roast cooked.
-
Once cooked, let the roast rest for 10 minutes before slicing.
-
Note: to achieve great crackling, getting the oven temperature correct is critical. We recommend the use of an “oven thermometer” to verify that the stated oven temperature is accurate.
-
Preheat oven to 180°C
-
Gently sear roast in a hot pan
-
Place in oven and cook for 45 minutes per kg to finish
-
Rest for 5-10 minutes and enjoy!
Roast Tomato Relish
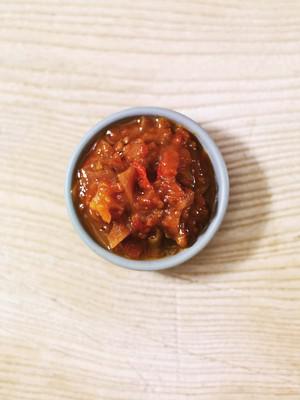
-
1 kg mixed coloured tomatoes
-
1 red chilli, seeded and finely chopped
-
1 red onion, finely chopped
-
2 cloves garlic, peeled and finely chopped
-
1 tsp fresh or dried oregano
-
Salt and pepper
-
2 tbsp olive oil
-
75 g golden caster sugar
-
100 ml cider vinegar
-
1 bay leaf
-
2 gherkins, finely chopped
-
Preheat the oven to 180°C.
-
Halve the tomatoes and place cut side up in a roasting tin. Sprinkle with the chilli, chopped onion, garlic and oregano. Season with salt and pepper and spoon over the olive oil.
-
Roast for 35 minutes.
-
Dissolve the sugar in the vinegar and add the bay leaf . Bring to the boil, tip in the tomatoes and their roasting juices and bubble vigorously until you have a nice thick relish. Stir often to prevent sticking to the base of the pan. Allow to cool a little then stir in the chopped gherkins and spoon into sterilised jars. Seal with vinegar-proof lids. Small Kilner type jars are ideal.
-
Discover
-
Serve on top of a Scotch Beef burger or a sandwich
Roasted Cauliflower with Blue Cheese Sauce & Bacon

-
1 head of cauliflower quartered, leaves and lower stem removed
-
½ cup mayo
-
1 cup blue cheese finely chopped
-
½ cup bacon crumbles
-
Preheat oven to 350. Spray a baking sheet with cooking spray. Put the cauliflower quarters on the baking sheet and cook for 30 minutes.
-
Meanwhile, stir together the mayo and blue cheese.
-
After 30 minutes the cauliflower should be slightly tender. Spread with the blue cheese sauce. Sprinkle on the bacon. Bake for 10-15 minutes until the cheese sauce is golden.
Rocket Pesto
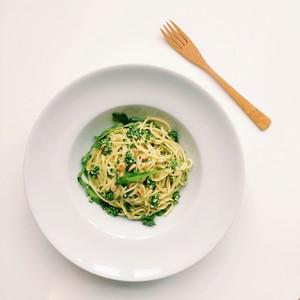
-
75 gr Rocket
-
50 gr Pine nuts
-
40 gr Parmesan cheese – grated
-
8 TBsp of Olive oil
-
1 clove of Garlic
-
Salt and Pepper
-
In a food processor, chop up pine nuts and garlic fine.
Add in the arugula till you get the desired structure.
Season with salt and pepper.
Next you add in the parmesan cheese and finish off with adding olive oil.
Mix and your ready to use your pesto!
-
I mix it with freshly cooked spaghetti and a lump of butter. I then lay it on a handful of arugula, roasted pine nuts and some extra parmesan cheese.
Rolled Oat Biscuits

-
2 cups rolled oats
-
3/4 cup self-raising flour
-
1/2 cup sugar
-
1/2 cup butter
-
1 tsp treacle
-
1/2 tsp bicarbonate of soda
-
1/4 cup walnuts
-
Mix all dry ingredients together. Chop walnuts, leave a few whole.
-
Dissolve butter with 2 tablespoons of boiling water and 1 teaspoon treacle and mix all together.
-
Place on a cool slide in about tablespoon proportions, with a half walnut in each centre.
-
Bake in oven at 230C until brown.
-
You can substitute treacle with maple syrup or honey.
Rustic Apple Pie
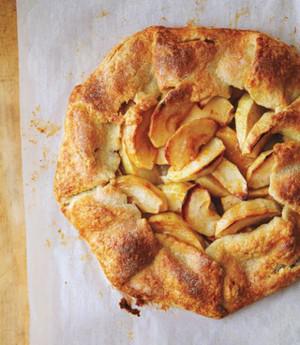
-
125 g sour cream (full fat)
-
250 g plain flour
-
200 g unsalted butter, chilled and cut into 1cm cubes
-
20 g unsalted butter
-
600 g Granny Smith apples
-
80 g caster sugar
-
1 lemon, rind finely grated and juiced
-
1/4 teaspoon vanilla extract
-
1 tablespoon cornflour
-
2 tablespoons water
-
4 tablespoons almond meal
-
2 tablespoons milk to glaze
-
To make the pastry, place the flour on workbench and add the butter, then mix with your fingertips until the mixture resembles fine breadcrumbs.
-
Add the sour cream into the middle of the mix and continue to combine and mix ingredients until the dough starts to incorporate into a ball.
-
Alternatively, place the flour into the bowl of a food processor with chopping blade, add butter and pulse until the mixture resembles fine breadcrumbs.
-
Add the sour cream and continue to pulse until the dough starts to come together into a ball.
-
Wrap the dough in plastic film and refrigerate for 20 minutes.
-
While dough is resting, make the pie filling.
-
Peel, quarter and core the apples, then thinly slice.
-
Place the butter into a medium sized saucepan add the apple, sugar, lemon rind and 2 tablespoons lemon juice and vanilla.
-
Gently stir and turn over the apples to combine.
-
Cook uncovered over medium heat for about 6 minutes until the apple just begins to soften.
-
Gently turn the apples 2-3 times to cook evenly.
-
Blend the cornflour and water and add to the hot apples.
-
Cook for 1 minute.
-
Remove mixture to a large bowl to begin the cooling of the mixture.
-
Allow to cool for 15 minutes.
-
Turn occasionally (if the apples are too hot it will melt the pastry this is why generally the filling for pies is cold).
-
Preheat oven to 200C.
-
To make 4 smaller pies divide the dough into 4 x 140g pieces of dough.
-
Roll out between kitchen baking paper until 1/2 cm in thickness and about 20cm in circumference.
-
Transfer rolled dough onto a large paper lined baking tray/slide.
-
You should fit two pastry pie rounds per tray.
-
Sprinkle the middle of each pastry round with a circle of 1 tablespoon almond meal and flatten out (diameter about 12cm).
-
Divide the pie mix into four and spoon on top of the almond. It is important to leave an empty outer ring (about 4cm of pastry) that you then lift and fold up to make a border around the pie.
-
Lightly brush the pastry pie edge with milk just before baking.
-
Bake in preheated oven for 25 minutes until golden.
-
The cooked hot pastry will be delicate so slide the pie on the paper off the tray and onto a cooling rack.
-
Allow to rest for 10 minutes before serving.
Rustic Greek Pie

-
2 sheets shortcrust pastry
-
Baby spinach leaves
-
Crushed garlic
-
Fetta
-
1/2 cup cream
-
2 eggs
-
Dried oregano
-
Pepper
-
Lemon wedges
-
Join the sheets of pastry together and lay on baking tray.
-
Cover with thick layer off spinach leaves, leaving a 2cm border all round.
-
Sprinkle garlic and crumbled fetta over spinach.
-
Fold the borders of pastry up and pinch corners together.
-
Whisk cream and eggs together and pour over the filling ingredients.
-
Sprinkle with a little oregano and pepper.
-
Bake at 180 degrees for 25 - 30 minutes.
-
Serve with lemon wedges.
Rye Sourdough Bread - German
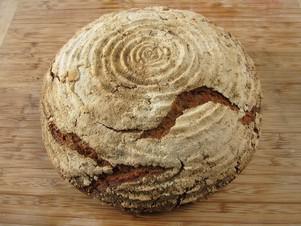
-
125 grams dark rye flour
-
125 grams water
-
1 Tbsp mature starter
-
350 grams dark rye flour
-
150 grams white bread flour
-
10 grams sea salt
-
1 teaspoon caraway seeds
-
250 grams rye sourdough starter (see step one)
-
475 grams warm water
-
First build: take one tablespoon of mature starter and add it to 50 grams of rye flour and 50 grams of room temperature filtered water. Let sit for between 8 to 12 hours at room temperature.
-
Second build: add 75 grams of rye flour and 75 grams of room temperature filtered water to the first build. Let sit for 8 to 12 hours at room temperature. You will end up with 250 grams of rye sourdough starter to use in your dough.
-
Combine the 250 grams of starter you made with 475 grams of warm water (25 to 30º C). Mix in the rest of the ingredients until everything is fully integrated and there are no more bits of dry flour. No kneading is necessary. Let the dough rest in a covered container for a half hour.
-
Dust a counter or cutting board with flour. Rub your hands in some flour to prevent sticking. Dump the dough onto your work surface and form into a boule (round).
-
Dust your banneton and the boule heavily with rye flour. Place the boule into the banneton and cover. Let proof at room temperature for approximately 3 hours. Note that rye ferments considerably faster than wheat.
-
A half hour before you’re ready to bake, pre-heat your oven and a dutch oven or combo cooker to 250º C.
-
Just before you’re ready to bake, turn the oven down to 230º C. Put the boule into the dutch oven and cover. This style of bread is not slashed. Bake, covered, for 20 minutes.
-
After 20 minutes remove the cover from your dutch oven and bake for another 20 minutes or until it is dark and the cracks in the loaf are just starting to burn.
-
Resist the urge to cut into the loaf until it has cooled. It’s best to wait between 12 to 24 hours before cutting into the loaf.
Sage, Chilli and Feta Sausage Rolls

-
Olive oil for frying
-
1 onion, finely chopped
-
2 garlic cloves, crushed
-
Small bunch fresh sage, leaves chopped
-
2 tsp dried chilli flakes
-
1 tsp dried oregano
-
200g feta, crumbled
-
450g British free-range sausagemeat
-
2 x 320g packs ready-rolled all butter puff pastry
-
1 medium free-range egg, beaten
-
Heat the oven to 200°C/180°C fan/gas 6. Heat a glug of the oil in a medium frying pan and fry the onion for 5-6 minutes over a medium heat until starting to soften. Add the garlic and fry for 2-3 minutes, then put in a large mixing bowl and leave to cool for 5 minutes.
-
Add the sage, chilli, oregano, feta and sausagemeat to the garlicky onion. Season generously with salt and pepper, then use your hands to mix everything together really well.
-
Unroll one of the sheets of pastry and cut in half lengthways. Place a quarter of the sausage mixture down each length of pastry, just off-centre, in a 2-3cm wide sausage shape. Lightly brush the wide edge of the pastry with the egg glaze, then fold over to encase the filling, leaving a small lip of pastry. Press down along the pastry lip to seal, then brush with the beaten egg and press a fork into the pastry lip to crimp and seal further. Put the rolls on a board and chill for 10 minutes. Repeat with the remaining pastry and filling.
-
Once chilled, use a sharp knife to cut each long roll into 4 individual sausage rolls and transfer to a baking sheet lined with non-stick baking paper. Chill again for at least 20 minutes.
-
After chilling, once the sausage rolls feel firm, brush again with beaten egg to glaze. Bake for 20 minutes until risen and golden and the meat is cooked through. Rest for 10 minutes before serving.
-
delicious. tips
-
If at any point the pastry gets warm and softens too much, chill for 10 minutes.
-
Wrap the unbaked rolls in cling film and chill for up to 24 hours. Glaze before baking. Freeze unbaked, then glaze and bake from frozen for 30 minutes. Baked rolls will keep chilled for 48 hours. Warm in a hot oven for 10 minutes to serve.
Salmon and Chive Arancini

-
2 x 95g cans Safcol Salmon in Springwater, drained
-
1 cup Arborio rice
-
3 cups chicken stock
-
1 bunch chives, chopped
-
1 red onion, finely diced
-
½ cup tasty cheese, grated
-
100g mozzarella, diced into 1cm cubes
-
2 tablespoons olive oil
-
2 cups breadcrumbs
-
1 cup plain flour
-
2 eggs, lightly beaten
-
2 cups vegetable oil, for frying
-
2 cups fresh rocket leaves
-
1 cup quality whole egg mayonnaise
-
1 tablespoon fresh lemon juice
-
1 tablespoon dill, chopped
-
sea salt and freshly ground black pepper
-
4 handfuls of rocket leaves, washed
-
lemon wedges
-
Heat the olive oil in a large pan and add the diced onion, fry until soft then add the rice, stirring constantly.
-
When the rice is toasted all over slowly add the stock, continuously stirring until it has all been absorbed into the rice.
-
Add the salmon, tasty cheese and chives, stir through and set aside until cool.
-
Once cooled, add one beaten egg to the mix and roll the rice mix into balls, about the size of a golf ball, pressing a cube of mozzarella into the centre of each one. Continue rolling the balls until the entire mixture has been used.
-
Crumb the balls by rolling first in flour, then egg then breadcrumbs.
-
Heat the vegetable oil in a large, deep frying pan, until hot then add the balls in batches, frying until golden brown all over.
-
Make the dressing by combining the ingredients in a small bowl and season to taste. Serve hot on a bed of roquette with lemon wedges and the dressing on the side.
Salsa Mexicana Classica
-
12 ounces (2 medium-small round or 4 or 5 plum) ripe tomatoes
-
Fresh serrano chiles to taste (roughly 3 to 5, 1/2 to 1 ounce total, or even more if you like it really picante), stemmed
-
A dozen or so large sprigs of cilantro
-
1 large garlic clove, peeled and very finely chopped (optional)
-
1 small (4-ounce) white onion
-
1 1/2 teaspoons fresh lime juice
-
Salt, about 3/4 teaspoon
-
Core the tomatoes, then cut in half widthwise and squeeze out the seeds if you wish (it will give the sauce a less rustic appearance). Finely dice the flesh by slicing it into roughly 1/4-inch thick pieces, then cutting each slice into small dice. Scoop into a bowl.
-
Cut the chiles in half lengthwise (wear rubber gloves if your hands are sensitive to the piquancy of the chiles) and scrape out the seeds if you wish (not only will this make the salsa seem less rustic, but it will make it a little less picante). Chop the chiles as finely as you can, then add them to the tomatoes. Carefully bunch up the cilantro sprigs, and, with a sharp knife, slice them 1/16-inch thick, stems and all, working your way down from the leafy end until you run out of leaves. Scoop the chopped cilantro into the tomato mixture along with the optional garlic. Next, finely dice the onion with a knife (a food processor will turn it into a sour mess), scoop it into a small strainer, then rinse it under cold water. Shake to remove the excess water and add to the tomato mixture. Taste and season with lime juice and salt, and let stand if you have a little time, for the flavors to meld before using or scooping into a salsa dish and serving.
Salsa Verde
-
1 cup green basil , packed
-
3/4 cup parsley , flatleaf; packed
-
1/2 cup mint leaves , packed
-
2 tbsp gherkins , roughly chopped
-
1/2 tbsp capers
-
1 tsp dijon mustard
-
1/2 tbsp red wine vinegar
-
4 tbsp extra virgin olive oil
-
1/4 tsp salt
-
1 ice cube – for loosening but keeps the mixture green.
-
1 – 2 anchovies
-
1/2 small garlic clove , roughly chopped
-
Substitute the basil and mint with more parsley
-
Blitz – Place all ingredients in a tall container and blitz into a fine puree (or to the texture you prefer) using a stick blender. You could also use a small food processor.
Salvadorian Salsa

-
8 tomatoes
-
4 garlic cloves
-
1/2 onion
-
3 chillies
-
2 tbsp of chicken bouillon
-
Boil tomatoes, onion and garlic for 7 minutes
-
Place in blender without the water
-
Add chillies and stock
-
Blend until very smooth
-
Simmer for 6 minutes
Satay Sauce

-
2 tablespoons sesame oil
-
1 peeled and finely chopped onion
-
2 cloves crushed garlic
-
½ teaspoon chilli powder
-
2 teaspoons curry powder
-
2.5cm piece peeled and grated green ginger
-
125g very finely chopped peanuts
-
½ cup vinegar
-
1 teaspoon salt
-
2 tablespoons peanut butter
-
⅓ cup fruit chutney
-
1 cup water
-
Heat 2 tablespoons oil in pan, add onion and crushed garlic.
-
Sauté gently until onion is golden brown.
-
Add chilli powder, curry powder, ginger and peanuts.
-
Sauté for 2 minutes.
-
Add vinegar, salt, peanut butter, ⅓ cup fruit chutney and water.
-
Stir until combined.
-
Bring to boil; reduce heat, simmer very slowly for 30 minutes or until mixture is thick.
-
Serve hot or cold.
Sauerkraut
-
1 head green cabbage
-
1 tablespoon sea salt per head of cabbage
-
Clean glass jar (I usually use one average head of cabbage per 2 litre mason jar)
-
Wash the cabbage and remove any wilted outer leaves.
-
Quarter the cabbage, remove the core, and slice the cabbage into thin strips (I shoot for around 1/4″ wide). Try to make the strips as uniform as possible, but don’t feel like they have to be perfect.
-
Place the strips in a large bowl, and sprinkle the sea salt over the top.
-
Allow it to sit for 15 minutes or so, and then start mashing. There isn’t a right or wrong way to do this– just use your hands, a mallet, or whatever blunt object you can find to mash/knead/twist/press/crush the cabbage. The goal is to start the juices flowing. (It helps if you can think of something that makes you mad while you do this–it’s better than therapy, really…)
-
I mash/knead for about 8-10 minutes. Hopefully by the end of this process, you’ll have a lovely pool of salty cabbage juice sitting in the bottom of your bowl. At this point, taste the juice in your bowl. If it doesn’t taste salty, like ocean water, you want to add a little more salt to get your ratios just right.
-
Place a couple handfuls of cabbage into the jar, then thoroughly pack down with a wooden spoon. The goal is to eliminate as many air bubbles as possible.
-
Repeat the packing and mashing until the jar is full– just make sure to leave about 2″ at the top.
-
If there is enough liquid flowing from your cabbage to cover it completely, congrats!
-
If not, make a 2% brine solution to fill up the rest of the jar. (If you don’t completely submerse the cabbage in liquid, it’s susceptible to mold and other gunk).
-
Cover the exposed cabbage with brine, leaving 1″ of headspace at the top. If you are having troubles with the cabbage floating to the top, you can weigh it down with a glass weight (this is my favorite glass weight), OR even wedge a piece of the cabbage core on top to hold it down. Any cabbage that is exposed will need to be thrown away, but you were going to toss the core anyway, so it’s no big loss.
-
Adding a glass weight to hold the cabbage under the brine
-
Affix a lid to the jar (fingertight only), and set aside in a room-temperature location, out of direct sunlight, for at least one week.
-
You’ll probably want to place a small dish or tray under the jar, as they have the tendency to leak a bit and spill over. Also, removing the lid after a day or so to “burp” the jar and release any pent-up gasses is also a smart idea.
-
Taste and smell your kraut after one week. If it’s tangy enough, move to the refrigerator for storage. If you like a bit more tang, simply allow to ferment for a bit longer.
Sausage - River Cottage Style

-
minced shoulder of pork (2.5kg)
-
3 % salt to the weight of the meat (75g)
-
chilli (30g)
-
cracked black peppercorns 40g
-
orange zest (1 orange)
-
350 ml wine
-
sausage casings
-
Soak the casings for at least 2 hours in cold water.
-
Mince the pork shoulder or hand using the coarse (8–10mm) plate of your mincer and place in a bowl. Cut the back fat into 2mm dice and add to the meat. Now add the garlic, cracked pepper, wine and salt. Mix the ingredients together thoroughly by hand.
-
Pack the mixture into the barrel of your sausage stuffer and fit a medium nozzle on the end. Load the casing on to the sausage stuffer, tie the end with string and fill the casing, to form sausages about 30cm long, packing tightly and ensuring there are no air pockets. Secure the other end of the casing with a second piece of string.
-
The natural casings are inclined to bow into a horseshoe shape. I tie the string at the ends of the salami into loops, then slip both loops on to one hook and hang them like this. However, if you prefer straight salami, suspend them from one end only and they will straighten up. To begin with, you will need to hang the salami in a warmplace, ideally 25–27°C, to enable incubation of the bacteria and facilitate fermentation.
-
After 12 hours in this environment, move the salami to your dry-curing spot, which should be between 12 and 18°C with a humidity level of approximately 70% and a constant circulation of air. Make sure the salami are not touching a wall, or each other, and they are not in direct sunlight. Over the coming weeks, test the pH to ensure it is below 4.5. A white mould should form on the casings, indicating that this level has been reached.
-
The salami may take anything from 6–10 weeks to mature, depending on the conditions and, indeed, on how you like them. They can be sampled as soon as they are fairly firm to the touch and dry-looking, but they will continue to dry out and harden until they are practically rock hard.
-
When the salami reach the stage you like, wipe off any mould from the outside with a cloth soaked in vinegar, then rub the surface with a little olive oil. Transfer the salami to the fridge.
-
Serve your salami in slices 2–3mm thick. If you prefer, peel off the ring of casing from each slice before eating, although it is perfectly safe to eat.
Sausage, Apple & Sage Roll
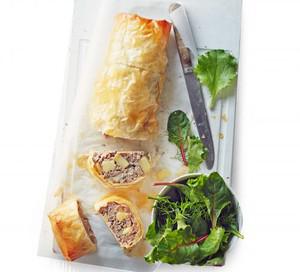
-
1 tbsp sunflower oil
-
1 medium onion, finely chopped
-
1 small eating apple, peeled, cored and cut into 1½ cm chunks
-
3 sheets filo pastry
-
454g pack extra-lean pork sausages
-
1 tbsp finely chopped sage
-
bag of mixed salad leaves, to serve
-
Heat oven to 200C/180C fan/gas 6. Line a large baking tray with baking parchment. Heat 1 tsp of the oil in a small non-stick saucepan and gently fry the onion and apple for 6-8 mins, stirring regularly, until softened and lightly browned. Leave to cool for 5 mins.
-
Place 1 sheet of pastry on your work surface, with the short end closest to you, and brush lightly with oil. Place another sheet on top, but off-set roughly 6cm to the right, and brush with a little more oil. Top with the final sheet, off-set another 6cm to the right. The pastry rectangle should be roughly 40 x 45cm.
-
Squeeze the sausagemeat from the skins into a large bowl. Add the onion, apple and sage, and mix well. Form the pork mixture into a large sausage shape and place across the pastry, about 8cm in from one short end and 8cm from each side.
-
Fold up the bottom of the pastry until it begins to cover the filling, then fold in the sides. Roll the pastry from the bottom, gently but firmly, to enclose the filling. Place on the baking tray and brush with the remaining oil. Bake for 30 mins or until the filling is cooked and the pastry is golden brown and crisp. Serve with mixed salad leaves.
Sautéed Radish and Silverbeet
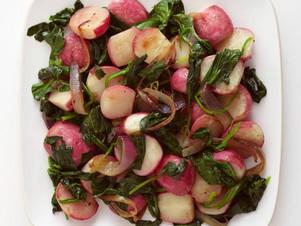
Tags:
Green Connect
-
1 bunch silverbeet, stem removed, thinly shredded
-
1 bunch radish, leaves removes, cut into quarters
-
3 cloves garlic, peals and minced
-
Olive oil
-
Sesame oil
-
Water
-
Heat olive oil in a pan and add garlic.
-
When garlic begins to brown, add quartered radish.
-
Cook for ten minutes or until radish begins to soften.
-
Add a small amount of water to keep radish and garlic from sticking.
-
Add shredded silverbeet, and two teaspoons of sesame oil.
-
Continually add water to keep vegetables hydrated.
-
Cook until radish begins to become translucent and silverbeet is soft.
Savoury mighty muffins
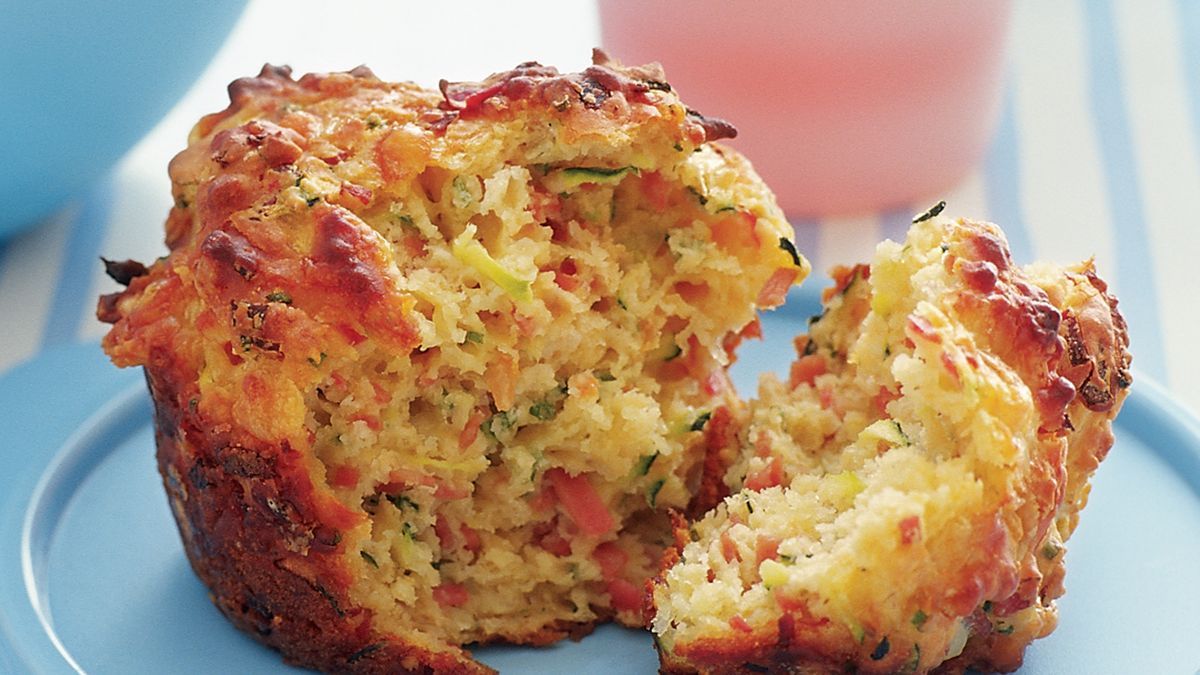
-
225.00 gm self-raising flour
-
500.00 ml grated tasty cheese
-
100g mortadella, chopped
-
1 zucchini, grated
-
62.50 ml thinly sliced chives
-
193.13 gm milk
-
1 egg
-
62.50 gm fruit chutney
-
Preheat oven to 200°C. Grease a 6 x 3/4-cup capacity Texas muffin pan. Line bases of holes with baking paper.
-
Sift flour into a large bowl. Add cheese, mortadella, zucchini and chives. Whisk milk, egg and chutney in a jug until well combined. Make a well in centre of dry ingredients. Pour in milk mixture. Using a large metal spoon, gently mix until just combined. Spoon into muffin holes.
-
Bake for 15 to 20 minutes or until a skewer inserted into the centre comes out clean. Stand in pan for 3 minutes. Turn onto a wire rack to cool. Store in an airtight container at room temperature.
Savoury mighty muffins
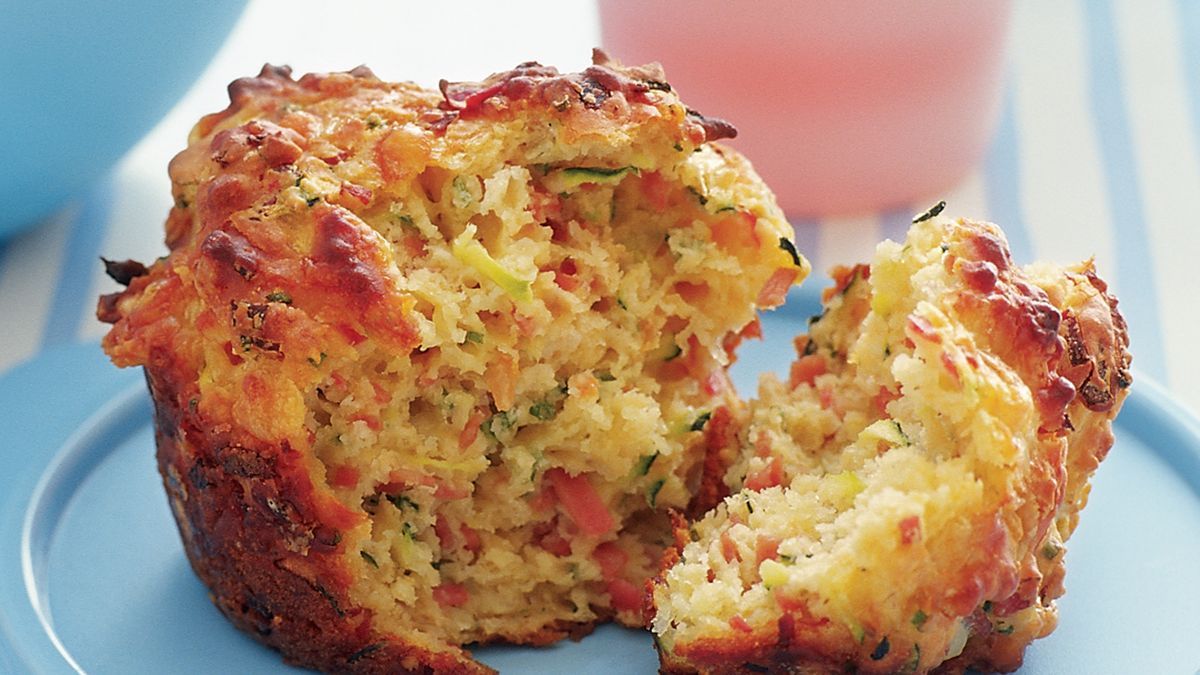
-
225.00 gm self-raising flour
-
500.00 ml grated tasty cheese
-
100g mortadella, chopped
-
1 zucchini, grated
-
62.50 ml thinly sliced chives
-
193.13 gm milk
-
1 egg
-
62.50 gm fruit chutney
-
Preheat oven to 200°C. Grease a 6 x 3/4-cup capacity Texas muffin pan. Line bases of holes with baking paper.
-
Sift flour into a large bowl. Add cheese, mortadella, zucchini and chives. Whisk milk, egg and chutney in a jug until well combined. Make a well in centre of dry ingredients. Pour in milk mixture. Using a large metal spoon, gently mix until just combined. Spoon into muffin holes.
-
Bake for 15 to 20 minutes or until a skewer inserted into the centre comes out clean. Stand in pan for 3 minutes. Turn onto a wire rack to cool. Store in an airtight container at room temperature.
Savoury mighty muffins
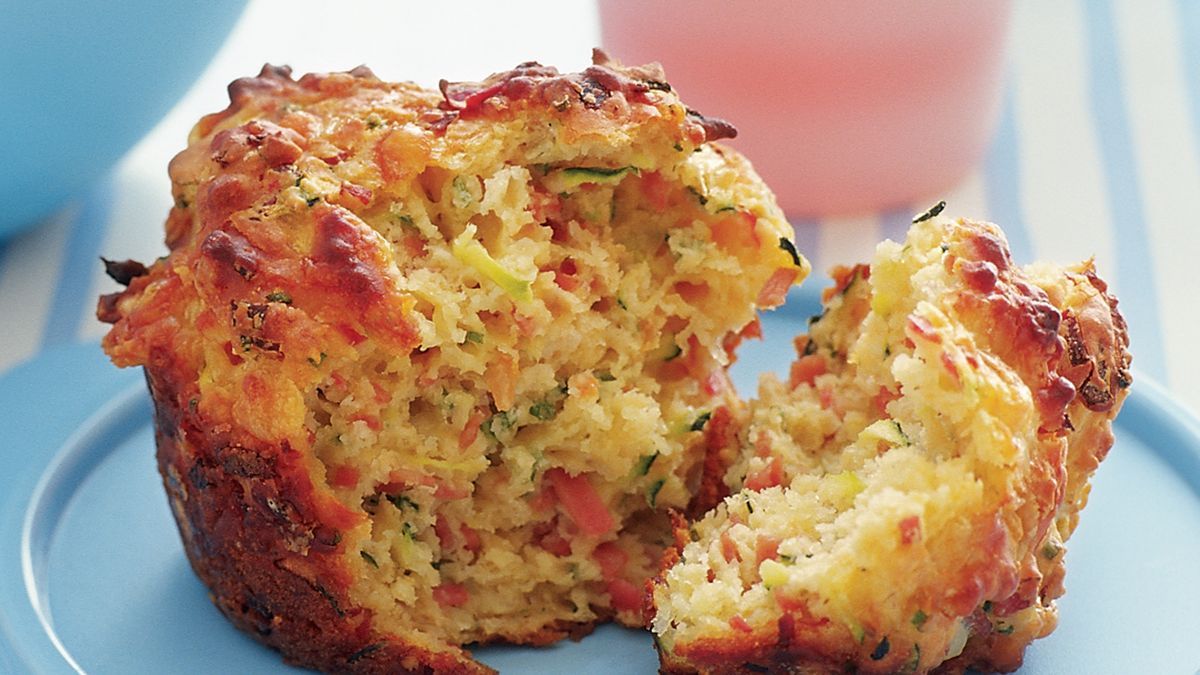
-
225.00 gm self-raising flour
-
500.00 ml grated tasty cheese
-
100g mortadella, chopped
-
1 zucchini, grated
-
62.50 ml thinly sliced chives
-
193.13 gm milk
-
1 egg
-
62.50 gm fruit chutney
-
Preheat oven to 200°C. Grease a 6 x 3/4-cup capacity Texas muffin pan. Line bases of holes with baking paper.
-
Sift flour into a large bowl. Add cheese, mortadella, zucchini and chives. Whisk milk, egg and chutney in a jug until well combined. Make a well in centre of dry ingredients. Pour in milk mixture. Using a large metal spoon, gently mix until just combined. Spoon into muffin holes.
-
Bake for 15 to 20 minutes or until a skewer inserted into the centre comes out clean. Stand in pan for 3 minutes. Turn onto a wire rack to cool. Store in an airtight container at room temperature.
Scalloped Potatoes
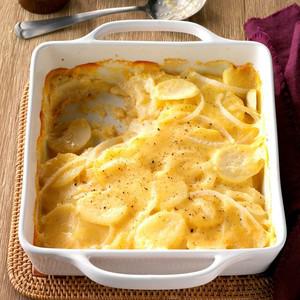
-
2 tablespoons butter
-
3 tablespoons all-purpose flour
-
1 teaspoon salt
-
1/4 teaspoon pepper
-
1-1/2 cups fat-free milk
-
1/2 cup shredded reduced-fat cheddar cheese
-
2 pounds red potatoes, peeled and thinly sliced (about 4 cups)
-
1 cup thinly sliced onions, divided
-
Preheat oven to 350°. In a small saucepan, melt butter; stir in flour, salt and pepper until smooth. Gradually whisk in milk. Bring to a boil, stirring constantly; cook and stir until thickened, about 2 minutes. Remove from heat; stir in cheese until melted.
-
Coat an 8-in. square baking dish with cooking spray. Place half of the potatoes in dish; layer with 1/2 cup onion and half of the cheese sauce. Repeat layers.
-
Bake, covered, 50 minutes. Uncover; bake until bubbly and potatoes are tender, 10-15 minutes longer.
Seared Scotch Fillet with Mozzarella, Pea and Tomato Salad
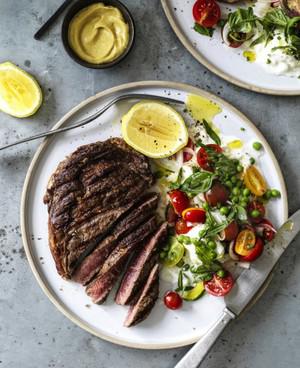
-
4 x 250g scotch fillet steaks, at room temperature*
-
sea salt and freshly ground black pepper
-
2 tsp extra virgin olive oil
-
4 lemon cheeks, to serve
-
Dijon mustard, to serve
-
½ white onion, finely sliced in half-moons
-
salt flakes and freshly ground black pepper
-
pinch of sugar
-
3 tbsp flavourful, quality extra virgin olive oil
-
2 tbsp natural yoghurt
-
3 large fior di latte (or buffalo mozzarella balls), torn roughly
-
1½ cups fresh baby peas (or frozen peas blanched for 1 minute, then drained)
-
1 punnet vine-ripened cherry tomatoes, larger ones halved
-
20 basil leaves, torn
-
2 sprigs fresh tarragon, leaves only
-
¼ bunch chives, chopped
-
1 tbsp white wine vinegar
-
Preheat a barbecue on high or a griddle pan for 5 minutes over high heat until very hot.
For the salad, season the onion with salt, pepper and sugar and set aside to soften.
Season the steaks well and coat with the oil. Cook for 2½ minutes on both sides for medium rare. Remove from heat and rest.
Combine 2 tbsp oil with the yoghurt in a bowl, season. Mix through the mozzarella and tip onto a flat serving bowl.
Toss the peas, tomatoes, herbs and softened onion with the vinegar and remaining 1 tbsp oil. Season to taste, then tip over the mozzarella.
Serve with the steaks – either whole or cut into slices – with the lemon and mustard on the side.
-
Tip: The key here is to make sure the meat has come up to room temperature and your barbecue or griddle pan is super-hot. If the steaks are fridge-cold, your grill won't have enough time to properly seal and caramelise the meat. Additionally, if you crowd the cooking surface, the heat will drop, and you'll stew rather than char.
Seed Cake

-
1 ½ cups unbleached flour
-
1 cup cracked wheat flour
-
1 pkg. yeast
-
1/8 cup warm (100 degrees) ale
-
1/8 tsp. salt
-
4 oz. (1 stick) sweet butter
-
3/4 cup sugar
-
2 eggs, beaten
-
1 tbs. seed (crushed anise, caraway, coriander, cardamom, etc. - choose something flavorful & pleasant)
-
½ - 1 cup milk
-
Sift together the flours and salt; set aside in large bowl.
-
Dissolve yeast in warm ale, along with 1/8 tsp. of the flour mixture.
-
Cream together the butter and sugar.
-
Beat in eggs and seeds.
-
Make a well in the flour and add the dissolved yeast.
-
Fold flour into yeast mixture, then fold in the butter.
-
Slowly beat in enough milk to make a smooth, thick batter.
-
Pour batter into an 8" round greased cake pan.
-
Bake in middle of oven at 180° C for 45 minutes, or until a toothpick inserted in the centre comes out clean.
-
Let cool slightly before turning onto a cake rack.
-
Period: England, 16th & 17th centuries
-
Source: Book of Cookrye and The English Huswife
-
Class: Authentic
-
Description: A sweet seed cake
-
About this Recipe: This is an original recipe, based on cake receipts from A.W.'s Book of Cookrye (1591) and The English Huswife by Gervase Markham, 1615. These sources are not medieval, but this type of sweet, almost bread-like round cake was very common during the Middle Ages, and this recipe is an approximation of how this delectable may have been prepared during that earlier period. A round cake such as this is described in Chaucer's Canterbury Tales, where it is compared to the shape of the medieval round shield, the Buckler.
Shortbread - Scottish!
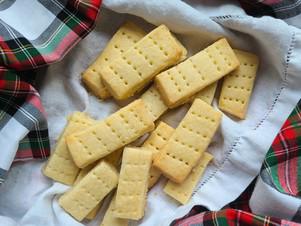
-
500 g butter, softened
-
175 g caster sugar
-
600 g plain flour, sieved (crunchier biscuits can be made by substituting 50 g/2 oz semolina for 50 g/2 oz plain flour)
-
Preheat the oven to 160°C.
-
Beat together the butter and the sugar.
-
Beat in the flour and semolina, 100 g at a time, until smooth.
-
If the dough becomes too stiff to stir, knead in the rest of the flour with your hands.
-
Grease and flour a large baking sheet (or a round shortbread mould).
-
Roll out the dough and press into the baking sheet.
-
Mark the dough into fingers or pie-shaped wedges and prick the pieces all over with the prongs of a fork.
-
Bake in the centre of the oven for 30 to 40 minutes or until firm to the touch and delicately browned.
Silverbeet Pie
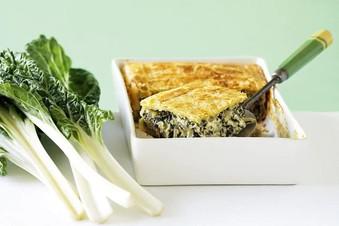
Tags:
Green Connect
-
1 1/2 tablespoons olive oil
-
1 bunch silverbeet, trimmed, stems thinly sliced, leaves shredded
-
1 brown onion, coarsely chopped
-
2 garlic cloves, finely chopped
-
200g feta, crumbled
-
200g ricotta, crumbled
-
Pinch of Masterfoods Ground Nutmeg
-
4 eggs, lightly whisked
-
2 sheets (25 x 25cm) frozen puff pastry, just thawed
-
Preheat oven to 210ºC. Heat 1 tablespoon of the oil in a large frying pan over medium heat. Add the silverbeet stems, onion and garlic. Cover and cook, stirring occasionally, for 10 minutes. Transfer to a bowl. Add the silverbeet leaves to the pan. Increase heat to medium-high. Cook, stirring, for 10 minutes or until any liquid evaporates. Add to the bowl. Set aside to cool slightly.
-
Stir the feta, ricotta and nutmeg into the silverbeet mixture. Season with pepper. Reserve 1 tablespoon of the egg. Add remaining egg to mixture. Stir to combine.
-
Brush a rectangular 2L (8-cup) capacity baking dish with remaining oil. Use 1 pastry sheet to line the base and 2 long sides. Spread the silverbeet mixture evenly over the base. Top with the remaining pastry and trim excess. Use the leftover pastry to completely enclose the top of the pie. Fold in the edges and press to seal. Brush with the reserved egg. Prick the top with a fork. Bake for 30 minutes or until golden.
Simple Marinated Cucumbers Aka Cucumbers and Vinegar
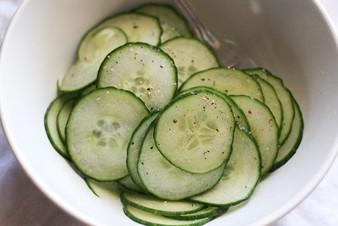
-
1 English cucumber, sliced very thinly
-
1/4 cup rice or white wine vinegar
-
1/4 teaspoon sea salt
-
1/2 teaspoon of honey or coconut sugar
-
black pepper, if desired
-
Place the cucumbers in a bowl.
-
Whisk together the remaining ingredients plus 1/4 cup of water in a measuring cup and pour over the cukes. Stir to coat well; adjust the seasonings if necessary.
-
Let it sit for at least 15 minutes or up to a few hours before eating.
Slow Cooked Beef Cheeks in Red Wine Sauce
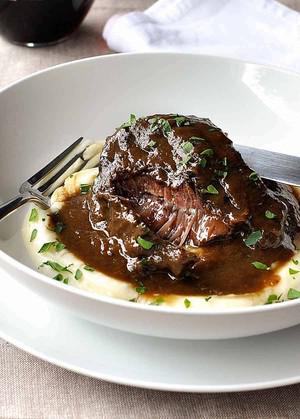
-
3 tbsp olive oil , separated
-
1.5 kg/3lb beef cheeks , (4 large or 6 small beef cheeks)
-
1 onion (white, brown or yellow), roughly diced (about 1 cup)
-
1 celery stalk , roughly diced (about 1 cup)
-
1 carrot , roughly diced (about 3/4 cup)
-
4 garlic cloves , minced
-
6 stems of fresh thyme or 1 1/2 tsp dried thyme leaves
-
4 dried bay leaves (or 3 fresh bay leaves)
-
1 cup (250 ml) beef stock (broth)
-
2 cups (500 ml) red wine (full bodied eg. cabernet sauvignon or merlot)
-
2 - 3 tsp salt , separated
-
Black pepper
-
Prepare the beef cheeks: cut off any large, fatty membrane. Pat dry then use 1 tsp of salt and black pepper to season the beef all over.
-
Heat 2 tbsp olive oil in a large heavy based pot over high heat. Sear half the beef cheeks on each side until nicely browned. Remove beef cheeks onto a plate, repeat with remaining cheeks.
-
Turn down the heat to medium high and heat the remaining 1 tbsp of olive oil. Add garlic and onion. Sauté for 3 minutes until onion is becoming translucent.
-
Add the celery and carrot,s sauté for a further 3 minutes.
-
Follow directions for your chosen cooking method below.
-
Pour the onion mixture into the slow cooker and place the beef cheeks on top.
-
Pour the wine into the pot and return to heat. Turn the heat up to high, bring to simmer and let it simmer for 1 minute (to cook out the wine a bit). Scrape the brown bits off the bottom of the pan so it mixes in with the wine.
-
Pour the wine into the slow cooker, then all the remaining ingredients, starting with a pinch of salt and pepper (add more to taste later).
-
Cook in the slow cooker on Low for 8 hours or High for 6 hours for 250g/8oz size beef cheeks or Low for 10 - 12 hours or High for 8 hours for 350g/12oz beef cheeks.
-
Open the slow cooker and remove the beef cheeks. Discard the thyme stems and bay leaves.
-
Use a handheld stick blender to puree the braising liquid into a smooth Sauce - it will change from a dark brown to a lighter brown colour.
-
Transfer liquid into saucepan, simmer on stove on medium high until the Sauce turns a darker brown colour and reduces by about 1/4 to 1/3, to a gravy consistency - about 10 minutes.
-
Do a taste test and adjust the seasoning (salt and pepper) to your taste.
-
Remove from heat, return beef cheeks to the Sauce, cover and keep warm until ready to serve.
-
Follow the Slow Cooker directions but cook on high in your pressure cooker for 1 hour on high for small cheeks (around 250g/8oz each).
-
Pour the wine into the pot / casserole dish (with the onion mixture) and stir to scrape the brown bits off the bottom of the pot. Bring wine to simmer for 1 minute.
-
Add remaining ingredients, starting with a pinch of salt and pepper (add more to taste later), the place lid on.
-
Stove: Simmer on medium low for 2 to 2 1/2 hours until the cheeks are very tender, turn at least once during cooking.
-
Oven: 160C/320F for 3 to 3 1/2 hours .
-
Remove the beef cheeks from sauce. Discard the thyme stems and bay leaves.
-
Use a handheld stick blender to puree the braising liquid into a smooth Sauce - it will change from a dark brown to a lighter brown colour.
-
Bring the Sauce to simmer over medium heat and simmer until it turns a darker brown colour and reduces by about 1/4 to 1/3, to a gravy consistency - about 3 to 5 minutes.
-
Do a taste test and adjust the seasoning (salt and pepper) to your taste.
-
Remove from heat, return beef cheeks to the Sauce, cover and keep warm until ready to serve.
-
Serve beef cheeks on Paris Mash (ultimate creamy mashed potato!) or Creamy Mashed Cauliflower, drizzled with a generous amount of Sauce. Garnish with finely chopped parsley if desired.
-
Size - The beef cheeks I got were unusually large, around 350g/12oz each. Great man size portions. Usually beef cheeks are around 250g/8oz each and I get 6.
-
Beef Cheeks - If you can't find beef cheeks, substitute with any other cut of beef suitable for slow cooking. Boneless beef short ribs is ideal! Cut them into 250g/8oz pieces.
-
Leftover beef cheeks and sauce can be kept in the freezer for 3 months.
-
Nutrition per serving, excluding mashed potato.
Slow Cooked Goat Shanks
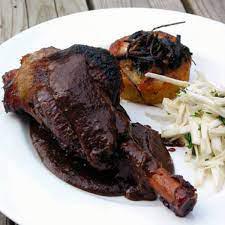
-
4 goat shanks
-
1 sliced onion
-
1 sliced celery stick
-
1 teaspoon lemon rind
-
1/2 star anise
-
1 bay leaf
-
1 crushed juniper berry
-
1 crushed garlic clove
-
250 ml red wine
-
Put ingredients into a deep dish.
-
Add water to just cover the shank.
-
Cover with foil.
-
Cook at 180 degrees for first half hour.
-
Then at 150 degrees for two to three hours.
-
Check every half an hour to ensure the meat and liquid hasn't dried out.
-
Reduce the liquid with flour and butter to make a sauce.
Slow Cooker Beef Bourguignon
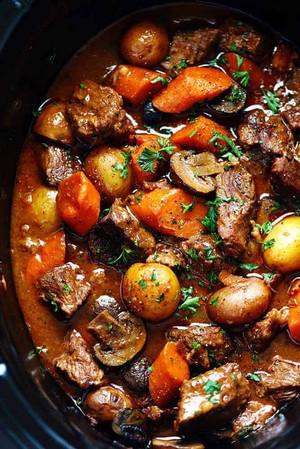
-
5 slices bacon finely chopped
-
3 lbs. boneless beef chuck cut to 1 inch cubes
-
1 cup red cooking wine
-
2 cups chicken broth
-
1/2 cup tomato sauce
-
1/4 cup soy sauce
-
1/4 cup flour
-
3 garlic cloves finely chopped
-
2 Tablespoons thyme finely chopped
-
5 medium Carrots sliced
-
1 pound baby potatoes I used tri color
-
8 ounce fresh mushrooms sliced
-
fresh chopped parsley for garnish
-
In a large skillet cook bacon over medium high heat until crisp. Put bacon in slow cooker. Salt and pepper the beef and add to the skillet and sear on each side for 2-3 minutes. Transfer beef to the slow cooker.
-
Add the red wine to the skillet scraping down the brown bits on the side. Allow it to simmer and reduce and slowly add chicken broth, and tomato sauce, and soy sauce. Slowly whisk in the flour. Add the sauce to the slow cooker.
-
Add garlic, thyme, carrots, potatoes, and mushrooms to the slow cooker. Give it a good stir and cook on low until beef is tender for 8-10 hours or high for 6-Garnish with fresh parley and serve with mashed potatoes if desired.
-
Updated on December 10, 2019
Slow Cooker Beef Brisket with Bbq Sauce
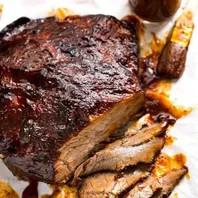
-
1.5 – 2 kg / 3 – 4 lb beef brisket (Note 1)
-
1 tbsp olive oil (or a neutral oil like vegetable, canola)
-
1 tbsp brown sugar
-
2 tsp paprika powder
-
1 tsp onion powder
-
1 tsp garlic powder
-
1/2 tsp cumin powder
-
3/4 tsp mustard powder
-
1 tsp salt
-
1/2 tsp black pepper
-
2 garlic cloves , minced
-
1/2 cup / 125 ml apple cider vinegar
-
1 1/2 cups / 375 ml ketchup
-
1/2 cup / 110g brown sugar , packed
-
2 tsp EACH black pepper, onion powder, mustard powder
-
1 tsp cayenne pepper (adjust to taste re: spiciness)
-
1 tbsp Worcestershire sauce
-
Mix Rub ingredients. Rub all over brisket. If time permits, leave for 30 minutes – 24 hours in the fridge, but I rarely do this.
-
Combine BBQ Sauce ingredients in a slow cooker. Mix then add the brisket – squish it in if needed, like I did (see video).
-
Slow cook in slow cooker for 8 hours (1.5 kg / 3 lb) to 10 hours (2 kg / 4 lb). (Note 2 for pressure cooker and click here for oven)
-
Remove brisket onto a tray.
-
Pour liquid in slow cooker into a saucepan. Bring to simmer over medium high heat and reduce until it thickens to a syrup consistency (it thickens more as it cools).
-
Meanwhile, drizzle brisket with oil then roast in a 200C/390F oven for 15 minutes until brown spots appear. Remove then baste generously with Sauce, then return to oven for 5 minutes. Remove and baste again, then return to oven for 5 – 10 minutes until it caramelises and looks like the photos. (See note for BBQ option)
-
TO SERVE: Slice brisket thinly across the grain and serve with remaining BBQ Sauce. This is terrific served as a meal with sides or piled high onto rolls with Coleslaw as sliders. See Note 3 for more ideas.
-
Beef – This recipe will work on any slow cooking cut of beef but it works best with brisket because it holds its shape once slow cooked until tender, so it can be sliced. See post for more info. Best sub is chuck beef roast that’s rolled and tied.
-
AUSTRALIA: Best to get it from a butcher so you can ask for a thick cut which is best. Woolies and Aldi sell rolled brisket which is thinner. Harris Farms also sells brisket but they are small pieces. Recipe will work for these, see notes below for cook times for different weights.
-
2a). Cook time – The cook times provided yields a tender brisket that is sliceable but tender so the slices tear easily, as demonstrated in the video. Don’t stress too much about cook time – brisket is a cut of beef that holds together pretty well even cooked to the point of being shreddable. So even a 1.5kg / 3 lb brisket slow cooked for 10 hours should still be sliceable. Brisket that isn’t tender is tough and chewy but if you pull it out too early, don’t worry, just keep cooking!
-
SLOW COOKER on HIGH: Same recipe, 4.5 hours for 1.5 kg / 3 lb or 5 hours for 2 kg / 4 lb. Follow same directions.
-
PRESSURE COOKER: Same recipe, 1 hr 15 minutes for 1.5 kg / 3 lb or 1 hr 30 minutes for 2 kg / 4 lb. Follow same directions. If you’ve got an Instant Pot, add 1 cup water (otherwise you get the burn notice) and might need to reduce sauce slightly at end. Natural release, or wait 15 minutes then quick release
-
OVEN: Click here for directions.
-
2b) DIFFERENT SIZES: For a 800g – 1 kg / 1.6 – 2 lb piece of brisket, I would still slow cook for 7 to 8 hours on low because the cook time is more about brisket width rather than length.
-
For a 2.5 – 3 kg / 5 – 6 lb brisket, I would slow cook for 10 hours on low.
-
How to serve – See in post for what to serve this with. For Sliders, I use soft rolls (brioche buns are pictured in the post) with Coleslaw ( or try this No Mayo Coleslaw – it’s excellent!)
-
Finish on BBQ: fantastic chargrilled flavour: Brush grills with oil, then preheat BBQ to medium. Place beef on the grills and leave until browned, then turn the beef over and brown the other side. Baste the beef generously and turn, then baste again. Do this repeatedly until there is a nice caramelised glaze on the brisket, then remove.
-
MAKE AHEAD: Slow cook the brisket but do not bake, then transfer into a storage container with the cooking liquid (don’t reduce it down) and refrigerate for up to 3 days. To reheat, transfer brisket only into a baking dish and cover. Bake at 180C/350F for 20 minutes or until warmed through. Then turn up oven to 200C/390F, remove cover and proceed with recipe to brown and baste the brisket surface. Transfer sauce into saucepan and warm – you may not need to reduce. Use for basting per recipe.
Slow Cooker Braised Steak and Onions

-
1tbsp Coles Classic Olive Oil
-
1kg whole beef topside roast, cut into 3cm-thick steaks
-
20g Coles Australian Salted Butter
-
2 brown onions, halved, thinly sliced
-
3 garlic cloves, thinly sliced
-
2 tbsp tomato paste
-
500ml (2 cups) Massel Liquid Stock Chicken Style
-
11/2 tbsp Worcestershire sauce
-
6 fresh thyme sprigs
-
3 dried bay leaves
-
11/2 tbsp cornflour
-
2 tbsp chopped fresh continental parsley, plus extra, to serve
-
Mashed potato, to serve (optional)
-
Select all ingredients
-
Heat the oil in a large frying pan over high heat. Cook the steaks, in 2 batches, for 3 minutes each side or until browned. Transfer to the slow cooker.
-
Add the butter to the pan. Cook until foaming. Add the onions. Reduce heat to medium-low and cook, stirring often, for 10 minutes or until browned and tender. Add the garlic and cook, stirring, for 1 minute or until aromatic.
-
Add the tomato paste to the frying pan and cook, stirring, for 1 minute. Add the stock, Worcestershire sauce, thyme and bay leaves. Bring to a simmer. Pour over the steaks in the slow cooker. Cover and cook on High for 5 hours or until beef is tender.
-
Combine the cornflour with 2 tbsp water. Add to the slow cooker. Cook for 20 minutes or until the liquid has thickened slightly. Season. Stir though the parsley.
-
Sprinkle with extra parsley. Serve with mash, if using.
Slow Cooker Lamb Chops with Tomato, Rosemary & Thyme
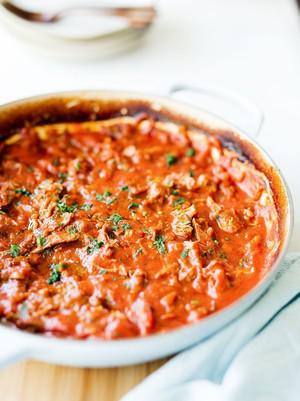
-
5 lamb forequarter chops
-
1 tablespoon olive oil
-
100g bacon, diced
-
1 brown onion, diced
-
1 clove garlic, finely diced
-
2 carrots, diced
-
1 stick celery, diced
-
3/4 cup red wine
-
4 tomatoes, diced
-
2 tablespoons tomato paste
-
500ml passata
-
1 cup chicken broth or stock
-
2 bay leaves
-
4 sprigs thyme
-
2 sprigs rosemary
-
2 sprigs oregano
-
Pre heat oven to 160°C.
-
Add half the oil to a frypan over high med-heat and brown the chops on each side. You just want to seal them, don’t cook through. Set these aside.
-
Add the remaining oil and the bacon, onion, garlic, carrots and celery and cook for 5-7 minutes until they just start to caramelise.
-
Pour in the red wine to deglaze any sticky bits off the bottom of the pan, bring to the boil and simmer for 2 minutes.
-
Place the lamb into a large casserole dish with a lid, top with the bacon mixture, tomatoes, stock and herbs, cover and cook for 2 hours.
-
Stir occasionally and add a little water or more stock if it starts to look too dry.
-
Once cooked, carefully lift out the lamb chops onto a plate. Shred the meat with a fork and discard the bones. Be careful no bones have been left in the sauce. Remove any stalks from the herbs.
-
Serve with pasta, polenta or mashed potato and sprinkled with fresh parsley.
-
If your kids don’t like chunky vegetables in their sauce (like mine), blend together the bacon mixture and tomatoes before adding to the casserole dish, then cook as per the recipe.
-
If you don’t have all those herbs easily available, use dried or just leave out the ones you don’t have.
Slow Cooker Roast Beef
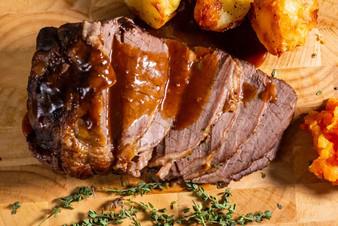
-
1 kg ( 2.2 lb) topside or top round beef
-
500 ml ( 2.1 cups) beef stock
-
187.5 ml ( 0.8 cups) red wine ¼ bottle
-
2 carrots roughly chopped
-
1 onion sliced
-
6 tbsp cornflour
-
3 tbsp tomato puree
-
2 tsp sugar
-
1 tsp salt
-
1 tsp pepper
-
1 tbsp olive oil
-
Add the carrots and onions to the slow cooker, then add 3 tbsp of cornflour and stir to ensure an even coating. Rub a little oil all over the beef and season well with salt and pepper. Sear the beef all over in a hot pan, and transfer to the slow cooker.
-
Add the beef stock, red wine, tomato puree and sugar, ensuring that the beef is mostly covered by the liquid. Cook on low for 5 hours, or high for 3 hours. Once cooked, remove the beef from the slow cooker and cover with foil to keep warm. Rest the beef for up to 30 minutes. If you want to be sure about cooking times, use a meat thermometer – one is linked in the equipment list.
-
Reduce the remaining liquid and vegetables in the slow cooker to a gravy consistency, adding 3 tbsp of cornflour to thicken (remove a little liquid, mix in the cornflour to make a paste, and mix it back into the gravy). If you've got a slow cooker with a metal pot (see the equipment list for a recommendation) you can do this by transferring it straight to the hob, if not, you'll need to transfer the contents of the slow cooker to a pan.
-
When you're ready to serve, slice the beef with a sharp knife and coat with plenty of red wine gravy!
-
Cooked Beef Internal Temperature
-
Insert the beef thermometer into the middle of the beef and wait for the temperature to settle. Use the following temperatures as a guide, depending how you like your beef to be cooked:
-
Rare: 50CMedium: 60CWell done: 70C
-
The temperature will continue to rise slightly once the beef is removed from the slow cooker.
-
Resting Beef
-
For best results, cover with foil and rest the beef for thirty minutes once cooked. This is the perfect time to make your gravy!
Slow Roasted Rack of Goat
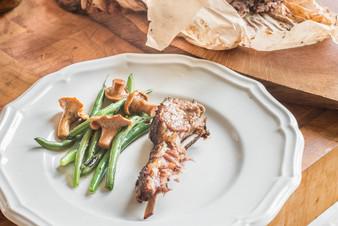
-
Rack of goat
-
Kosher salt
-
1 tablespoon finely ground coffee
-
1 tablespoon ancho chili powder
-
1 teaspoon onion powder
-
2 teaspoons finely ground cumin
-
1 teaspoons fresh chopped thyme or ½ teaspoon dried thyme
-
Trim and score the rack
-
Using a paring knife, remove the half-moon shaped piece of cartilage from the shoulder, then score the fat just deep enough to penetrate it with a cross-hatch pattern to help fat render (see pictures above).
-
Remove the connective tissue from the bottom of the rack (see pictures above-optional)
-
Rub and roast
-
Season the rack all over with salt and fresh thyme if using. Mix the rub seasonings, then apply the coffee rub powder to the rack, turning the rack over in the powder to help it adhere.
-
Put the rack bone-side down on the parchment, then sprinkle any remaining rub powder over the top. It should seem like an excessive amount of seasoning on top of the meat, but this will help make a delicious crust. Wrap the meat in parchment and refrigerate overnight (recommended) or cook.
-
To cook the rack of goat, bake the packet in a pan (cast iron is great) to catch the fat for 4 hours at 250 degrees, then serve. (See below for tips on slicing/serving, as it will be delicate when it's done cooking)
-
Getting perfect slicesCooked like this, the lamb will fall apart a bit as you serve it. For perfect slices, chill the lamb after cooking, then cut into slices and gently reheat.Making a pan sauceTo make a pan sauce from the dripping, scrape all of the drippings from the parchment into a small sauce pan, sprinkle over a tablespoon of flour and cook until lightly browned. Add 1/4 cup of white wine, cook down by half, then add 1 cup of lamb stock. Simmer until the sauce is slightly thickened, adjust the seasoning for salt, and serve.
Slow-Cooked Moroccan Beef Stew with Dates
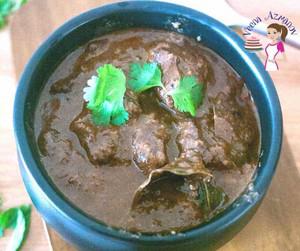
-
1 kg Beef (chuck roast or similar)
-
1 cup ( 150 g) Dates (chopped )
-
½ cup Onion (finely chopped)
-
2 tbsp Cooking oil (olive or canola)
-
1 tbsp Ground ginger ((or 1 tsp fresh grated))
-
1 tbsp Garlic (grated)
-
3 Bay leaves
-
2 cups ( 470 ml) Chicken or beef both
-
1 ½ tbsp Tomato paste
-
2 tsp Hot paprika ((or use half sweet paprika))
-
½ tsp Cinnamon
-
1 tsp Cumin
-
2 tbsp All purpose flour
-
½ tsp Salt
-
½ tsp Pepper
-
Trim off excess fat from the meat. Using a sharp chef's knife and sturdy cutting board cut the beef into large bite-size cubes and set aside.
-
Season with salt, pepper, and toss in the flour – coat well.
Tip – The flour gives these that toasted brown look and will help thicken the sauce later.
-
In a pan or Dutch oven pot over medium heat sear the beef on all sides.
Tip – Cook 2 minutes on one side before you turn over. Then cook 2 minutes on the other side as well.
-
Once the beef is browned – add in the chopped onions, garlic, and ginger – saute a minute.
-
Then, add the tomato paste, spices (paprika, cinnamon and cumin) – broth, and bay leaves.
-
Season again with salt and pepper and sprinkle the chopped dates all over making sure they do not clump in one place. Combine well.
-
Bring to a boil. Cover and simmer on low for one hour or two until the meat is fork-tender. Add 1/4 to 1/2 cup water if necessary to prevent it from sticking at the bottom.
Tip – Depending on the cut of meat you use, it will take between 1 to 2 hours. For example, brisket takes me almost 2 hours, stew meat makes just 1 1/2 hour or less
-
When cook to fork-tender, adjust gravy by adding a bit more water depending on how you going to serve it.
Tip – If you serve it with chapati, naan, or roti – keep it thick. If you serve with rice, add a little water to make a gravy.
-
Alternatively, transfer to a slow cooker or crockpot, and cook until the meat is fork-tender
Tip– You can cook for 6 to 8 hours on low or for 3 to 4 hours on high. Personally, I like cooking on low so the meat is moist, juicy and fork-tender
Slow-Cooked Roast Pork Chump
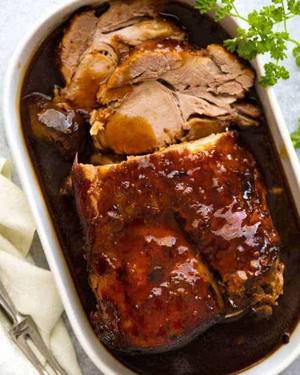
Tags:
Green Connect
-
1.5-2kg Pork chump
-
4 small fennel heads, halved
-
1 Cup apple cider
-
Zest from 1 orange
-
1 tsp fennel seeds
-
1 tsp brown mustard seeds
-
1 tsp of sea salt
-
Preheat your over to 140°C
-
Pat the skin dry and score a criss cross pattern over the skin, careful not to cut the fat and meat).
-
In a mortar and pestle, muddle together the seeds and sea salt, then rub that all over your roast. Place snug in a medium-sized oven tray and pour over the cider.
-
Then grate over a zest of one orange.
-
Cover with foil, not to let any steam out and place in the middle of your oven for 4-5 hours.
-
Basting the meat, a couple of times.
-
When time is up, take the meat out, add the fennel to your roasting pan and crank the oven up to 240°C.
-
Remove the foil and cook for another 20 min or until you have a nice crackling.
Slow-Roasted Crispy Pork Belly
-
1kg / 2 lb pork belly with skin on , NOT SCORED. Look for 3 – 3.5cm / 1.2 – 1.6" thick, even thickness with flat, unwrinkled skin, preferably not vac-packed (Note 1)
-
1 1/2 tsp olive oil , divided
-
1/2 tsp fennel powder / ground fennel seeds , optional, Note 3
-
1 tsp salt , cooking/kosher salt (or 7/8 tsp table salt), divided
-
1/4 tsp black pepper
-
Apple Sauce
-
Vermouth Jus
-
Cauliflower Puree , (Note 2)
-
See in post for more Sauce options
-
Dry skin overnight: Place pork belly on a plate. Pat skin dry with paper towels. Leave uncovered in fridge overnight to dry out the skin. (If you don't have time, pat the skin dry as best you can).
-
Preheat oven to 140°C/285°F (120°C fan).
-
Season flesh: Drizzle flesh (only) with 1 tsp oil. Sprinkle over 1/2 tsp salt, the pepper and fennel powder. Rub all over the flesh, including on the sides, being sure you get right into all the cracks and crevices.
-
Wrap in foil: Place 2 pieces of foil on a work surface. Put the belly in middle of foil, skin side up. Fold the sides in to enclose the belly, forming an open box, pinching corners to seal tightly and make it as snug as possible. Place meat on a tray.
-
Season skin: Pat skin dry with paper towels. Rub with 1/2 tsp oil then sprinkle remaining 1/2 tsp salt evenly all over the skin surface, from edge to edge.
-
Slow roast 2 1/2 hours: Place in the oven and roast for 2 1/2 hours. After 1 1/2 hours, remove and tighten the foil (pork will have shrunk), and continue cooking. This keeps the pork fat level up as high as possible, and the flesh protected so it stays moist.
-
Increase heat: Remove pork from oven, then increase heat to 240°C/465°F (all oven types).
-
Level pork: Remove pork from foil and place on a rack set over a tray (using rack is best, but optional). Use scrunched up balls of foil stuffed under pork to prop up so the skin surface is as level and horizontal as possible (see photos in post).
-
30 minutes on high heat! Place the pork back in the oven for 30 minutes, rotating after 15 minutes as needed, until the crackling is deep golden, puffy and crispy all over. If some patches are browning faster, protect with foil patches.
-
Rest 10 minutes: Remove pork from oven. Rest for 10 minutes before slicing.
-
Serving: Slice into 2cm / ⅘"-thick slices using a serrated knife. Pictured in post with Apple Sauce and Vermouth Jus, with a side of Cauliflower Puree (Note 2)! See directions in post for how to plate it up as pictured (fine dining style!), as well as a list of more sauce options.
-
Pork Belly – It’s best to get one that has not been vacuum-packed. Vac-packed means the skin has been soaking in juices for who-knows-how-long, and the crackling won’t be as good (although we can still get it crispy using this recipe method!) If your belly is vac-packed, I really recommend doing the overnight drying uncovered in the fridge.
-
Look for a piece with flat, even skin as wrinkly skin doesn’t crackle as well (in the ridges, because heat can’t get to it as well).
-
Also, do NOT get one that is scored. It is a plain fact that you do NOT need to score for perfect crackling! All too often, butchers do poor scoring jobs and pierce through the fat into the flesh. Even the tiniest prick will cause meat juices to bubble up onto the skin and you’ll end up with rubbery patches.
-
See in post for further information on what to look for when purchasing your pork belly.
-
Cauliflower Puree pictured in post is my Cauliflower Mash recipe which I pureed more thoroughly to make it as smooth as possible.
-
Fennel powder – This is ground fennel seeds. Fennel is a classic pairing with pork. Fennel powder gives a subtle, floral, aniseed flavouring to the pork meat. You can grind your own powder: Grind 1 tsp of lightly toasted fennel seeds in a mortar and pestle or spice grinder to yield 1/2 tsp fennel powder. If you don’t have any fennel powder or seeds, you can leave it out.
-
Storage and reheating – Pork belly keeps and reheats well. Keep for up to 3 – 5 days. To reheat, it’s recommended you separate the crackling. Reheat meat in microwave, and crackling in a hot oven to retain crispiness. You can also slice and pan fry, or eat at room temperature on sandwiches or salads.
-
Nutrition information – The calculation assumes all fat including discarded rendered out fat is counted. Real calorie values are lower! But this is not a diet food, to be sure
Slow-Roasted Goat Shoulder Roast
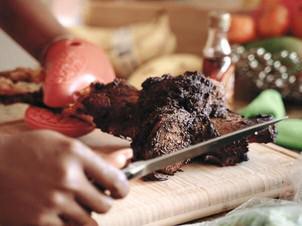
-
2 tsp allspice seasoning
-
2 tsp cumin powder
-
1 tsp dried pepper or paprika
-
1/2 tsp cinnamon powder
-
1/4 tsp nutmeg powder
-
1/4 tsp cardamom
-
1 pinch garlic powder
-
Juice of 2 lemons
-
1 goat shoulder (1.5 - 2 kg)
-
Salt (to taste)
-
Black Pepper
-
Fresh aromatics: Halved garlic cloves, 1 chopped onion, fresh celery and parsley leaves
-
2 tablespoons olive oil
-
1 cup Beef broth
-
1 cup red wine
-
Trim all but a thin layer of fat off the goat shoulder and season it with the aromatic rub, salt and black pepper. Place the meat on a plate and refrigerate it uncovered for 12 to 24 hours.
-
Preheat your oven temperature to 200 degrees celsius. While it's heating up, prepare the fresh aromatics and herbs for roasting with the goat.
-
Grab a heavy, ovenproof frying pan, pot or Dutch oven that's big enough to hold the goat shoulder. Place the fresh aromatics in the bottom of the pan.
-
Rub all over the goat shoulder with olive oil and place it on top of the aromatics with the fatty side facing up.
-
Prepare a mixture of beef broth and red wine and pour over the goat shoulder.
-
Place the pan with your goat shoulder above a larger roasting pan with a bit of water at the bottom. Reduce the oven temperature to 160 degrees Celsius and roast the goat shoulder for about 4 hours, until the meat is fork tender.
-
Serve warm with any sides of choice!
Smoked Chicken Filo Pie

-
2 medium red onions, peeled and sliced
-
250g button mushrooms, sliced
-
2 Tbsp chopped marjoram or oregano
-
2 Tbsp sundried tomatoes,sliced (optional)
-
1 Smoked Chicken
-
250g creme fraiche
-
12 sheets filo pastry
-
3 to 4 Tbsp butter, melted
-
2 tsp sesame seeds (optional)
-
Cook the onions in a dash of oil, in a heated pan for 3-5 minutes until softened.
-
Add the mushrooms and cook for a further 5 minutes.
-
Stir in the herbs and sundried tomatoes if using, and cool.
-
Tear the Smoked Chicken into bite-sized pieces and toss into the mushroom mixture with the creme fraiche and season with salt and pepper.
-
Brush 8 sheets of the filo pastry with butter or spray with oil and place into a 24cm flan tin.
-
Fill with the chicken and mushroom mixture and then flip the overhanging filo pastry edges into the centre.
-
Brush the remaining sheets of filo with butter and place on top of the pie.
-
Sprinkle with sesame seeds if wished and bake at 190°C for 40 minutes.
-
Creme fraiche requires no reducing down and does not curdle if boiled or mixed with wine.
Smoked Chicken Pasta
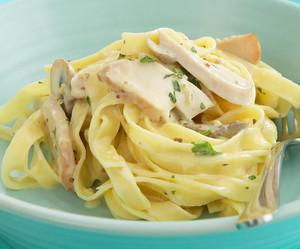
-
1 whole smoked chicken
-
½ bunch shallots
-
1 cup chicken stock
-
½ cup cream
-
1 teaspoon tomato paste
-
Pepper
-
Fry shallots.
-
Add skinned, chopped chicken, pepper, tomato paste and stock.
-
Simmer and reduce.
-
Add cream.
-
Serve with pasta.
Smoked Sausage

-
1 kg ground beef
-
1/2 t curing salt #1
-
1/2 t ground mustard
-
1 tablespoon paprika
-
2 teaspoons fine black pepper
-
1 t onion powder
-
1 t garlic powder
-
1 T kosher salt
-
1/4 cup apple cider vinegar
-
Mix all together with hands
-
Cure in fridge for three days
-
Form into sausage shapes
-
Smoke at 100°C for an hour and a half - internal temperature should be 65°C.
Sourdough Bread
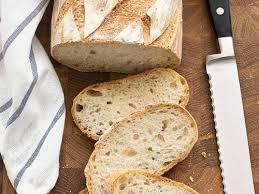
Tags:
Bread
-
500 g strong unbleached white bread flour, plus extra for flouring
-
300 g sourdough starter
-
250 ml water
-
10 g brown sugar
-
10 g salt
-
flavourless oil, for greasing
-
Mix together the flour, sourdough starter and water in a bowl. Add the sugar and salt. Turn out on to a clean kitchen surface and knead for 10 minutes or until the 'windowpane effect' is achieved (where the dough can be stretched until it is so thin that it becomes transparent).
-
Put the dough into a lightly oiled bowl, cover with a damp tea towel and let it prove for 21/2-3 hours. You won't notice as much of a rise in the dough as you would with a normal, yeasted bread and it will take a lot longer.
-
Turn out the dough onto a clean kitchen surface and knock back. Portion the dough into two and shape into two ball-shaped loaves. Flour generously, and place each loaf seam side up in a bowl, lined with a couche cloth or a heavily-floured tea towel - without the cloth, your loaf will stick in the bowl and you won't be able to turn it out. Leave to prove for a further 21/2 hours.
-
Preheat the oven to 230°C. Put a few ice cubes or cold water into a baking tin and place in the bottom of the oven to create steam. Turn the loaves out onto a baking tray or hot baking stone. Using a thin sharp knife score two or three times on the top of the loaf and place in the oven. Bake for 35-40 minutes or until a good crust has formed and the loaves sound hollow when tapped on the base.
-
The dough can be made the day before baking allowing the fermentation process to be extended further. Once the dough is rolled, place it in the fridge and leave overnight. Remove 1½ hours before baking
Sourdough Bread - Alex
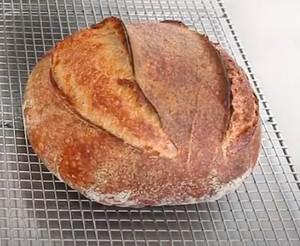
-
200gm Sourdough Starter (1 part)
-
400gm Water (335.6gm) (2 parts 100gm flour = 71.4 gm water?)
-
600gm Flour (3 parts)
-
12gm salt
-
Place water, sourdough and flour into bowl.
-
Mix through and rest, covered, for one hour.
-
Add salt and splash of water, mix through to dissolve salt.
-
Knead for ten minutes on clean dry surface.
-
Prove for four hours in warm spot.
-
Drop onto unfloured bench top, sprinkle with flour and flip.
-
Stretch and form ball, cover and rest on bench top for thirty minutes.
-
Sprinkle with flour then flip, fold using envelope style stretching to form ball.
-
With seam facing down push dough in all directions .
-
Place cloth in a bowl and dust with 50/50 rice flour/bread flour.
-
Place dough ball seam up into bowl, cover with cloth edges and place in fridge overnight.
-
Take out of fridge and rest on bench top for two hours.
-
Heat dutch oven in oven at 250°C for thirty minutes.
-
Flip dough onto floured plate.
-
Place dough in dutch oven.
-
Score at a low angle on each side.
-
Spray water onto dough, cover and place in oven, turning temperature down to 220°C and cook covered for twenty-five minutes.
-
Uncover and bake for another twenty-five minutes.
-
Cool before slicing.
Sourdough Crumpets

-
1 cup (227g) sourdough starter, unfed/discard
-
1 teaspoon sugar
-
1/4 to 1/2 teaspoon salt
-
3/8 teaspoon baking soda*
-
Place the starter in a medium-sized bowl. Stir in the sugar and salt, then the baking soda. The batter should rise up and bubble a bit, becoming almost billowy.
-
Heat your griddle over medium-low heat; 300°F is perfect. Lightly grease the surface with cooking oil (if your pan isn't non-stick), then melt a pat of butter atop the oil.
-
Lightly grease four English muffin rings (1" high and 4" across) and place on the griddle. Divide the batter evenly among the rings. Each ring will take a generous 1/4 cup of batter; a generously heaped muffin scoop is the perfect tool for this task. Cook for about 5 minutes, until the tops are set and full of small holes. Carefully flip the crumpets over, remove the rings (they should pop right off), and continue to cook for about 3 minutes, until they're golden on the bottom.
Sourdough Pizza Dough
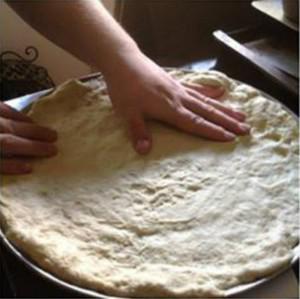
-
1 1/2 cups sourdough starter, room temperature
-
1 tablespoons olive oil
-
1 teaspoon coarse salt
-
1 1/2 cups bread flour (plus a little more or less to adjust consistency)**
-
Remove sourdough starter from refrigerator and let sit at room temperature for 2 hours.
-
In a mixing bowl of your Stand Mixer, place sourdough starter, olive oil, salt, and bread flour. Fit the mixer with a dough hook and mix the dough on medium speed for approximately 5 minutes until you have a soft dough. If the dough is too dry, add some water. Once dough is kneaded, cover and let rest for 30minutes.
Sourdough Waffles

Tags:
Bread
-
2 cups All-Purpose Flour
-
2 tablespoons sugar
-
2 cups buttermilk
-
1 cup sourdough starter, unfed/discard
-
All of the overnight sponge
-
2 large eggs
-
1/4 cup vegetable oil or melted butter
-
3/4 teaspoon salt
-
1 teaspoon baking soda
-
In a large mixing bowl, stir together the 1 cup unfed starter, flour, sugar, and buttermilk.
-
Cover and let rest at cool room temperature for about 12 hours, or overnight.
-
In a small bowl or mixing cup, beat together the eggs, and oil or butter.
-
Add to the overnight sponge.
-
Add the salt and baking soda, stirring to combine. The batter will bubble.
-
Pour batter onto your preheated, greased waffle iron, and bake according to the manufacturer's instructions.
-
Serve waffles immediately, to ensure crispness.
-
Yield: 1 dozen 20cm waffles.
Soy Ginger Salmon
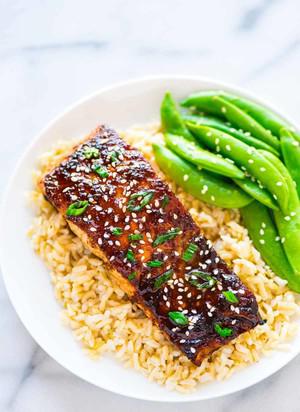
-
3 tablespoons low-sodium soy sauce
-
1 tablespoon rice vinegar
-
2 cloves garlic minced (about 2 teaspoons)
-
2 teaspoons grated fresh ginger
-
1 teaspoon honey
-
½ teaspoon garlic-chili paste sriracha, or 1/4 teaspoon red pepper flakes
-
1 pound skin-on salmon fillet* at room temperature, cut into 3–4 portions
-
2 teaspoons extra-virgin olive oil
-
Chopped green onions for serving
-
Toasted sesame seeds for serving
-
Place a rack in the center of your oven and preheat to 425 degrees F. Place a large cast-iron skillet or other sturdy, ovenproof skillet on a burner set to high and heat for at least 10 minutes. You want the pan screaming hot or the salmon will stick to it.
-
In a small saucepan, stir together the soy sauce, rice vinegar, garlic, and ginger. Bring to a simmer over medium high, then remove from heat and stir in the honey and chili paste. Remove a few spoonfuls of the cooked glaze in a separate bowl for serving.
-
Drizzle the salmon with the olive oil and brush so that it is evenly coated. Place the salmon skin-side up on the hot skillet. Let cook for about 3 minutes, totally undisturbed, until the salmon forms a nice crust. When the salmon turns opaque on the sides and starts to turn opaque on top, use a flexible spatula to flip the salmon so that it is skin-side down. Brush or spoon the remaining glaze in the saucepan all over the top. Place the skillet immediately into the oven and let cook for 6 minutes (the salmon will appear a little undercooked in the center but will finish cooking as it rests). Remove from the oven and cover with foil. Let rest 4 to 5 minutes. Serve immediately, topped with reserved glaze, chopped green onion, and sesame seeds.
Spaetzle
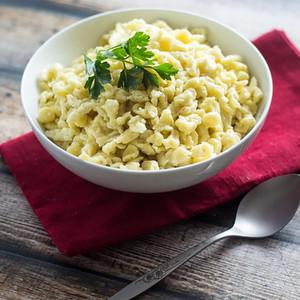
-
4 eggs
-
1/3 cup milk - (add a little more milk if your batter is too dry)
-
2 teaspoons salt
-
2 cups all-purpose flour
-
4 Tablespoons unsalted butter
-
1 teaspoon white pepper
-
1/4 teaspoon nutmeg
-
1 tbsp chopped fresh parsley - optional for garnish
-
In a medium bowl, whisk together the eggs, milk, and salt. Add in the flour and stir until well combined. If it is too runny, then add a little more flour. If it is too thick, then add a little more milk.
-
Bring a large pot of salted water to a rapid boil over high heat. Place your spaetzle maker over the top, then pour half of the batter into the cup of the device. Quickly slide the cup back and forth to allow the batter to drop through. Repeat with second half of batter, working quickly, until all the batter is cooking in the pot.
-
Set the spaetzle maker aside and give the dumplings a good stir in the pot. Let them cook for 1 to 2 minutes, until floating on the surface. Remove with a slotted spoon and place in a large bowl. Toss with butter and spices. Serve warm.
-
Optional: Sprinkle chopped fresh parsley on top for a garnish
Spanakopita
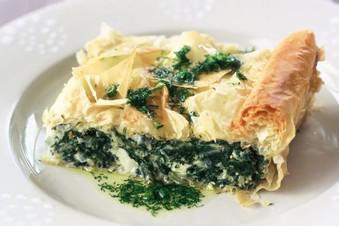
-
1/4 cup (60ml) olive oil
-
1 onion, finely chopped
-
1 bunch shallots (spring onions), finely chopped
-
2 garlic cloves, crushed
-
1.2kg baby spinach or silverbeet
-
2 tablespoons chopped dill
-
250g feta cheese, crumbled
-
150g full-fat ricotta cheese
-
3 tablespoons grated kefalotyri cheese or parmesan cheese
-
4 eggs, lightly beaten
-
1/2 teaspoon grated nutmeg
-
12 sheets filo pastry
-
120g salted butter, melted
-
Heat oil in a frypan, then add onion, shallots and garlic. Cook for 1 minute until softened, then add spinach and half the dill. (If using silverbeet, remove leaves, and chop before adding; discard stalks). Cook, stirring, over low heat for 1-2 minutes or until spinach has wilted. Drain in a colander and cool, then combine with cheeses, egg, nutmeg, salt and pepper.
-
Preheat oven to 180°C. Brush a 2 1/2-litre baking dish with butter. Lay one sheet of filo on base and sides and brush with butter. Repeat with 5 more sheets. Spread cheese mixture over top. Cover with remaining filo, brushing each sheet with butter. Trim excess pastry with kitchen scissors and tuck edges into sides of dish. Brush top with butter and score in diamond patterns.
-
Bake for 45 minutes or until golden. Rest for 10 minutes. Warm remaining butter, add remaining dill and, when serving, pour over sliced spanakopita.
Spanakopita Recipe Greek Spinach Pie
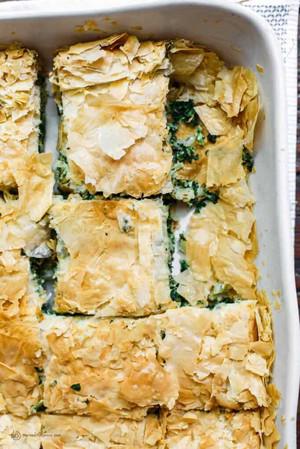
-
16 oz frozen chopped spinach, thawed and well-drained
-
2 bunches flat-leaf parsley, stems trimmed, finely chopped
-
1 large yellow onion, finely chopped
-
2 garlic cloves, minced
-
2 tbsp Private Reserve extra virgin olive oil
-
4 eggs
-
10.5 oz quality feta cheese, crumbled
-
2 tsp dried dill weed
-
Freshly-ground black pepper
-
1 16 oz package The Fillo Factory Organic Dough (# 4 pastry sheets), properly thawed (see tips above)
-
1 cup Private Reserve extra virgin olive oil, more if needed
-
Preheat the oven to 325 degrees F.
-
Before you begin mixing the filling, be sure the spinach is very well drained, and squeeze out any excess liquid by hand.
-
To make the filling: In a mixing bowl, add the spinach and the remaining filling ingredients. Stir until all is well-combined.
-
Unroll the phyllo (fillo) sheets and place them between two slightly damp kitchen cloths.
-
Prepare a 9 ½" X 13" baking dish like this one. Brush the bottom and sides of the dish with olive oil.
-
To assemble the spanakopita: Line the baking dish with two sheets of phyllo (fillo) letting them cover the sides of the dish. Brush with olive oil. Add two more sheets in the same manner, and brush them with olive oil. Repeat until two-thirds of the phyllo (fillo) is used up.
-
Now, evenly spread the spinach and feta filling over the phyllo (fillo) crust. Top with two more sheets, and brush with olive oil.
-
Continue to layer the phyllo (fillo) sheets, two-at-a-time, brushing with olive oil, until you have used up all the sheets. Brush the very top layer with olive oil, and sprinkle with just a few drops of water.
-
Fold the flaps or excess from the sides, you can crumble them a little. Brush the folded sides well with olive oil. Cut Spanakopita ONLY PART-WAY through into squares, or leave the cutting to later.
-
Bake in the 325 degrees F heated-oven for 1 hour, or until the phyllo (fillo) crust is crisp and golden brown. Remove from the oven. Finish cutting into squares and serve. Enjoy!
-
What to Serve with Spanakopita? Spanakopita makes a great side dish for large holiday dinners next to lamb or lemon chicken. But it can easily stand alone as the main dish. Serve it with a big salad like Greek salad; Balela; or this Mediterranean chickpea salad, and favorite dips like Greek Tzatziki or Roasted Garlic Hummus.
Spatzle
-
300 g (2 cups) plain flour, sifted
-
½ tsp ground or grated nutmeg
-
6 eggs, lightly beaten
-
150 g butter, chopped
-
½ cup flat-leaf parsley, chopped
-
1 onion
-
1½ Cups Emmental style cheese
-
Using an electric mixer, beat flour, nutmeg, eggs, ½ tsp salt and 150 ml water for 3 minutes or until smooth. Transfer the batter to a jug, cover with plastic wrap and refrigerate for 45 minutes to rest.
-
Lightly whisk refrigerated batter. Bring a large saucepan of salted water to the boil. Place a large colander over the pan, pour one-third of the batter into the base of the colander and, using a plastic spatula or scraper, press the batter through the holes. Cook spätzle for 1 minute or until it rises to the surface. Remove immediately with a slotted spoon, then transfer to a bowl and keep warm. Repeat twice more with the remaining batter.
-
Melt butter in a large frying pan over high heat and saute chopped onion.
-
Add spätzle and parsley, and cook, stirring for 3 minutes or until the spätzle is heated through and well coated in butter.
-
Season with salt and pepper, sprinkle cheese on top and cook in a hot oven until nicely brown on top.
Spiced Carrot Soup with Coconut Cream

-
1 tablespoon light olive oil
-
1 onion, finely chopped
-
2 garlic cloves, crushed
-
1 small red chilli, seeds removed, chopped
-
1 teaspoon grated fresh ginger
-
500g carrots, peeled, chopped
-
1 medium sweet potato, peeled, chopped
-
2 kaffir lime leaves
-
4 cups (1L) chicken stock
-
Juice of 1/2 lime
-
2 tablespoons palm sugar
-
2 tablespoons Thai fish sauce
-
200ml coconut cream
-
150ml thick cream
-
Heat oil in a saucepan over medium heat, add onion and cook for 2-3 minutes or until softened.
-
Add garlic, chilli, ginger, carrot, sweet potato, lime leaves and stock. Bring to boil, then reduce heat to low and simmer for 20 minutes. Allow to cool slightly, then puree in a blender. Pass puree through a sieve, then season.
-
Return to pan with lime juice, sugar and fish sauce and gently reheat. Whip creams until thick.
-
Pour soup into glasses and top with coconut cream and a sprinkle of nutmeg, if desired.
Spiced Coconut Carrot Soup
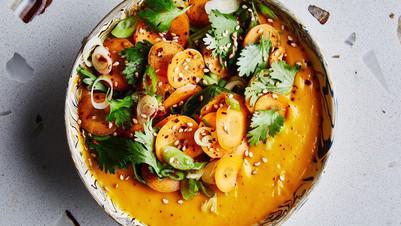
-
1 tablespoon coriander seeds
-
2 tablespoons virgin coconut or extra-virgin olive oil
-
1½ pounds carrots, peeled, chopped (about 4 cups), plus 1 carrot, thinly sliced
-
Kosher salt
-
2 red chiles, such as Fresno or cayenne, seeded, chopped
-
1 large shallot, chopped
-
1 1-inch piece ginger, peeled, finely grated
-
4 garlic cloves, chopped
-
2 teaspoons curry powder
-
1 15-ounce can unsweetened coconut milk
-
1 teaspoon fish sauce (optional)
-
2 tablespoons fresh lemon juice
-
Crushed red pepper flakes, toasted sesame seeds, sliced scallions, and/or cilantro leaves (for serving)
-
Special Equipment
-
A spice mill or mortar and pestle
-
Finely grind coriander seeds in spice mill or with mortar and pestle; set aside.
-
Heat oil in a small pot over medium-high. Add chopped carrots, season with salt, and cook, tossing occasionally, until lightly browned around the edges, 5–6 minutes. Add chiles, shallot, ginger, garlic, curry powder, and reserved ground coriander and cook, stirring often, until shallot and garlic are softened, 4–6 minutes. Add coconut milk and 1½ cups water. Bring to a boil, then reduce heat and simmer, stirring occasionally, until carrots are tender, 20–25 minutes. Add fish sauce, if using. Purée with an immersion blender or, carefully, in small batches in a blender until smooth (make sure the small cap set within the blender jar lid is removed so that steam can escape). Season with salt, if needed.
-
Toss sliced carrot with lemon juice in a small bowl; season with salt. Add a pinch of red pepper, a few pinches of sesame seeds, and a handful of scallions and/or cilantro leaves and toss to combine.
-
Divide soup among bowls. Top with carrot-herb salad just before serving.
Spicy Beetroot Relish
-
2 cups beetroots , raw, grated peeled
-
1 tablespoon honey , mildly flavoured
-
1 ⁄4 cup red wine vinegar or 1/4 cup cider vinegar
-
1 teaspoon mustard seeds
-
1 ⁄4 teaspoon ground allspice
-
1 ⁄2 teaspoon ground cinnamon
-
1 ⁄4 teaspoon ground cumin
-
3 ⁄4 cup water
-
3 ⁄4 teaspoon salt
-
Place all the ingredients into a medium sized saucepan and, over a high heat, stir until the honey dissolves.
-
Bring to the boil and then reduce to a simmer and cook for about one and a half hours or until most of the liquid has evaporated and the grated beetroot is tender.
-
Taste for seasoning while it is still warm and adjust if necessary.
-
MY PRIVATE NOTES
-
Add a Note
Spicy Cauliflower Falafel with Beetroot Dip
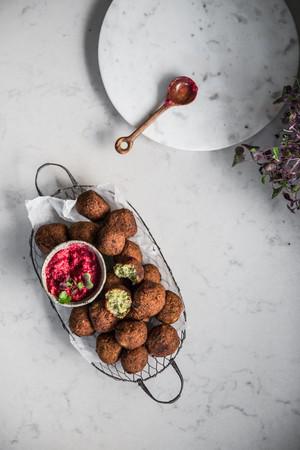
Tags:
Green Connect
-
300g cauliflower florets
-
400g can butter beans, rinsed and drained
-
1/2 cup (35g) flat leaf parsley
-
1/2 cup (60g) almond meal
-
80g wholemeal spelt flour
-
3 garlic cloves
-
1 teaspoon chilli flakes
-
1 teaspoon ground cumin
-
1 1/2 teaspoons sea salt flakes
-
1/4 teaspoon baking powder
-
1 can (450g) whole baby beetroot, rinsed and drained
-
1 garlic clove
-
50g toasted pinenuts
-
sea salt flakes and black pepper to taste
-
salad leaves to serve
-
Place cauliflower, butter beans, parsley, almond meal, spelt flour, garlic, chilli, cumin, salt and baking powder in the jug of a food processor and process until coarsely chopped and mixed.
-
Shape the mix into 20 golf ball sized balls.
-
Heat sunflower or vegetable oil in a small saucepan on high (oil height in pan at least 5-6 cm).
-
Carefully drop 3-4 falafel balls in the oil and fry for a minute or two until cooked and golden. Remove with a slotted spoon and drain on paper towels. Repeat for remaining balls.
-
To make the beetroot dip, place all ingredients in a small food processor and blitz for a few seconds until smooth.
-
Serve falafels on a bed of greens with beetroot dip and/or tabbouli.
Spicy Fried Fish Balls

-
4 shallots, sliced
-
4 Thai chilies, sliced
-
4 kaffir lime leaves, stems and spines removed
-
1 2-inch length of fresh or frozen (and thawed) turmeric, peeled and trimmed
-
½ lemon grass stalk, outer layers removed, core thinly sliced
-
1 tablespoon ground coriander
-
¼ teaspoon ground white pepper
-
1 pound cod filets, cut into 1-inch cubes
-
120 gm salted mackerel, boned and skinned, cut into 1-inch cubes, or 4 ounces anchovies
-
2 eggs
-
⅔ cup coconut milk
-
4 to 5 tablespoons rice flour
-
To make fish balls, pound shallots, chilies, lime leaves, turmeric, lemon grass, ground coriander and pepper to a paste in a mortar and pestle, or use a food processor. Transfer to bowl.
-
In food processor, blend cod and mackerel to a smooth paste. Add eggs. Gradually pulse in aromatics and coconut milk, alternating ingredients, until incorporated. Pulse in rice flour until you can form paste into a ball.
-
To make sauce, whisk remaining ingredients, other than oil and panko, in a bowl.
-
In a saucepan or wok, heat 3 inches oil to 190°C. Meanwhile, grind panko in a food processor or mortar and pestle. Using wet hands, roll fish paste into 2-inch balls. Dip balls into panko and coat evenly. Fry, turning frequently, until golden brown all over, 3 to 4 minutes. Drain on a paper-towel-lined plate. Serve with dipping sauce.
Spicy Thai Pork Tenderloin Salad
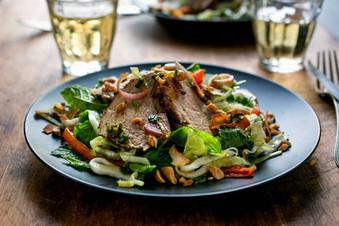
-
1 ½ pounds boneless pork tenderloin (usually 2 tenderloins)
-
⅔ cup thinly sliced shallots (about 4 shallots)
-
⅔ cup chopped cilantro leaves and tender stems
-
5 tablespoons light brown sugar
-
6 garlic cloves, grated
-
5 tablespoons soy sauce
-
5 tablespoons peanut or grapeseed oil
-
Juice and zest of 4 limes
-
3-inch piece peeled ginger root, grated
-
2 tablespoons Asian fish sauce
-
½ teaspoon kosher salt, more to taste
-
1 to 2 Thai bird, serrano or jalapeño chile peppers, seeded and minced
-
8 cups Napa or regular cabbage, thinly sliced
-
5 whole scallions, trimmed and thinly sliced
-
2 small Kirby or Persian cucumbers, thinly sliced
-
1 red bell pepper, thinly sliced
-
1 ½ cups cilantro leaves
-
1 ½ cups mint leaves
-
1 cup basil leaves
-
1 ¼ cups roasted cashews or peanuts, toasted and chopped
-
¼ cup unsweetened coconut chips or large flakes, toasted
-
Pat pork dry with paper towel. In a bowl, combine shallot, cilantro, 2 tablespoons of the sugar, garlic, soy sauce, peanut or grapeseed oil, lime zest and juice, ginger, fish sauce, salt and chile. Pour a quarter of the mixture into a blender, add remaining sugar and purée until a smooth, loose paste forms. (Save the unblended mixture to use as dressing.)
-
Place tenderloin in a large bowl and spread the paste all over pork. Marinate at room temperature for 2 hours, or cover and refrigerate up to 24 hours; turn the tenderloin occasionally.
-
Light the grill or heat the broiler and arrange a rack at least 4 inches from the heat. Grill or broil pork, turning occasionally, until well browned and meat reaches an internal temperature of 135 degrees, 4 to 10 minutes per side depending upon the heat of your broiler or grill. Keep an eye on it so it doesn’t overcook. Let meat rest while you prepare the salad. (Or, cook the pork 1 or 2 hours ahead and serve it at room temperature.)
-
In a large bowl, combine the salad ingredients, reserving the herbs, cashews and coconut. Whisk the dressing and use just enough to dress the salad, tossing to combine. Let sit for a few minutes for the flavors to meld, then right before serving, add herbs and toss again.
-
To serve, slice the pork. Arrange salad on a platter and top with sliced pork. Scatter cashews and coconut on top, drizzle with a little more of the remaining dressing, to taste.
Spinach & Cheese Quiche
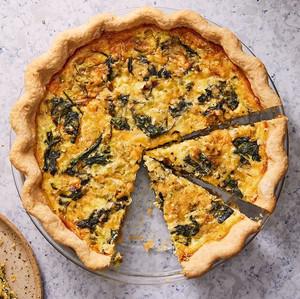
-
1 homemade or store-bought 9” pie crust, defrosted according to package instructions
-
1 tbsp. extra-virgin olive oil
-
1 medium leek, cleaned well, halved lengthwise, and cut into ½” pieces (white and light green parts only)
-
Kosher salt
-
Freshly ground black pepper
-
5 oz. fresh spinach
-
1 1/2 c. shredded aged Gouda or white cheddar
-
1/4 c. thinly sliced scallions (from about 4 scallions)
-
1 medium shallot, minced
-
2 large eggs
-
1 c. half-and-half
-
Pinch freshly grated nutmeg (optional)
-
Preheat oven to 375°. Place crust on a baking sheet, then line it with a piece of parchment paper and fill with dried beans (or another pie weight). Bake until crust is lightly golden on the sides and no longer appears doughy, about 15 minutes. Transfer to a wire rack to cool and decrease oven temperature to 325°.
-
Meanwhile, heat oil in a large skillet over medium heat. Add leeks and season with salt and pepper. Cook until bright green and tender, 5 to 7 minutes. Add spinach and cook until wilted, about 1 minute. Season with more salt and pepper and transfer to a bowl to cool.
-
In a medium bowl, stir to combine cheese, scallions, and shallot.
-
In a large bowl, whisk eggs until smooth. Whisk in half-and-half and season mixture with ½ teaspoon salt, black pepper, and nutmeg if using.
-
When crust and spinach mixture have cooled to room temperature, assemble the quiche: Sprinkle half the cheese mixture in an even layer on the bottom of the pie crust. Next, add the spinach and leek mixture in an even layer. Pour egg mixture over spinach, then sprinkle with remaining cheese mixture.
-
Bake quiche until just set, about 40 to 45 minutes. Let cool until warm, about 20 minutes, until serving.
Spinach and Ricotta Enchiladas

-
1 tablespoon butter
-
2 cloves garlic, minced
-
50g sliced spring onions
-
300g frozen spinach, thawed and squeezed dry
-
250g ricotta cheese
-
110g sour cream
-
225g grated Cheddar cheese
-
10 corn tortillas
-
500g enchilada sauce
-
Preheat the oven to 190 degrees C.
-
Melt butter in a saucepan over medium heat. Add garlic and spring onions then cook for a few minutes until fragrant, but not brown. Stir in the spinach and cook for about 5 more minutes. Remove from the heat, and mix in ricotta cheese, sour cream and 1/2 of the cheese.
-
In a frying pan over medium heat, warm tortillas one at a time until flexible, about 15 seconds. Spoon about 4 tablespoons of the spinach mixture onto the centre of each tortilla. Roll up, and place seam side down in a 22x33cm baking dish. Pour enchilada sauce over the top, and sprinkle with the remaining cheese.
-
Bake for 15 to 20 minutes in the preheated oven, until sauce is bubbling and cheese is lightly browned at the edges.
Spinach and Ricotta Filo Triangles

-
1 bunch English spinach, leaves removed, washed and chopped
-
1 Granny Smith apple, grated
-
500g fresh ricotta cheese
-
1/2 cup pine nuts, toasted
-
1 egg, lightly beaten
-
finely grated rind of 1 lemon
-
8 sheets filo pastry
-
2 tablespoons olive oil
-
Preheat oven to 180°C. Lightly grease 2 baking trays. Cook spinach in a small saucepan of boiling salted water for 30 seconds or until just wilted. Drain and refresh under cold water. Drain well.
-
Squeeze all moisture from spinach and apple. Place into a mixing bowl. Add ricotta, nuts, egg and lemon rind. Season with salt and pepper. Mix well to combine.
-
Place 1 sheet of filo onto work surface. Cut into 3 long strips. Keep remaining sheets of pastry covered with a damp paper towel so they don't dry out.
-
Brush pastry lightly with oil. Place a tablespoon of spinach mixture in 1 corner of filo and fold diagonally, creating a triangle. Continue folding, taking care to retain triangular shape. Brush pastry with olive oil. Place onto baking tray. Continue with remaining pastry and spinach filling.
-
Bake for 20 to 25 minutes or until golden and crisp. Place 3 onto each entree plate and serve hot.
Spinach, Leek and Sausage Bake
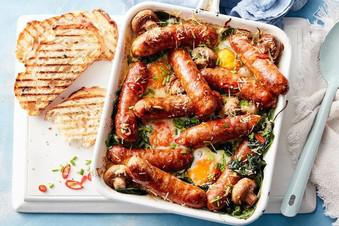
-
2 leeks, thinly sliced
-
200g cup mushrooms
-
2 garlic cloves, thinly sliced
-
2 tbsp olive oil
-
500g pkt Coles Finest Pork Calabrese Sausages
-
80g baby spinach leaves
-
1/4 cup (60ml) cream
-
4 Coles Australian Free Range Eggs
-
1 1/2 tbsp finely grated parmesan
-
Chopped chives, to serve
-
Thinly sliced long red chilli, to serve
-
Sliced Coles Bakery Stone Baked White Sourdough Vienna, toasted, to serve
-
Select all ingredients
-
Preheat oven to 180C. Combine the leek, mushrooms, garlic and half the oil in a large baking dish. Roast for 20 mins or until the leek is tender.
-
Meanwhile, heat the remaining oil in a large frying pan. Cook the sausages, turning, for 5 mins or until browned all over.
-
Add the spinach to the leek mixture and toss to combine. Use the back of a spoon to make 4 indents in the spinach mixture in the dish. Carefully crack an egg in each indent. Drizzle with cream. Arrange the sausages over the spinach mixture. Sprinkle with parmesan. Season. Bake for 15 mins or until the eggs are just cooked and sausages are cooked through.
-
Sprinkled with chives and chilli. Serve with the bread.
Sponge Cake
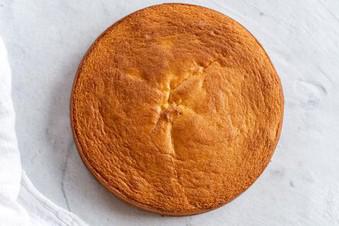
-
5 large eggs
-
3/4 cup sugar
-
1 cup all purpose flour
-
Preheat oven to 350 °F.
-
Beat 5 eggs (no need to separate them) with sugar until it’s three times in volume.
-
Using a spatula, fold in flour by thirds; be very gentle with the dough so you don’t over mix it and lose the fluffiness.
-
Add cake batter to an oiled baking sheet. Springform baking pan works amazing, size 9-12 inches is perfect.
-
Bake at 350F for 30 minutes and check it using a wooden toothpick. If the cake is ready, the dough should not stick to the toothpick.
-
Keep the eggs at room temperature before you make the cake. Room temperature eggs beat better!
-
Beat the eggs with sugar for at least 15 minutes. The texture should be airy, yet stiff.
-
Sift the flour first. Getting rid of any lumps and clumps of flour will ensure that you have a consistent texture.
-
When adding flour, carefully it in by thirds into the egg mixture. Lightly adding the flour will ensure you don’t overmix and compromise the fluffiness of your beaten eggs.
-
Your baking pan size should be 9 inches or larger. This cake can easily overflow during the baking process. Don’t open the oven door during the baking process because the cake can collapse when hit with a sudden temperature change.
-
Test to see if the cake is fully baked by pricking it with a toothpick. If it comes out clean, you’re good to go!
-
Cut the sponge cake only when its fully cooled to room temperature.
Steak Mungana
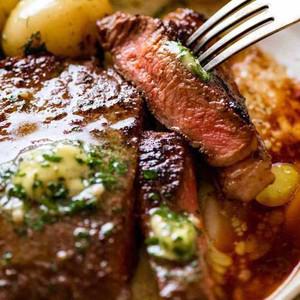
Marinated Steak
-
2.5kg topside steak
-
3 cloves garlic crushed
-
2 Onions finely chopped
-
5cm ginger crushed
-
1/2 cup white vinegar
-
1 Tablespoon soy sauce
-
3 tablespoons oil
-
1 dessertspoon salt
-
1 dessertspoon worcestershire sauce
-
Mix together and bring to boil. Allow to cool and add a glass of claret. Marinate sliced topside for 5 hours. BBQ or pan fry steak. Heat the marinade and add dessertspoon of cornflour (made into a paste) to thicken.
Steamed Pudding
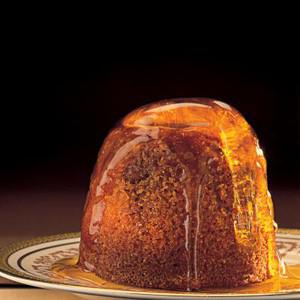
-
1 T butter
-
1 egg
-
½ cup milk
-
½ cup sugar
-
1 cup SR flour
-
Melt butter in steamer.
-
Add other ingredients and mix well.
-
Steam for one hour.
Sticky Pork Belly Bites
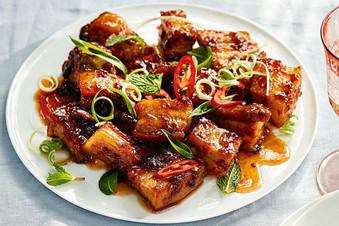
-
1 tbsp olive oil
-
500g pkt Coles Pork Belly Bites
-
1 tbsp soy sauce
-
1 tbsp sweet chilli sauce
-
1 tbsp honey
-
1 garlic clove
-
2 tsp finely grated ginger
-
1 spring onion, thinly sliced
-
1 red chilli, thinly sliced (optional)
-
Heat the oil
-
In a large frying pan over high heat. Cook pork, turning, for 5 mins or until golden and heated through.
-
Add the soy sauce, sweet chilli sauce, honey, garlic and ginger to the pan. Cook, tossing, for 3-5 mins or until the pork is coated in sauce and the sauce is sticky.
-
Arrange the pork on a serving plate. Drizzle with a little sauce and sprinkle with spring onion and chilli, if using.
Stir-Fried Snow Pea Leaves with Garlic
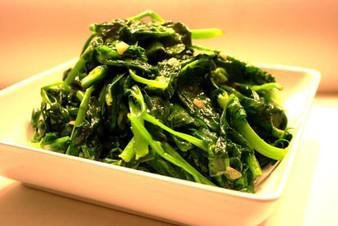
Tags:
Green Connect
-
1 pound snow pea leaves (450g)
-
3 tablespoons vegetable oil
-
3-5 cloves garlic (finely chopped, depending on how much you like)
-
1/2 teaspoon salt (or to taste)
-
1/4 teaspoon white pepper
-
1 teaspoon sesame oil
-
Soak snow vegetables in a large bowl or other container for 1 to 2 hours. Then wash thoroughly (2 to 3 times) to get rid of all the dirt and sand clinging to the leaves and stems. Drain off all the water.
-
Using very high heat, heat oil in your wok until it just starts to smoke a bit. Quickly add the garlic and the veggies, taking care not to burn them by constantly stirring. After a minute, add salt, cracked white pepper, and sesame oil. Stir and mix well.
-
Put the lid on the wok and cook for about 1-2 minutes. Remove lid, stir briefly, and transfer to a dish.
Stirred Custard
-
2 teaspoon cornflour
-
2 cup (500ml) milk
-
3 eggs
-
2 egg yolks
-
2 tablespoon caster sugar
-
1/2 teaspoon vanilla essence
-
Combine the cornflour with one tablespoon of the milk.
-
Whisk eggs, egg yolks, sugar, vanilla and remaining milk in a medium saucepan. Add cornflour mixture and stir continuously over a low heat until mixture thickens.
-
Strain the custard through a fine sieve into a large jug. Serve warm or cold.
-
NOTE: This recipe can be made a day ahead. Not suitable to freeze. Not suitable to microwave.
Strawberry Squares
-
300g SR Flour
-
300g light brown sugar
-
150g butter
-
2 eggs
-
300g sour cream
-
150g fresh strawberries
-
1.Mix flour & sugar
2.Rub butter through and press half this mixture in the base of a slice tin
3.Add eggs and sour cream to the remaining mix and spread on top of the base slice
4.Place strawberries on top
5.Bake at 160 for 30 -40 mins
Sugar-Free Carrot Cake with Orange Cream Cheese Icing
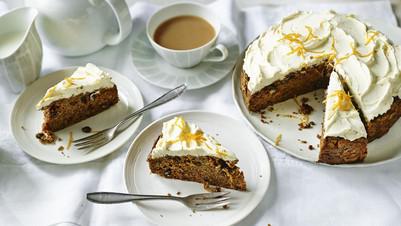
-
150g/5½oz self-raising flour
-
100g/3½oz ground almonds
-
50g/1¾oz raisins
-
50g/1¾oz walnut halves, roughly broken
-
4 tsp ground mixed spice
-
1 tsp bicarbonate of soda
-
3 large free-range eggs
-
100ml/3½fl oz sunflower oil, plus extra for greasing
-
3 tbsp semi-skimmed milk
-
300g/10½oz carrots, coarsely grated
-
150g/5½oz full-fat cream cheese
-
1 medium orange, finely grated zest only
-
Recipe tips
-
Preheat the oven to 180C/160C Fan/Gas 4. Grease and line the base of a 20cm/8in springform cake tin with baking parchment.
-
Put the flour, almonds, raisins, walnuts, mixed spice and bicarbonate of soda in a large bowl and mix thoroughly. Make a well in the centre.
-
In a separate bowl, whisk the eggs, oil and milk together and stir in the grated carrot. Add the egg mixture to the dry ingredients, stirring to form a thick batter.
-
Pour into the prepared tin and spread to the sides. Bake in the centre of the oven for 35 minutes, or until the cake is well risen and a skewer inserted into the centre comes out clean. Leave to cool in the tin.
-
Take the cake out of the tin and peel off the lining paper. Put the cake on a board or plate.
-
To make the frosting, stir the cheese and orange zest together. Spread evenly over the cake.
-
Cut into small wedges to serve.
-
This cake will keep in the fridge without the frosting for three days. Just spread the frosting over the cake before serving.
Swedish Meatballs
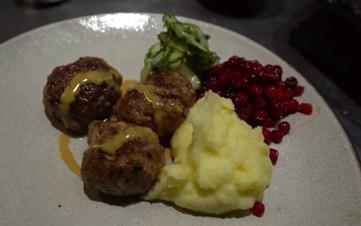
-
200 gram ground beef
-
100 gram ground veal
-
100 gram ground pork
-
50 gram bread crumbs
-
200 ml heavy cream
-
1 onion
-
1 tbsp butter
-
1 egg
-
1 tsp salt
-
½ tsp ground allspice
-
A pinch of grounded nutmeg
-
A pinch of grounded cloves
-
2 tbsp cooking oil + 2 tbsp butter for pan frying
-
Soak bread crumbs in cream for 5-10 minutes
-
Chop onion. Heat 1 tablespoon butter in a large skillet over medium heat.
-
Add onion, and cook, stirring frequently, until onions have become translucent, about 2-3 minutes.
-
In a large bowl, combine all three grounded meat, soaked bread crumbs, egg, spices, salt and cooked onion.
-
Using a wooden spoon or clean hands, stir until well combined.
-
Roll the mixture into 1 1/4-to-1 1/2-inch meatballs, forming about 20 meatballs.
-
Add 2 tablespoon cooking oil + 2 tbsp butter to the skillet.
-
Add meatballs, in batches, and cook until all sides are browned, about 4-5 minutes.
-
Transfer to a paper towel-lined plate.
-
Serve with mashed potato, lingonberries, thinly sliced cucumber soaked in vinegar and cream sauce from the pan stock.
Sweet and Sour Pork

-
400g/14oz pork scotch roast (aka pork neck, collar butt) or shoulder / butt, cut into 2cm / 4/5" cubes (Note 1)
-
1/2 onion , finely grated (Note 2a)
-
1 tsp garlic , finely grated (Note 2a)
-
1 tsp ginger , finely grated (Note 2a)
-
3/8 tsp baking soda (bi-carb) (Note 2b)
-
2 tsp cornflour/cornstarch
-
2 tbsp light soy sauce , or all purpose (Note 3)
-
5 tbsp cornflour/cornstarch - for mixing in
-
1/2 cup cornflour/cornstarch - for Coating
-
2 - 3 cups vegetable or canola oil
-
1/3 cup white sugar
-
1/3 cup apple cider vinegar (or 1/4 cup normal white vinegar)
-
3 tbsp pineapple juice (from a 227g/8oz can pineapple pieces in juice, preferably no added sugar, Note 4)
-
3 tbsp ketchup (or Aussie tomato sauce)
-
1/2 tsp Worcestershire sauce
-
1 tbsp soy sauce , light
-
1 tsp Oyster Sauce (Note 5)
-
4 tsp cornflour/corn starch
-
1/2 cup water
-
1 tbsp oil
-
1 garlic clove , finely chopped
-
2 tsp ginger , finely chopped
-
1 onion (medium), cut into 2.5cm/ 1" cubes (brown, white, yellow)
-
1/2 red capsicum/bell pepper (large), cut into 2.5cm / 1" cubes
-
1/2 green capsicum/bell pepper (large), cut into 2.5cm / 1" cubes
-
1 cup pineapple pieces (from the can of pineapple under Sauce)
-
Mix Pork with Marinade. Marinade 18 to 24 hours. (See Note 1 for marinating time for other cuts)
-
Rack & warm oven: Preheat oven to 80°C/175°F and place rack on tray - to keep pork warm.
-
Sauce: Place all Sauce ingredients EXCEPT water in a large jug or small bowl. Mix until combined, then mix in water.
-
Be Stir Fry Ready: Have all ingredients lined up, ready to toss in. After Fry #2, things move quickly.
-
Coating #1: Mix 5 tablespoons cornflour into the pork and leave for 5 minutes. At first, it will be white from the cornflour, but after a while it will sweat and make the cornflour (mostly / partially) wet, and will be sticky (this is key for coating to stick).
-
Coating #2: Spread 1/2 cup cornflour in a shallow bowl. Coat pork, shaking off excess, and pile onto a plate.
-
Reserve cornflour in case you need to dust again just prior to frying. Pork should be at least half white when you put it into the oil (if not, just sprinkle with reserved cornflour).
-
Heat oil: Pour enough oil into a large saucepan or small pot so it's 2.5cm / 1" deep. Heat to 180°C/350°F (or until pork immediately starts sizzling when you dip it in).
-
Fry #1: Cook pork in batches, being sure not to crowd the pot, for 3 minutes until golden. Drain on rack. This step is just to cook the pork. It takes me 4 batches.
-
Fry #2: Turn the stove up slightly and heat oil to 200°C/390°F. Starting with the coolest pork, add half the pork (you can crowd the pot) and cook for 1 1/2 minutes, or until pork is deep golden brown and crispy. Transfer to rack, repeat with remaining pork - I do 2 batches.
-
Keep warm in oven.
-
Heat oil in a very large skillet over high heat.
-
Add garlic, ginger and onion, stir for 1 1/2 minutes. Add capsicum and stir for 2 minutes.
-
Add Sauce & pinapple, then let it come to a rapid simmer. Simmer for 2 minutes until it thickens - when you drag the spoon across the base, a path should briefly appear (see video at 1 min 53 s).
-
10 second toss: Add pork, then QUICKLY toss to coat - aim for 10 seconds!
-
Serve asap! Pour onto serving plate, serve immediately! Will stay crispy for around 5 minutes then starts softening but still has a solid coating. This is just the reality of Sweet and Sour Pork, even at restaurants!
-
DOUBLE vs SINGLE FRY - Double fry definitely stays crispy for longer once sauced, but for an express version, just do a single fry for 1 minute longer, until it's deep golden brown. It still stays crispy for a few minutes, and nobody has EVER complained!
-
Pork - pork scotch (aka pork neck / collar butt) and pork shoulder/butt are recommended for best flavour and juiciest pork pieces. Usually requires slow cooking to make them tender - the baking soda and cornflour in the marinade is a Chinese tenderising secret - also see how to tenderise Chicken and Beef. This juicy cut means we can cook for a bit longer to get the outside super crispy without the inside becoming dry and tough.
-
Other pork cuts can be used but because they are leaner, are more prone to drying out due to overcooking before the outside of the pork gets crispy - though the marinade helps counteract this. General rule: the more tender/expensive the pork, less minimum marinating time required:
-
Loin, steaks, tenderloin (aka fillet) - 3 hours to overnight
-
Anything labelled "cutlets" or "steak" - - 3 hours to overnight
-
Pork leg - per recipe, 24 hrs
-
Do not use - belly, bone in ribs, or pickled pork
-
2a. Finely grated - for best flavour, use a microplane so it's grated really finely and becomes wet and "juicy".
-
2b. Bicarb / baking soda - If you don't have a 1/8th teaspoon measure, just measure 1/4 teaspoon PLUS half of the 1/4 teaspoon. That totals 3/8 teaspoons.
-
Baking soda is the Chinese restaurant secret to tenderise meat, also used for chicken and beef in everything (such as stir fries, soups and noodles). 3/8 teaspoon is the maximum that can be used before you start tasting it (for chicken and beef, I use more for speedier results but rinse it off).
-
Soy sauce - do not use Dark Soy Sauce or sweet soy sauce. Read more about different types of soy sauce here.
-
Pineapple - I like to use canned so I can use the juice in the Sauce which adds extra flavour. If you prefer to use fresh pineapple, just use more water instead (don't worry, the Sweet & Sour Sauce has plenty of flavour already!)
-
Vegetarian Oyster Sauce - Nowadays you can find vegetarian oyster sauce (suitable for vegans) even at supermarket. For example, Ayam Vegetarian Oyster Sauce. It's actually pretty good!
-
And here's homemade Vegetarian Oyster Sauce recipe by Omnivore's Cookbook, a Chinese recipe blog. I was extremely impressed with it.
-
Best baking method - I tried a bunch of ways, and this is the method that yields the best results. Not quite as crispy as deep frying, but certainly crispy enough for a very respectable Sweet & Sour Pork. The brief pan fry is key here to seal in some crispiness - without this step, the coating is just kind of powdery, not crispy at all.
-
Place rack on tray, spray rack with oil;
-
Pour in enough oil to cover base of large skillet, heat to medium high;
-
Add pork, then turn to make each side golden (this is the tedious part) - about 2 minutes in total, no longer; then
-
Place on rack, spray with oil, bake 13 - 15 minutes at 220°C/430°F until deep golden. Use per recipe.
-
Air fryer? Haven't tried, would love to know if anyone does. I would spray pork pieces with oil then air fry. I see no reason why it wouldn't work.
-
Reuse oil - the pork is neutral enough in flavour such that the oil can be reused twice more. Cool oil, line a mesh colander with paper towel, strain, and store. Use for any savoury fried foods.
Sweet and Sour Sauce
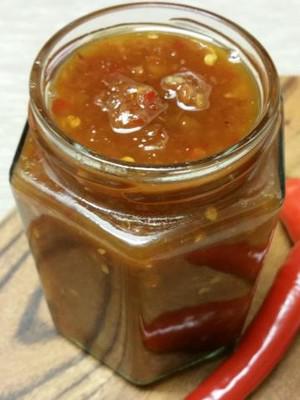
-
1 tablespoon Soy sauce
-
1 tablespoon Chinese wine
-
3 tablespoons Tomato sauce
-
2 tablespoons Vinegar
-
2 tablespoons Sugar
-
185 ml Water
-
1 tablespoon Cornflour
-
2 tablespoons Cold water
-
2 tablespoons Peanut oil
-
1 clove Garlic
-
1/4 teaspoon Fresh root ginger, finely grated
-
Combine soy sauce, wine, tomato sauce, vinegar, sugar and water and stir until sugar dissolves.
-
Mix cornflour smoothly with the cold water.
-
Heat oil, add garlic and ginger - fry for 2 minutes.
-
Add combined sauce mixture, bring to the boil, then stir in cornflour and cook, stirring until thickened.
Sweet Pea and Pistachio Cake
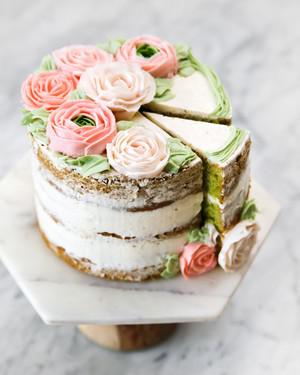
-
2 1/4 cups fresh or frozen peas
-
3/4 cup unsalted butter, softened
-
1/4 cup buttermilk, room temperature
-
1 1/4 cup granulated sugar
-
3 eggs, room temperature
-
2 teaspoons vanilla extract
-
2 cups all-purpose flour
-
1/4 cup unsalted pistachios, grounded
-
2 teaspoons baking powder
-
1/2 teaspoon salt
-
1 cup whipping cream
-
275g cream cheese, room temperature
-
3/4 cup icing sugar
-
1 teaspoon vanilla
-
Preheat the oven to 350 F. Prepare three 6-inch cake pans. Set aside.
-
In a medium size pot, boil the peas for a few minutes until soft. Once the peas are soft, drain the peas and run the peas under cold water until they are no longer hot.
-
Transfer peas into a blender. Add buttermilk. Purée mixture until completely smooth. Set aside.
-
Combine flour, ground pistachio, baking powder and salt. Set aside.
-
In the bowl of a mixer, cream together the butter and sugar until light and fluffy.
-
Beat in the eggs, one at a time. Beat in the cooled pea purée. Add vanilla.
-
Add dry ingredients into the wet mixture and mix until just combined.
-
Divide the mixture evenly into the prepared pans and bake for 25 - 27 minutes or until an inserted skewer comes out clean.
-
Cool cakes for 15 minutes in the tins and then turn onto a wire rack to cool completely before icing.
-
Pour whipping cream into bowl of standing mixer. With the whisk attachment whisk the whipping cream until it becomes fluffy and forms stiff peaks. Transfer whipped cream into a different bowl.
-
With a paddle attachment on your mixer, beat cream cheese and powdered sugar until light and fluffy. Add vanilla and mix until fully incorporated.
-
In the same bowl, gently fold in the whipped cream.
-
Keep whipped cream cheese frosting chilled until ready to use.
-
The frosting recipe yields enough frosting for covering the cake layers. If you want to add decorative elements like buttercream flowers, whip up your favourite buttercream recipe (I like using American or Swiss Meringue!) to do so.
Sweet Semolina Filo Pie (Bougatsa)

-
375 g fresh filo pastry
-
110 g (½ cup) caster sugar
-
90 g (½ cup) fine semolina
-
pinch of salt
-
1 tbsp unsalted butter
-
1 tsp vanilla extract
-
750 ml (3 cups) milk
-
120 g unsalted butter
-
3 tbsp icing sugar, to dust
-
1 tsp ground cinnamon
-
Oven temperatures are for conventional; if using fan-forced (convection), reduce the temperature by 20˚C. | We use Australian tablespoons and cups: 1 teaspoon equals 5 ml; 1 tablespoon equals 20 ml; 1 cup equals 250 ml. | All herbs are fresh (unless specified) and cups are lightly packed. | All vegetables are medium size and peeled, unless specified. | All eggs are 55-60 g, unless specified.
-
The following recipe has been tested and edited by SBS Food and may differ slightly from the podcast.
-
Combine the sugar and milk in a medium-size saucepan. Place over a medium heat and bring to a simmer, stirring to dissolve the sugar. Stirring constantly, gradually add the semolina and a pinch of salt and cook for 3 minutes until the mixture thickens. Add 1 tablespoon of butter and the vanilla extract and stir to combine. Pour the mixture into a bowl, cover the surface with baking paper and allow to cool completely.
-
Preheat oven to 200°C.
-
Melt the remaining butter and set aside. Unroll the filo pastry and place between two clean tea towels on the benchtop. Brush a 21 cm round, low-sided cake tin with butter. Brush a sheet of filo with butter and lay it in the tin with the edges overhanging. Repeat with another 9 sheets changing the angle slightly each time as you lay the filo into the tin (this creates an even edge of filo around the tin). Spoon the semolina custard evenly over the filo. Trim 10 sheets of filo into a square just big enough to cover the surface of the tin. Brush each sheet with butter and fan the sheets over the custard to cover the surface. Fold the overhanging edges towards the centre and brush with butter. Place the baking tin in the oven and bake for 25 minutes until golden.
-
Allow to cool for 10 minutes. Combine the icing sugar and cinnamon and generously dust the surface before cutting into slices.
-
Serve warm.
Tabouleh
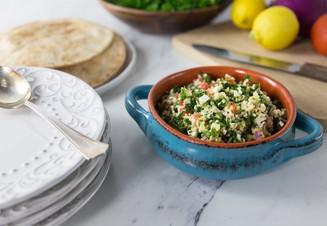
-
1 cup bulgur wheat
-
1 ½ cup water boiling
-
1 tsp Kosher salt
-
¼ cup lemon juice fresh squeezed juice
-
2 cup curly parsley fresh, finely chopped
-
2 Roma tomatoes diced
-
¼ cup red onion diced
-
¼ cup olive oil
-
1 Tbsp mint leaves fresh, chopped finely
-
¼ cup feta cheese crumbled
-
In a glass bowl place lemon juice, olive oil, salt, parsley, tomatoes, onion, mint and feta. Mix well, cover and refrigerate for 2 hours.
-
In another glass bowl, place the bulgur wheat. Add the boiling water. Cover and let it stand at room temperature for 45 minutes. Refrigerate for one hour.
-
When bulgur is cold, remove from fridge and add the vegetable mixture and mix well.
-
Serve cold
Tamarillo Sauce

-
8 ripe tamarillos (also called tree tomato)
-
1 quart heavy beef stock (or chicken stock if used to accompany poultry)
-
1 tbspn minced chives
-
1 tbspn chopped cilantro
-
1 teaspoon ground ginger
-
Salt and pepper to taste
-
Peel the tamarillos by immersing in hot water until the skin loosens.
-
Cut the tamarillos in half and remove all the seeds.
-
In a blender, puree the fruit pulp.
-
Warm the broth, then mix in the pulp and the rest of the ingredients.
-
Simmer until desired thickness. This will depend on the end use and type of meat.
-
Freeze any unused portion for later use.
Tallow Soap
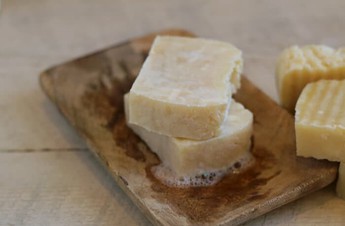
-
850g tallow or lard
-
110g 100% pure lye
-
312g distilled water
-
Melt the tallow in the crockpot (or a pot over the stove if you're in a hurry).
-
Once the fat is nearly all melted, put on your safety gear and carefully measure the lye.
-
In an area with good ventilation (I do this under with my oven fan on), carefully stir the lye into the measured water. ALWAYS add the lye to the water– do NOT add the water to the lye, as it can result in a volcano-like reaction.
-
Stir this lye/water mixture until it has dissolved and let it sit for a few minutes. There will be a chemical reaction between the lye and water, and the water will become very hot, so be careful handling the container.
-
Place the melted tallow in the crockpot (if it's not already there), and slowly stir the lye/water mixture in.
-
Switch to an immersion blender (trust me, unless you want to stand there stirring for an hour, you'll use an immersion blender), and proceed to blend the tallow, lye, and water until you reach trace.
-
Trace is when the mixture turns to a pudding-like consistency and holds its shape when you drip a bit on top.
-
Trace can take anywhere from 3 to 10ish minutes to achieve.
-
Now put the lid on the crockpot, set it on LOW, and allow it to cook for 45-60 minutes. It will bubble and froth, which is fine. Just keep an eye on it to make sure it doesn't attempt to bubble out of the pot. If it attempts an escape, just stir it back down.
-
Once it has cooked for a while and passes the "zap" test (see this post to understand what the zap test is), pour/scoop it into a mold and allow it to set for 12-24 hours.
-
Remove the solid soap from the bar, cut into bars, and allow to cure for 1-2 weeks. You can technically use the soap right away, but the dry time will produce a nicer, harder bar of soap.
Ten-Minute Chocolate Chip Cookies
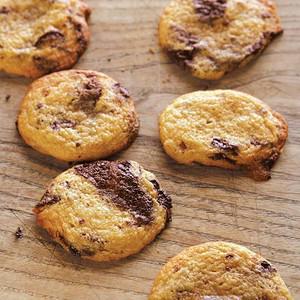
-
125g unsalted butter
-
100g caster sugar
-
75g soft light brown sugar
-
1 medium egg, lightly beaten
-
2 teaspoons vanilla extract
-
150g plain flour
-
½ teaspoon baking powder
-
A pinch of sea salt
-
100g dark chocolate, chopped into smallish chunks (or use milk chocolate, if you prefer)
-
Gently melt the butter in a small saucepan. Put both sugars into a mixing bowl, pour in the melted butter and beat well with a wooden spoon. Beat in the egg and vanilla. Sift the flour, baking powder and salt into the bowl and stir them in, then add the chocolate. You should have a pretty sloppy sort of mixture.
-
Dot heaped dessertspoonfuls of the mixture on to 2 baking sheets lined with baking parchment, leaving a good 4cm in between each one as they really spread out. Place in an oven preheated to 190°C/Gas Mark 5 and bake for 8–10 minutes, until the cookies are turning pale golden brown.
-
Remove from the oven and leave on the baking sheets for a couple of minutes to firm up. Then carefully lift the baking parchment on to a wire rack and leave to cool completely. Inevitably they will be eaten as soon as they are cool enough not to burn fingers.
Thai Beef Salad
-
1 1/2 tablespoons fresh lime juice
-
1 garlic clove, crushed
-
1 tablespoon finely chopped palm sugar
-
1 tablespoon fish sauce
-
2 teaspoons sesame oil
-
1 teaspoon soy sauce
-
2 teaspoons finely grated fresh ginger
-
1 (about 680g) beef rump steak
-
1 x 200g pkt grape tomatoes, quartered
-
1 continental cucumber, halved lengthways, thinly sliced diagonally
-
1 red onion, halved, cut into thin wedges
-
2 long fresh red chillies, halved, deseeded, thinly sliced lengthways
-
1 bunch fresh mint, leaves picked, large leaves torn
-
1 bunch fresh coriander, leaves picked
-
1 bunch fresh Thai basil, leaves picked, large leaves torn
-
55g (1/3 cup) toasted peanuts, coarsely chopped
-
4 kaffir lime leaves, centre veins removed, finely shredded
-
Whisk together lime juice, garlic, fish sauce, sesame oil, soy sauce, ginger and palm sugar in a jug. Place the steak in a glass or ceramic dish. Drizzle with half the dressing. Cover with plastic wrap and place in the fridge, turning occasionally, for 2 hours to develop the flavours.
-
Preheat a barbecue grill or chargrill pan on high. Cook steak on grill for 2-3 minutes each side for medium or until cooked to your liking. Transfer to a plate. Cover with foil and set aside for 10 minutes to rest.
-
Place the tomato, cucumber, onion, chilli, mint, coriander, basil, peanuts and lime leaves in a large bowl. Thinly slice steak across the grain and add to the salad. Drizzle with remaining dressing and gently toss to combine. Divide salad among bowls and serve immediately.
Thai Beef Salad with Noodles
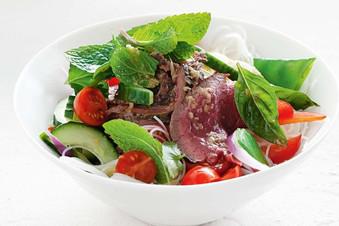
-
500g beef eye fillet, trimmed
-
1 tbs olive oil
-
125g dried rice vermicelli noodles
-
1 telegraph cucumber, halved lengthways, seeds removed, thinly sliced
-
1 red capsicum, very thinly sliced
-
1 red onion, very thinly sliced
-
250g punnet cherry tomatoes, halved
-
1 cup fresh coriander
-
1 cup fresh mint
-
1 cup fresh Thai basil or regular basil leaves
-
1 long red chilli, seeds removed, finely chopped
-
1/4 cup (60ml) lime juice
-
1 tbs sesame oil
-
2 tbs brown sugar
-
2 tbs fish sauce
-
1 tbs light soy sauce
-
1 tbs grated ginger
-
2 garlic cloves, finely chopped
-
Preheat a chargrill or barbecue on high. Brush beef with olive oil and season. Chargrill beef, turning, for 10 minutes for rare or until cooked to your liking. Loosely cover with foil and set aside to rest for 5 minutes.
-
Meanwhile, soak noodles in a bowl of boiling water for 5 minutes, then drain and refresh under cold running water. Divide among 4 serving bowls.
-
Combine the cucumber, capsicum, onion tomato, herbs and chilli in a bowl.
-
Place lime juice, sesame oil, sugar, fish and soy sauces, ginger and garlic in a screwtop jar and shake well to combine.
-
Slice beef, combine with salad and divide among the bowls of noodles, then drizzle over dressing to serve.
Thai Fish Cakes with Sweet & Sour Dipping Sauce
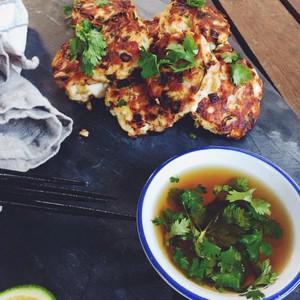
-
400g x Robinson Bream Cooked Fillets – flaked (Sub in Tuna if need be)
-
240g x Water Chestnuts - Tinned
-
2 x Eggs
-
1 x Red Chilli
-
1 x Coriander Bunch
-
20g x Ginger
-
1 x Tbs Fish Sauce
-
4 x Kaffir Lime Leaves
-
2 x Tbs Peanut Oil
-
1 x Lime
-
1 x Tbs Castor Sugar
-
2 x Tbs Rice Wine Vinegar
-
1 x Tbs Fish Sauce
-
A few coriander leaves for garnish
-
Combine your castor sugar (1 Tbs), rice wine vinegar (2 Tbs), fish sauce (1 Tbs) and squeeze your lime in as well. Gently mix until the sugar has dissolved. Pour into a pretty serving bowl and top with some coriander leaves for beauty and effect.
-
*Note you may need to slightly tweak quantities depending on the juiciness of your lime and the brand of your ingredients – you want it to be sweet, salty and sour all at the same time - what a combo piglet!
-
Finely slice your kaffir lime leaves (4) & coriander (1 Bunch).
-
Skin and finely slice your ginger and finely slice your drained water chestnuts (240g) into slivers.
-
Roll your chilli firmly around under the palm of your hand like a play dough snake, chop off his head and bang out and discard all of the seeds and then finely dice the rest of your chilli.
-
Finely dice your spring onion into thin discs.
-
Crack your eggs (2) into a bowl and whisk together with your fish sauce (1 Tbs).
-
Take your fish fillets and chop up until they are small flakes of fish.
-
Now combine your kafir lime leaves, coriander, ginger, fish, water chestnuts, whisked eggs & fish sauce, spring onion and chilli in a bowl and combine well.
-
Take about a tablespoon of the mixture at a time and roll into golf ball sized balls.
-
Heat a fry pan with your peanut oil (you may not need all of it) and once hot to trot, pop in your fish cakes.
-
After a few minutes, carefully flip these beauties and slightly squash down to flatten a little – make sure they have turned a nice golden colour before you flip them.
-
As the fish is cooked you are just gently warming them through and giving them a nice colour so no need to focus on cooking them too much – just make them look beautiful (and tell them so – self esteem is so important).
-
Once golden on both sides, gently remove from the pan and place on a lovely serving board with your glorious dipping sauce.
-
These beauties are going to rock your socks piglets. Oink!
Thai Fish Curry (Easy to Make!)

-
1 ½ lb white fish
-
3 tablespoons red Thai curry paste, divided
-
2 tablespoons coconut oil
-
½ medium onion, finely minced
-
2 tablespoons finely minced ginger
-
3 cloves garlic, finely minced
-
15 ounce can coconut milk
-
½ cup water
-
1 tablespoon fish sauce
-
1 tablespoon coconut or brown sugar
-
4 cups chopped veggies, pictured are green beans, carrots, and red bell peppers
-
Minced cilantro and lime juice, to serve
-
Cut the fish into pieces about 2-inches wide. Dry the fish with a paper towel then rub 1 tablespoon of the curry paste over the pieces.
-
Heat the oil in a large pot over medium-high heat. (See notes.) Add the onion, ginger, and garlic and cook until golden brown, about 5 minutes. Add the remaining 2 tablespoons of curry paste, coconut milk, water, fish sauce, and sugar. Add the veggies and bring the pot to a boil.
2 tablespoons coconut oil, ½ medium onion, 2 tablespoons finely minced ginger, 3 cloves garlic, 15 ounce can coconut milk, ½ cup water, 1 tablespoon fish sauce, 1 tablespoon coconut or brown sugar, 4 cups chopped veggies
-
Reduce the heat to medium-low and add the fish. Cover the pot and cook for 5 minutes, or until the fish is no longer opaque. If your fish is quite thick, you may need to flip the pieces over and cook for 1-2 minutes more.
-
Serve with a little minced cilantro and a squeeze of lime juice.
-
A low-sided pot works great for this recipe. But if you don't have one, simply use your biggest pot so that you don't have to stack the pieces of fish on top of each other.
Thai Mango Chicken Curry

-
1 tbsp oil (vegetable, canola, grape seed)
-
3 garlic cloves , minced
-
1/2 tsp ginger , minced (not critical)
-
1/2 - 1 tsp red chilli , minced (Optional. I used 1 tsp.)
-
1 small onion , sliced (brown, white, yellow) or 3 eschallots
-
1.2 lb / 600g chicken thigh fillets (or breast), cut into bite size pieces
-
4 - 5 tbsp Thai Red Curry Paste (Note 1)
-
1 can (400ml/13oz) coconut milk (full fat is better but low fat is ok too)
-
3/4 cup chicken broth
-
1 cup mango puree , preferably fresh (1 large mango) (Note 2)
-
1 tbsp fish sauce
-
2 kaffir lime leaves
-
Steamed jasmine rice
-
Coriander/cilantro leaves
-
Lime wedges
-
Fresh red chili , sliced
-
Heat oil in a skillet over medium high heat.
-
Add garlic, ginger, chilli (if using) and onion and saute until the onion is starting to soften.
-
Add chicken and cook until white all over but still raw inside.
-
Add curry paste and saute for 2 minutes until fragrant.
-
Add coconut milk and chicken broth. Bring to simmer, stirring to dissolve the curry paste into the liquid. Then add the mango, fish sauce and kaffir lime leaves.
-
Turn heat down to medium and simmer for 12 - 15 minutes, stirring occasionally, until the sauce is thickened. Adjust saltiness using fish sauce.
-
Serve over jasmine rice, garnished with coriander/cilantro, wedges of lime and slices of red chilli, if desired.
-
I use Maesri Red Curry Paste which you can get from Woolworths supermarket in Australia. I also use Ayam on occasion.
-
To make mango puree, place mango in a food processor of blender and whizz until smooth. A handheld stick blender can also be used.
-
If you can't find fresh mangoes, either defrost then puree frozen mango or use canned mango (pieces, drained, or pureed). Mango juice is not suitable because it is watered down.
-
To make this with just coconut milk, leave out the mangoes and chicken broth/stock and use 1 1/2 cups extra coconut milk (just under 1 extra can). The nutrition information for this alternative is below.
-
Nutrition per serving assuming 4 servings using MANGO puree. Note: This curry is saucier than most Thai curry recipes you'll find!
Thai Red Curry with Chicken

-
5 - 6 tbsp Thai Red Curry Paste (store bought, Maesri best) (Note 1)
-
1 quantity homemade Thai Red Curry Paste
-
2 large garlic cloves , minced
-
2 tsp fresh ginger , finely grated
-
1 tbsp lemongrass paste or finely chopped fresh (Note 3)
-
3 tbsp vegetable oil (or canola or peanut)
-
1 cup (250 ml) chicken broth/stock , low sodium
-
400 ml / 14 oz coconut milk (full fat!)
-
6 kaffir lime leaves (Note 4)
-
1 tbsp sugar (white, brown or palm)
-
2 tsp fish sauce , plus more to taste
-
350g / 12 oz chicken thighs (boneless and skinless), cut into 0.75 / 1/3" thick slices (Note 5)
-
150 g / 5 oz pumpkin or butternut squash, cut into 1.5cm / 3/5" cubes (~1 heaped cup)
-
120 g / 4oz green beans , trimmed and cut into 5cm/2" pieces
-
12 Thai basil leaves (Note 6)
-
Fresh red chilli slices (small chilli - spicy, large = less spicy)
-
Fresh coriander / cilantro leaves
-
Heat oil in a large heavy based skillet over medium high heat.
-
Add curry paste and Extras (if using jar paste) and cook for about 2 minutes so it "dries out" (See video)
-
Add chicken broth and stir to dissolve paste. Simmer rapidly for 3 minutes or until liquid reduces by half.
-
Add coconut milk, lime leaves, sugar and fish sauce. Stir, then add chicken.
-
Spread chicken out, bring to simmer, then turn heat down to medium. Simmer for about 8- 10 minutes or until Sauce reduces, the chicken is cooked and the sauce is almost at the thickness you want.
-
Do a taste test. Add more fish sauce (or even shrimp paste) to add more saltiness, sugar for sweetness.
-
Add pumpkin and beans, stir. Cook for 3 minutes or until pumpkin is just cooked through and Sauce is thickened - see video for Sauce thickness.
-
Remove from heat. Stir through a handful of Thai basil leaves.
-
Serve over rice, garnished with fresh red chilli slices and fresh coriander/cilantro leaves, if desired.
-
Curry paste - if using store bought, try to get Maesri brand if you can, it's the best (small can, very cheap). Sold at major grocery stores (Woolies, Coles) or Asian stores. Otherwise, use your favourite.
-
Use 5 tbsp if you are unsure about spiciness, or 6 tbsp (or the whole can!) if you are sure you can handle it!
-
Note: curry paste in jars has a more concentrated flavour than fresh homemade paste so you need less. The video shows homemade paste.
-
Extras - these are to freshen up store bought curry paste. Not required if using homemade.
-
Lemongrass paste - convenience tubes of cold pressed lemongrass paste, the next best thing to peeling / finely chopping fresh lemongrass! Can sub with 2 tsp finely minced fresh lemongrass.
-
Kaffir Lime Leaves are the leaves of a kaffir lime tree. It's used to add earthy citrus flavours into Asian food. Sold at large grocery stores and Asian stores. Dried is an ok substitute (same amount), but I really urge you to try to find fresh if you can because it adds that "something-something" that really makes this "restaurant quality".
-
Chicken - Thigh is best for this recipe because it's nice and juicy. But breast and tenderloin is fine too.
-
Thai Basil looks like normal basil but has pointier leaves and a purplish tinge. It tastes like basil aniseed. Not the end of the world if you can't find it - ordinary basil will be an adequate substituted but only use a small handful.
-
General recipe notes:
-
Spiciness: Thai Red Curry is not supposed to be crazy spicy but it has a nice tingle to it.
-
Sauce thickness varies drastically between restaurants - at some it is almost watery, at others it is really thick and seems to be made with coconut cream. I like mine in between - a sauce that is pourable but with a gravy like consistency. I am not a fan of very sweet Red Curry, but if you are, just add more sugar.
-
Consistency: Thai red curry sauce doesn't look completely smooth, it looks a bit split because of the oil and that's the way it is supposed to be.
-
Stuff in it: There are no hard and fast rules about what goes into a Thai Red Curry. You'll find Thai eggplant in curries at very authentic Thai restaurants but to be honest, I am not a huge fan of them - they are like tiny eggplants and kind of hard (also not easy to find in shops). I'd say that the two most common vegetables I've noticed are pumpkin and green beans or snake beans. While pumpkin may not sound "Thai", don't dismiss it, it is spectacular in red curry for both the texture, the sweetness and also because it soaks up the sauce.
-
Nutrition per serving, curry only.
Thai Style Peanut Pork

-
1 tbsp sunflower oil
-
1 kg (2.2 lbs) diced lean pork shoulder
-
1 onion peeled and chopped
-
2 tbsp. ground coriander
-
1 tbsp ground cumin
-
1 tsp ground ginger
-
¼ tsp garlic salt
-
300 ml (1 1/4 cups) chicken/veg stock use vegetable bouillon for gluten-free
-
400 ml (14 oz) can full-fat coconut milk
-
2 heaped tbsp peanut butter check if you need it to be gluten-free, it usually is though
-
2 tbsp fish sauce
-
juice of 1 lime
-
100 g (1 cup) beansprouts these can be fresh, or canned beansprouts that have been drained
-
boiled rice
-
fresh coriander cilantro – roughly torn
-
green chillies I use Fresno chillies, chopped
-
chili flakes
-
steamed tenderstem broccoli (optional)
-
Preheat the oven to 170C/325F (fan), then heat the oil in a large casserole pan on a high heat until hot.
-
Add the pork, and brown on all sides – takes about 6-8 minutes.
-
Turn down to a medium heat and add the onions. Cook for 5 minutes, moving around the pan regularly, until the onions soften.
-
Add the coriander, cumin, ginger, and garlic salt and stir.
-
Add the stock, coconut milk, peanut butter, and fish sauce. Stir and bring to a gentle simmer.
-
Then place a lid on the pan and place in the oven to cook for 90 minutes to 2 hours until the pork falls apart tender. NOTE: Check a couple of times in the last hour, if it's looking a little dry then you can stir in a splash of water.
-
Once the pork is tender, remove from the oven and stir in the lime juice, then add the beansprouts.
-
Stir and place back in the oven for 10 minutes.
-
Remove from the oven and stir. Serve over boiled rice, garnished with fresh coriander. Add some chopped fresh chillies and/or dried chilli flakes if you like a bit of heat.
boiled rice, fresh coriander, green chillies, chili flakes, steamed tenderstem broccoli
The Chocolate Cake That Fueled the Manhattan Project
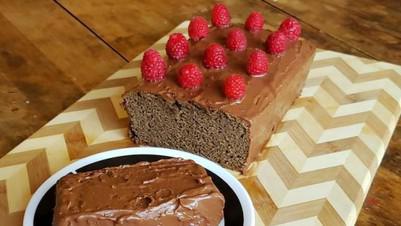
-
2 eggs beaten
-
1 cup granulated sugar
-
2 1/3 cups flour (sifted 3 times)
-
1/2 teaspoon salt
-
2 teaspoons baking powder
-
1 teaspoon vanilla
-
1/2 cup milk
-
1 1/2 (43g) ounces baker's chocolate
-
4 (56g or 1/4cup) tablespoons butter
-
3 heaping tablespoons cocoa
-
1 1/2 cups powdered sugar
-
1/2 teaspoon vanilla
-
2 tablespoons melted butter
-
2 tablespoons coffee or milk
-
Preheat oven to 250ºF. Grease and flour a 9-inch by 5-inch loaf pan. Mix eggs, sugar and flour. Gradually mix in milk, then salt, vanilla and baking powder. Melt baker's chocolate and butter then beat with remaining ingredients until light.
Bake for 15 minutes at 120C, then increase to 135C for 15 minutes, then 150C for a total of 1 hour bake time.
Prepare icing by sifting sugar and cocoa together, then beating all ingredients until smooth. Top with fresh raspberries.
Thyme Pear and Brie Tart
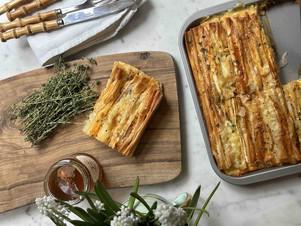
-
10 sheets of filo pastry
-
10 slices of brie
-
2 pears, thinly sliced
-
20g butter, melted
-
2 eggs
-
200ml double cream
-
Thyme leaves
-
Honey
-
Sea salt and freshly ground black pepper
-
Pre-heat the oven to 180oC fan.
-
Gently fold up the filo pastry sheets, gathered like a fan (2 sheets at at time), alongside each other, quite snug in a baking tray. Brush the pastry with the melted butter.
-
Place the slices of brie cheese and pear, in between the sheets.
-
Whisk together the eggs, cream and season with sea salt and freshly ground black pepper. Spread this all over the pastry.
-
Bake in the pre-heated oven for 40 minutes.
Toad in the Hole

-
2 tbsp olive oil
-
500g thick beef sausages or pork sausages
-
3/4 cup White Wings Plain Flour
-
1/2 tsp salt
-
2 eggs
-
1 1/4 cups milk
-
1 tbsp rosemary leaves, chopped
-
Preheat oven to 200°C. Pour oil
-
into a 5cm deep, 25cm x 35cm (base) roasting pan. Place into oven for 5 minutes or until hot.
-
Using tongs, carefully add sausages to hot oil. Bake for 10 minutes, turning after 5 minutes, or until lightly browned.
-
Meanwhile, sift flour and salt into a bowl. Make a well in the centre. Whisk eggs, milk and rosemary together in a jug. Add to flour mixture. Mix until batter is smooth.
-
Remove roasting pan from oven. Carefully pour batter over sausages. Bake for 30 to 35 minutes or until puffed up and golden. Serve.
Tomato & Cucumber Salad
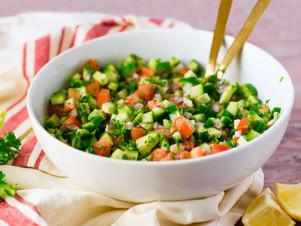
-
1 pound Persian cucumbers, diced
-
1 pound fresh ripe tomatoes, seeded and diced
-
1/3 cup minced onion (optional)
-
1/2 cup minced fresh parsley
-
3 tablespoons extra virgin olive oil
-
3 tablespoons fresh lemon juice
-
Salt to taste (I use about 1/2 tsp)
-
Fresh and tasty Israeli Salad with cucumbers, tomatoes, parsley, olive oil, lemon juice, and onion.
-
0 seconds of 59 seconds
-
Here is the way I like to dice the Persian cucumbers-- it produces small, even, triangular pieces. Slice the Persian cucumber in half lengthwise.
-
Slice each half into 4 slices lengthwise, so you have 8 long, thin pieces total.
-
Hold the long, thin pieces together with one hand, and slice the bunch into very small pieces with the other hand. Note: Persian cucumbers have lots of little seeds, which add to their flavor. If you have trouble digesting seeds, you can seed the cucumber easily by slicing it in half lengthwise and scooping out the seed-filled center.
-
Place the diced cucumbers into a large mixing bowl along with all the other ingredients.
-
Mix until vegetables are well coated with parsley, oil, lemon juice, and salt.
-
Best served fresh at room temperature. You can also serve chilled for a more refreshing salad.
Tomato and Eggplant Compote
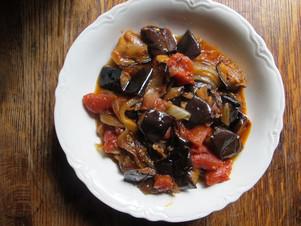
-
1/3 cup canola oil, more or less
-
1 pound eggplant, preferably a small variety, cut into 1 1/2-inch cubes
-
Fine sea salt
-
4 tablespoons extra-virgin olive oil
-
1/2 large onion
-
3 cloves garlic, thinly sliced
-
2 beefsteak tomatoes, peeled and cut into chunks
-
1 small cinnamon stick
-
2 dried bay leaves
-
1 teaspoon honey
-
Freshly ground black pepper
-
1/2 lemon
-
Heat half of the canola oil in a large skillet over medium-high heat. Add one-third of the eggplant and fry until dark brown on both sides, about 4 minutes. Transfer the eggplant to a paper towel-lined plate, blot it well, and cover with more paper towels. Repeat with the remaining eggplant, adding the rest of the canola oil as needed. Season the fried eggplant with a little salt.
-
Heat 2 tablespoons of the olive oil in the skillet and add the onion. Cook over medium-high heat until darkened around the edges, about 5 minutes. Add the garlic and cook for another 2 minutes.
-
Add the eggplant, tomatoes, cinnamon stick, bay leaves, honey, 1/2 teaspoon salt, pepper, and the remaining 2 tablespoons olive oil. Stir gently, turning the vegetables over to combine. Reduce the heat to low, cover the pan, and cook until the eggplant is soft and the mixture is liquidy, about 20 minutes. Uncover the pan, and don't stir, but shake the pan to shift things around. Continue to cook over medium-low heat until the thick liquid clings to the vegetables, about 15 minutes.
-
Squeeze the lemon juice into the pan and shake the pan softly to incorporate. Turn the vegetables out into a shallow bowl, remove the cinnamon stick and bay leaves, and serve warm or at room temperature, as a side dish or an appetizer with bread or pita.
Tomato Conserva Bruschetta
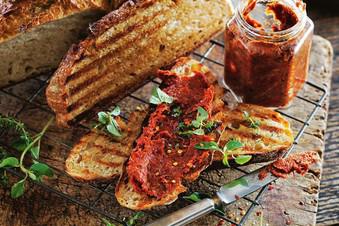
-
Tomato seeds and skin mixture (recipe below)
-
Olive oil, to cover, plus extra to drizzle
-
4 slices sourdough, grilled
-
Dried chilli flakes, oregano and thyme, to serve
-
5kg ripe red tomatoes, washed, halved
-
500g onions, chopped
-
1 garlic bulb, cloves separated, peeled, bruised
-
To make tomato seeds and skin mixture, preheat oven to 180°C. Grease 2 baking trays and line with baking paper.
-
Spread tomatoes, onion and garlic evenly across prepared trays, then season with 1 tbs salt flakes and 1 tsp freshly ground black pepper. Divide oil evenly between trays and toss to combine. Roast, swapping trays halfway, for 45 minutes or until tomatoes are blistered and onion has softened. Set aside to cool for 30 minutes, then stir through basil.
-
Pass tomato mixture through a mouli or nylon sieve into a bowl. Repeat several times, together with the seeds and skins, to extract as much juice as possible. Reserve tomato juice for use in passata or pasta sauces and collect any remaining seeds and skins to make the tomato conserva.
-
For the conserva bruschetta, preheat oven to 100°C. Grease a large baking tray and line with baking paper.
-
Spread tomato seeds and skin mixture over prepared tray and roast for 1 hour 45 minutes or until slightly charred around the edges.
-
Transfer roasted seeds and skin to a bowl and, using a stick blender, whiz until smooth, then tightly pack into a sterilised jar. Cover with a 1cm-deep layer of oil and store, chilled, for up to 1 month.
-
To make bruschetta, spread tomato conserva onto grilled sourdough and drizzle with extra oil. Scatter with chilli flakes, oregano and thyme to serve.
Tomato Passata Recipe: How to Make the Classic Italian Sauce
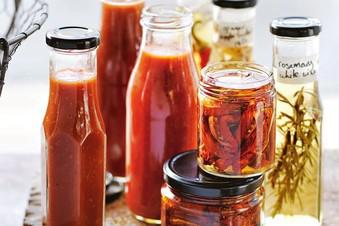
-
5kg ripe red tomatoes, washed, halved
-
500g onions, chopped
-
1 garlic bulb, cloves separated, peeled, bruised
-
1/2 cup (125ml) olive oil
-
1 bunch basil, leaves torn
-
Preheat oven to 180°C. Grease 2 baking trays and line with baking paper.
-
Spread tomatoes, onion and garlic evenly across prepared trays, then season with 1 tbs salt flakes and 1 tsp freshly ground black pepper. Divide oil evenly between trays and toss to combine. Roast, swapping trays halfway, for 45 minutes or until tomatoes are blistered and onion has softened. Set aside to cool for 30 minutes, then stir through basil.
-
Pass tomato mixture through a mouli or nylon sieve into a bowl. Repeat several times, together with the seeds and skins, to extract as much juice as possible. Reserve any remaining seeds and skins to make tomato conserva.
-
Sterilise bottles and lids and pour passata into hot jars. Tap jars on a work surface and run a clean knife around the inside to remove any air bubbles. Wipe the rim of the jars with paper towel and seal.
-
Line the base of a large stockpot (it should be deep enough to submerge the jars under water) with a tea towel and, working in batches if necessary, add jars, making sure they don’t touch the sides of the pot or one another.
-
Roughly matching the water temperature to the temperature of the jars (this prevents the jars breaking when the water is added), pour in enough water to completely cover the jars. Slowly bring to the boil over medium heat. Boil for 40 minutes, adding more boiling water when necessary so the jars are completely submerged at all times, or until the jar lids are puffed up and convex. Using a heatproof jug, carefully remove enough water from the pot to allow you to carefully remove jars from water using oven gloves or a thick tea towel. Set aside at room temperature overnight.
-
The next day, the jar lids should be concave, confirming they are vacuumsealed. If lids are not concave, passata should be stored chilled and used within 2 weeks. Sealed jars can be stored in a cool, dark place for up to 1 year.
Tomato Relish
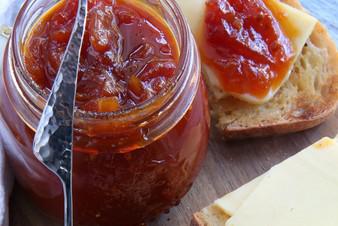
-
1 kg tomatoes - you can use any and all tomatoes here and happily mix varieties
-
2 cloves garlic
-
1 tsp whole cloves
-
1 tsp peppercorns
-
1 tsp allspice
-
1 tsp ground ginger
-
1 tsp salt
-
Dash cayenne pepper or can add tbsp chilli flakes if you like it hot
-
1/2 cup white wine vinegar
-
Whizz tomatoes in the food processor.
-
Place all the ingredients, except the sugar, in a heavy based pot and simmer gently for 30 minutes.
-
Add 200g sugar and stir until dissolved.
-
Simmer again for 30 minutes or until thickened.
-
Pour into sterlised jars and seal.
Tomato Salsa
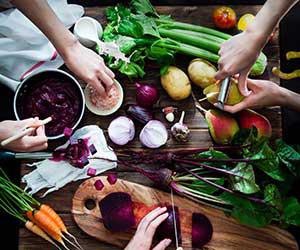
-
6 ripe tomatoes
-
1 big bunch of fresh coriander
-
1 onion
-
2 fresh jalapeño or green chillies
-
1 large clove of garlic
-
1 to 2 limes
-
extra virgin olive oil
-
Finely chop the tomatoes and coriander (stalks and all) and place into a large bowl.
-
Peel and finely chop the onion, deseed and finely chop the chillies, then scrape into the bowl. Peel and finely grate in the garlic.
-
Squeeze in the juice from 1 lime, add 2 tablespoons of extra virgin olive oil, and mix well. Season to taste with sea salt, black pepper and more lime juice, if needed.
-
Serve straightaway or cover and set aside for a few hours to let all those flavours develop.
Tongue Nello Stile Di Stefano
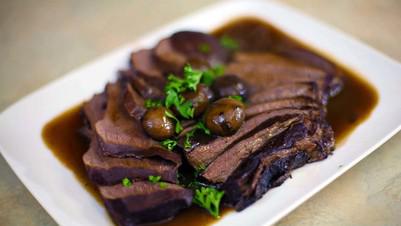
-
1 beef tongue
-
Olive Oil
-
1 Onion
-
5 Cloves of Garlic
-
5 Sticks of Celery
-
2 Carrot
-
2 Sage Leaves
-
1 piece Star anise
-
5 Cloves
-
Pancetta
-
Red wine
-
Simmer tongue in water for two hours.
Immerse tongue in ice water for five to ten minutes and peel off skin.
Braise chopped onion, carrot, garlic and celery and sage in olive oil for a few minutes.
Cut holes in the tongue and poke in chopped pancetta.
Place tongue into vegetable mix with a few cloves a piece of star anise and red wine.
Cover and braise for one hour.
Remove tongue from pot.
Strain braise mix to make a sauce.
Traditional French Scallops Sage Cream
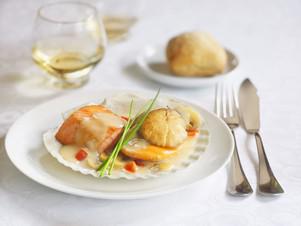
-
1 1/2 pound sea scallops (King size are best)
-
1/4 salt
-
1/8 teaspoon ground black pepper
-
2 tablespoons olive oil
-
2 tablespoons butter
-
1/2 cup finely diced carrots
-
1/2 cup finely diced celery
-
1/2 cup finely diced onions
-
1/2 cup chopped shallots
-
3/4 heavy cream
-
6 fresh sage leaves, finely chopped
-
Gather the ingredients.
-
Before starting, it is important that you have prepared all your ingredients ready to cook. If you do this then cooking the dish will be so much easier and will also be successful.
-
Preheat a large skillet over medium heat. Heat the oil and the butter in the skillet take care not to burn them.
-
Add the carrots, celery, and onions to the skillet, lower the heat to medium-low, and sauté the mirepoix for five minutes, or until the vegetables turn tender but not soft. Transfer the sautéed mirepoix to a plate and cover it with foil.
-
Preheat a large skillet over medium heat. Heat the oil and the butter in the skillet. Add the carrots, celery, and onions to the skillet, lower the heat to medium-low, and sauté the mirepoix for five minutes, until the vegetables turn tender. Transfer the sautéed mirepoix to a plate and cover it with foil.
-
Turn up the heat to medium-high. Season the scallops with salt and black pepper and sauté them in the skillet for 1 1/2 minutes on each side, no more, no less.
-
Transfer the pan-seared scallops to a plate and cover them with foil.
-
Sauté the shallots in the skillet for 4 minutes; add 1 teaspoon of butter, if needed. Add the heavy cream to the shallots and bring the sauce to a boil for 1 minute. Remove the cream sauce from the heat and stir in the sage leaves. Leave to infuse for a few minutes, then remove the leaves.
-
Drizzle the sage cream on a warm serving plate, spoon a small mound of mirepoix onto the center of the plate, and arrange a few scallops on top of the mirepoix.
Trombocini Relish
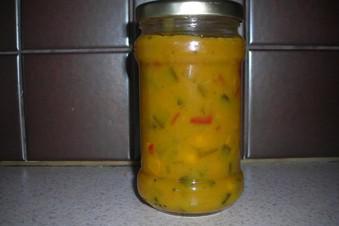
-
700 g trombocini diced
-
1 red capsicum diced
-
1 cup corn cob kernels
-
1 onion diced
-
1 1/2 cups white vinegar
-
1 cup white sugar
-
4 tsp ground turmeric
-
4 tsp mustard powder
-
1 tsp allspice
-
1/4 tsp curry powder
-
2 garlic cloves crushed
-
1 tbs vegetable oil
-
1 tbs salt
-
2 tbs cornflour
-
1 tbs water
-
Combine all ingredients, except cornflour and water, in a pot and simmer for 1 hour, stirring often.
-
Combine cornflour and water, stir into zucchini relish and simmer for a further 5 minutes.
-
Transfer hot relish to sterilised jars with sealed lids.
-
Makes approximately 1 litre.
Tuna and Chorizo Risotto Bake
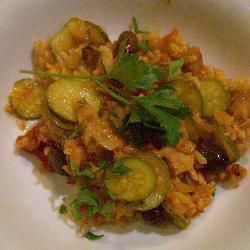
-
2 tablespoons extra virgin olive oil
-
1 onion, finely chopped
-
1 clove of garlic, finely chopped (optional)
-
1 fresh chorizo sausage, chopped
-
handful of pitted Kalamata olives
-
1 teaspoon sea salt
-
180g arborio rice
-
375ml chicken stock or water
-
400g tin chopped tomatoes
-
185g tin tuna packed in spring water
-
3-4 small courgettes, thinly sliced
-
freshly ground black pepper
-
2 tablespoons finely chopped flat-leaf parsley
-
grated Parmesan cheese, for serving (optional)
-
Preheat the oven to 200 C / Gas 6.
-
Heat a three-litre ovenproof casserole (with a lid) over a medium heat. Add the olive oil, onion, sausage, garlic and sea salt and stir for five minutes, or until the onion is soft and translucent.
-
Add the rice to the dish and stir for another minute. Add the stock or water and the chopped tomatoes and bring to simmering point. Stir in the tuna, courgette and season with black pepper.
-
Cover the dish and bake the risotto in the pre-heated oven for thirty minutes, or until the rice is cooked. Stir in the olives.
-
Scatter parsley over the top, sprinkle with grated Parmesan if desired, and serve in the dish.
Tunisian Almond Orange Lemon Cake

-
145 g ground almonds (almond flour)
-
200 g granulated sugar
-
1 and ½ tsp baking powder
-
200 ml sunflower or vegetable oil
-
4 eggs
-
grated zest of 1 large orange
-
grated zest of 1 lemon
-
85g sugar (or less if you prefer)
-
juice of 1 orange
-
juice of ½ lemon
-
2 cloves (optional)
-
1 cinnamon stick (optional)
-
Prepare a 20cm/9in round cake pan by lining bottom and sides with parchment paper (siliconized paper).
Mix the almonds, sugar and baking powder. Add the oil and eggs and beat well. Stir in the orange and lemon zest. Pour in the pan put into a COLD oven. Turn oven ON and set the heat to 190°C/ 375°F. Bake for 40-50 minutes until the cake is a rich brown on top and a skewer inserted into the centre comes out clean (this will depend on your oven gas or electric but start with 40 min see if you smell any burning or if it is dry).
While the cake is baking, make the syrup by putting all the ingredients into a pan, bring them gently to a boil, stirring until the sugar has dissolved. Simmer for 3 minutes. (you need to reduce the volume to about half the orginal amount otherwise the cake would get too soggy). Strain it to remove chunks.
Once is cake is baked, pull it out and let it cool for 5 minutes in the pan. It will dissociate from the parchment paper. Run a thin flat knive around the edge of the cake to make sure the paper is off. Remove the parchment paper lining the sides then turn the cake out onto a plate. Carefully peel the parchment off the bottom. Pierce holes in the warm cake with a skewer or toothpick and slowly spread the syrup over it until it is all soaked up. Let it sit until cool then loosely cover and place in the fridge overnight to allow it to soak the juice well. Bon appétit.
Turkish Bread
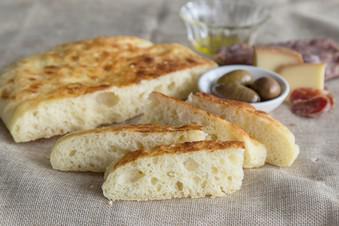
Tags:
Bread
-
2 1/2 teaspoons yeast (active dry)
-
1 1/4 cups water (warm)
-
2 teaspoons sugar
-
4 tablespoons butter (or margarine)
-
3 1/2 cups flour
-
2 1/2 teaspoons salt
-
1 egg yoke
-
Garnish: sesame seeds
-
Garnish: nigella seeds
-
In a large bowl, stir the dry yeast and warm water until the yeast is dissolved.
-
Add the sugar and stir again until it has dissolved. Set the yeast mixture aside in a warm place to let it develop. You’ll know it’s ready when you see bubbles on the surface.
-
After 15 minutes, melt the butter then let it cool down. Stir it into the yeast mixture.
-
In a separate bowl, mix together the flour and salt. Add the dry ingredients to the yeast mixture.
-
Knead the dough first in the bowl, then on a lightly floured surface until it forms a smooth ball.
-
Grease the inside of a deep bowl with a little olive oil, place the dough inside, and cover with plastic wrap.
-
Allow the dough to rise in a warm place for about 15 minutes. Turn the dough out onto your floured surface and knead again for 15 minutes.
-
Oil the bowl again and add the dough, this time letting it rise for about 2 hours. The dough should double in size.
-
Preheat the oven to 480 F (250 C). Turn out the dough onto your floured surface and flatten it with your hands.
-
Cut the dough in half, then cut each half into 3 even-sized pieces.
-
Form the pieces into balls and cover them with plastic wrap and let them rise on the floured surface for 15 minutes.
-
Using your hands or a rolling pin, make a disk out of each piece of dough.
-
Continue to flatten the disk until it becomes very thin. Use extra flour to keep it from sticking to your hands and the surface.
-
Sprinkle sesame and nigella seeds onto the dough and roll it in with the rolling pin with one last stroke.
-
Grease two large baking trays with a little olive oil and place 3 pieces of dough on each one.
-
Once the loaves are ready for baking, use the end of a wooden spoon dipped in flour and poke holes in the bread.
-
Whisk the egg yolk and one tablespoon of olive oil together and brush over the loaves.
-
Sprinkle with the seeds and salt
-
Bake for about 8 minutes until the centers puff up high and they begin to brown. If you have time, bake them one by one in the very center of the oven for the best puff-up results.
Tzatziki Recipe (Greek Cucumber Yogurt Sauce)
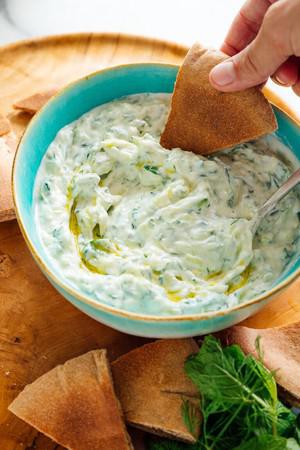
-
2 cups grated cucumber (from about 1 medium 10-ounce cucumber, no need to peel or seed the cucumber first, grate on the large holes of your box grater)
-
1 ½ cups plain Greek yogurt
-
2 tablespoons extra-virgin olive oil
-
2 tablespoons chopped fresh mint and/or dill
-
1 tablespoon lemon juice
-
1 medium clove garlic, pressed or minced
-
½ teaspoon fine sea salt
-
Working with one big handful at a time, lightly squeeze the grated cucumber between your palms over the sink to remove excess moisture. Transfer the squeezed cucumber to a serving bowl, and repeat with the remaining cucumber.
-
Add the yogurt, olive oil, herbs, lemon juice, garlic, and salt to the bowl, and stir to blend. Let the mixture rest for 5 minutes to allow the flavors to meld. Taste and add additional chopped fresh herbs, lemon juice, and/or salt, if necessary (I thought this batch was just right as-is).
-
Serve tzatziki immediately or chill for later. Leftover tzatziki keeps well, chilled, for about 4 days.
-
Recipe adapted from my cookbook, Love Real Food.
Vanilla and Pea Cake with Lemon Icing
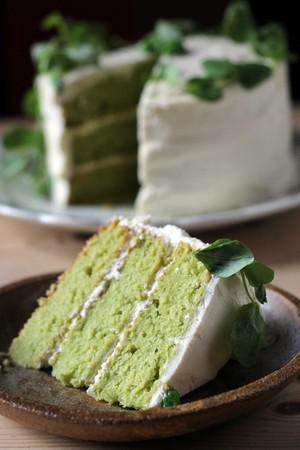
-
275g (2 cups) fresh or frozen peas
-
200g (3/4 cup) unsalted butter, softened
-
150g (3/4 cup) granulated sugar
-
3 eggs
-
2 teaspoons vanilla extract
-
zest and juice of ½ lemon
-
250g (2 cups) plain flour
-
2 teaspoons baking powder
-
½ teaspoon salt
-
150g (2/3 cup) unsalted butter, softened
-
300g (2 ½ cups) powdered icing sugar
-
Zest and juice of ½ a lemon
-
Pea shoots (optional)
-
lemon zest (optional)
-
Preheat the oven to 160C/325F. Grease and line two 9” cake pans (or three 6” pans, as I did in the pictures).
-
Boil the peas for a few minutes, drain, refresh under cold water and puree until completely smooth. Set aside.
-
In a large bowl, cream together the butter and sugar until light and fluffy. Beat in the eggs, one at a time, then beat in the cooled pea puree, vanilla, zest and lemon juice.
-
Sift in the flour, baking powder and salt and stir to gently combine.
-
Spoon the mixture into the prepared tins, push to the edges and level, then bake for 25 minutes or until an inserted skewer comes out clean. Cool for 10 minutes in the tins and then turn onto a wire rack to cool completely before icing.
-
In a large bowl, cream the butter until fluffy. Add in the icing sugar and beat. Beat in the zest and a little of the lemon juice. Add more lemon juice to make it a frosting consistency and beat again. Store in the fridge until ready to use.
-
Spread a little of the buttercream between the layers of the completely cooled cakes and sandwich together. Cover the cake in the remaining buttercream and decorate with pea shoots and lemon zest.
Vanilla Strawberry Bake
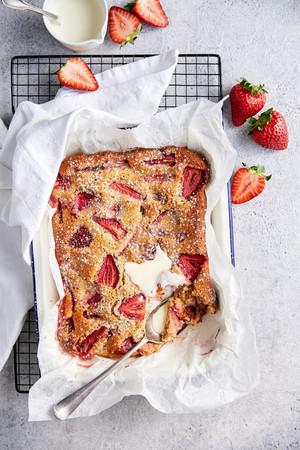
-
500g Strawberries, rinsed
-
1 1/2 tsp vanilla essence
-
1 tsp cinnamon powder
-
Juice of 1/2 lemon
-
Zest of 1/2 lemon
-
4 egg whites
-
160g unsalted butter, melted
-
180g caster sugar
-
80g self raising flour
-
130g ground almond meal
-
Preheat the oven to 170°C
-
Grease and line a high sided baking tray (29cm x 23cm) with baking paper and set aside.
-
In a medium bowl add the rinsed strawberries - cut in half or if they are very large cut them into quarters. Followed by adding the vanilla essence, 1/2 tsp cinnamon powder, 2 tbsp caster sugar, the lemon juice and zest. Toss to combine and coat the strawberries, allow them to sit for 15-20 minutes while the flavours of the strawberries come out.
-
To make the cake batter; combine in a large mixing bowl the remaining caster sugar, almond meal, self-raising flour, remaining 1/2 tsp cinnamon along with the melted butter, stir to combine.
-
Whisk the egg whites up in a separate bowl until they are light and fluffy, using a spatula, combine them with the cake batter by folding them in.
-
Fold in 3/4 of the strawberries plus 3 dessert spoons of the strawberry liquid.
-
Pour out the batter into the pre-prepared baking tray using a spatula. Place the remaining strawberries on the top evenly spread out.
-
Bake for 35-40 minutes or until a golden colour forms.
-
Serve hot from the oven with fresh pouring cream or yogurt.
-
Cook / prep time: 45-50 minutes
Vanilla/ Sponge Cake

-
2 cups plain / all purpose flour (cake flour OK too, Note 1)
-
2 1/2 teaspoons baking powder ( check it's still active, Note 2)
-
1/4 tsp cooking salt (kosher salt)
-
4 large eggs (50 – 55g / 2 oz each), at room temp (Note 3)
-
1 1/2 cups caster / superfine sugar (granulated/regular ok too, Note 2)
-
115g / 1/2 cup unsalted butter , cut into 1.5cm / 1/2” cubes (or so)
-
1 cup milk , full fat (Note 5)
-
3 tsp vanilla extract , the best you can afford (Note 6)
-
3 tsp vegetable or canola oil (Note 7)
-
225g / 2 sticks unsalted butter , softened
-
500g / 1 lb soft icing sugar / powdered sugar , SIFTED
-
3 tsp vanilla extract
-
2 – 4 tbsp milk , to adjust thickeness
-
Preheat oven to 180°C/350°F (160°C fan) for 20 minutes before starting the batter (Note 8). Place shelf in the middle of the oven.
-
Grease 2 x 20cm / 8” cake pans with butter, then line with parchment / baking paper. (Note 9 more pan sizes) Best to use cake pan without loose base, if you can.
-
Whisk flour, baking powder and salt in a large bowl. Set aside.
-
30 sec beat: Beat eggs for 30 seconds on speed 6 of a Stand Mixer fitted with a whisk attachment, or hand beater.
-
Slowly add sugar: With the beater still going, pour the sugar in over 45 seconds.
-
Triple volume: Then beat for 7 minutes on speed 8, or until tripled in volume and white.
-
Heat Milk-Butter (Note 5): While egg is beating, place butter and milk in a heatproof jug and microwave 2 minutes on high to melt butter (or use stove).
-
Gently add flour: When the egg is whipped, scatter 1/3 flour across surface, then beat on Speed 1 for 5 seconds. Add half remaining flour, then mix on Speed 1 for 5 sec. Add remaining flour, then mix on Speed 1 for 5 – 10 sec until the flour is just mixed in. Once you can’t see flour, stop straight away.
-
Combine milk, vanilla & oil – Pour hot milk, vanilla and oil into the now empty flour bowl.
-
Lighten with some Egg Batter: Add about 1 1/2 cups (2 ladles or so) of the Egg Batter into the Milk-Butter (don't need to be 100% accurate with amount). Use a whisk to mix until smooth – you can be vigorous here. Will look foamy.
-
Slowly add milk: Turn beater back on Speed 1 then pour the Milk mixture into the Egg Batter over 15 seconds, then turn beater off.
-
Scrape and final mix: Scrape down sides and base of bowl. Beat on Speed 1 for 10 seconds – batter should now be smooth and pourable.
-
Pour batter into pans.
-
Knock out bubbles: Bang each cake pan on the counter 3 times to knock out big bubbles (Note 10 for why)
-
Bake 30 minutes or until golden and toothpick inserted into centre comes out clean.
-
Turn out & cool: Remove from oven. Cool in cake pans for 15 minutes, then gently turn out onto cooling racks. If using as layer cakes, cool upside down – slight dome will flatten perfectly. Level cake = neat layers.
-
Frost: Once cake layers are fully cool, top with frosting of choice, or cream and fresh berries or jam. See list of ideas in post!
-
Beat butter with paddle attachment in stand mixer for 3 minutes on high until it changes from yellow to almost white, and it becomes fluffy and creamy.
-
Add icing sugar / powdered sugar gradually in 3 lots, beating slowly (to avoid a powder storm) then once mostly incorporated, beat on high for a full 3 minutes until fluffy.
-
Add vanilla and milk, then beat for a further 30 seconds. Use milk only if needed to make it lovely and soft but still holds it's form (eg for piping). Use immediately. (If you make ahead, refrigerate then beat to re-fluff).
-
To ensure success:
-
Read recipe from start to finish before starting;
-
Make sure your baking powder is not past its expiry – here’s how to check;
-
Work in order of steps per recipe;
-
Don’t incorporate add-ins like funfetti or blueberry (they sink); and
-
Once you start, keep going until it’s in the oven. Do not at any point leave batter sitting around – bubbles will subside!
-
Stand Mixer speeds are for a Kitchen Aid which has 10 speed settings. Hand beater works for same times and speeds (though not as powerful, I have found that the ability to move around bowl makes it just as effective).
-
Cake flour works just fine with this recipe, but butter and vanilla flavour, and crumb is ever so slightly better using plain / all-purpose flour. Also, cake flour makes the cake surface sweaty and sticky the next day.
-
Caster / superfine sugar are finer grains than regular / granulated sugar so it dissolves when whipped with the eggs. Regular sugar sometimes doesn’t fully dissolve which doesn’t affect the cake rise or texture but can leave some small brown sugar specks on the surface. Not a big deal – just visual if serving undecorated.
-
Eggs – important to be at room temp as they fluff better when whipped which is key to the fluffy texture of this cake. Also, fresher eggs aerate better = better rise. Old eggs don’t fluff as well.
-
Quick way to warm up fridge cold eggs – place in a large bowl, cover with warm tap water (just warm, not hot), leave for 5 minutes. Wipe dry (to avoid residual water dripping into bowl), then use per recipe.
-
Large eggs – 50 – 55g / 2 oz per egg this is the industry standard of egg sizes sold in cartons labelled as “large eggs” in Australia and the US. If your eggs are significantly larger or smaller in size, just weigh your eggs and use 200 – 220g / 8 oz in total (including shell) or 180 – 200g / 7.3 oz in total excluding shell (this is useful if you need to use a partial egg to make up the total required weight. Just crack eggs, whisk THEN pour into a bowl to measure out what you need).
-
Baking powder – dead baking powder is a common problem with cake fails, even if not past the expiry date. Here’s how to check yours is still good.
-
Baking soda (bi-carb) won’t make the cake rise quite as well. If you have no choice, then use 3/4 teaspoons of baking soda.
-
Milk – if you sub with lower fat milk then the texture of the crumb becomes a little less tender. Do not substitute with non-dairy milk, such as soy or almond milk.
Veg Chilli Con ‘Carne’

-
1 tbsp extra virgin olive oil
-
1 red onion, chopped
-
200g small button mushrooms
-
1 red capsicum, chopped
-
1 yellow capsicum, chopped
-
3 garlic cloves, crushed
-
1 tbsp smoked paprika
-
3 tsp ground cumin
-
2 tsp ground coriander
-
1 tsp dried oregano
-
810g can crushed tomatoes
-
300g sweet potato, peeled, chopped
-
1 zucchini, sliced
-
400g can kidney beans, drained, rinsed
-
400g can Coles Cannellini Beans, drained, rinsed
-
Corn chips, to serve
-
Sliced avocado, to serve
-
Sliced red chilli, to serve
-
Fresh coriander sprigs, to serve
-
Lime cheeks, to serve
-
Heat oil
-
Click on the underlined ingredient to reveal the quantity. No need to flip back and forth!
-
in a large saucepan over medium-high heat. Add onion, mushrooms and capsicums. Cook, stirring occasionally, for 5 minutes or until onion starts to brown. Add garlic, smoked paprika, cumin, ground coriander and oregano. Cook, stirring, for 1 minute or until fragrant.
-
Add tomatoes and 1/2 cup water. Bring to a simmer. Add sweet potato, zucchini and beans. Cook, covered, over medium heat for 20 minutes or until vegetables are tender. Season with salt and pepper.
-
Serve chilli con ‘carne’ with chips, avocado, chilli, coriander and lime cheeks.
Vegetable Madras Curry
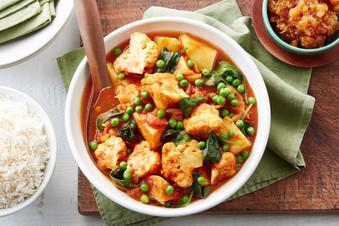
-
1 tablespoon vegetable oil
-
1 brown onion, sliced
-
2 garlic cloves, crushed
-
3cm-piece ginger, finely grated
-
1 tablespoon madras curry powder
-
400g can crushed tomatoes
-
2 cups (500ml) vegetable stock
-
400g brushed potatoes, peeled, coarsely chopped
-
1/2 (300g) small head cauliflower, trimmed, cut into small florets
-
1 cup (120g) frozen peas
-
120g baby spinach leaves
-
Steamed basmati rice, to serve
-
Mango chutney, to serve
-
Heat the oil in a large heavy-based saucepan over medium heat. Cook the onion for 8-10 mins or until golden and lightly caramelised. Add the garlic, ginger and curry powder. Cook, stirring, for 2 mins or until fragrant.
-
Add the tomato, stock, potato and cauliflower. Bring to the boil. Reduce heat to low and cook for 15-20 mins or until vegetables are tender. Add the peas and baby spinach. Cook for a further 2-3 mins or until heated through and spinach wilts.
-
Serve the vegetable curry with steamed basmati rice and mango chutney.
Vermicelli Noodle Salad

-
100g / 4 oz dried vermicelli noodles (Note 1)
-
2 cups white or green cabbage , shredded
-
1 1/2 cups shredded carrot (1 medium carrot)
-
1 1/2 cups bean sprouts
-
2 green onions , finely sliced
-
1/2 cup coriander/ cilantro leaves
-
2 tbsp light soy sauce
-
2 tbsp rice wine vinegar
-
1 1/2 tsp sugar
-
1 1/2 tbsp grapeseed oil (or any other neutral oil)
-
1 garlic clove , minced
-
1 birds eye chilli , finely minced
-
Fried Asian Shallots , to garnish (optional)
-
Red chilli , finely sliced
-
Combine dressing ingredients in a jar and shake well to combine. Set aside for 5 minutes for the flavours to infuse.
-
Prepare vermicelli noodles per packet directions (usually soak in warm or boiling water 2 minutes). Drain well then set aside for 10 minutes to drain off exces water. Turn out onto tea towel if necessary to dry more (watery noodles = watery flavour).
-
Combine vermicelli noodles with remaining salad ingredients.
-
Just prior to serving, toss through dressing. Garnish with Fried Asian Shallots if you wish.
-
Vermicelli noodles - very thin noodles made from rice. My favourite brand is Wei Wei (see photo in post). Any thin noodles can be used.
-
Dressing substitutes:
-
Light soy sauce - sub with regular dark soy sauce, however, the colour of the dressing will be a darker colour and so the salad will look browner than in the photo.
-
Rice wine vinegar - sub with lime juice for more of a Thai / Vietnamese spin. Can also sub with other mild vinegars like white wine vinegar, sherry vinegar, champagne vinegar, even apple cider vinegar.
-
Chilli - is optional. 1 chilli provides a nice subtle hum, barely there. I also like to add slices of chilli for a bit more of a kick!
-
Customisation:
-
Sub vegetables with any that can be thinly sliced in similar shapes (eg iceberg lettuce, snow peas, red onion, capsicum/bell peppers, cucumber)
-
Add mint for a Thai / Vietnamese spin. Could also add Thai Basil leaves.
-
Nutrition per serving.
Viennoises Au Chocolat
-
500 g flour Type 65
-
25 g of fresh baker's yeast
-
80 g butter
-
20 g butter to garnish
-
80 g of caster sugar
-
30 cl of 2 beaten eggs + milk
-
1 pinch salt
-
150 g of chocolate chips
-
Put the flour in a terrine and form a fountain: pour the sugar, salt and liquids.
-
Start kneading (robot or bread machine).
-
When the dough begins to be formed gradually incorporate the butter cut into pieces (80 g).
-
Knead in all from the beginning for 30 minutes then let rest the dough for 1 hour covered with a clean cloth.
-
The dough has doubled in volume, arrange it on the work surface and divide it into 3 pieces of the same size.
-
Spread each piece with a rolling pin.
-
Melt the remaining butter (20 g) in the microwave and brush with a kitchen brush the surface of the dough (think it will do for the 2 pasta!).
-
Sprinkle with chocolate chips (50 g per piece of dough).
-
Roll the dough on itself until you get a pudding, make a weld.
-
Do the same for the remaining 2 pieces and arrange the chopsticks on a baking sheet lined with baking paper.
-
Allow to swell for 35 to 45 minutes under a damp cloth.
-
Preheat the oven to 180 ° C.
-
Using an incisette or razor blade, make deep grapes and brush with beaten egg or sweet milk.
-
Bake for 25 minutes. Let cool on a rack ... And enjoy!
Vietnamese Carrot Salad

-
limes 2, 1 juiced and 1 cut into cheeks to serve
-
fish sauce 3 tbsp
-
sweet chilli sauce 3 tbsp
-
root ginger 2cm chunk, finely grated
-
carrots 3 large, finely shredded – a mandolin does the job quickly
-
white cabbage ¼, very finely shredded
-
peanuts a handful, toasted and chopped
-
mint a large bunch, chopped
-
Mix the lime juice, fish sauce, chilli sauce and ginger. add the carrot, cabbage and mint and toss.
Sprinkle with peanuts. serve as a side dish.
Vietnamese Pork Chop
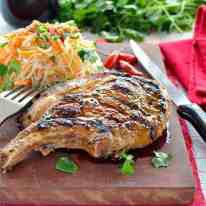
-
4 pork cutlets , around 250g - 300g (8oz - 10oz) each
-
1 tbsp vegetable or peanut oil (for cooking)
-
1 tsp chilli sauce (sriracha, chilli paste) or 1 birds eye chilli, finely chopped
-
2 cloves minced garlic
-
Juice of 1 lime
-
2 tbsp fish sauce
-
1 tbsp soy sauce
-
1 1/2 tbsp brown sugar
-
1 stalk lemongrass , white part only, bruised them sliced into 1cm/0.5" pieces
-
Place the Marinade ingredients in a ziplock bag and massage the bag to mix the ingredients.
-
Add pork to the Marinade and massage the bag to coat all the cutlets with the Marinade.
-
Marinate for at least 4 hours, up to 24 hours.
-
Brush the outdoor grill with oil and heat to medium high (or pan on a stove).
-
Remove pork from the marinade.
-
Place pork on the grill and cook each side for 2 minutes, or until cooked (depends on thickness of the cutlets). Remember that it will continue to cook while resting.
-
Remove pork from the grill onto a plate and cover loosely with foil. Rest for 5 minutes before serving.
-
I often freeze the meat with the marinade. Then defrost and bring to room temperature before cooking.
-
Nutrition per serving.
Water Celery Pesto
Tags:
Green Connect
-
2 handfuls water celery, leaves picked and roughly chopped
-
1 handful flat leaf parsley
-
1 garlic clove
-
1 handful pine nuts
-
extra virgin olive oil
-
2 tablespoons cold water
-
sea salt
-
1 lemon for squeezing a little of juice
-
Lightly toast your pine nuts in a pan to make their flavour intense but save the creamy texture.
-
In a food processor pulse your garlic, celery leaves, parsley, pine nuts, 2 tablespoons cold water, a pinch of salt and extra virgin olive oil to taste. You can start with about 3 tablespoons, then add more until you get the desired texture. At the end squeeze just a little bit of lemon juice and stir it into the sauce, it will give you the best freshness you can only imagine in pesto.
-
A classic recipe also requires grated Parmesan cheese which we safely omit as pine nuts work just greatly in getting the creamy texture so you probably would not want to add extra calories when you can simply go without them.
-
The most popular way of using pesto is definitely adding lots of it to pasta. The popularity and wide spreading of this way doesn't make it dull or tasteless though. On the opposite, pesto pasta is a great comforting, filling and so pleasant to eat dish.
-
You can also add some pesto to your tomato soup, or use it to dress a steak, to put on the top of your pizza, to mix with grilled vegetables or cover your fish with it - all these things will work, no doubt. Just remember to cook enough of your dish because most probably you'll want some more!
Whole Baked Cauliflower Cheese
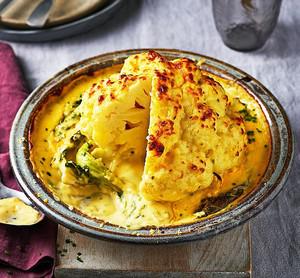
-
1 large cauliflower (about 1kg)
-
50g unsalted butter
-
50g plain flour
-
large pinch of sweet smoked paprika
-
600ml whole milk
-
2 tsp English mustard
-
170g mature cheddar, gruyère, comté or a mixture
-
½ bunch of chives, finely chopped
-
Bring a large pan of salted water to the boil. Pull any large leaves off the cauliflower, but leave any smaller ones attached. Carefully lower the cauliflower into the water and boil for 15 mins, then drain and set aside.
-
Heat the oven to 180C/160C fan/gas 4. Melt the butter in a medium pan over a medium heat, then stir in the flour and paprika, and cook for 1-2 mins. Remove from the heat and slowly whisk in the milk until smooth, then mix in the mustard. Return the pan to the heat and bring the mixture to the boil, whisking continuously. Add two-thirds of the cheese and whisk until the cheese has melted. Season to taste.
-
Put the cauliflower in the middle of a deep baking dish and pour over the cheese sauce. Sprinkle with the remaining cheese. Bake uncovered for 30-35 mins until golden brown and bubbling. Scatter with the chives before serving.
Whole Baked Leatherjacket with Soy and Ginger
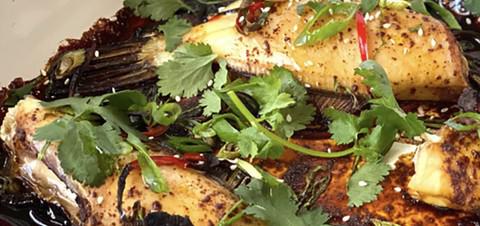
-
2 tablespoon kecap manis
-
2 tablespoons soy sauce
-
2 tablespoons mirin (substitute a sweet wine)
-
2 teaspoons finely grated ginger
-
1 teaspoon sesame oil
-
2 teaspoons Chinese five-spice
-
4 Leatherjacket, skin removed
-
5 spring onions, finely sliced on an angle
-
2 long red chillies, deseeded finely sliced
-
½ bunch coriander, leaves picked
-
1 tablespoon sesame seeds, to serve
-
Preheat oven to 190o C. Combine kecap manis, soy, mirin, ginger, sesame oil and five-spice in a small bowl.
-
Place Leatherjackets into a baking tray then pour over soy and ginger sauce. Transfer to oven and cook for 12-15 minutes or until fish has just
cooked through.
-
Serve topped with spring onion, chilli, coriander and sesame seeds.
Yeast

-
1 unpeeled medium-sized potato
-
4 C warm water
-
1 tsp salt
-
1 tsp sugar
-
Rinse your potato to remove dirt, but don’t scrub it too much.
-
Cut it into pieces to facilitate cooking, then boil until cooked through.
-
Drain, and save the water.
-
Mash the potato and add sugar and salt.
-
Allow mixture to cool until it is at room temperature.
-
Add water to the potato mash until the whole mixture equals 1 quart.
-
Cover and let sit in a warm place and allow it to ferment for several days.
-
1/2 cup equivalent to a tablespoon dry yeast.
Yogurt - Ian Style.

-
750 - 2 litres ml whole milk
-
2-3 tbsp yoghurt
-
Measure the amount of milk according to the size of the thermos to be used.
-
Allow room for 2-3 tablespoons of yoghurt.
-
Place yoghurt in a small jar - or leave it in the jar from the previous batch.
-
Pour enough milk from the thermos to half fill the jar and shake it well before setting it aside.
-
Pour the remainder of the milk into a saucepan and heat to 80°C.
-
Boil some water.
-
Fill the thermos ⅓ full with tap water.
-
Add small amounts of boiled water until the temperature inside the thermos reaches 44°C and screw the lid on the thermos.
-
When the milk reaches 80°C turn off the heat and place the lid on the saucepan and keep it half on / half off the hotplate to keep it warm. Keep it above 70°C for twenty minutes.
-
After twenty minutes allow the milk to cool to 52°C.
-
Empty the water from the thermos and pour in the 52°C milk.
-
Give the yoghurt and milk mix another shake, add it to the thermos and screw on the lid firmly.
-
Leave the thermos on the bench.
-
After four hours "burp" the thermos to release gas build up by slowly undoing the lid - it will be a little hard to unscrew. Don't take the lid completely off, just enough to hear the gas being released. Screw the lid back on firmly to keep the heat inside.
-
Leave on the bench for another four hours.
-
Again, slowly open the thermos to release the gas build up.
-
Put the lid back on tightly an shake the thermos a couple of time so that the yoghurt doesn't stick to the side.
-
Place a sieve over a deep bowl or pot, with some cheesecloth lining it.
-
Pour the contents of the thermos into the sieve - it may look quite runny, this is normal.
-
Cover the top of the sieve and leave to drain for a couple of hours.
-
Spoon the yoghurt form the sieve into a jar and place in the refrigerator.
-
Pour the whey in the bottom of the bowl into a suitable container. It can be frozen if not needed straight away.
-
The whey can be used in baking in place of water. It's great for bread making, pancakes, sourdough, making tangy porridge and as a marinade. One day I'll try it in a cake recipe in place of milk to see how that tastes!
-
If you're not up for any of this water it down and feed it to some plants.
Yogurt Dough Pizza Scrolls
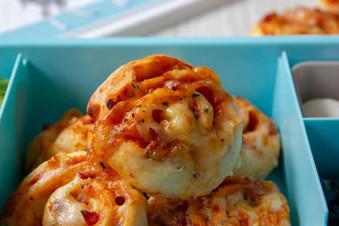
-
1 cups self raising flour plus 1/2 cup reserved self raising flour – see note
-
1 cup of greek yogurt – see note
-
1 tbsp tomato paste
-
50g of grated mozzarella or tasty cheese
-
10g pepperoni sliced into thin strips (optional – you could add pineapple or tomato instead or just leave out completely)
-
Dried basil or oregano
-
Preheat your oven to 190c and line a baking tray
-
In a bowl add the greek yogurt and stir around a little.
-
Add in 1 cup of self raising flour and mix together until a dough forms and smooth into a ball, it will be a little sticky at this point.
-
Leave the dough in the bowl and continue to add the extra flour slowly as required (I find just over 1/4 cup is necessary but you may need more) kneading until the dough is workable, smooth to touch and is no longer sticky. This process will take around 5 minutes.
-
Turn out the dough onto a piece of waxed baking paper. If your paper is not waxed then lightly spray with cooking oil. This will ensure the dough does not stick to the paper.
-
Place the dough on the paper and quickly shape into a rectangle with your hands.
-
With a floured rolling pin, roll out until the dough is about 1.5 cm thick. Try to work through this step quickly.
-
Lightly spread the dough with tomato paste then sprinkle the cheese and the pepperoni (if using) evenly over the dough
-
Quickly and gently roll the dough up evenly from the shortest side to form a log then slice each log into 8 even scrolls.
-
Slightly squash, sprinkle with the dried herbs and put on the prepared baking tray
-
Bake for around 12-15 minutes or until the cheese is melted and bubbly and the dough has cooked and is lightly golden
-
This dough can be sticky so take care with how you measure the flour and Greek Yogurt. I measure the greek yogurt by spooning it in the measuring cup. I measure the flour by scooping it from the container and ensuring the flour is tightly packed (for this recipe only – do not measure flour like this in my other recipes).
-
Spend some time mixing the dough in the bowl, using a spoon until the dough is workable with your hands. You can add in additional flour if you feel it is too sticky but around 1/4 cup of flour (measured so it is tightly packed) should be sufficient.
-
It’s important to have waxed baking paper to avoid sticking. You could instead lightly grease the baking paper by spraying with cooking oil. It is also important to roll quickly and lightly with a floured rolling pin.
Yorkshire Parkin
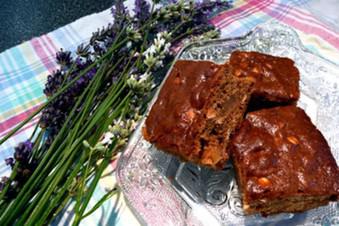
-
9 ounces ( 250 g) plain white flour or 9 ounces whole wheat flour
-
7 ounces (200g) brown sugar
-
3 1⁄2 ounces (100g) porridge oats or 3 1/2 ounces oatmeal
-
1 tablespoon ground ginger
-
2 ounces (60g) preserved crystallized ginger, chopped
-
5 ounces (150g) softened butter or 5 ounces softened margarine
-
7 ounces (200g) golden syrup or 7 ounces corn syrup
-
3 ounces (85g) black treacle or 3 ounces molasses
-
1 teaspoon bicarbonate of soda
-
2 teaspoons vinegar
-
1⁄4 pint milk 120ml
-
Pre-heat oven to 170C/340F/Gas 3 to 4. Grease and LINE with baking paper a large roasting tin or Pyrex roasting/lasagne dish - I use a 9" by 14" glass dish for mine.
-
Mix the flour, sugar, oats, ground ginger and chopped preserved ginger together in a large mixing bowl. Make a well in the centre.
-
Melt the butter in a saucepan and then add the golden syrup and treacle, warm them through but do not allow them to boil.
-
Pour the butter mixture from the saucepan into the well in the middle of the dry ingredients. Drop the bicarbonate of soda on top and then sprinkle the vinegar over the soda and watch it fizz.
-
Meanwhile, add the milk to the butter and treacle saucepan and heat it up gently - not TOO hot, hand hot is fine.
-
Add the milk to the ginger parkin mixture and mix thoroughly. It should be a fairly loose batter. Pour the cake batter into the prepared tin/tray and bake just above the middle of the pre-heated oven for 1 hour. (The parkin is cooked when it springs back when touched and is a dark brown with a sticky-ish surface.).
-
Allow it to cool completely in the tin/tray, then cut into slices or chunks and store in an airtight tin for 2/3 days before eating. It can be frozen at this stage too. You can eat it straight away, but it is always better after 2 to 3 days!
Yorkshire Pudding
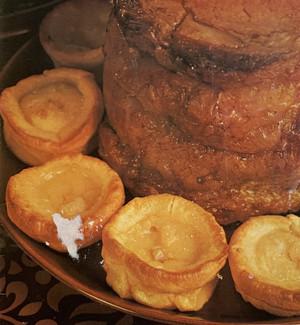
-
1 cup plain flour
-
½ teaspoon salt
-
2 eggs
-
½ cup milk
-
½ cup water
-
dripping
-
Sift flour and salt into bowl, make a well in centre, add whole eggs.
-
Gradually beat in a little flour from the sides of bowl.
-
Add combined milk and water a little at a time, beating constantly and incorporating more flour from sides of bowl.
-
When all is combined. beat well for 2 minutes; allow mixture to stand for 30 minutes.
-
Put ½ teaspoon of dripping in each of 12 deep patty tins, heat in hot oven for 2 minutes.
-
Fill each patty tin with batter bake in hot oven 10 minutes or until golden.
-
Heat 30g dripping in' 1½ litre (6 cup) ovenproof dish in hot oven.
-
Pour in batter.
-
Bake 15 to 20 minutes, or until well puffed and golden.
Zucchini Fritters

-
1 1/2 pounds zucchini, grated (about 3 cups)
-
1 teaspoon salt
-
1/4 cup all-purpose flour
-
1/4 cup grated Parmesan
-
2 cloves garlic, minced
-
1 large egg, beaten
-
Kosher salt and freshly ground black pepper, to taste
-
2 tablespoons olive oil
-
Place grated zucchini in a colander over the sink. Add salt and gently toss to combine; let sit for 10 minutes. Using a clean dish towel or cheese cloth, drain zucchini completely.
-
In a large bowl, combine zucchini, flour, Parmesan, garlic and egg; season with salt and pepper, to taste.
-
Heat olive oil in a large skillet over medium high heat. Scoop tablespoons of batter for each fritter, flattening with a spatula, and cook until the underside is nicely golden brown, about 2 minutes. Flip and cook on the other side, about 1-2 minutes longer.
-
Serve immediately.
Zucchini Slice
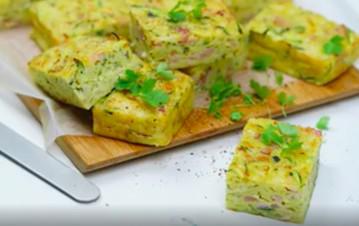
-
5 eggs
-
150g (1 cup) self-raising flour, sifted
-
375g zucchini, grated
-
1 large onion, finely chopped
-
200g rindless bacon, chopped
-
1 cup grated cheddar cheese
-
60ml (1/4 cup) vegetable oil
-
Preheat oven to 170C.
-
Beat the eggs in a large bowl until combined. Add the flour and beat until smooth, then add zucchini, onion, bacon, cheese and oil and stir to combine.
-
Grease and line a 30 x 20cm lamington pan. Pour into the prepared pan and bake in oven for 30 minutes or until cooked through.